✨ upCampo Platform Overview
upCampo is a platform specialized in farm operations management, focused on making the field team's routine easier and improving the quality of the information generated for decision-making.
This documentation presents an organized path for using the system, starting with the basic records and moving on to complete operations, dashboards and reports.
The platform is made up of:
- 🌐 Web portal: access through the browser at www.upcampo.com.br (use the login area at the top of the page, which redirects you to portal.upcampo.com.br)
- 📱 Android app: designed for use in the field, available on the Google Play Store, with offline mode support. Download the app on Google Play
- 📱 iOS app (iPhone): also available on the App Store, with the same main features for data collection and execution, also with offline mode support. Download the app on the App Store
📦 Main modules
| Module | Description |
|---|---|
| Agronomy | Pest scouting, traps, weather |
| Operations / Activities | Work orders, product and inventory control, crew management, cost per hectare |
| Machinery and Fleet | Preventive and corrective maintenance, fueling, checklists |
| Storage | Sales contracts, harvest, outbound and standalone load tickets, with NF-e (Brazilian electronic invoice) issuing |
| Tax | NF-e issuing, purchasing workflow with purchase order, quotation and requisition |
| Financial | Accounts payable and receivable, cash flow |
| Budget | Season budget, feasibility analysis, scenario comparison |
| Research and Operational Safety | Management of experimental activities, re-entry control for fields, workplace safety and auditing |
❓ Frequently asked questions
Does upCampo work without internet in the field?
Yes, through the apps. The Android and iPhone apps support offline mode and are built for use in the field, where signal is often missing. Data syncs when the device gets a connection again. The web portal, since it runs in the browser, needs internet.
How do I access the upCampo portal?
Through the browser, at www.upcampo.com.br: the login area is at the top of the page and redirects you to portal.upcampo.com.br.
What modules does the platform have?
Agronomy (pest scouting, traps and weather), Operations and Activities, Machinery and Fleet, Storage, Tax, Financial, Budget and Research/Operational Safety. Each farm uses the modules that make sense for its operation.
Do I need to install anything to use the portal?
No. The portal runs directly in the browser. Installation is only needed for the field apps, downloaded from Google Play or the App Store.
🏠 Home Screen: dashboards and shortcuts
The Home Screen is the first thing you see after logging in: a dashboard with twelve tabs showing how the farm is doing today (scouting, rainfall, operations, fleet, checklists, inventory and storage), plus shortcuts to the everyday screens and the list of reports.
It is not a data entry screen: nothing is typed here. It is for looking, filtering and, with one click, going where the work happens.
📍 Location in the system
It is the screen that opens when you log in to the portal. From anywhere in the system, the upCampo item, at the left end of the menu bar, brings you back to it.
🗂 The tabs, one by one
🏷️ Home
The session's identification card: the farm logo (the same one set in the Farm record; without it, the upCampo logo appears), the farm name, the selected season and the Log out button. If the numbers on any dashboard look odd, this is where you check, in two seconds, whether the farm and season are the ones you expect.
🔗 Shortcuts
Colored buttons grouped by crop stage: Tillage (Plowing, Harrowing, Subsoiling, Chiseling, Ratoon removal), Fertilization (Broadcast, Pneumatic, By fertigation, By spraying), Planting (Season Planting, Planting W.O., Irrigation, Weather & Stations & Rain Gauges), Crop protection (Pesticide application, Pest Scouting) and Harvest (Harvest W.O., Bale tracking, Inbound Load Ticket, Outbound Load Ticket). Below, in gray, the shortcuts for Fleet / Farm Assets (Fleet, Maintenance work order, Requisition, Fueling) and Other (Work Order/Activity, Inventory, Transfer between storage locations, Transaction).
Each button opens the Work Order/Activity screen already filtered by that operation: clicking "Harrowing" takes you to the harrowing list, not to a blank screen.
🎓 Help
Two buttons: General documentation and Request help via WhatsApp, which opens a conversation already addressed to upCampo support.
🐛 Scouting
The board of recent scouting records, with one column per scouting record and, in the rows, field, crop, variety, days after planting and after emergence, growth stage, scout, rainfall over the previous 15 days, the last order generated and what was found (pests, diseases and weeds, each with its value).
- View: Default, Pest x Field or List.
- Show filters: opens the date range and the field selection; after choosing, use Apply filter.
- Show only pests found: checked by default, and it's what keeps the board readable; without it, every monitored pest shows up, including the ones at zero.
- Period: from the last day up to the last ninety days.
- Map and Details, on each column, show where the points were and the point-by-point breakdown.
🪤 Trap
Trap collections on the map or in a table, filtered by season, period, sector and trap group. The table shows group, sector, date and rating.
🌧️ Weather & Stations & Rain Gauges
Rainfall by field, in the most direct way to look at it: the farm map colored by rainfall range, with the legend No rain, Low, Medium and High, and the average in millimeters for the period. You can switch to Chart or Table, filter by period and sector, and turn the field name and sector on the map on or off.
The data comes from the rain gauges entered in the app and from the integrated weather stations.
🚩 Operations
The progress of work orders in the period. At the top, one bar per subtype showing what is Finished and what is Pending, next to the "Fields per day — Overall" chart. Below, a gauge per subtype (with total, finished and pending) and the fields-per-day chart for that operation, which can be viewed By day, By field or by Work Order/Activity.
- Type: All, Tillage & Fertilization, Planting, Pesticide application, Harvest, Irrigation, Agronomic schedule, Other and Manual; the list shows only the activity types enabled for your user.
- Sector, Start date and End date.
- Unit: Hectares or By no. of fields (number of fields).
- Group by: Short ID (Subtype) (the short identification) or Activity type.
🚜 Fleet
Six display modes, chosen at the top: Summary, Type, Consumption, Hours/KM driven, Cost and Hectares worked. All filtered by period and by equipment classification/type.
The Summary shows the fleet cards: total items, how many are fleet units/machines, implements and farm improvements; the percentage with a maintenance plan (with the number of items with and without a plan); the split between preventive and corrective orders; and how much of the maintenance work orders is finished or pending in the period.
📋 Checklist
The completed checklists in the period, as a Chart or Table, filtered by checklist template. The table shows code, date, template, identifier (the license plate or the equipment), the work order generated and the status of the service request, with a Print button on each row.
The New button opens a new checklist to fill in right from here.
📦 Inventory
The balance by storage location and by product class, in a column chart. Filter by sector and by location; when you choose a specific location, the chart opens on that location's details. The Refresh button reloads the numbers.
⚖️ Storage
One block per stored product, with Current balance, To ship and Available; available is what is left after subtracting what is already committed under contract. The pie chart shows that split, and next to it is the list of contracts, which can be filtered by Sale, Purchase or All.
At the top: unit (Bags (60 Kg) or Kilo (Kg)), season and storage location; the latter accepts more than one location at a time.
📑 Reports
All the reports enabled for you, grouped by topic (Crops, Weather, Scouting, Operations, Inventory, Costs, Fleet…) in collapsible sections. Each button shows the code and name (EST.01.01 (formerly 012) - Local X Estoque (Saldo atual), for example; the code tells you the report's area and subject; see how the code is built) and opens the parameters window to run it.
At the top there is the Search field: start typing the code or part of the name and the report appears, without opening topic by topic. This list is managed on the File > Report screen.
How to fill in the filters, what changes between the three output types and how to export to Excel is covered in the Reports Quick Guide.
🚪 Which tab each user lands on
The tab that opens at login is set per user and per farm, in the Default home screen field of File > Users. Someone who works with spraying can land straight on Operations; someone who handles storage, on Storage.
Today the options that lead to the matching tab are Home, Weather Dashboard, Operations Dashboard, Fleet Dashboard and Storage Dashboard. With Default or Schedule, the screen opens on Shortcuts. The other options open on Home; either way, every tab is still one click away.
- You can answer "how is the farm doing today?" without opening a single report.
- The path to the work screen is one click, already filtered by the operation.
- Each person on the team opens the system in the view that matters for their job.
❓ Frequently asked questions
How do I make the system open straight on the dashboard I use?
In the user record, under File > Users, field Default home screen. The choice is per farm: the same person can open on Operations at one farm and on Storage at another.
The dashboards are empty or show odd numbers. What should I check first?
The selected farm and season, shown on the Home tab, and the period on each tab; most open with one or two days. An empty dashboard is almost always a filter, not missing data.
Why don't I see all the shortcut blocks?
Because the blocks follow the activity types enabled for your user at that farm. Without a tillage activity type, for example, the Tillage block doesn't appear. Access is granted by whoever manages the company's users.
I chose 60 days on the scouting dashboard and, when I came back, it was on 2 days.
That's expected: the period is saved, but long periods go back to last two days when the screen opens, so the dashboard loads quickly. Just choose the period again.
How do I find a report without knowing which topic it's under?
Use the Search field at the top of the Reports tab: type the code or part of the name and the report appears with its topic next to it.
How do I get back to the home screen after opening another screen?
Click upCampo, the first item on the menu bar. It always takes you back to the Home Screen.
🔰 Getting started: the upCampo Base Structure
To use the upCampo platform correctly, it is essential to start by creating the base structure. This structure organizes the data and ensures that all future information (such as work orders, product usage, scouting and harvests) is correctly linked to each season.
1. 🏢 Company and Branches
- Company: represents the main grouping of the operation.
This is in theFile > Companymenu. - Branches (Farms): the company's production units. Each branch can have its own separate areas, inventories, crews and operations.
This is in theFile > Farmmenu.
2. 👥 Users
- Register the users who will have access to the system and set their permissions.
- A user can have access to one or several farms, as needed.
This is in theFile > Usersmenu.
3. 🌱 Setting up the Crop Structure
After the administrative structure, start registering the crop elements:
- Season: represents the crop cycle (e.g., Season 2024/2025).
This is in theCrops > Seasonmenu. - Crop: which crops your farm grows (e.g., soybean, corn, cotton).
This is in theCrops > Cropmenu. - Variety: the specific cultivars of each crop (e.g., BRS 1010). It can be registered later, as needed.
This is in theCrops > Varietymenu. - Field: subdivisions of the farm, usually used as management units. Each field belongs to a single farm (branch).
This is in theCrops > Fieldmenu.
4. 🌾 Season Planting
This is the central record of the operation. There is a dedicated article for this screen here.
In Season Planting, you will:
- Link the Field to a Season, a Crop and one or more Varieties
- Enter the planted area and other characteristics of this planting
- Define how data will be split by variety, if applicable
This is the central foundation of the platform. Everything else builds on it.
❓ Frequently asked questions
Where do I start setting up upCampo on my farm?
In this order: first the administrative structure (Company, Farms and Users, in the File menu), then the crop structure (Season, Crop, Variety and Field) and, finally, Season Planting, which ties it all together.
What is the difference between Company and Farm in upCampo?
The Company is the main grouping of the operation. Farms (branches) are that company's production units, each with its own separate areas, inventories, crews and operations.
Can a user access more than one farm?
Yes. In the record under File > Users you define which farms each person can access; it can be just one or several, as needed.
Why is Season Planting considered the central record?
Because it gives context to everything that happens on the farm. Applications, harvests, analyses and pest scouting are linked to Season Planting, and that is what lets you analyze data by field, by crop and by production cycle.
Do I need to register varieties right at the start?
No. Varieties can be registered later, as needed. What must be in place before operating is Season, Crop and Field.
🗄️ Quick Guide - File (structure and setup)
The File menu is the foundation of the system: it's where you define who the company is, which farms it has, who logs in, what each person can do and how upCampo behaves for that group. Almost everything here is set during implementation and reviewed only a few times a year, but every change affects everyone's routine.
This menu also holds the support screens that don't belong to any specific module: the file center, the contact book, notifications and the two integration screens.
📍 Location in the system
Menu: File
🏗️ The implementation order
If you are setting up the system from scratch, follow this sequence; each step depends on the previous one:
1. Company
The company is the owning group, the top of everything. Each company has its own records, and nothing from one appears in another. Only the legal name is required.
2. Farm
Inside the company are the farms, where the operation actually happens. Besides the address, two fields pay off: Latitude and Longitude, which center the dashboard maps, and the logo, which appears in report headers. A farm cannot move to another company once saved.
3. Tax settings
Only for those who issue invoices through the system. The tax settings hold the CNPJ (Brazilian company tax ID), the state registration, the A1 digital certificate and the e-mail server that sends the invoice to the recipient. The same farm can have more than one. Keep an eye on the certificate expiration column.
4. Users
In Users you create who logs in and define, screen by screen, what each person can view, add, edit and delete. The time-saving shortcut is to apply one of the ready-made profiles (agronomist, applicator or manager) or to copy the access of someone already set up. Remember: access is per farm.
To change a user (e-mail, password, phone), select the person in the list and click User details. Opening the registration tab directly brings up an empty form, which creates a new user when saved.
5. Company/Crop Settings
Finally, the Company/Crop Settings, which decide how the system behaves: whether the work order requires a storage location, how products leave inventory (average cost or last cost), the name fields are given on the screens, what the scout measures in each crop and which reports are sent by e-mail automatically.
⚖️ Company setting or user setting?
Several options exist in both places (requiring a storage location on the work order, for example). The rule to keep it straight:
- Does it apply to everyone? Company/Crop Settings
- Does it apply to just one person? The General settings tab of the Users screen
When a behavior shows up for just one person, it's almost always a user setting. When it shows up for everyone, it's a company setting.
🧰 The support screens
Access log
The farm's usage trail: who logged in, when and what they did (opening each screen, report run, spreadsheet exported, import). In Access log you search by period, with a search on each column and export to Excel. It's the screen that answers security questionnaires and audit requests without opening a support ticket.
Report
The catalog of the company's reports, with the code the Help Center cites in its articles
(CLI.01.03, EST.01.09: area, subject and position; see how the code is built). In Report you remove
a report from the menu, organize topics and clone an existing report to customize it without breaking the
original.
File Center
All of the company's attachments in a single list, with the Source column telling which screen each one came from. It also accepts standalone files. See File Center.
Contact and Notification
Contact is the address book: phone numbers, e-mails and WhatsApp groups. Notification is the sending itself, with the delivery and read status of each message. To reach the whole team, register a contact of the WhatsApp Group type.
The two integration screens
They only matter if you exchange data with another system:
- From X to - Integration: the dictionary that translates the external name into the upCampo record. It's what makes spreadsheet imports stop flagging "field not found".
- Integration issues: the list of what didn't come in, with the equipment and field check already done.
- The company → farm structure is in place, and the other records have somewhere to live
- Each person logs in seeing only what concerns them, with no risk of deleting what they shouldn't
- The system enforces what management wants enforced, and stays out of the way otherwise
- Invoices, automatic reports and WhatsApp alerts work with no manual steps
❓ Frequently asked questions
Where do I start setting up the system?
With the Company, then the Farm and the Users. Only then move on to the Company/Crop Settings: they make more sense once the structure exists. Tax settings can wait until you start issuing invoices.
A user is seeing something they shouldn't. Where do I fix it?
On the Users screen, Access control tab, with the right company and farm selected at the top. Unchecking View for a screen makes that item disappear from the person's menu. To restrict storage locations or cost centers, use the General settings tab on the same screen.
Do I need to touch the integration screens?
Only if the farm exchanges data with another system. Without a contracted integration, From X to and Integration issues stay empty, and that's how it should be.
Which screens in this menu don't appear for me?
The File menu shows only the items your user has permission to view, and some items are for internal use by the upCampo team; that's why a farm administrator's menu is shorter than the one described in some places. If an item you need is missing, the fix is in the Access control tab of the Users screen.
📘 Screen: Company
The company is the top of the structure in upCampo: it's the group that brings the farms together. "Agropecuária Santa Clara", "Fazendas Reunidas Boa Esperança", "Grupo Rio do Peixe": each of these is a company, and inside it are the farms/branches where the operation actually happens. Even someone with just one farm also has a company: it's what ties the records together.
Almost everything in the system is separated by company: products, fields, seasons, users, reports. Switching companies is switching worlds: nothing from one appears in the other.
📍 Location in the system
Menu: File > Company
🧩 Main function
Register and maintain the owning group (legal name, address and contact), which is the level above the farms. It's a record you set up once, during implementation, and rarely come back to.
📝 Main fields
| Field | Description |
|---|---|
| Legal name | The only required field. The group's official name. |
| Trade name | What the group is called day to day. The list is sorted by it, and it's what appears when you choose the company as you log in. |
| Phone | The group's contact number. |
| Street · District · Number · City · State · ZIP code | Head office address. These are free-text fields: the city here doesn't come from a list, unlike the farm record. |
| The group's e-mail. | |
| Website | The group's website, if any. |
| Cloud storage ID | Identifier of the folder used by the cloud storage integration. It's filled in during implementation, together with the upCampo team; the one that organizes the field and season folders in Drive is the equivalent field in the Farm record. |
| Active | Uncheck it to take the company out of use without deleting its history. |
The list shows Legal name, Trade name, City and Active, with a search field on each column.
🔒 What the screen won't let you do
You can't delete the company you are logged into. To take a company out of use without deleting anything (the recommended way), uncheck Active.
🏗️ Where the company fits in
The implementation order is always the same:
- Company: the group (this screen)
- Farm/Branch: each unit, with or without its own CNPJ
- Tax settings: only if the farm issues invoices
- Users: who logs in and what each person sees
- Company/Crop Settings: how the system behaves for that group
- The group's farms sit under one umbrella, with data isolated from other groups
- Records (products, crops, reports) apply to the whole group
- The name shown when logging in is the group's name, not a code
❓ Frequently asked questions
What's the difference between company and farm in the system?
The company is the group; the farm is the unit where the operation happens. A company can have several farms, and it's at the farm level that fields, inventory, fleet and work orders are entered. If the group has three properties, that's three farms within a single company.
Do I need to register a company for each CNPJ?
Not necessarily. The CNPJ (Brazilian company tax ID) printed on the invoice is stored in the Tax settings of each farm, and a single farm can have more than one tax setting. You create a new company when it's a different group: different management, a different set of farms, data that shouldn't be mixed.
I registered the wrong company. Can I delete it?
Yes, as long as it isn't the company you are logged into; in that case the system refuses. If the company already has activity, the recommended approach is to uncheck Active instead of deleting it: that way the history can still be consulted.
Why don't the products I registered show up in the other company?
Because each company has its own. upCampo separates data by company, and that separation is intentional: it's what lets the same office serve different groups without one seeing the other. To use the same product in both places, register it in both.
📘 Screen: Farm/Branch
The farm is where the operation happens: fields, seasons, inventory, fleet and work orders all depend on it. "Fazenda São Camilo", "Complexo São Pedro", "Syngenta MT": each property or unit becomes a farm within the company.
In the system, farm and branch are the same thing. The double name exists because the unit is both the rural property and the tax and financial level: when you log in to upCampo, you choose the company and then the farm, and that pair decides everything you'll see from then on.
📍 Location in the system
Menu: File > Farm
🧩 Main function
Register each unit in the group, with address, coordinates, time zone and logo, and (on the Tax settings tab) the details of whoever issues invoices for it.
📝 Main fields
| Field | Description |
|---|---|
| Company | Required. Which group the farm belongs to. It's only chosen at creation: when you open a farm that has already been saved, the field is locked; a farm doesn't change companies. |
| Code | A short code for the unit, the way the farm already uses it: 01,
005, FAZ. It's left blank in many records. |
| Legal name/Name | Required. The unit's official name. |
| Trade name | What the unit is called day to day. It's the name shown in the farm selection at login and in report headers. |
| Phone · Street · District · Number · ZIP code | The unit's address and contact. |
| City (selection) | Required. Pick the city from the list: it automatically fills in the text city field and the state. Only when no city is selected can you type the name by hand. |
| Entity | Links the farm to the matching Entity record; useful when the unit itself appears as a party in documents from another farm in the group. |
| Map registration | The property's registration number (CAR, deed registration), stored as record information. |
| E-mail · Website | The unit's contacts. |
| Latitude · Longitude | Coordinates of the farm headquarters. This is what centers the maps
on the home screen dashboards (weather, traps) and the interpolated pest map. Leaving them at
0.0 makes the map open somewhere outside the farm. |
| Time zone | The offset in hours, in the format -04, -03.
It's used to stamp the date and time when issuing the MDF-E (Brazilian electronic cargo manifest).
|
| Currency code · Currency code 2 · Currency code 3 | Currency symbols used by the unit:
R$ in Brazil, and the others for operations outside the country. |
| Cloud storage ID | Identifier of the farm's folder in cloud storage. The system uses it to create the field and season folders in Drive; without this field filled in, the File tab of the Season has nowhere to save. |
| John Deere ID (integration) | Identifier of the farm's organization at John Deere. The John Deere connection button next to it shows the company's connected John Deere accounts, generates the link to connect a new account and fills in this field through the Use in this farm button; then just save. Anyone without access to this screen can ask the upCampo team for the link. The step-by-step is in How the John Deere integration works. |
| Active | Uncheck it to take the farm out of use without deleting its history. |
| Require access reason | Check it to require a written reason from anyone
who logs in to this farm. It only takes effect together with the same option in the
user record: the reason is requested when the
farm and the person are both checked; that's how you require it from consultants and support without
getting in the way of your own team. The text is stored in File > Access log. |
| Logo image name · Choose Logo | The logo printed in report headers. Upload a JPEG or PNG with the Choose Logo button: the file name is filled in automatically, and the system reminds you that you must save the record to confirm. |
The list shows Code, Legal name/Name, Active and Trade name, with a search on each column.
🗂 Tax settings tab
Inside the farm record there is the Tax settings tab, with the list of settings already registered for that unit and the form to add another. It's the same content as the Tax settings screen in the menu; the difference is that here you see the settings for the farm that is open, while from the menu you see those of the farm you're logged into.
Watch out: the farm must be saved before you save the tax setting. If you try to save both at once, the system warns you.
🔒 What the screen won't let you do
- Delete the farm you are logged into
- Change the company of a farm that has already been saved
To take a unit out of use, uncheck Active; the history can still be consulted.
- Fields, inventory, fleet and orders have somewhere to live
- The dashboard maps open already centered on the property
- Reports come out with the right unit's name and logo
- Invoice issuing has somewhere to look, through the Tax settings tab
❓ Frequently asked questions
I have three properties. Do I register three farms or just one?
It depends on how you manage them. If each property has its own inventory, fleet and results, they're three farms. If all three are run as a single operation (same warehouse, same crew, same cost), one farm with three sectors is usually less work.
The home screen map opens in the wrong place. How do I fix it?
Fill in Latitude and Longitude in the farm record. Those
coordinates center the dashboard maps. As long as both are at 0.0, the map
opens at some random point on the globe.
How do I put the farm logo on reports?
In the farm record, click Choose Logo and upload a JPEG or PNG file. The file name appears in the field next to it and, after that, save the record; uploading alone isn't enough.
Can I move a farm to another company?
Not from the screen: as soon as the farm is saved, the Company field is locked. If the record was created in the wrong company and has no activity yet, the way to go is to register it again in the right company and deactivate the wrong record.
How do I require a consultant to state the reason when logging in to the farm?
There are two options, and both must be turned on. In the farm record, check
Require access reason; then, in File > Users, check the
same field in the record of each person you want to require it from (usually consultants and support).
From then on, when that person logs in to that farm, the system asks for a written reason for the access
before opening the system, and stores the text in the access log.
📘 Screen: Tax settings
The tax setting is who signs the invoice: the CNPJ, the state registration, the address and the digital certificate that will be used for issuing. A farm can have more than one; a common case is a property that sometimes issues under the company's CNPJ (Brazilian company tax ID) and sometimes under the grower's CPF (individual taxpayer ID), or a group with different state registrations in the same unit.
A farm that doesn't issue invoices through the system doesn't need to fill in this screen for that. But a CPF tax setting has a second role: it represents the grower in the tax cash book. That's why the CPF one has the Exploited properties tab, explained further below.
📍 Location in the system
Menu: File > Tax settings
The same content appears on the Tax settings tab inside the Farm record. From the menu, you see the settings of the farm you're logged into; from the tab, those of the farm open in the list.
🧩 Main function
Store the issuer's details and the A1 digital certificate, so that NFE Transmission and the MDF-E have what they need to sign and transmit the document.
📝 Main fields
| Field | Description |
|---|---|
| Legal name | Required. The issuer's name as registered with the Federal Revenue Service (Receita Federal). |
| Trade name | Required. The name used day to day. |
| CNPJ/CPF | The issuer's tax ID. This is what goes on the invoice. |
| IE | The issuer's state registration. |
| Series | The series this setting uses when issuing. |
| Street · District · Number · ZIP code | The issuer's address. |
| City (selection) | Pick it from the list: it automatically fills in the text city field and the state. You can only type the city by hand if no city is selected. |
| Phone · E-mail | Contacts printed on the invoice. |
| Logo image name | Logo used on documents issued with this setting. |
| Currency | Currency of this setting's documents. |
| Manifestation type | Required. What upCampo should reply to SEFAZ (the state tax authority) when it retrieves an invoice issued against your CNPJ. The three options are explained below. |
📥 Manifestation type
When you import an invoice by its access key, in Transaction, SEFAZ doesn't always return the full document. In many cases it returns only a summary (number, amount, issuer) and holds the full XML until the recipient makes a manifestation about that transaction. The manifestation is that reply: the recipient telling the tax authority what it knows about the invoice.
The Manifestation type field defines, once and for all, what upCampo replies in these cases:
| Option | What happens |
|---|---|
| No manifestation | upCampo doesn't reply. If only the summary comes back, the full XML isn't requested and the import tells you it stopped there. |
| Acknowledgement of the operation | Records that the farm is aware of the invoice, without committing to the transaction. It's the mildest manifestation and the one usually used just to get the XML. |
| Confirmation of the operation | Confirms that the transaction described in the invoice actually took place. It's the strongest manifestation. |
🔐 Certificate
The Certificate block holds the file and the passwords:
| Field | Description |
|---|---|
| Certificate name | Filled in automatically when you upload the file. |
| Choose file | Upload the A1 certificate (a
.pfx/PKCS#12 file). An A3 certificate, on a card or token, doesn't work here. |
| Digital certificate password | The password of the certificate file. |
| Transmission password | Password used when transmitting the document. |
| Validate Certificate | Opens the file with the password provided and shows the Valid until date next to it. Use it to check before you need to issue. |
When you save a setting that has a certificate, the system validates the certificate before saving. If the password is wrong, the file has expired or there is no valid certificate inside it, the save doesn't go through and the message tells you which of the three it is.
In the list, the Certificate expiration date column shows the expiration of each setting; that's where you find out, without opening anything, that the farm's certificate expires next month.
✉️ E-mail settings
The E-mail settings block is the outgoing server used to send the issued invoice to the recipient: the message Subject and Text, HOST, PORT, User, Password and the AUTH, TSLS and SSL options. The E-mail test button asks for a recipient and sends a test message; use it after any change, instead of finding the error when sending a real invoice.
🏞 Tab: Exploited properties
This is where you state how this grower operates each rural property: whether the land is theirs, leased, worked in partnership or joint ownership, and with what percentage. It's the basis for the allocation in the tax cash book and in the LCDPR (Brazil's Digital Rural Producer Cash Book). The property itself (name, CIB, CAR, registrations) is registered once in File > Rural property; here you only link the grower to it.
The exploitation fields
| Field | Description |
|---|---|
| Property | Required. The rural property being operated. If it doesn't exist yet, the New property button next to it registers it right there with name, CIB, city and area; address, CAR and registrations can be completed later, in File > Rural property. |
| Exploitation type | Required. 1 - Individual / own property, 2 - Joint ownership, 3 - Leased property, 4 - Partnership, 5 - Free loan or 6 - Others. |
| Declarant percentage | This CPF's share of the property's result, greater than 0 and at most 100. |
| CAEPF | The Individual's Economic Activity Registration (CAEPF), with 14 digits. The LCDPR requires it for individual exploitation. If left blank, the exploitation is saved anyway, but the warning "No CAEPF: LCDPR pending issue" appears. |
| State registration | Optional. This tax setting's registration is suggested. |
| Activity | Agriculture, Livestock or Agriculture and livestock. |
| Start date · End date | The period during which the exploitation applies. The start is required; an empty end means it is still in effect. |
| Main | Marks the grower's main exploitation, the one the cash book uses. See just below. |
The same property can appear more than once for the same grower, with different types: part of the land owned and part leased, for example.
Participants
The other CPFs or CNPJs that share the exploitation, each with Participant type, CPF/CNPJ, Name and Percentage. The types are 1 - Co-owner, 2 - Lessor, 3 - Partner, 4 - Lender, 5 - Other and Spouse. The tab shows the Declarant + participants total, so you can check that it adds up to 100%.
The rules upCampo checks when saving:
- Individual: the declarant has 100% and there are no participants.
- The other types (or a declarant percentage below 100%) need at least one participant, and declarant + participants must add up to 100%.
- Lessor and lender get 0%: they lend or rent out the land, but don't share in the result of the activity, so they don't count toward the 100%.
- Spouse: only one per exploitation, with a CPF, and only in 50/50 or 100/0 splits (declarant/spouse).
- The declarant themselves isn't entered as a participant.
The cash book grower is the tax setting
There is no "Growers" screen in upCampo. For the tax cash book and the LCDPR, the grower is the individual (CPF) tax setting: it supplies the name, CPF and address that go into the file, which is why LCDPR generation requires a complete address, number, district, state, municipality, ZIP code and e-mail here.
- The same CPF can have a tax setting at each farm. In the cash book, it appears only once: the book belongs to the CPF, not to the farm.
- A joint-ownership or partnership participant doesn't need their own tax setting. It's enough to be registered as a participant, with more than 0%, in another grower's exploitation: they appear in the cash book and receive their share of each of the holder's titles.
- If each co-owner issues their own invoices, register each one's exploitation as individual, in each one's tax setting. Then every title belongs only to whoever issued it, and there is nothing to split.
⚠️ The farm must be saved
A tax setting belongs to a farm. If you create the farm and try to save the setting without saving the record first, the system warns that "the farm must be saved". Save the farm first, then the setting.
- NF-e and MDF-E are issued under the correct CNPJ and state registration
- The certificate expiration is visible in the list, before it becomes a problem
- The issued invoice reaches the recipient by e-mail with no manual steps
- A single farm can issue under more than one issuer
❓ Frequently asked questions
I lease land from someone else. How do I set it up in the cash book?
In the Tax settings of your CPF, Exploited properties tab, add the property with the type 3 - Leased property, yourself at 100%, and the landowner as a Lessor participant at 0%. The lessor doesn't share the result: for them the lease is rent, not rural income, so they don't get a cash book for that exploitation.
The Exploited properties tab doesn't appear. Why?
It only exists on a CPF tax setting, and only after it has been saved. Check that the saved document is a CPF and save the setting: the tab appears right away. A CNPJ setting doesn't have the tab.
What type of digital certificate does the system accept?
Only the A1, which is the file-based certificate (.pfx extension). It's
stored in the system and lets you issue without anyone having to plug anything in. An A3 certificate, on a token or
card, can't be uploaded on this screen.
My certificate expired. What do I do?
Upload the new file with the Choose file button, type the password and click Validate Certificate to check the new expiration date. Then save. There's no need to create another tax setting: it's the same one, with the updated certificate.
Can I have two CNPJs issuing at the same farm?
Yes. Register one tax setting for each issuer, each with its own CNPJ, state registration and certificate. When issuing, you choose which one the invoice goes out under.
The invoice isn't reaching the customer by e-mail. Where do I start?
Open the E-mail settings block on this screen and click E-mail test: it sends a message to the address you enter. If the test fails, the problem is the server, port or password; if the test arrives and the invoice doesn't, the recipient's address on the document is the suspect.
I imported the invoice by key and only a summary came back, without the products. What's missing?
The manifestation is missing. SEFAZ usually returns only the invoice summary (number, amount and issuer) until the recipient makes a manifestation about the transaction; only then does it release the full XML, with the items. What upCampo replies is decided by the Manifestation type field of the tax setting used for the import. If it's set to No manifestation, the full XML is never requested; choose Acknowledgement of the operation or Confirmation of the operation. The difference between the two is a tax matter, and it's worth agreeing on it with your accountant.
Where do I register the grower for the LCDPR?
Here, in Tax settings: there is no "Growers" screen. The grower for the tax cash book and the LCDPR is the individual (CPF) tax setting, with the complete address and e-mail, and with the properties on the Exploited properties tab. The same CPF can have a setting at each farm.
📘 Screen: Rural property
The rural property is the land the grower operates, registered just once in upCampo: Fazenda Santa Rita, with its CIB, CAR number, area and registry office deed registrations. It's the basis for the tax cash book and the LCDPR (Brazil's Digital Rural Producer Cash Book): it's how upCampo knows on which property each payment took place and, when the land is operated in partnership or joint ownership, how much of each amount belongs to each grower.
This screen stores only the land. Who operates the property, in what form (owned, leased, partnership…) and with what percentage is kept on the Exploited properties tab of each grower's Tax settings. The separation is intentional: the same land can be owned by one grower and leased by another.
📍 Location in the system
Menu: File > Rural property
It comes right after Tax settings, where the exploited properties that use this record are. The screen has its own permission: it only appears in the menu for those who have been granted access in File > Users.
🧩 Main function
Register the company's rural properties, with the deed registrations of each one. One rule decides how many properties to register:
📝 Main fields
| Field | Description |
|---|---|
| Name | Required. What the farm calls the property: "Fazenda Santa Rita", "Sítio Boa Esperança". It's the name that appears when choosing the property, in Tax settings and in the cash book. |
| CIB (former NIRF) | The property's CIB (Brazilian Real Estate Registry number), which replaced the Federal Revenue Service's NIRF. Up to 8 characters, including the check digit; dots and hyphens are removed automatically. |
| CAR number | The property's registration in the CAR (Rural Environmental Registry). |
| Area (ha) | The property's area in hectares. It's suggested from the sum of the registrations and can be edited; see The area and the registrations, below. |
| Street, Number, Complement, District, City, ZIP code | The property's address. The City matters: the municipality code goes into the LCDPR. |
| Notes | Free-text notes. |
| Active | Uncheck it to take out of use a property the farm no longer operates, without losing its history. |
The list shows Name, CIB, City, Area (ha), the number of Registrations and Exploitations linked to the property, and whether it's active.
🗂 Tab: Registrations
Each registry office deed registration that makes up the property: Registration (the number, required), Registry office and Area (ha) of that registration.
The area and the registrations
Below the list you'll see the Sum of registrations. As long as nobody types a different area over it, the property's Area (ha) follows that sum: add, change or delete a registration, and the area adjusts. If you type a different area (because the current survey doesn't match the deeds, for example), it stops following the sum and keeps the value you entered. The Use the sum as area button sets the area back to the sum of the registrations.
🗑 Delete or deactivate
A property that is already used in an exploitation in Tax settings can't be deleted; upCampo warns "This property is used in an exploitation in the Tax configuration and cannot be deleted. Deactivate it." Uncheck Active instead of deleting. Deleting only makes sense for a property registered by mistake, and it takes its registrations with it.
- Each piece of land is registered once, with CIB, CAR, area and registrations, ready for the LCDPR.
- Each grower's Tax settings state which property they work and with what percentage.
- The tax cash book splits partnership and joint-ownership amounts automatically, CPF by CPF.
❓ Frequently asked questions
I have three deed registrations on the same farm. Do I register three properties?
No, if the registrations adjoin each other. In upCampo, neighboring registrations are a single property, with one CIB: register the property once and add all three on the Registrations tab. Only separate areas that don't adjoin are different properties.
What is the CIB? Is it the same as the NIRF?
The CIB (Brazilian Real Estate Registry number) is the number that replaced the NIRF in the Federal Revenue Service's rural property registry. In upCampo it goes in the property's CIB (former NIRF) field, with up to 8 characters and the check digit.
Where do I say the property is leased or operated in partnership?
On the Exploited properties tab of the grower's Tax settings, not on the property. The rural property is just the land; the form of operation (owned, joint ownership, leased, partnership, free loan) and each person's percentage belong to whoever operates it, and the same land can be operated in different ways by different growers.
The property area changed on its own. Why?
Because it follows the sum of the registrations as long as nobody types another value. When you add, change or delete a registration, the area adjusts. If you want an area different from the sum, type it in: from then on it stays fixed, and the Use the sum as area button makes it follow the sum again.
I can't delete a property. What do I do?
The property is already used in an exploitation in some grower's Tax settings, so it can't be deleted. Uncheck Active: it goes out of use and the cash book history keeps pointing to it.
📘 Screen: Users
This is where you create the people who log in to upCampo and define what each one sees and can do: the technician who only enters scouting from a phone, the warehouse clerk who receives products, the manager who approves work orders, the consultant who only looks at reports. The screen is called User Settings/Access Control and does both things at once: the person's record and their permission on that farm.
The point that confuses people at first: there is only one user, but access is per farm. The same login can exist on three farms of the group with different permissions on each one.
📍 Location in the system
Menu: File > Users
🧩 Main function
Register the people who use the web portal and the app, grant screen by screen what each one can view, add, edit and delete, choose which reports they see and adjust their work preferences.
🧭 How the screen is organized
The screen is a staircase: you go down one step at a time:
- Select a company, in the list at the top
- Select a farm, which appears next
- On the Users tab, click the person's row
- With the user selected, the Access Control, Reports and General Settings tabs open below
Until the company, farm and user are chosen, the tabs below stay hidden: it is not a bug, it is the screen's sequence.
👤 Users tab: the list
Shows who has access to that farm, with Name, First Name, E-mail, Login, Phone, Sectors, Active, the Disable button and Reference/Integration ID. Each column has a search box.
| Button | What it does |
|---|---|
| New user | Opens a blank registration tab, to create a new person. |
| Show user details | This is how you change a user. Select the row and click: the button opens the User Registration tab already filled with that person's data, ready to edit. If no one is selected, the system warns that you still need to choose the user. |
| Remove User from Farm | Removes access to that farm. The person still exists and still accesses the other farms where they have permission. |
| Import | Brings to this farm users who already exist in another company you have access to. Check as many as you want in the window and confirm. |
| Disable (on the row) | Turns the user off. Careful: the block applies to all farms the user has access to, not only this one. The history of what they entered stays intact. To remove access from one farm only, use Remove User from Farm. |
📝 User Registration tab
This tab is where the person's data is entered, and it behaves in two ways, depending on the button that opened it:
- Opened with Show user details, it comes with the record loaded: whatever you change and save changes that person.
- Opened with New user, or by clicking the tab directly, it comes empty: whatever you save creates a new person.
When in doubt, look at the Full Name field before typing: if it is blank, you are creating someone.
| Field | Description |
|---|---|
| Full Name | Required. This is the name that appears in lists and reports as the person responsible for the entry. |
| First Name | Required. Short name, used where space is tight, mainly in the app. |
| Used to log in to the system and cannot be repeated between users. | |
| Login | Short access name (thiago, ana.santaclara).
It cannot be repeated either and does not accept "@": if you want to log in with an e-mail, use the
E-mail field. You must fill in the login or the e-mail. |
| Password · Confirm password | The password is required. Confirmation is only required when the password changes. |
| Phone | The person's phone number. |
| WhatsApp number (with country code) | Number used to send WhatsApp messages,
with the country code: 5561999999999. This is what the
Notification screen uses. |
| Sectors the user has access to | Limits what the person sees to the sectors entered. If blank, they see all of them. |
| Active | Uncheck to block access without deleting anything. It has the same effect as the Disable button on the list and, like it, applies to all farms the person has access to. |
| Public | Marks the user as a template: it starts appearing in the import of standard users, to serve as a base in other companies. |
| Hide finished orders | The person stops seeing orders that are already finished: useful for a field operator, who only needs what is still open. |
| Require access reason | This person has to write the reason for accessing when
logging in. It only works if the farm is also
checked: the combination of the two checkboxes is what turns the requirement on, which lets you require it from
consultants and support without asking anything of your own team. The text is stored in
File > Access log. |
| Reference/Integration ID | This person's code in the external system, when there is an integration. |
| Image - Signature | Upload a JPEG or PNG with the signature, so it appears on reports. The tip on the screen itself is right: remove the image background, otherwise it comes out as a white rectangle on top of the report. |
The buttons on the tab are Save/Add, Cancel, Delete User and Import Users; the last one brings users marked as Public, to copy from a ready-made template.
🔐 Access Control tab
It is the list of every screen in the system, grouped by menu (File, Basic, Crop, Inventory…), with four checkboxes per row: View, Add, Edit and Delete. Unchecking View for a screen makes the item disappear from that person's menu.
Checking one by one is rarely needed: the toolbar has shortcuts:
| Button | What it does |
|---|---|
| Full access | Grants everything. This is the farm administrator's profile. |
| Uncheck all | Closes everything, to build access from scratch. |
| Apply technician profile (scouting) | Leaves open what is needed for someone who scouts pests in the field. |
| Apply applicator profile (work orders) | Leaves open what is needed for someone who carries out work orders. |
| Apply manager profile (work orders) | Profile for someone who plans and follows up on orders. |
| Copy Access | Opens the list of users from other farms and copies to the current user the access of whoever you choose. It is the fastest way when a new technician joins and another technician is already set up. |
📊 Reports tab
Lists the company's reports with Code, Description, Show (opens the report right away, so you can check what it is), Theme and the Allow checkbox. Only the checked ones appear in that user's reports menu.
The Copy report access button repeats, for the current user, another user's report permissions.
⚙️ General Settings tab
Careful not to mix them up: these are the settings for that user on that farm. The ones that apply to the whole group are in Company/Crop Settings. After changing anything here, click Save General Settings.
| Block | What it controls |
|---|---|
| Default home screen | Which screen the person lands on when logging in: Default, Start, Schedule or one of the dashboards (Scouting, Traps, Operations, Weather, Fleet, Maintenance, Storage). |
| Work Order/Activity | How the quantity is proposed when finishing (Original qty, Based on executions or Based on tank mixes) and whether the storage location and the start/end reading are required from this person. |
| Fueling | Whether the person enters start and end readings, and whether they can save without a reading or without checking the date. |
| Stock Movement (In & Out) | Where they can move items to: inventory, field, fleet, allocation, entity; whether they can disable an inventory line and whether they see entries without a cost center. |
| Storage Location | The default locations for the work order and which locations this person sees. Move only the allowed ones to the right; leaving all of them (or none) means no restriction. |
| Approval Departments | Which departments the person approves for, with the Minimum amount and Maximum amount they can approve, and whether they are the second approver. |
| Activity type | Which activity types appear in this person's home screen dashboards. |
| Cost center | Which cost centers they see in entries. Same rule as the locations: all or none means no restriction. |
🚪 Disable, remove from the farm or delete?
- Disable: the person left the group. Blocks access on all farms and keeps the history.
- Remove User from Farm: the person moved to another unit. Loses access only to this farm and keeps the others.
- Delete User: deletes the record. It only makes sense for a user created by mistake who has not entered anything yet.
- Everyone opens the system right on the screen they use, seeing only what matters to them
- No one deletes by mistake what they should not even see
- A new technician is set up in minutes, by copying someone else's access
- Purchase order and work order approval has an owner and an amount limit
❓ Frequently asked questions
How do I change a user's password or e-mail?
Select the company and the farm at the top, click the person's row on the Users tab and then the Show user details button. The registration tab opens with their data; change what you need and click Save/Add. When changing the password, also fill in Confirm password: the system only asks for the confirmation when the password changes.
I tried to change a user and ended up creating another one. Why?
Because the User Registration tab was opened empty. Clicking the tab directly, or using New user, opens a blank form, and saving there creates a new person. To edit someone who already exists, always select them in the list and click Show user details. The user created by mistake can be removed with Delete User, since they have not entered anything yet.
How do I give a user access only to enter scouting on their phone?
Select the company, the farm and the user, open the Access Control tab and click Apply technician profile (scouting). It leaves open what scouting needs and closes the rest; from there, fine-tune item by item if needed.
The employee left the farm. Do I disable or delete them?
If they left the group, disable them: the Disable button, on the list row, blocks access and keeps everything they entered (orders, scouting, fueling) in place. But note: Disable applies to all farms. If they only moved to another unit and are still in the group, use Remove User from Farm on this farm. Deleting the record is only for a user created by mistake.
How do I remove a user's access on just one farm?
Select the company and the farm they should leave, click their row and use the Remove User from Farm button. On the other farms they keep logging in normally. Do not use Disable in this case: it locks the person out of all farms at once.
Why is a user's menu missing some items?
Because View for that screen is unchecked on the Access Control tab, for that user on that farm. Also check that you selected the right farm before looking: access is per farm, and the same person can have different permissions on each one.
Can a user access more than one farm?
Yes, and that is normal in a group with several units. Use the Import button to bring the existing user to this farm, then adjust their access here. When logging in, they choose which farm they will work on.
The system says the login is already in use. What now?
Login and e-mail cannot be repeated between users. If the person already exists on another farm or in another company, do not create them again: use Import on the Users tab to bring the record that already exists. If it really is a different person, choose a different login.
How do I get the technician's signature to appear on the report?
On the User Registration tab, in the Image - Signature block, upload the signature image in JPEG or PNG and save. Remove the image background before uploading: a signature with a white background shows up as a rectangle over the report.
I checked the access reason and the system does not ask for anything. What is missing?
The other checkbox is missing. The access reason is only required when the
Require access reason field is checked in both records: the
person's, in File > Users, and the farm's they log in to, in
File > Farm. Checking only one of the two asks for nothing. Keep in mind that the system
asks once per farm on each login: if you switch farms without logging out, it asks
again.
📘 Screen: Access log
The access log is the usage trail of the upCampo web portal: every time someone opens a screen, runs a report, exports a spreadsheet or imports a file, the system records a line with the date and time, the name of who did it, the screen and the action. This screen is where the farm looks up and exports that trail, without having to ask support for anything.
It is read-only: it does not create, change or delete anything. What it shows is always for the company and farm selected at the top of the system, for the period you choose.
📍 Location in the system
Menu: File > Access log
🧩 Main function
Answer three audit questions with evidence in hand: who logged in to the farm's system, when and what they did. It is also the practical answer to security questionnaires and data protection requirements (such as Brazil's LGPD) that ask for "access logs and recorded events": the farm itself looks them up and exports them.
📝 Main fields
The bar at the top of the screen builds the query. Next to the title is the count, N record(s), which follows the filters.
| Field | Description |
|---|---|
| Start date (from) | Start of the period. The screen opens with the last 30 days already filled in. |
| End date (to) | End of the period. It opens filled with the day after today, so the current day is fully included. |
| Show login events | It comes checked, so the list brings everything recorded in the period. If you uncheck it, the list keeps only screen visits, without the Home page and the Company/farm selection, which are the lines generated at each login, and also without anything that is not a screen visit (report run, export, logoff). It is useful to follow the person's path through the system without the login noise. |
| Refresh | Runs the query again for the period entered. If you changed one of the dates or the checkbox above, this is how the list is refreshed. |
| Export to Excel | Generates a spreadsheet of what is in the list. Details below. |
📋 The list columns
| Column | What it shows |
|---|---|
| Date | Date and time of the record, with hour, minute and second. The list already comes from the most recent to the oldest. |
| User | Name of the person who was operating. |
| Screen | Name of the screen by the label the system uses: Fueling, Contract, Home page, Company/farm selection. |
| Action | What was done there: Acesso (opened the screen), Relatório: followed by the name of the report run, Exportar Excel, Importou do excel, Finalizou, Logoff, among others. |
| Notes | Additional detail for the action, when there is one: the name of the imported file, the number of records exported, the text of the access reason. |
| Success | Yes or No. No marks what was not completed and security alerts. |
All columns can be sorted by the header and resized. Below the header there is a search box in Date, User, Screen, Action and Notes: it filters what is already on screen, instantly, without querying the system again; it is the quick way to isolate a person or a screen within the period. The Success column has no search box; for it, use sorting.
⏱ The record does not appear right away
Actions are accumulated and saved from time to time, usually within 15 minutes. This is on purpose: saving every click right away would make the system slower for everyone.
🔍 What goes into the trail, and what does not
Included: opening each screen, running each report (with the report's name), exports to Excel, spreadsheet imports, finalizations, approvals and rejections made through a link, logging out of the system and the access reason.
The content of the change is not included. The trail records that the person was on the screen and which action they performed; it does not store that a product's price went from one value to another. To find out who created or changed a specific record, look at the record itself, which stores the user who created it and the user who changed it.
✍️ Markers that appear in Notes
- ACESSO VIA <name> (access via): the action was done by someone who logged in to the system as another user, a feature used by the administrator and by support to reproduce a problem. The line is under the name of the assumed user, and the marker tells who actually was operating.
- ACESSO LOCAL (local access): the action came from a run outside the production server, a work situation of the upCampo team.
- Access reason: on farms that require a reason for access, the text written by the person is stored here, in the action of the same name. The requirement is turned on with two checkboxes: in the farm record and in the record of each user you want to require it from.
🚨 Security alerts in the list
Besides what people do, the list may include lines generated by upCampo's automatic
monitoring. They appear with the screen MonitorSeguranca, the action Alerta de seguranca and
Success = No, and the alert text is in Notes; for example, an access made from
an unusual country, with city, user and IP. The same alert is not repeated within one
hour, so it does not flood the list.
The monitoring follows other signals that are not tied to a farm, such as sequences of wrong password attempts, and those are handled by the upCampo team. The whole set is described in Information security in upCampo.
📤 Export to Excel
The Export to Excel button sends to the spreadsheet exactly what is in the list: the period queried, with the column filters already applied. They are the same six columns: Date, User, Screen, Action, Notes and Success.
The system opens the File ready window, with the number of records and the
Click here to download button; the file is named
upCampo_log_acessos_<data>_<hora>.xlsx. With an empty list, nothing is generated and the
system warns "No records found for the selected period.".
This is the spreadsheet you attach to a security questionnaire, an internal investigation or an audit request.
🔑 Who can see this screen
The menu item only appears for those with view permission on it, granted per farm on the Access Control tab of the Users screen. There is only view: the screen does not add, edit or delete, so there is nothing else to grant.
When the feature was delivered, the permission was given to those who already saw the Users screen: whoever manages the farm's access is usually the one who needs to audit it.
- You can answer "who logged in and what they did" with date, time and name, without opening a ticket
- Consultant and support access is visible, with the written reason next to it
- Security questionnaires and audit requests are answered with a spreadsheet exported on the spot
- An unusual access shows up in the same list, without depending on a warning
❓ Frequently asked questions
I just did something and it does not show in the log. Is it broken?
No. In upCampo actions are accumulated and saved from time to time, usually within 15 minutes: saving every click right away would make the system slower. Wait a few minutes and click Refresh.
How do I find out who changed an entry?
The access log shows who was on that screen and at what time, which usually already points to the person. What it does not store is the content of the change: from which value to which value. That information is in the record or document itself, which stores the user who created it and the user who changed it.
I unchecked "Show login events" and almost everything disappeared. Is that normal?
That is how the screen behaves in upCampo: unchecked, only screen visits remain; the Home page and Company/farm selection lines, which are generated at each login, disappear, and so do reports run, exports and logouts. To see the complete trail, leave the option checked, which is how the screen opens.
Can I see the log of another farm in the group?
This screen always shows the company and farm selected at the top of the system. To look up another one, switch farms (logging out and back in) and open the screen again.
Why can't I see the wrong password attempts?
Because the login attempt happens before the system knows which farm the person will log in to, and this list is always for one farm. These attempts are still recorded and are followed by upCampo's security monitoring, which raises an alert when they repeat for the same user within a short interval.
What does "ACESSO VIA" at the start of the notes mean?
It means "access via": the action was done by someone operating the system in place of another user, a feature used by the administrator and by support to reproduce a problem. The line is under the name of the assumed user, and the marker shows who was actually operating at that moment.
How long are the records kept?
For more than 180 days. The query on this screen is always by period, so just widen the dates to reach the history. If you need a longer period because of a specific requirement, contact support.
Who can open the Access log?
Whoever has view permission for this screen granted on the Access Control tab of the user record, and only on that farm. Since the screen is read-only, there is no add, edit or delete permission for it.
📘 Screen: Company/Crop Settings
This is the screen that decides how upCampo behaves in that company: whether the work order requires a storage location, whether fueling asks for the hour meter, whether the field is called "field" or "block", how many decimal places a hectare has, which measurements the technician takes in each crop and which reports go out by e-mail every morning.
When an article in this Help Center says a behavior "depends on the company settings", this is what it is talking about. It is a setup screen: it is changed rarely, but each checkbox changes the routine of everyone.
📍 Location in the system
Menu: File > Company/Crop Settings
At the top of the screen you choose a company and a farm before anything else: that pair defines whose settings you are looking at.
🧩 Main function
Adjust how the web portal and the app behave for the company, set up what is measured in each crop during scouting and schedule automatic report delivery by e-mail.
🗂 The three tabs
- General company settings: how the system behaves, in blocks
- Crop Settings: what is measured in each crop
- Automatic sending: reports and alerts by e-mail
⚙️ General company settings tab
The settings come in blocks that open and close. After making changes, click Save: it applies to the whole screen, not per block.
Pest Scouting
The first three fields are about vocabulary: Display name for 'Quadra', for 'Variedade' and for 'Setor' change the name shown on the screens and in the app. If the farm says "block", type "Block" there and the system starts talking the way the farm does.
In the same block: Dynamic mode when adding pests, Manual Point (APP), Show pest scientific name (APP), Show point opening (APP), Show disabled fields (APP), Do not send data automatically in the APP and Observation updates last scouting date; the last one makes an observation count as a visit, for the purpose of the field's last scouting date.
Crop & Fields
- Allow multiple active seasons: for those who have the main season and the second crop running at the same time
- Show grouping column: shows the Grouping field on the Field screen
- Allow changing Bale during collection
- Decimal places for Ha: how many decimals the area carries in calculations and on screens
- Generate fallow automatically when finishing season planting and the Fallow Crop to be used in that case
Stations & Rain Gauges
The ranges for Low, medium and high rain level, in millimeters. You type only the start of each range: the To field of each one is filled in automatically from the start of the next range. This is what colors the rain gauge on the dashboards.
Operations
The largest block on the screen, divided into six:
| Sub-block | What it controls |
|---|---|
| W.O. Show | Show the Border area option on the order (APP), the Equipment column on the W.O. and the team technical lead column. |
| W.O. Header | Single numbering for orders, allow changing the number and the area of a W.O. with products, clear the fields when leaving the order, require approval of the field work order and send a WhatsApp notification. |
| W.O. Short Identification (Subtype) | Whether the short identification is required and whether it can be changed later. |
| W.O. Execution - Auxiliary Qty | In which executions the auxiliary quantity appears (soil preparation, fertilizing, planting, application, harvest) and how it is captured: by GPS location or QR Code. |
| W.O. Inventory | Inventory Issue Type (required): Average cost or Last cost; this decides at what value the product goes out. Also: show receiving control, require a storage location when creating and when finishing, and Service Order - Show only products with stock, which keeps in the order's product list only those with a balance in some storage location, even before choosing the location (services always appear). |
| Products & Integration | Require a product class and integration ID in the product record, show the integration column in lists, what to do when the dose departs from the label instructions (Warn only or Block) and which ERP the company integrates with. |
Other blocks
| Block | What it controls |
|---|---|
| Purchase order (approval) | Require approval of purchase orders and require double approval. |
| Finance | Require approval to settle. When on, no account payable is paid outside an approved payment batch, on any screen, and the payment window in Accounts Payable/Receivable starts offering Add to batch. Accounts receivable are not affected. When off (the default), nothing changes: anyone who wants to keeps settling installments directly in Accounts Payable/Receivable. See the two caveats below the table. |
| Field history - QR Code | Whether the field's QR Code shows the orders and the products applied. |
| Bale collection | Tracking capture format (Barcode, QR Code or Camera), automatic location capture and automatic opening of the capture screen. It applies to Bale collection. |
| Fleet | Require a fleet classification, require the maintenance work order number and Require hour meter to finish maint. W.O. Without the last one, the finishing of a maintenance work order only asks for the hour meter/km on preventive maintenance; when checked, it also asks on corrective maintenance, whenever the machine has an hour meter in its record. It applies per farm, and takes effect after switching farms or logging in to the portal again. |
| Maintenance work order | Maintenance W.O. cost type: Manual or Calculated automatically. Defines who fills in the Total amount of the maintenance work order: in manual, the user enters it when finishing; in automatic, the system adds up the hours logged, the parts issued from inventory and the parts purchased for the order. It applies to the whole company. |
| Fueling | Generate a fueling number, show the ticket field, skip the hour meter/km check and require an employee. |
| Requisition | Do not allow filling in a requisition without a product. |
| Default reports | Which report the Print button produces on each screen: harvest load ticket, outbound, stand-alone, work order, transfer between locations and field W.O. inventory issue. |
Two fields may appear without a translation, showing the internal key instead of the name
(!pt: bloquear_totan, in the W.O. Inventory block, and
!pt: relatorio_padrao_coliteras, in Default reports, which is the default report for bale
collection). It is a label issue, not a functional one: if you do not use these features, ignore them.
🌱 Crop Settings tab
This is where you define what the technician measures in the field, per crop. On the left, the list of the company's crops (Code and Description); choose one and the form appears on the right. Each crop has its own settings: soybeans do not need the same measurements as cotton.
At the top: Default plants/meter, Manual point and Show 'Number of plants' field for phenology. Below comes the list of measurements, each one with a checkbox to turn it on:
Height · Number of Nodes · Distance between Nodes · STAND · Number of Stems · Number of Pods · First Pod Height · Grains per Pod · No. of squares · No. of Small Bolls · No. of Medium Bolls · No. of Large Bolls · Ht. 1st to 5th node · No. of Bolls Pos. 1 to 5 · Rotten Boll · Open boll · Plants/meter · No. of Bolls · Boll weevil.
Once a measurement is on, its settings open, always the same ones:
| Field | Description |
|---|---|
| Occurrence | How often the measurement is requested: First point, Every point, Fixed interval or Specific points. |
| Every (interval) | Only appears with Fixed interval: every how many points to measure. |
| Points (separate with ,) | Only appears with Specific points: at which points
to measure, for example 1,5,10. |
| Set by Days after Planting | When checked, the Minimum Days After Planting and Maximum fields open: the measurement is only requested within that window of the crop. This is how you ask for plant height only between 30 and 60 days, for example. |
| Optional | The technician can leave it blank and close the point anyway. |
| Per meter (1) | The measurement is recorded per meter, not per plant. |
| Show in details (APP) | On some measurements: shows the value on the app's details screen. |
When you are done with the crop, click Save Crop Settings. The button saves the crop that is open: each one is saved separately.
📧 Automatic sending tab
This is e-mail scheduling: the rain report that reaches the manager at 7 a.m., the list of work orders by sector that goes out every morning, the alert for fields without scouting. The list at the top shows what is already scheduled, with Type, Category, Subject, Report, Hour, Minute, E-mails, Active and Last immediate send date.
| Field | Description |
|---|---|
| Type | Required. Send report by E-mail (the common case), E-mail alert, Base for immediate sending or Immediate E-mail sending. |
| Hour · Minute | What time the sending fires. |
| Email (recipients) | Who it goes to. Separate several with commas. |
| E-mail (blind copy) | Blind copy, same rule. |
| Email Subject · E-mail body | What the recipient reads before opening the attachment. The subject is what identifies the sending in the list, so make it count: "Rain on the Last day - EMERSON" says more than "Report". |
| Active | Uncheck to suspend the sending without deleting the schedule. |
| Send only new records | Sends only what came in since the last sending. |
| Send only 1 per day | Avoids repeats on the same day. |
| Every day · days of the week | Checking Every day checks all seven days at once; uncheck the ones you do not want. |
| Report | Required. Which report is attached. |
| Fixed parameters (name) · (value) | Fixes a report filter for the sending: this is how one report becomes one e-mail per technician or per sector. |
| Category | Common for scheduled sending. The others are event triggers: order for approval, approved, rejected; purchase order for approval, approved, rejected; maintenance plan generated. If you choose one of them, the day-of-week schedule disappears: the event is what drives it. |
| Notes | Internal note about the schedule. |
The buttons are Save, Cancel, Delete, New and Clear last sending; the last one resets the last-sending marker, so that the next run sends everything again (useful when the e-mail got lost or the only new records option blocked the sending).
- The screens speak the farm's language: field, block, plot, whatever it is
- The system requires what management wants required at the right moment, and stays out of the way otherwise
- Each crop asks in the field only for the measurements that make sense for it
- The report reaches the decision-maker's e-mail without anyone having to remember to send it
❓ Frequently asked questions
How do I make the system call a "block" a "field"?
On the General company settings tab, in the Pest Scouting block, type the name you want in Display name for 'Quadra' and save. The same goes for variety and sector. It is a name change on screen: nothing changes in the data already entered.
Why is the technician being forced to enter a storage location on the work order?
Because the Service Order - Require 'storage location' checkbox is on, either in the W.O. Inventory block on this screen, which applies to the company, or in that user's settings, which apply only to them. Check both places.
The automatic report stopped arriving. What do I check?
Open the Automatic sending tab and check, on the schedule's row: whether Active is checked, whether today's day of the week is checked and what time the sending is scheduled for. If everything is right and it still did not arrive, click Clear last sending and wait for the next run.
Do I need to set up crop by crop?
Yes: each crop has its own settings, and that is on purpose: what is measured in cotton (open boll, boll, boll weevil) is not what is measured in soybeans (stand, pod, grains per pod). Set up first the crops the farm actually plants.
I changed a setting and nothing happened. Why?
Two common causes: you did not click Save (the button is at the top of the tab and applies to the whole tab), or the company/farm selected at the top of the screen is not the one you are using. On the crops tab, the button is Save Crop Settings, and it saves only the crop that is open.
📘 Screen: Report
This is the screen where the system's reports are registered and organized, not where
they are run. Each row here is one of the reports that appear in the Reports menu:
CLI.01.03 - Controle Pluviométrico - Geral,
EST.01.09 - Dashboard Visão Geral Local x Estoque,
POS.06.01 - Armazenagem - Extrato. This is where the code the Help Center cites in its
articles comes from.
ÁREA.ASSUNTO.NN (area.subject.number); OPE.01.01 is Operations › Recommendation sheet › 1st report.
For a few weeks the old code stays at the end of the name, in parentheses
(“Ficha de recomendação (INDIVIDUAL) (003.B)”), and the Help Center shows it like this: “OPE.01.01 (formerly 003.B)”.
The full rule, with the areas and subjects, is in the
Reports Quick Guide.
It is a setup screen, usually changed together with the upCampo team. What the farm does often on it is something else: check a report's code, remove it from the menu, change the theme it appears under or request a new report to be installed.
To run a report (filters, output types and export to Excel), see the Reports Quick Guide.
📍 Location in the system
Menu: File > Report
🧩 Main function
Maintain the company's report catalog: the report file, where it appears in the menu, which filters it asks for before running and who can see it.
📝 Main fields
| Field | Description |
|---|---|
| Type (at the top) | Report, Power BI or Table. The default is Report; the other two are for a Power BI dashboard and for a query shown as a table. |
| Code | Required. It is the identifier that appears in the menu and in the
articles: CLI.01.03, OPE.04.03, EST.01.09. A new report
only saves with a code in the pattern ÁREA.ASSUNTO.NN: three letters for the area,
two digits for the subject and two for the position, like OPE.02.01, or, if it is customized
for one farm, ÁREA.ASSUNTO.Pnn, like OPE.02.P03. Otherwise, the web portal
warns “Code outside the pattern”. The code also cannot repeat one you already see in the menu. The
letters are converted to uppercase automatically. |
| Old code | Read-only. The code the report had before the
October 2026 reorganization (003.B, 15.07…). It helps you find the
report by the number the team was used to; a report created after that has the
field blank. It is temporary: it leaves the screen when the transition ends. |
| Description | Required. The name the user reads in the menu. |
| File name | Required. The report file
(.mrt) that will run. Upload it with the button next to it: the name is filled in
automatically and the system warns that you must save the record to confirm. If a
file with the same name already existed, it is kept as a copy before being
replaced. |
| Small file name | Version of the report for small screens, when there is one. |
| HTML file name | HTML version, when there is one. |
| Form | Screen the report is linked to. |
| Theme · Order | Theme is required. It is the report's area (Registrations, Crop, Weather, Scouting, Costs, Operations, Inventory, Fleet, Storage, Finance) and appears in the Theme column of Search report…. The Reports menu, however, groups by the three letters of the code; that is why the titles there are already Monitoring (Scouting theme) and Post-harvest (Storage theme). The order no longer decides the position in the menu: the code does. |
| Subject | The report's subject within the area: Recommendation sheet, Inventory balance, Rain. Choose one from the list (they are the ones that already exist) or type a new one. It is what appears in the Subject column of Search report…, and it should match the two middle digits of the code. |
| Format | List, Sheet, Report, Table or Dashboard: how the report is presented. It is only a classification, for people searching: it is not the same as the Type, at the top. The Type (Report, Power BI, Table) decides how the report opens; the Format changes nothing when running it. |
| Menu group | Subdivision within the reports menu. |
| Show in report menu | Uncheck to remove the report from the menu without deleting it. |
| Active | Turns the report off completely. |
| Summary | Free text explaining what the report shows. It is worth writing: it is what helps someone choosing between two similar ones. |
The list shows Code, Old code, Description, Theme, Subject, Format, Type, Company and Active, with search on each column.
How to choose the code for a new report
The New button no longer suggests a number: the code depends on the area and the subject, and only the person registering knows which they are. The way to do it:
- Area: the one for the menu where the report's source screen is (load ticket →
POS, work order →OPE). - Subject: one the area already has. A new subject only if none fits, and it goes at the end of the area.
- Number: the next free one in the subject. A report customized for one farm uses the next free
Pfor that farm. - Also fill in Subject and Format.
A report that already existed and still has an old code keeps saving normally; the rule applies to new ones.
🔘 Buttons
| Button | What it does |
|---|---|
| Show | Runs the report right away, to check the result without leaving the screen. |
| Clone | Creates a copy of the selected report, with its filters and queries. It is the way to start from a ready-made report and adjust what the farm wants differently, without touching the original. |
| Set as default company | Marks the report as the company default. |
Clone and Set as default company require the report to be saved already.
🗂 Filters and Queries tabs
These are the two tabs that make the report ask questions before running and fetch the data.
Filters is the list of questions that appear before running: season, period, field, technician. Each filter has a Name, Order, Type, whether it is Required, whether it Shows search, whether it accepts only one value, the Default value and the query that feeds the list of options.
Queries holds the queries the report runs, with Name, Order and Active.
Both tabs are technical territory: changing them without knowing the database structure breaks the report for everyone in the company. Ask the upCampo team and, if you want to experiment, do it in a Clone, never in the original.
👀 Who sees each report
Being registered here is not enough for a user to see the report: permission per person is on the Reports tab of the Users screen, where you check Allow report by report. And the report sent automatically by e-mail is chosen on the Automatic sending tab of Company/Crop Settings.
- The reports menu holds what the farm uses, grouped by subject
- Each report has a fixed code that tells the area and the subject: easy to ask for by phone or cite in a ticket
- Customizations live in copies, without breaking the original report
- The right report reaches whoever needs it, through the menu or by e-mail
❓ Frequently asked questions
Where do I see a report's code?
In the Code column of this screen: it is the same code that appears in the reports menu and in
Search report…, in the format CLI.01.03. It is the fastest way to
identify a report when asking for help. If you only remember the old number (006.A),
look in the Old code column or type it in Search report…, which finds
it by either one.
What is the difference between Format and Type?
The Type decides how the report opens: in the viewer (Report), in a grid with export to Excel (Table) or in a Power BI dashboard. The Format (List, Sheet, Report, Table or Dashboard) is only a label for people searching, and changes nothing when running it.
I want a report with my farm's logo and layout. Is that possible?
Yes. The logo comes from the Farm record; the layout is the report file. To change the layout without affecting the others, use Clone, adjust the copy and remove the original from the menu. Talk to the upCampo team: the file design is done in a dedicated tool.
How do I remove a report nobody uses from the menu?
Open the report and uncheck Show in report menu. It leaves the menu and stays registered, with its history intact: you can undo it whenever you want. If the goal is to hide the report only from some people, the place is the Reports tab of the Users screen.
A report stopped opening. What do I check here?
Click Show on this screen: if it does not open even from here, the problem is with the report, not with permissions. Check that the File name is filled in and that Active is checked. If everything is right, open a ticket with the report's code.
📘 Screen: Mapping - Integration
The mapping is the translation dictionary between the name that comes from outside and the
upCampo record. The external system calls the field TH-014; in upCampo it is
Talhão 14 - Boa Vista. The scale's spreadsheet brings the variety as M8210; in the
record it is M 8210 IPRO. Without this translation, every import stops at "not found";
with it, the system finds the match on its own.
It is a behind-the-scenes screen: it is used by whoever handles the integration with the ERP, the scale or the technology partner, not by day-to-day crop work.
📍 Location in the system
Menu: File > Mapping - Integration
🧩 Main function
Store, for each upCampo record, the equivalent name and code in the external system, so that data imports find the right record even when the names do not match.
📝 Main fields
| Field | Description |
|---|---|
| Code | Required. Identifies the mapping line. |
| Supplier | Which external system this translation comes from. It is what lets you have, for the same record, one translation for each partner. |
| Active | Only active lines are considered during import. Unchecking is the way to turn off a translation without deleting it. |
| Table | What kind of record is being translated: Field, Variety, Product class, Product, Fleet type, Fleet or Field Work Order. |
| upCampo table · upCampo description · upCampo ID | This side: the upCampo record, with its name and identifier. When you choose the record in the field matching the table, all three fill in automatically. |
| External table · External description · External ID | The other side: what the same item is called in the outside system. The external description is the key piece: it is what the import searches by. The external table field accepts typing a new value, besides the ones already used. |
The list repeats these columns (Code, upCampo table, upCampo description, upCampo ID, External table, External description, External ID, Supplier and Active), with search on each one.
🔎 Where the translation is used
The most visible case is importing harvest load tickets from a spreadsheet, on the Inbound Load Ticket. When reading the spreadsheet, the system first looks for the field and the variety by the exact name in the record; if it does not find them, it looks in the mapping for an active line whose External description equals the one in the spreadsheet (ignoring upper and lower case) and uses the record that line points to. Only if both searches fail does the line go into the problem list as "not found".
The other translations serve the integrations that use these records. If you do not have an integration in place, this screen stays empty, and that is how it should be.
- Spreadsheet imports stop flagging fields and varieties as "not found"
- Different names in the two systems no longer require renaming records
- Each partner has its own translation, without one getting in the way of the other
When the integration is with the Operations Center, it is worth seeing how the upCampo integration with John Deere works.
❓ Frequently asked questions
The load ticket import says "field not found". What do I do?
Compare the field name in the spreadsheet with the one in the record. If they differ and you do not want to rename either, register a line here: the upCampo field on one side, the name that comes in the spreadsheet in the External description field on the other, with Active checked. On the next import the system finds it.
Do I need to fill in this screen?
Only if the farm exchanges data with another system (ERP, scale, technology partner) and the names do not match. A farm that enters everything inside upCampo does not use this screen.
Can I have more than one translation for the same field?
Yes: one line per external system, identified in the Supplier field. What you should avoid is two active lines with the same external description pointing to different records: in that case the import uses the first one it finds.
📘 Screen: Notification
This is how the office talks to people in the field: it sends a WhatsApp message to the operator, tells the technician there is scouting to do, pushes the day's order list to the app. And this is where you see what has already been sent, to whom, and whether the person received and read it.
The screen works both ways: creating the message and tracking what the system sent on its own; the approved order notice, for example, when that notification is turned on in the company settings.
📍 Location in the system
Menu: File > Notification
🧩 Main function
Send a WhatsApp message or an in-app notification to a user, a team or a contact, and track delivery and read status.
📝 Main fields
| Field | Description |
|---|---|
| Type | Whatsapp (the default) sends the message to a number; Notification pushes the notice into the app of someone who already uses upCampo. |
| Status | Read-only, filled in by the system: Processing, Sent, Delivered or Read. |
| Sender user | Read-only: who sent it. |
| Team | When you choose a team, its lead is added as the recipient user. |
| Recipient user | Who it goes to. When you choose one, the phone number is pulled from the person's record: the WhatsApp number first, and the regular phone if there is none. |
| Contact | An alternative to the user: sends to a registered contact, including a WhatsApp group. Its number fills in the phone field when that field is empty. |
| Phone | The number that will receive it. Required for the Whatsapp type. |
| Title | Short subject of the message. |
| Message | Required. The text itself. |
| Action | Only for the Notification type: what the app opens when the person taps the notice: no action, the list of orders, IPM scouting, traps, rain gauge, fueling, bales or bale collections; or a specific order or a specific field (IPM). |
| Select | Also only for the Notification type: opens the list of work orders to choose which one (or ones) the notification refers to. |
| Reference - code · Reference | The record the message refers to. The reference is filled in by the system. |
| Date / Hour / Minute | Three pairs of fields, all read-only: when the message was created, when it was delivered and when it was read. |
The list shows Date, Title, Sender user, Recipient, Contact, Status, Delivery date, Read date, Type and Text.
✅ What the screen requires
- Message always: without text, it does not save
- For the Whatsapp type: the phone
- For the Notification type: the recipient user (they are the one with the app)
Once the notification is saved, sending is handled by the messaging service; that is why the status starts at
Processing and changes on its own. If the message gets stuck, the number is the first
suspect: WhatsApp requires the country code, as in 5561999999999.
- The message reaches the phone of whoever is in the field, without depending on a call
- You can prove what was communicated, to whom and when, with delivery and read times
- The operator taps the notice and goes straight to the work order to carry out
❓ Frequently asked questions
I sent the message and it did not arrive. What do I check?
Start with the Status in the list. If it is stuck at Processing, the message has not
gone out yet: check the number, which needs the country code (55 for Brazil) and the area code. If it is
Sent and the person says they did not receive it, check whether the number in their record is really the
WhatsApp number they use.
What is the difference between Whatsapp and Notification?
WhatsApp arrives on the phone as a regular message and works for anyone, whether or not they have access to the system. A Notification appears inside the upCampo app and only works for users; on the other hand, it can open the order or field it refers to directly.
Can I notify the whole team at once?
When you choose the Team, its lead becomes the recipient. To reach several people at once, the way is a WhatsApp group registered in Contact: then the message goes to the group.
Where do the notifications I did not create come from?
From the system itself. Work order notices sent by WhatsApp and approval alerts are triggered according to what is turned on in Company/Crop Settings. This screen is where all of them are recorded.
📘 Screen: File center
It is the farm's filing cabinet inside the system: the supplier's invoice as a PDF, the photo of the flooded field, the soil analysis spreadsheet, the signed contract, the lab report. Everything that was attached on any upCampo screen appears here in a single list, and you can also upload a stand-alone file that does not belong to any entry.
The benefit is not depending on anyone's computer: whoever has access to the system has access to the document, from anywhere.
📍 Location in the system
Menu: File > File center
The title inside the screen is just File.
🧩 Main function
Gather in one place the company's files (those attached on screens and the stand-alone ones) to look up, download and organize.
📝 Main fields
| Field | Description |
|---|---|
| Title | How the file is identified in the list. It is the field you will use to find the document later: "Soybean Contract 2026 - Cooperative" can be found; "doc1" cannot. |
| Description | Details about what the file is. |
| File name | Filled in by the system when you upload the file. Spaces
become _ and, if another file with the same name already exists, a number is added at the end:
this keeps one file from overwriting another. The screen itself warns about this. |
| File upload | Drag or choose the file. Accepted: images (jpg, jpeg, png, gif, bmp), text (txt, doc, docx, pdf, rtf), spreadsheets (xlsx, xls, csv), audio (mp3, wav, ogg), video (mp4, avi, mkv), presentations (pptx, key) and compressed files (zip, rar). |
| Notes | Free note about the document. |
The list shows Title, Name, Description, Origin, Extension and a view button on each row. The form toolbar has the Download button.
📍 The Origin column
It is the most useful column on the screen. It tells where the file came from: the attachment of a purchase order, an entity, a stock movement, a quotation. A file uploaded directly on this screen, not linked to any entry, appears as Avulso (stand-alone).
👁 Open and download
The row's view button opens the file in another browser tab. Spreadsheets
(.xlsx, .xls) open inside the system itself, without downloading. For
other formats, the browser decides: PDFs and images open on screen, the rest is downloaded.
- Farm documents no longer live on one person's computer
- You can find an attachment without remembering which entry it was attached to
- Invoices, contracts and lab reports stay with the system that records the operation
❓ Frequently asked questions
I attached a file to a purchase order. Does it show up here?
Yes, with the screen it came from in the Origin column. That is why this screen is the best place to look for a document when you do not remember which entry it was attached to.
What file types can I upload?
PDF, images (jpg, png, gif, bmp), Word documents, Excel spreadsheets and CSV, audio, video, presentations and compressed files (zip, rar). If the file is rejected on upload, its extension is not on that list: compress it into a zip and upload it that way.
I uploaded two files with the same name. Did one delete the other?
No. When it sees a file with that name already exists, the system adds a number to the end of the new file's name. Both are kept; that is why it is worth writing a good Title, which is what tells them apart in the list.
📘 Screen: Contact
It is the system's address book: phone numbers, e-mails, WhatsApp numbers and WhatsApp groups that upCampo sends messages to. The "Season Operations 2026" group, the consulting agronomist's WhatsApp, the accounting firm's e-mail: each one becomes a contact, and then you just choose it on the Notification screen.
A contact is not a user. A user logs in to the system; a contact only receives messages. The consultant who follows the crop without using upCampo is a contact.
📍 Location in the system
Menu: File > Contact
🧩 Main function
Store the farm's message destinations (number, e-mail or WhatsApp group) so the system's notices have somewhere to go.
📝 Main fields
| Field | Description |
|---|---|
| Type | Defines what kind of contact it is: Phone (the default), E-mail, WhatsApp, WhatsApp Group or Other. The next field changes its name according to the type: choose E-mail and it becomes "E-mail"; choose WhatsApp and it becomes "WhatsApp". |
| Code | Short code for the contact. |
| Description | Required. How the contact is identified in the list. "Operations Group - Season 2026", "Consultant João - agronomy". |
| Phone / E-mail / WhatsApp (the field that changes name) | The destination itself.
Required for all types except WhatsApp Group: for a group, it is filled in by
the button described below. For a WhatsApp number, include the country code:
5561999999999. |
| Entity | Links the contact to the matching Entity record: the contact for the supplier, the carrier, the buyer. |
| Active | Uncheck to remove the contact from the list of destinations without deleting the history. |
| Notes | Free note. |
The list shows Code, Description, Type, Address and Active, with search on each column.
💬 WhatsApp groups and the Get group ID button
A WhatsApp group is not identified by a number: it has its own identifier, which nobody types from memory. That is why, when you choose the WhatsApp Group type, the Get group ID button appears: it lists the groups the upCampo WhatsApp number has already been added to, and the group you choose fills in the field automatically.
So the order is:
- Add the upCampo WhatsApp number to the group, from your own phone
- On this screen, choose the WhatsApp Group type
- Click Get group ID and select the group in the list
- Save
Once that is done, the group appears as a destination on the Notification screen: that is how a notice reaches the whole crew at once.
- The notice goes to the operations group, not to each person one by one
- People who do not use the system (consultant, accountant, carrier) still get notified
- Destinations are stored, without depending on someone's phone contacts
❓ Frequently asked questions
What is the difference between a contact and a user?
A user has a login and enters the system; a contact only receives messages. If the person needs to enter something, register them as a user. If they only need to be notified, a contact is enough.
How do I send a notice to a WhatsApp group?
First add the upCampo WhatsApp number to the group. Then, on this screen, create a contact of the WhatsApp Group type and use the Get group ID button to choose the group from the list. Once the contact is saved, it appears as a destination on the Notification screen.
The group does not appear in the Get group ID list. Why?
Because the upCampo WhatsApp number has not been added to it yet. Only groups that number is already in appear: add it from your phone and try again.
📘 Screen: Integration problems
When the farm exchanges data with an external system (machine telemetry, the manufacturer's platform, an ERP), not everything gets in. An operation arrives from equipment that is not registered, or from a field whose name upCampo does not recognize. Instead of disappearing, these records stop here, with a description of what blocked them.
It is a read-only screen: it shows what got stuck and helps you find out why. The fix is made in the records, or in Mapping - Integration, when the problem is just a different name.
📍 Location in the system
Menu: File > Integration problems
🧩 Main function
List the records the integration could not import and show, for each one, whether the equipment and the field that came from outside exist in upCampo's records.
📋 The list
Shows Sorting, Date, Description (the reason for the problem), Type, Equipment, Variety/Cultivar, Field, Field ID and JD ID, with search on each column. The Reload button refreshes the list.
🔍 Diagnosing the record
When you select a row, the form shows the data as it came from the external system (date, description, equipment, variety, field, the identifiers and the raw content received) and, below a divider line, two check fields:
- Equipment - upCampo: the system looks up the matching fleet by chassis number. If it finds it, it shows "Equipment found!" right below the field; if not, "Equipment not found!"
- Field - upCampo: the same check for the field
That pair of messages shows the way: "not found" means the record is missing in upCampo, or it exists under another name, and in that case the mapping solves it.
The screen changes nothing: there is no save or delete, only Cancel to go back to the list. After fixing the record, the integration itself reprocesses the item.
- Data that did not get in no longer disappears without warning
- It becomes clear whether what is missing is a new record or a name translation
- The equipment and field check comes ready, without searching two screens
❓ Frequently asked questions
"Equipment not found" appeared. What do I do?
Check whether that machine is registered in Fleet / Facility with the chassis number filled in: the integration finds the equipment by its chassis number. If the machine exists but the chassis number is blank or different, complete the record.
I fixed the record. Do I need to do anything here?
No. This screen is read-only: the integration does the reprocessing. Keep an eye on the list over the following days: if the same problem keeps showing up, the record you fixed is not the one the integration is looking for, and it is worth opening a ticket with the error description.
My farm has no integration. Why does this screen exist?
It is for those who integrate upCampo with another system. Without an integration in place, the list stays empty, and that is how it should be.
🧱 Quick Guide - Basic (base records)
The Basic menu gathers the records that the other modules use and that almost never change once set up. They are of two very different kinds, which is why the menu looks like a mix: on one side, the base for pest scouting (class, pest and group); on the other, the tax base for invoices (nature of operation, CFOP, CST and series). In between, the sector, which divides the branch into units.
The good news is that almost everything here is set up only once. After it is built at the start of the contract, you come back to these screens only a few times a year.
📍 Location in the system
Menu: Basic
🐛 The scouting base
1. Pest Class
Start here: the class is the drawer that organizes pests for people in the field ("Caterpillars", "Stink bugs", "Rust", "Broadleaf"), and it is a required field for the pest. Each class has a type (Pests, Diseases, Weeds or Evaluation) and an order, which sets the sequence it appears in on the phone.
2. Pest, weed and diseases
Before registering by hand, use the Import standard pests button on the Pest screen: it brings, from a library maintained by upCampo, pests with scientific name, class and counting method already set. Then adjust what the farm does differently, mainly the selection method in the APP (typed quantity, by sizes or by predefined levels) and the action thresholds per crop.
3. Pest group
If the decision to spray looks at the total of several species together ("defoliating caterpillars", "stink bugs"), set up the group. It adds up the counts into a single number and has its own action thresholds, which are what color the map and trigger the alert e-mail.
4. Trap group
If you work with traps, register the groups in Trap group, which appears both in the Basic menu and in the Crop menu.
🗺️ The sector
The sector divides the branch into units: "Boa Vista", "Nascente", "São João". It does not need to be created here: it is born when someone types a new sector in the Sector field of the Field record, and only then does it appear in this list.
The screen is auxiliary, and you open it for two reasons: to fill in the Grouping, which combines several sectors into a single view, and the Reference/Integration ID, when the farm exchanges data with an external system.
🧾 The invoice tax base
These four records exist so that issuing invoices no longer depends on case-by-case questions. The content is dictated by the property's accountant; the screen only stores what they indicated.
1. Nature of Operation
The phrase printed at the top of the invoice explaining why it exists: "Other outbound", "Sale of the establishment's production". Register it in Nature of Operation, with the NF-e (Brazilian electronic invoice) purpose and whether the invoice is inbound or outbound. The description is limited to 60 characters. It is asked for only in NFE Transmission: the regular Stock Movement screen does not show this field, and a few natures are usually enough.
2. CFOP
The four-digit code that classifies each item on the invoice for the Brazilian tax authorities. Register in CFOP only the ones the farm uses, usually between five and fifteen.
3. CST
The code that tells how each item is taxed, per tax. On the CST screen, first choose the tax in the ICMS / PIS / COFINS / IPI selector and only then click New: it is the selector that defines which tax the code belongs to.
4. Series
The invoice numbering sequence. Register in Series the series the branch uses, with the Last number field that prevents repeated invoices or gaps in the sequence.
🔗 Screens the Basic menu shares with other modules
- Trap group: also in the Crop menu, and documented under Pest Monitoring
- Active ingredient: documented under Inventory, which is where it is used in the product record
- Field scouting opens with the list ready and the right counting type
- The map colors the field on its own, because the action thresholds exist
- Invoices are issued by choosing from short lists, without typing codes from memory
- The branch can be viewed by unit, not only as a whole
❓ Frequently asked questions
Where do I start setting up the Basic menu?
With the pest class, then the pests (importing the standard ones) and, if needed, the groups. The tax part (nature of operation, CFOP, CST and series) can be done later, together with the accountant, and is only needed by those who issue invoices through the system.
Why are pests and invoice records in the same menu?
Because the Basic menu is not organized by subject but by the kind of record: they are the support tables that the other modules use and that practically never change once set up. In practice, each team uses only the half that matters to it.
Do I need to fill in the tax part if I do not issue invoices through the system?
No. CFOP, CST and series are only needed by those who enter invoices in Stock Movement or transmit NF-e through the web portal, and the nature of operation is only asked for in NFE Transmission. Those who use the system only for field operations can leave these four screens empty.
📘 Screen: Sector
The sector groups the farm's areas together — "Boa Vista", "Nascente", "São João", "Entre Rios". In practice, sectors are created by the Field record: when someone types a new sector in the field's Sector field, it starts to exist and shows up in this list on its own.
That is why this is an auxiliary screen, not the starting point. You come here for two reasons: to say which group each sector belongs to, and to enter the Reference/Integration ID when the farm exchanges data with an external system. Day to day, the New button is almost never used.
📍 Location in the system
Menu: Basic > Sector
🧩 Main function
Complete the information on sectors that were already created from the field records — the group and the integration code —, and let you deactivate a sector that is no longer in use.
🌱 Where sectors come from
From the field. In the Field record, the Sector field accepts a new value typed on the spot, and that is how the farm builds up its internal division: each field gets the name of the unit it belongs to. The list shown there combines the sectors already used in fields with the ones that exist in this record, so both sides always see the same set.
The practical consequence is that if a sector is spelled two ways in the fields ("Boa Vista" and "BOA VISTA"), it becomes two sectors. Standardizing the spelling in the field is what prevents a duplicated list here.
📝 Main fields
| Field | Description |
|---|---|
| Code | Short identifier for the sector. It is usually left blank, since the sector comes from the field. |
| Name/Description | Required. The name of the unit, exactly as it is spelled in the fields: "Boa Vista", "Nascente", "Primavera". |
| Group | This is the main reason to open this screen. A level above the sector, to bring several units together in a single view — for example, the sectors Boa Vista, Nascente and São João all in the group "Lucas", and Campinas and Jandaira in "Tapurah". |
| Reference ID | The other reason. The sector's code in the external system, when there is an integration. It becomes required when the company is set up to require an integration ID — in that case the system refuses to save without it. |
| Zoom | Map zoom level for that sector. On most farms it stays at zero; it is only filled in when a specific map dashboard needs it. |
| Latitude / Longitude | Reference point for the sector, in the same situation as Zoom: they are usually left at 0.0. |
| Active | Uncheck it to remove the sector from the lists without deleting the entries that already used it. |
The list shows Code, Description, Group, Zoom, Latitude, Longitude, Active and Reference/Integration ID, with search on each column.
🧾 Where the sector shows up
Besides the crop sector filters — which read the sector saved on the field —, the sectors in this record feed the Sector field in the header of Inventory Movement (Inbound & Outbound). That field only appears on the screen when at least one sector is registered.
- Several sectors can be read together through the group, instead of one by one
- The integration recognizes each unit by the external system's code
- A sector that is no longer used is deactivated without erasing history
❓ Frequently asked questions
Do I need to register sectors before registering fields?
No. It is the other way around: type the sector directly in the Sector field of the Field record and it starts to exist on its own. This screen is for completing what the field does not ask for — the group and the integration code.
What is the Group field for?
To bring several sectors together in a layer above, usually by region, municipality or manager. That way "Boa Vista", "Nascente" and "São João" can be added up as a single block, while still existing separately.
The same sector shows up twice in the list. How do I fix it?
This happens when the name was spelled differently in the fields — "Boa Vista" and "BOA VISTA" become two sectors. Standardize the spelling in the Sector field of the fields involved and then deactivate the leftover record.
Is the Reference ID field required?
Only when the company is set up to require an integration ID. In that case the system refuses to save the sector without that code, because that is how the external system recognizes the area. In other companies the field can stay empty.
What is the difference between a branch and a sector?
The branch is the unit with its own CNPJ (Brazilian company tax ID) — it is the one that issues invoices and closes inventory. The sector is an internal division of that branch, to separate production units that share the same CNPJ. If the areas have different CNPJs, they are branches; if they share the same one, they are sectors.
📘 Screen: Pest Class
The class is the "drawer" where each pest is kept: Caterpillars, Mites, Beetles, Fungi, Bacteria, Viruses, Nematodes, Broadleaf Weeds, Grass Weeds. Instead of working with a loose list of sixty items, scouting works by class — and the class is what organizes the choice in the field app, the order in which items appear and how the results are read afterwards.
It is the first scouting record: without a class you cannot register a pest, because the class is a required field of Pest.
📍 Location in the system
Menu: Basic > Pest Class
🧩 Main function
Group pests, diseases, weeds and assessments into categories, defining the order in which they appear to the person in the field.
📝 Main fields
| Field | Description |
|---|---|
| Name/Description | Required. The name of the class as a crop scout would recognize it: "Caterpillars", "Mites", "Fungi", "Broadleaf Weeds". |
| Type | Required. Separates what the class represents — pest, disease, weed or assessment. This is what makes "Fungi" and "Bacteria" read as diseases, and "Caterpillars" and "Beetles" as pests. |
| Code | Short identifier, for when classes come from another system. On most farms it is left blank. |
| Order | Number that sets the class's position in the list, instead of alphabetical order. Repeated numbers are accepted — just number consistently within each type. |
| Active | Uncheck it to remove the class from the lists without deleting the pests already in it. |
The list shows Code, Description, Type, Order and Active, with search on each column.
🧭 How to divide the classes
A good division is the one the crop scout already has in mind. A well-built base usually looks something like this: Caterpillars, Beetles, Mites and Others on the pest side; Fungi, Bacteria, Viruses and Nematodes on the disease side; Broadleaf Weeds and Grass Weeds for weeds.
Notice they are few and obvious. A "Pests" class with thirty items inside, or fifteen classes with two pests each, get in the way just the same. If scouting is slow because the crop scout scrolls through the list looking for the item, it is almost always the classes that are poorly divided.
This is also the place for things that are not crop enemies but are measured at the point — such as a class like Detailed Cotton Phenology, used to record the plant's growth stage along with the rest of the scouting.
- The crop scout finds the pest in two taps, without scrolling a long list
- Pests, diseases, weeds and assessments are kept separate from the start
- The order of the classes reflects what the farm scouts most often
❓ Frequently asked questions
What goes in as an "Assessment" instead of a pest?
Anything the crop scout measures at the point that is not a crop enemy: plant height, stand, number of nodes, number of bolls, plant growth stage. The Assessment type makes these items follow the same scouting flow without mixing with the pest counts when the results are read.
What is the Order field for?
To set the position in which the class appears to the person in the field. Give the classes the farm scouts every day the lowest numbers; rare ones go at the end of the list. Without an order, the list stays in the default sequence and the crop scout wastes time looking.
Do I need to fill in the Code?
No. It is only useful when the classes came from another system and need to keep that system's code. On most farms the field is left empty, and the class is identified by its name.
Can I delete a class I no longer use?
Only if no pest is linked to it. If there is one, uncheck the Active field: the class disappears from the selection lists and older pests keep the classification they had in the history.
📘 Screen: Pests, weeds and diseases
This is the record of what the crop scout will monitor in the field: bollworm, two-spotted spider mite, alternaria, volunteer cotton — and also measurements that are no enemy at all, such as plant height and stand. Each item registered here becomes a line in the scouting done in the field app.
It is the most complete screen in the Basic menu, because it does not just define the name: it defines how each target is measured — and there are many ways to measure. Per plant, per meter, per leaf, per fruit, per square meter: this is where you choose which one applies to each pest, whether the count is split by size, which ready-made options the scout sees on the phone and, above all, from what number that count stops being normal.
📍 Location in the system
Menu: Basic > Pests, weeds and diseases
🧩 Main function
Register pests, diseases, weeds and assessments, defining how each one is counted and the control levels that color the map and trigger the alert.
📥 Start by importing the standard pests
Before registering anything by hand, use the Import standard pests button, above the list. It opens a pest library maintained by the upCampo team — already with scientific name, class and counting method — and brings into your company the ones you check. There is a filter by type (All, Pests, Diseases, Weed, Assessment) to find them faster.
This is the recommended path: the imported pest comes already configured in a way that works, and you only adjust what your farm does differently.
📝 Main fields
| Field | Description |
|---|---|
| Type | Required. Four options side by side — Pests, Diseases, Weed and Assessment. |
| Name/Description | Required. The common name, the way the crop scout says it: "Bollworm", "Two-spotted spider mite", "Alternaria", "Volunteer cotton". |
| Scientific Name | Tetranychus urticae, Polyphagotarsonemus latus. It also accepts the way the farm describes the target when it combines more than one species — "Helicoverpa + Bollworm". It goes into the agronomic prescription and the technical reports. |
| Pest Class | Required. The drawer where the pest is kept. The list shows the class together with its type — "Caterpillars - Pest", "Mites - Pest" —, which helps you avoid choosing a disease class for a pest. See Pest Class. |
| Standard Pest (image) | Required in records created by the farm. It is the pest from the upCampo library that matches this one, and it is where the photo shown in the app comes from. |
| Calculation method | How the count at the point becomes the field's number. The default is IPM Standard. There are also Simple sum, Average per occurrence, Average per point, Per plant, Per meter, Per leaf, Per fruit, Per total field plants, Formula, Text and Cotton Phenology. What each one does is detailed further below. |
| Allow decimals | Check it when the count accepts fractional numbers (0.5 caterpillar per meter). For counts of whole individuals, leave it unchecked. |
| Active | Uncheck it to remove the pest from the lists without deleting the scouting already done. |
Next to Allow decimals are Has Sizes and Predefined levels. They are grayed out on purpose: they are not fields to check, but indicators that the screen itself turns on according to the selection method set right below.
🎚 Selection method in the APP
This is the most important decision in the record, because it changes what the crop scout sees on the phone. There are three paths, and each one unlocks a different tab:
- No sizes or levels — the scout types the quantity found. No extra tab
- By sizes — the count is split by instar. Unlocks the Size tab
- By predefined levels — the scout picks a ready-made option instead of typing. Unlocks the Predefined levels tab
Size is the instar — the pest's development stage. Each size becomes its own field at the point, and the scout records how many were found at each stage. Egg, Small, Medium and Large are one possible example: how many stages to separate, and what to call them, is your decision, pest by pest. Use it when the decision to spray depends on the instar, not just on how many there are.
A predefined level is a ready-made scale — Low, Medium, High is the most common case. On the phone the options become single-choice buttons, in the order registered, and the number field disappears. Use it when an exact count makes no sense and does not help, as in disease assessment by visual scale.
The two paths can be combined: a size can have its own predefined levels (that is the Yes = choose levels selector on the Size tab). When that happens, the levels of that size apply, and not those of the pest.
🧮 How the count at the point becomes the field's number
The crop scout records pest by pest at each point along the walk. What turns those separate entries into a single number for the field is the calculation method. Two pieces of scouting information go into almost every calculation: the number of points walked and the quantity assessed per point (how many plants, how many meters) entered by the scout in the app.
The summary is closed per day and per season planting, not per scout: if two people walked the same field on the same date, both people's points go into the same calculation. Along with the result, the system stores the value from the previous scouting, and that is where the comparison from one date to the next comes from.
| Calculation method | What the system does with the count |
|---|---|
| IPM Standard | This is the default, and it changes with the scouting type. For Plant, it returns the percentage of infested plants: total found × 100 ÷ (plants per point × points). For linear meter, it returns the average per meter. For the beat cloth / M2, it returns the average per point. |
| Simple sum | Adds up everything found and shows the raw total, without dividing by anything. |
| Average per point | Total found ÷ points walked — the average per point, including the points where nothing was found. |
| Average per occurrence | Total found ÷ points where the pest appeared. Clean points are left out, so the number shows the intensity where there is a hotspot — not the average situation of the field. |
| Per plant / Per meter | Total ÷ (quantity assessed per point × points): how many individuals per plant, or per meter. |
| Per leaf / Per fruit | Same calculation, but returned as a percentage — leaves or fruits infested out of the total examined. |
| Per total field plants | Percentage of the field's stand, not of what was examined at the point. |
| Formula | Lets you build your own expression — adding egg and small, for example. The formula can use the value already calculated for other sizes and also the number of points in the scouting. It is written on the Size tab, with the Formula button. |
| Text | What the scout records is text, not a number: it shows up in the history as a note and does not go into averages or level ranges. |
| Cotton Phenology | Specific calculation for cotton phenology tracking. |
The Size tab has its own Calculation method field, for when one instar needs to be treated differently from the rest of the pest.
With predefined levels the calculation is different: it is a percentage of points. The system counts how many points chose each option and divides by the total number of points. In a scouting with 10 points where 2 were marked as Low, the summary shows Low = 20% — and the other options show their own percentages, adding up to 100% across all the ones used. That is why this format answers "how much of the field is in situation X", while the numeric count answers "how much is there".
🗂 Additional tabs
📊 Size
Only makes sense when the selection method is "By sizes". Each line is an instar — a development stage of the pest. Egg, Small, Medium and Large are an example; the farm decides how many stages to separate and what to call them. Each line has Name, Order (the sequence in which it appears on the phone), its own Calculation method and Active. The list shows Name/Description, Order, Active and Levels.
A No = typed value / Yes = choose levels selector decides whether that size is typed or picked from a list. Choosing Yes opens a second block right below to build the options for that size, with Name, Order, Value and Active — for example, the "Egg" size offering only "Present", with value 1.
The tab's toolbar has Save Size, Cancel, Delete, Delete all sizes, Import (copies the sizes already built for another pest, so you don't redo the same setup), Deactivate All and Formula, which opens the "Formula builder" window to build a calculation combining the sizes.
The Advanced menu checkbox, on the same toolbar, reveals the fine-tuning fields: Default value, Number of repetitions, Formula (optional) and its Translated version, Maximum value, Abbreviation, plus the checkboxes Show in field detail (app), Calculate entry automatically, Keep last value, Required, Hide in summary (dashboard and app) and Hide in entry.
📉 Predefined levels
Only makes sense when the selection method is "By predefined levels" — Low, Medium, High is the most common example. Each line is an option that the crop scout sees on the phone as a single-choice button, with Name, Order (the sequence in which the buttons appear), Value (the number stored behind the option) and Active. The toolbar has Save, Cancel, Delete, Import and Delete all.
The summary for this kind of pest is a percentage of points: each point marks an option, and the system shows how much of the walk fell into each one. Ten points with two marked as Low become Low = 20%. That is why it pays to keep few, clearly separated options — a long list dilutes the percentage and does not help you decide.
📈 Control Levels
This is the most important tab on the screen — and what separates scouting that turns into a decision from scouting that turns into a spreadsheet. The control level is the number from which the pest stops being a presence and becomes a problem: the threshold that research and consultants set for that crop, at that growth stage, for that insect size.
Without it, the system shows "8 caterpillars per meter" and each person reads it differently. With it, the system itself classifies: 8 is High. The agronomist doesn't need to remember the threshold for each pest at each crop stage by heart — the whole farm uses the same criterion, including whoever just joined the team.
The tab itself says what they are for: they are the "control levels for dashboard display, map legend and emails". In practice, what you see today is the scouting dashboard: at the pest × field intersection, the result is highlighted in the color of the range it fell into, and that is what makes anything over the threshold jump out — without anyone interpreting numbers by hand. The dashboard map shows the collected points; the field itself is not filled in by control level.
Each range is registered with:
- Crop — required; it is what loads the list of growth stages
- Scouting type — Plant, M2 or Both
- Size — when the pest is counted by size, the range applies to one specific size
- Start stage (from) and End stage (to) — required, and chosen from the crop's growth stages: PP - Pre-planting to R8 - Full maturity in soybean, V0 to C30 in cotton. The stage compared is the one the scout entered when opening the scouting — it applies to all pests that day; the stage is not chosen pest by pest
- Description — the situation the range represents: Low, Medium or High
- From and To — the count range. In the list the columns appear
as
From (=<)andTo (>): the From value belongs to the range, the To value already belongs to the next range. That is why the ranges sit right against each other with no number left between them — 0 to 2, 2 to 5, 5 to 100
In practice there are three lines per combination, each one touching the next. In cotton, for the "Small" size between V0 and C30: Low from 0 to 2, Medium from 2 to 5, High from 5 to 100 — and the same trio repeated for the "Large" size. The last "To" is usually a very high number (100) precisely so that no count falls outside the last range.
It takes work because the same pest's tolerance changes as the crop grows: ten caterpillars in newly emerged cotton don't carry the same weight as ten caterpillars once bolls are formed. That is why the range is registered by growth stage, and why it pays to register at least the targets the farm actually tracks, instead of trying to cover everything at once.
The numbers don't come from the system: they come from the technical recommendation the farm follows — research, cooperative or consultant. The record just makes sure that recommendation is applied the same way in every field. Without a control level registered for the crop, size and growth stage of the scouting, the field gets no color.
🧭 Default Type (Pest x Type)
Defines, by Crop and range of growth stages, whether the count for that pest is Plant, M2 or Both. This is what makes the app open in the right type instead of the crop scout choosing at every point — and what prevents the same pest from being counted per plant in one field and per meter in another. The list shows Crop, Start st., End st. and Type.
🌱 Crop
The list of crops in which that pest occurs — ALGODÃO, SOJA. It keeps the crop scout from seeing, in soybean scouting, a pest that only occurs in cotton. When the target is generic, the Include all crops button fills in the tab at once.
📄 Text
A free-text field for the pest's technical description — symptoms, when it occurs, notes from the consultant. It is the support text that people in the field look up when in doubt.
📷 Image
The photo shown in the app comes from the Standard Pest chosen in the record, and is not uploaded here. The tab makes this explicit: the image is optional.
🔎 Filters and bulk actions
Above the list, two checkboxes change what the screen offers:
- Show filters (as displayed in the APP) — shows the filter by type and by class the way the crop scout sees it on the phone, with the Apply filter and Clear filters buttons. It is how you check the record through the user's eyes
- Advanced menu — unlocks the record's secondary fields (Code, Short description for reports, Description in English, 'Plant count' field name, Export alias and Export order) and the bulk actions toolbar. Alongside them appear Image and Previous image ID, for reference only: they show the file that came from the standard pest
Each bulk action opens its own window, all with the same filter by type (All, Pests, Diseases, Weed, Assessment) and a list with a checkbox on each line — Description, Scientific Name, Class, Type, Active, Size and Levels:
- Change class (bulk) — reclassifies the checked pests at once
- Copy to another company — takes the records to another company
- Delete several records at once — confirmed with the Confirm deletion of selected button
- Deactivate/Activate several records at once — has a Deactivate / Activate selector at the bottom, so it works both ways
These are housekeeping actions, which is why they are hidden behind the advanced menu. Always use them with the filter applied first.
The main list shows Description, Scientific Name, Class, Type, Active, Code, Size and Levels.
- The crop scout opens the scouting and finds the list ready, already in the right counting type
- Counting by size and visual scales work side by side in the same flow
- The control level classifies the number on its own and highlights it on the dashboard, with no interpretation needed
- The scientific name goes to the agronomic prescription without retyping
❓ Frequently asked questions
Do I have to register every pest by hand?
No — and it is not recommended. Use the Import standard pests button: it brings pests from a library maintained by the upCampo team, with scientific name, class and counting method already set. Only register by hand what is specific to your region or your consultant.
The system won't save and asks for the "Standard Pest". What is that?
It is the pest from the upCampo library that matches the one you are registering. It is required in records created by the farm because it is where the photo shown in the app comes from, and it is what makes it possible to compare data across properties. Pick the closest one in the list.
Why can't I check "Has Sizes" and "Predefined levels"?
Because they are not fields to check: they are indicators. They are turned on by the choice made in Selection method in the APP — selecting "By sizes" lights up the first, and "By predefined levels" lights up the second.
When should I count by size instead of just counting the quantity?
When the decision to spray depends on the instar — the pest's development stage. Twenty small caterpillars and twenty large caterpillars call for different management, and the total number alone hides that. If size doesn't change the decision, splitting by size just makes scouting slower.
What does "size" mean in the pest record?
It is the instar, that is, the development stage at which the pest was found. Egg, small, medium and large are just an example: each farm sets up the division it uses, with the names the team uses. Each size becomes its own field at the point and can have its own control level range.
I chose "predefined levels". How does the system calculate the field's result?
As a percentage of points. Each point on the walk marks an option, and the system shows how much of the walk fell into each one: in a scouting of 10 points with 2 marked as Low, the summary shows Low = 20%. This is different from the numeric count, which answers "how much is there" — here the answer is "how much of the field is in that situation".
What is the difference between "Average per point" and "Average per occurrence"?
Average per point divides the total found by all the points walked, including clean ones — it is the average situation of the field. Average per occurrence divides only by the points where the pest appeared, showing the intensity where there is a hotspot. The same crop can have a low average and a high occurrence: a pest concentrated in patches.
What is a control level and why does it matter so much?
It is the number from which the pest stops being a presence and starts requiring a decision. Registered on the Control Levels tab, it makes the system classify each count on its own as Low, Medium or High — and that is what highlights the situation on the scouting dashboard and feeds the email alert. Without it, scouting delivers loose numbers and each person reads them differently.
Where do I get the control level numbers from?
From the technical recommendation the farm already follows: research, cooperative, consultant or the agronomist's own history. The system does not suggest values — it applies the criterion you register, the same in every field and for the whole team. If the recommendation changes from one season to the next, just adjust the ranges here.
Why do I have to repeat Low, Medium and High for each crop growth stage?
Because tolerance changes as the crop grows: ten caterpillars in newly emerged cotton don't carry the same weight as ten caterpillars once bolls are formed. Registering by growth stage range is what lets the alert fire early when the plant is fragile and not fire for nothing when it can already handle it.
I counted the pest but the result shows no classification. Why?
There is no control level for that combination. Ranges are registered by crop, by counting type (Plant or M2), by size and by growth stage range — if the scouting was done at a stage outside the registered ranges, the count doesn't fall into any of them and the number shows on the dashboard without highlighting.
Do I need to register a control level for every pest?
No. A pest with no level registered is still counted and recorded normally — it just doesn't get a color or an alert. Start with the targets that actually drive spraying decisions in your crop and fill in the rest over the season.
Why is the same pest counted per plant in one field and per meter in another?
Because the default has not been set on the Default Type (Pest x Type) tab. That is where you declare, by crop and growth stage range, whether the count for that target is Plant, M2 or Both — and the app opens in the right type, instead of leaving the choice to each point. Without it, the numbers from different fields cannot be compared.
How do I register a measurement that is not a pest, such as plant height?
Register it normally, choosing the Assessment type and a class that is also of the Assessment type. It will show up in the scouting alongside the pests, but stays separate from them when the results are read.
Where do I change the class of several pests at once?
Check Advanced menu above the list: the toolbar appears with Change class (bulk), plus copy to another company, delete and deactivate/activate several records at once. Each one opens a window with a filter by type and line-by-line selection.
📘 Screen: Pest Group
A pest group combines separate counts into a single number. The most common use is to add up the sizes of the same species: if you count small and large helicoverpa in separate fields, you create the group "Helicoverpa Armigera Total" to see the total for the species. You can also combine similar species — "Heliothinae Family Total", "Soybean Looper Total".
Whoever decides on spraying usually looks at that total, not the size-by-size count — and that total is what this screen defines.
Besides adding up, the group has its own control levels: the "Low", "Medium" and "High" ranges that color the map legend, feed the dashboard and trigger the alert email.
📍 Location in the system
Menu: Basic > Pest Group
🧩 Main function
Define groups that add up the counts of several pests and set, by crop and growth stage range, the control levels for that total.
📝 Main fields
| Field | Description |
|---|---|
| Code | Short identifier for the group. |
| Name/Description | Required. The name of the group as it appears in the field and on the dashboard: "Helicoverpa Armigera Total", "Heliothinae Family Total", "Soybean Looper Total". |
| Calculation method | How the counts of the group's pests become a single number. With Standard, the group adds up the value already calculated for each pest — this covers most cases. The other options (Individual, Cotton (positions), Simple average and Group (positions)) serve specific setups; only change them with help from support. |
| Show in details (APP) | Check it so the group appears in the field app's detail view, and not only in the summary. |
| Active | Uncheck it to remove the group from the lists without deleting the scouting records that already used it. |
🗂 Additional tabs
🐛 Details (Pest)
This is where you say what goes into the group. For each line:
- Pests — required. The pest that starts counting toward the group
- Size — only appears after you choose a pest that works by size, and then lists its active sizes. This is how you build the most common case: one line for "Small" and another for "Large" of the same pest
- Group — required. The group this line goes into
- Active — uncheck it to take the line out of the calculation without deleting it
The tab's list shows Group, Pests, weeds and diseases, Size and Active. When the group adds up sizes of the same pest, the Size column is what tells the lines apart.
It helps to know how the total is produced: each pest is first calculated by its own calculation method, and the group adds up those finished values. It is not a sum of raw counts — if one pest is measured as a percentage of plants and another as individuals per meter, adding both in the same group does not produce a number that means anything. Group pests that are counted the same way.
A pest set up with predefined levels (Low/Medium/High) is left out of the group calculation: its result is a percentage of points, and it does not go into the sum.
The group does not replace the pest. Each pest keeps its own value and its own color; the group gets one more value and one more color, calculated in parallel.
📈 Control Levels
These are the ranges that translate the counted number into a situation — this is what makes the result appear highlighted in the range's color on the scouting dashboard. Each level is registered by crop, because what is "high" in soybean is not "high" in cotton:
- Crop — required; it is what loads the list of growth stages right below
- Type — whether the count is per Plant, per m2 or Both
- Start stage (from) and End stage (to) — the development range in which that level applies. Either you enter both, or neither. The stage compared is the one the scout entered when opening the scouting
- Start value (From) and End value (To) — the count range.
In the list the columns appear as
From (=<)andTo (>): the From value belongs to the range, the To value already belongs to the next range - Description — the situation that range represents: Low, Medium or High. It is what sets the color
- Order — the range's position in the legend. If left blank, the system fills it in on its own based on the description: Low 1, Medium 2, High 3
- Send alert email — check it so the system sends an email when the count falls into that range. It is usually checked only on the High level
The list shows Crop, Start st., End st., Description, From (=<), To (>), Type and Order.
A soybean group looks like this, with the three ranges covering the whole cycle: PP - Pre-planting to R8 - Full maturity, Low from 0 to 1, Medium from 1 to 2, High from 2 to 200. You don't have to break it down by growth stage — only do so when the threshold really changes over the cycle.
The system does not allow two overlapping ranges for the same crop, same type and same description, nor a start stage later than the end stage — when this happens, it warns you and does not save.
- The spraying decision looks at the group total, not the single species
- The map and dashboard show the situation in colors, without anyone interpreting numbers
- The alert email goes out on its own when the count passes the control level
❓ Frequently asked questions
What is the difference between a pest class and a pest group?
The class organizes the list so the crop scout can choose in the field — it is screen organization. The group adds up counts of different pests into a single number and has its own control level — it is an agronomic decision. A pest has one required class; joining a group is optional.
How do I add small and large caterpillars into a single number?
By creating a group. On the Details (Pest) tab, add the same pest twice: one line with the "Small" size and another with "Large". The system starts calculating the group total alongside the values for each size — and the group can have its own control levels, which are usually different from those of each size on its own.
Why doesn't the result show a classification even though the pest was counted?
Almost always because there is no control level for that combination. Levels are registered by crop, by counting type (Plant or m2) and by growth stage range: if the scouting was done at a stage outside the registered ranges, the count doesn't fall into any level and the number shows on the dashboard without highlighting.
How do I get the system to alert me when a pest goes over the level?
Check Send alert email on the range that represents the critical level — usually the one described as "High". When a scouting falls into that range, the alert goes out automatically, without depending on anyone opening the dashboard.
Do I need to register levels for each crop?
Yes. Crop is a required field of the control level, precisely because the threshold changes from crop to crop. Register the ranges for each crop the farm scouts; for a crop with no level registered the result appears without classification.
📘 Screen: Nature of Operation
The nature of the operation is the phrase printed at the top of the invoice stating why that invoice is being issued: "Other outflows", "Sale of the establishment's production", "Shipment for storage", "Purchase return". This is where those phrases are registered, along with what type of invoice each one generates.
This record is used for issuing electronic invoices (NF-e, the Brazilian electronic invoice). The nature is only asked for on the NF-e Transmission screen — the regular Inventory Movement, which only records inventory inflows and outflows, does not show this field. If you don't transmit NF-e through the system, you don't need to touch anything here.
📍 Location in the system
Menu: Basic > Nature of Operation
🧩 Main function
Standardize the natures offered in the NF-e Transmission header and, along with the phrase, define two pieces of information that go on the invoice without anyone typing them: the purpose and whether the invoice is inbound or outbound.
📝 Main fields
| Field | Description |
|---|---|
| Code | Short identifier, optional. It is usually left blank: people look for the nature by its phrase. |
| Name/Description | Required, 60 characters max. It is the text printed in the invoice header — "Other outflows", "Sale of the establishment's production". Over 60 characters, the system refuses to save. |
| NF-e Purpose | What the invoice is for the Receita Federal (Brazilian tax authority): 1 - Normal,
2 - Supplementary, 3 - Adjustment or 4 - Return. It comes
pre-filled with Normal, which is the case for the vast majority of invoices. |
| Operation type | Whether the invoice is 1 - Outbound or 0 - Inbound.
It comes pre-filled with Outbound. |
| Active | Uncheck it to remove the nature from the NF-e Transmission list without affecting invoices already issued. |
The list shows Code, Description, NF-e Purpose, Operation type and Active, with search on each column.
🧾 What each field does on the invoice
Choosing the nature in NF-e Transmission fills in three things at once, which is why it pays to register it properly:
- the description becomes the nature of the operation printed in the invoice header;
- the purpose tells the Receita Federal whether that invoice is normal, supplementary, an adjustment or a return;
- the operation type declares the invoice as inbound or outbound.
In NF-e Transmission the nature is required, and the field shows the phrase together with the purpose — "Other outflows - 1 - Normal" —, so two natures with similar text aren't confused. Only the active natures of the company you are in appear.
You don't need many: most farms handle their day-to-day with one or two phrases. Register a new one only when the purpose or the type really changes.
- The invoice phrase always comes out the same, with no typing variations
- The invoice's purpose and type go along with the phrase, without relying on the memory of whoever transmits
- A single choice in the header settles three pieces of NF-e information
❓ Frequently asked questions
What is the difference between the nature of operation and the CFOP?
The nature of the operation is the plain-language phrase that explains the whole invoice and is printed in the header. The CFOP is the four-digit code that classifies each item for the tax authority. An invoice has only one nature, but it can have different CFOPs item by item.
I registered the nature and it doesn't show up in Inventory Movement. Why?
Because the nature of the operation is only asked for in NF-e Transmission. The regular Inventory Movement, for inventory inflows and outflows, does not issue invoices and so does not show this field. If the nature doesn't show up in Transmission either, check that it is Active and that it was registered in the company you are working in.
How many natures do I need to register?
Just a few. Register one phrase for each situation the farm actually issues invoices for — many properties work with one or two. It is only worth creating another when the purpose (normal, supplementary, adjustment, return) or the type (inbound or outbound) is different; changing just the wording does not justify a new record.
The description won't save and a warning appears. Why?
The text is over 60 characters. That is the limit for the nature of operation on the invoice — shorten the phrase, removing details that already appear in other fields of the invoice.
Do I need one nature for each CFOP?
No. The two are independent: register natures for the situations the farm actually issues invoices for (sale, shipment, return, transfer) and leave the CFOP for each item's tax details.
📘 Screen: CFOP
The CFOP (Código Fiscal de Operações e Prestações, the Brazilian tax operation code) is the four-digit number that states, on the invoice, what is happening with the goods: 5102 is an in-state sale, 5949 is another unspecified outflow, 1102 is a purchase for resale, 5905 is a shipment to a warehouse. This screen is the list of CFOPs the farm uses — nothing more than code, description and active.
You don't need to register the more than 400 CFOPs in the official table: register only the ones that appear on the invoices the farm issues and receives. In practice there are only a few, and the farm's accountant can tell you exactly which ones.
📍 Location in the system
Menu: Basic > CFOP
🧩 Main function
Keep the list of CFOPs available to choose from on the items of NF-e Transmission and Inventory Movement (Inbound & Outbound). Without the CFOP registered, the invoice item lacks the information the tax authority uses to classify the operation.
📝 Main fields
| Field | Description |
|---|---|
| Code | The CFOP number, as it appears in the official table — 5102,
1102, 5905, 5949. |
| Name/Description | Required. What the operation means, written in a way the person issuing the invoice will recognize: "Sale of the establishment's production", "Shipment for storage", "Purchase return". |
| Active | Uncheck it to remove the CFOP from the selection lists without deleting the invoices that already used it. |
The list shows Code, Description and Active, with a search field on each column.
🧾 Where the CFOP is chosen
On the invoice item, together with the taxes — not in the header. Each product entered can have a different CFOP: it is common for the same invoice to carry the sale on one item and the freight or shipment on another. Only active CFOPs are offered.
Next to the CFOP chosen from the list there is also a free-text field, used when an imported invoice carries a code that is not registered yet.
In an Inventory Movement of the Inbound with invoice type the field does not appear: that invoice's CFOP comes from the supplier's XML.
- Whoever issues the invoice picks from a short list, instead of typing the number from memory
- The code comes out the same on every invoice for the same type of operation
- Checking with the accountant no longer depends on memory
❓ Frequently asked questions
Do I need to register every CFOP there is?
No. Register only the ones the farm actually uses on inbound and outbound invoices — usually between five and fifteen codes. If a new operation comes up, register its CFOP on the spot; the record has only three fields.
Which CFOP should I use when selling my production?
That is a tax decision, and it depends on where the goods are going and on the property's tax regime — the accountant decides. The system does not choose the CFOP for you: it just stores the list the accountant gave you and offers it when you enter the invoice.
I can't delete a CFOP. Why?
Because it has already been used on an invoice. The system warns that the record has already been used and blocks deletion, so older invoices aren't left without their tax classification. In that case, uncheck the Active field: the CFOP disappears from the selection lists and the history stays intact.
📘 Screen: CST - ICMS, PIS, COFINS, IPI
The CST (Código de Situação Tributária, the Brazilian tax status code) is the code that states, for each tax, how that item is taxed: whether it pays in full, has a reduced base, is exempt, or is under tax substitution. This screen is the list of CSTs the farm uses, split by tax — ICMS, PIS, COFINS and IPI — with the rate each one usually applies.
It is a record dictated by the farm's accountant: they say which codes go in and at what rate, and here you just register them so issuing the invoice no longer depends on case-by-case lookups.
📍 Location in the system
Menu: Basic > CST - ICMS, PIS, COFINS, IPI
🧩 Main function
Keep, per tax, the list of CSTs available in the tax block of each item in NF-e Transmission and Inventory Movement, with the default rate and base reduction already filled in.
The tax block does not appear in an Inventory Movement of the Inbound with invoice type: there the taxes come from the supplier's invoice XML, and there is nothing to choose.
🔀 The ICMS / PIS / COFINS / IPI filter
Above the list there is a selector with the four taxes. It does two things at once, and it is the most important detail on the screen:
- It filters the list, showing only the CSTs for that tax
- It sets the tax of what you are saving — a new CST is tied to the tax that is selected at that moment
In other words: before clicking New, choose the tax first. Registering a PIS CST with the selector on "ICMS" makes the code show up in the wrong tab when you issue the invoice.
📝 Main fields
| Field | Description |
|---|---|
| Code | The official tax status code — 00, 20,
40, 60 for ICMS; 01, 07, 49
for PIS and COFINS. |
| Name/Description | Required. What the code means: "Fully taxed", "With reduced tax base", "Exempt", "ICMS charged by tax substitution". |
| Default rate | The percentage that CST usually applies (e.g. 12, 17, 1.65). It comes pre-filled on the invoice item and can be adjusted there. If you leave it at zero, nothing is filled in — the item field stays as it was. |
| % BC reduction | Percentage reduction of the tax base (BC), used for reduced-taxation CSTs. The same rule applies: at zero, nothing is filled in. |
| ICMS BC method | How the ICMS tax base is determined. Four
options: 0-Value Added Margin (%), 1-Reference price list (value),
2-Max. listed price (value) and 3-Operation value — the last one is the
most common. |
| Active | Uncheck it to remove the CST from the lists without affecting the invoices that already used it. |
The list shows Code, Description, Default rate and Active, with search on each column.
🧾 Where the CST is chosen
On the invoice item: each tax has its own block — ICMS, PIS, COFINS and IPI —, and each one has the CST for that tax next to the tax base, the percentage and the amount. Each block only offers the CSTs registered under that tax that are active.
Choosing the CST fills in the rest: the default rate goes to the item's percentage, the base reduction to the reduction field and, for ICMS, the BC method is carried along too. All of this is a starting point — it can be adjusted on that item without changing the record.
- Whoever issues the invoice picks from a short list, already with the right rate
- Base reduction and BC method no longer have to be typed item by item
- The same operation is taxed the same way on every invoice
❓ Frequently asked questions
I registered a CST and it doesn't show up when I issue the invoice. What happened?
It was probably saved under the wrong tax. The ICMS / PIS / COFINS / IPI selector above the list sets which tax the CST belongs to at the moment you save. Go back to the screen, choose the correct tax and check whether the code appears in its list.
Which CST should I use for each product?
The farm's accountant decides, because it depends on the product, the destination and the farm's tax regime. The system does not suggest a code: it stores the list the accountant gave you and offers it when issuing.
Is the rate registered here fixed?
No. It comes pre-filled on the invoice item to save typing, but it can be changed on that item without changing the record. Use the record for the common case and adjust exceptions on the invoice.
📘 Screen: Series
The series is the numbering "track" for the branch's invoices. Every invoice has a number and a series: series 1 might be for sales invoices, series 2 for shipments, and each one runs its own sequence — invoice 1,250 of series 1 has nothing to do with invoice 1,250 of series 2. Many farms work with a single series, simply called "1".
This record is used for issuing electronic invoices (NF-e, the Brazilian electronic invoice). The series is asked for — and is required — on the NF-e Transmission screen; the regular Inventory Movement does not show this field.
📍 Location in the system
Menu: Basic > Series
🧩 Main function
Register the invoice series used by the branch, so NF-e Transmission knows which sequence to number the invoice being issued in.
📝 Main fields
| Field | Description |
|---|---|
| Name/Description | Required. What the series is called day to day. It is the text offered for selection in NF-e Transmission — if you have only one series, you usually just call it "1"; if you have more than one, it helps to use "Series 1 - Sales", "Series 2 - Shipments". |
| Code | The series number as it is printed on the invoice: 1, 2,
4. |
| Last number | A record of the number where that series stopped. It is for information only — the number proposed when issuing is set by the last invoice already issued (see below). |
| Active | Uncheck it to remove the series from the NF-e Transmission list without deleting the invoices already issued in it. |
The list shows Description, Code, Last number and Active, with search on each column.
🔢 How the invoice number is proposed
In NF-e Transmission, as soon as you choose the series the system fills in the number on its own: it looks for the highest number already issued in that series, for that branch, and proposes the next one. For the first invoice of a series, the proposal is 1.
The proposed number can be edited. So if the farm is coming from another system and needs to continue from a specific number, the place to set that is the first invoice issued in the series — from then on the sequence continues on its own. Only the active series of the company you are in are offered.
- Each type of invoice runs in its own sequence, without overlapping
- The invoice number comes pre-filled in the transmission, without anyone checking the invoice book
- There is no risk of repeating a number within the same series
❓ Frequently asked questions
How many invoice series do I need?
It depends on how the accountant organizes invoicing. Many farms work with a single series; those that separate sales from shipments usually use two or three. Don't create series just because: each one is one more sequence to keep track of.
I started issuing through the system partway through my invoice numbering. How do I continue the sequence?
On the first invoice issued in that series, delete the proposed number and type the correct number. From then on the system continues on its own, always adding 1 to the highest number already issued in that series for the branch. Changing the Last number field in the record does not change the proposed number.
Where is the series chosen when issuing?
In the header of NF-e Transmission, together with the nature of operation, and it is required there. The regular Inventory Movement, which only records inventory inflows and outflows, does not ask for a series.
Quick Guide - Crop Setup (Start of the Season)
This guide is for you if you have just created the farm and want to start using the system for the crop side.
Below is the correct sequence and basic guidance for each step. This flow is required to enable the app and the other features.
📘 1. Crop
Location in the system: Crops > Crop
Main function: Register the crops the farm grows, such as Soybean, Corn, Cotton, and others.
Important: Correctly mark whether the crop is Annual or Perennial, and whether it Allows Bales (required to use the bales module, for example for cotton).
✅ After registering the crop, move on to the variety.
📘 2. Variety
Location in the system: Crops > Variety
Main function: Register the specific varieties of each crop. E.g.: BRS1010 (for Soybean).
Important: Each variety must be linked to its crop. If you want to track vegetative growth or link it to pest scouting, use the specific tabs.
✅ With the varieties registered, move on to registering the fields.
📘 3. Field
Location in the system: Crops > Field
Main function: Register the farm's productive areas.
Important: Even after you register the fields, they only show up in the app after the Season Planting. You can register them manually or import them from Excel, and also add their geographic coordinates.
✅ With the fields defined, the next step is to create the season.
📘 4. Season
Location in the system: Crops > Season
Main function: Represents the crop cycle, such as "Season 2024/25".
Important: The season is required to organize entries in the system. Each planting will be linked to a season. There are advanced options, such as harvest parameters, but they are not required at the start.
✅ After creating the season, it is time to set up the heart of the system: the Season Planting.
📘 5. Season Planting
Location in the system: Crops > Season Planting
Main function: Links Field + Crop + Variety(ies) + Season + Area.
Important:
- The field will only show up in the app after it is registered here.
- The area entered cannot be larger than the field's area.
- You can use just one or several varieties in the same field.
- There is an option to split by variety in operations (scouting, harvest, etc.).
- The "color" field is used in charts and maps.
Most common use: many farms prefer to create the season planting at first with only the crop, without entering the planting date or the variety.
That way you can already start recording field operations. Later, as planting actually happens, you can come back to this screen to set the actual planting date and the final variety used.
❓ Frequently asked questions
What is the right order to start using upCampo for the season?
Crop, then Variety, then Field, then Season and finally the Season Planting. This sequence is what enables the app and the other features.
I registered my fields and they don't show up in the app. Why?
The Season Planting is missing. A field only shows up in the app after it is linked to a planting — that is what ties together field, season, crop and variety.
Do I have to register fields one by one?
No. The Field screen lets you import many at once from an Excel spreadsheet, and it also accepts geographic coordinates. If you have the farm map in KML, the Field Map Importer creates the record and the boundary for all fields in one go.
What do I need to check on the crop to use the bales module?
The Allows Bales option, in the Crop record. That is the case for cotton. This record is also where you set whether the crop is annual or perennial.
📘 Screen: Crop
The Crop screen is used to register the crops grown on the farm, such as soybean, corn, cotton, and others.
This record is essential so that field operations and scouting can be correctly tied to the production cycle.
📍 Location in the system
Menu: Crops > Crop
🧩 Main function
Each registered crop serves as the basis for:
- Season Planting
- Pest scouting
- Classifying varieties
- Harvest and production load tickets
📝 Record fields
| Field | Description |
|---|---|
| Type | Choose between Annual or Perennial. This choice changes some settings in Season Planting and in other features. |
| Code | Numeric identifier for the crop. |
| Description | Name of the crop (e.g. Soybean, Corn, Cotton). |
| Color | Used in dashboards and reports. |
| Unit | The crop's default unit: SC - Bags, CX - Box or @ - Arroba. Used mainly in sales contracts and yield. |
| Allows Bales | Enables the option for crops that involve bale production (e.g. cotton). There is another feature tied to this one, the Bales screen. |
| Active | Sets whether the crop is available for use in records and entries. |
| Reference/Integration ID | This crop's code in the external system, when there is an integration. It also appears as a column in the list. |
The list, on the left, shows Code, Description, Active, Color and Reference/Integration ID, each column with its own search field.
🐛 "For pest scouting" section
Just below the main fields there is a collapsible section called For pest scouting. It only matters to those who use the scouting module — that is why it starts collapsed:
| Field | Description |
|---|---|
| Point Name, Plant Name, Stage Name, Sub-stage Name | Customize what these fields are called in that crop's scouting. In some crops it makes no sense to call it a "Point"; in others, "Plant" fits better. |
| Crop image | Pick an already registered crop to use its image — it is the icon that appears in the app and elsewhere. |
| Image | The image file itself, filled in when you pick the crop above. |
| Default type | Beat cloth, Plant or Meter. Sets the option that comes pre-selected in Pest Scouting when the field has this crop. |
| Show in | Beat cloth, Plant and Meter. Marks which methods are available for the user to choose in scouting. Some crops, such as corn, make no sense with a beat cloth. |
🌱 Tab: Stage
Sets up the crop's growth stages — R4, V2, pre-planting. Fields:
- Code (e.g.
R4,V2,PP) - Description (e.g. "Pod fully developed", "Pre-planting")
- Order: sets the sequence in which the stages follow one another
- Default type: Beat cloth, Plant or Meter — the method suggested at that stage
- Active: lets you retire a stage without erasing history
The list below the form shows Code, Description, Order and Active, with search by column.
🌱 Tab: Sub-Stage
Practically the same as the stage, but one more level of division — some crops need it. The fields are Code, Description, Order and Active. This tab has no import from another crop.
🔍 Tab: Pests - For pest scouting
On this tab you can link the pests that affect the crop.
Features:
- View and manage the pests linked to the crop — the list shows Pests, Type, Class and Active
- Link one pest at a time, choosing it in the Pests field (required) and saving
- Or use the Import several pests button, which lets you check several at once
This link gives you more control and focus in scouting, avoiding needless display of irrelevant pests.
📈 Tab: Ideal Veg. Growth
On this tab you can define the ideal vegetative growth standards for the crop. Each line has three fields:
- Days after emerg. — DAE, days since plant emergence
- Plant Height
- No. of Nodes
This data is used to check whether the plant is growing as expected.
During pest scouting, when opening a point in the app, the scout enters DAE, height and number of nodes, allowing this comparison.
This control is especially important for cotton, where tracking growth is key to adjusting management.
Additional features:
- View chart: shows the registered ideal growth curve as a chart
- Import: copies the vegetative growth already registered for another crop
- Generate in bulk (height): fills in several DAEs at once — you enter Start D.A.E, End D.A.E and Height per D.A.E, and the system builds the curve
- Delete all: clears the whole curve for that crop, so you can start over
📊 Related reports
Crops are the basis for many reports on the platform. Some of them are:
Shows the whole planting setup with summaries by crop, variety, planted area, planting dates and expected harvest (based on the variety's cycle days).
Shows the season's fields with crop, variety, total cost, cost per hectare and average yield.
These reports support strategic analysis and technical and financial tracking of the season.
- You can link it in Season Plantings
- All management of varieties, scouting, harvests and recommendations will be correctly tied to the crop
❓ Frequently asked questions
What is the difference between an annual and a perennial crop in upCampo?
It is the Type field. The choice changes settings in Season Planting and in other features — perennial crops, such as citrus and coffee, show their own fields, such as row and plant spacing.
How do I enable bale tracking for cotton?
Check the Allows Bales option in the crop record. That is what unlocks the Bales screen for that crop.
What is the crop's default scouting method for?
The Default type — Beat cloth, Plant or Meter — sets the option that comes pre-selected in pest scouting when the field has that crop, avoiding entry mistakes in the field. It is in the For pest scouting section, which expands and collapses just below the main fields; each stage also has its own.
Where is the crop's unit used?
Mainly in sales contracts and in yield calculation. The options are SC - Bags, CX - Box and @ - Arroba.
Do I have to type all the stages again for each crop?
No. On the Stage tab there is an Import button that copies all the stages from another crop already registered. Then just adjust whatever is different. The Ideal Veg. Growth tab has a similar button to copy the growth curve from another crop.
How do I change the name "Point" in this crop's scouting?
In the For pest scouting section of the crop record, using the Point Name, Plant Name, Stage Name and Sub-stage Name fields. What you type there is the name the operator sees in that crop's scouting.
📘 Screen: Variety/Cultivar
The Variety/Cultivar screen is used to register the cultivars of each crop grown on the farm — TMG 31 B3RF for cotton, NEOGEN 690 I2X for soybean, P3845VYHR for corn.
This information complements the Crop record and is essential for Season Planting, allowing more precise control of production and of the agronomic behavior of each genetic material.
📍 Location in the system
Menu: Crops > Variety
🧩 Main function
Each registered variety can be linked to:
- A specific crop
- One or more season plantings
- Technical information such as cycle, yield, weight and germination
📝 Record fields
| Field | Description |
|---|---|
| Name/Description | Name of the cultivar, as the market calls it (e.g. TMG 31 B3RF, VORAZ IPRO). |
| Code | Identifier for the variety. |
| Crop | Required. The crop this cultivar belongs to. |
| Color | Used on maps and dashboards to represent plantings of this variety. |
| Cycle Days | Length of the cycle, in days — the basis for the harvest forecast. |
| Days to flowering | Days until flowering. |
| Technology | Conventional, Transgenic or Other. It comes checked as Conventional. It is for information only and makes no difference in other features. |
| Active | Sets whether it is available for use. |
| Reference/Integration ID | This variety's code in the external system, when there is an integration. |
| John Deere ID | The matching identifier on the John Deere platform, used by the machine integration. |
| Notes | Free-text field at the end of the form. |
The list, on the left, shows Code, Name/Description, Crop, Cycle Days, Technology, Active, Macro, Generation, Strategy, Color and Reference/Integration ID.
🌾 "Harvest" section
A collapsible section with three Estimated weight (KG) fields — 1, 2 and 3. These are the yield estimates for that cultivar.
🌱 "Planting" section
Also collapsible, it gathers what guides planter calibration:
| Field | Description |
|---|---|
| Sieve (PN) | Seed sieve size. |
| Thousand-seed weight (PMS) | Weight of a thousand seeds — used to calculate the amount of seed per hectare. |
| % Germination | Germination rate stated on the seed lot. |
| Plants / M | Target plant population per meter. |
| Seeds / M | Seeds per meter to drop, taking germination into account. |
| KG/HA | Kilograms of seed per hectare. |
📈 Tab: Ideal Veg. Growth
Just like on the Crop screen, you can define the expected development curve — except here it is per cultivar, which is where differences in behavior really show up. Each line has:
- D.A.E. — days after emergence
- Plant Height
- No. of Nodes
These values are used in scouting to check whether development is within the expected standard.
Tab buttons:
- View chart: shows the registered growth curve
- Import: copies the curve already built for another variety
- Generate in bulk (height): fills in several DAEs at once — enter Start D.A.E, End D.A.E and Height per D.A.E
- Delete all: clears the whole curve, so you can start over
- You can use them in season plantings
- Scouting can be assessed against the ideal behavior
- The system will be able to produce more accurate harvest forecasts and reports
❓ Frequently asked questions
Do I need to register the variety to plant?
Yes, and it must be linked to a crop — choosing the crop is required in the record. The variety is what lets you track the behavior of each genetic material on the farm.
How does the system estimate the harvest date?
Using the variety's Cycle Days field, which states how many days that cultivar takes to complete its cycle. There is also Days to flowering, to track that stage.
Does the variety's technology (transgenic/conventional) change anything in the system?
No. The Technology field is for information only — it does not change how other features behave.
Where do I enter the cultivar's thousand-seed weight and germination?
In the Planting section of the variety record, which expands and collapses just below the main fields. That is where Sieve (PN), Thousand-seed weight (PMS), % Germination, Plants / M, Seeds / M and KG/HA are. Yield estimates are in the neighboring section, Harvest.
What is the ideal vegetative growth for?
For comparison during scouting. You define the expected plant height, number of nodes and days after emergence (DAE), and the system uses those values as a reference for what was collected in the field.
Do I have to build each cultivar's growth curve by hand?
You don't. On the Ideal Veg. Growth tab, the Import button copies the curve from another variety and Generate in bulk (height) builds the whole sequence from the start DAE, end DAE and height per DAE.
📘 Screen: Field
The Field screen is where you register the plots or subdivisions of the farm. These records are fundamental to all crop management in the system, because they are the smallest unit for planning and carrying out activities.
📍 Location in the system
Menu: Crops > Field
🔧 The field list
The list shows Code, Name/Description, Sector, Area, Has map? and Active, each column with its own search box. The Has map? column tells you at a glance which fields already have their boundary registered — it's how you find out what still needs to be mapped.
Next to the buttons is the Total (ha) and Qty totalizer, which adds up what is being displayed: filter by sector and the total becomes that sector's total.
- Reports ▼: opens the reports linked to the Field screen
- Import from Excel: bulk registration from a spreadsheet (see below)
- Map: opens the Farm map window with the fields that have a registered boundary, drawn on the map. There are two options at the top — Show sector and Show hectares — that write that information on each field, and a Grid for pest map button
🧩 Registering one field
To register a new field, click New. The form has four main fields:
| Field | Description |
|---|---|
| Name/Description | Name of the field, its main identifier (e.g., 04 - CIMA 2). |
| Sector | Used to group fields (e.g., Cima 2, Cima 3, São Jerônimo Farm). It's also common to use the sector to separate farms when records (inventory, fleet, etc.) are shared. You can type a new sector directly into the box. |
| Area (ha) | Total hectares of the field (not to be confused with the area planted in each season). |
| Active | Defines whether the field is visible in the planting options. |
| Reference/Integration ID | The field's code in the external system. It only appears when the company is set up to use an integration. |
⚙️ "Advanced" section
A section that opens and closes, above the main fields. Nothing here is required — these are refinements to area and planning:
| Field | Description |
|---|---|
| Code (order) | Numeric, used to sort the field in lists and reports. |
| Width and Length | Dimensions of the field. |
| Ground area (ha) | Part of the area that can only be worked with ground machinery. |
| Aerial area (ha) | Part that receives aerial application. |
| Border area (ha) | Border (headland) area of the field. |
| Exclusion area (ha) | Area left out of the calculation — farm road, reserve, buildings inside the field. |
| Quantity | Quantity associated with the field (used in perennial crops, by number of plants). |
| Show in season planting import | When checked, the field appears in the quick field import of the Season Planting. It comes checked by default. |
| Generate grid for interpolated map | Schedules the generation of the point grid used in interpolated maps. You choose the grid size in meters — the smaller it is, the longer it takes. It only works once the field is saved and has coordinates. |
| Grouping | Extra grouping field. It only appears when the company is set up to show it. |
📥 Importing from Excel
You can register several fields at once using the "Import from Excel" button.
- The file must contain the columns: Code, Description, Sector, Area, Active — the order doesn't matter
- Accepted extensions:
.xlsand.xlsx - Delete empty rows from the file before importing
- A sample template can be downloaded directly from the screen
Crops > Field Map Importer): it creates the fields from a single
KML file, already with the boundary and the calculated area.
🗺️ "Coordinates" tab
This is where the field gets its boundary on the map. First choose the file Type — the field is required and defaults to KML:
- KML (
.kml) — the Google Earth format - Shapefile — upload the
.shp,.shxand.dbffiles together (the.prjis also accepted), or a single.zipcontaining all of them
Then use Upload File... to send the file. The system processes it and draws the boundary on the map — which switches between Map and Satellite — so you can check it before saving with 2 - Save Coordinates.
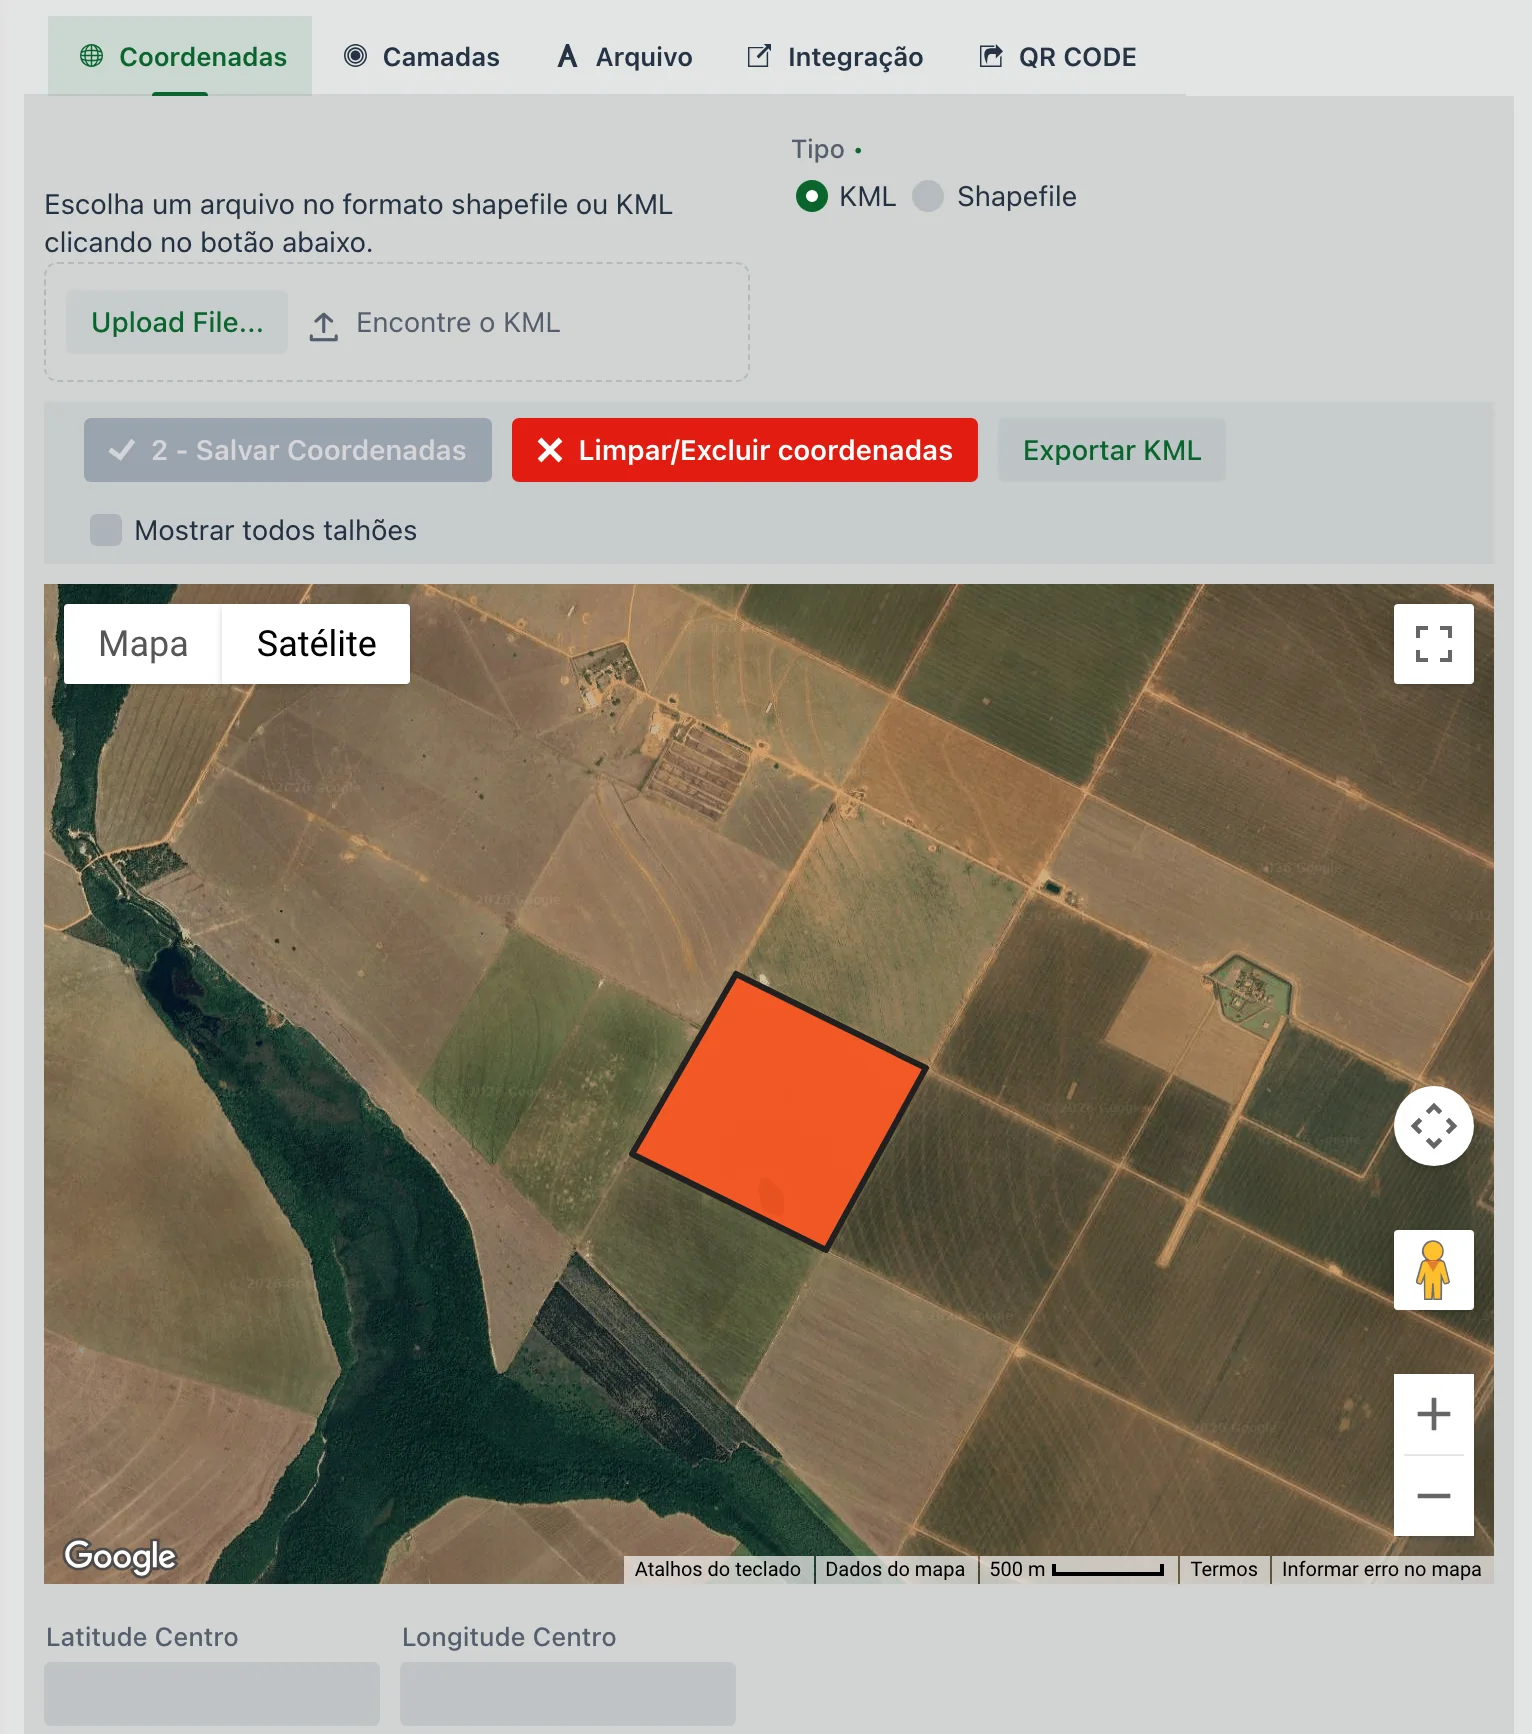
The other features on the tab:
- Clear/Delete coordinates: erases the field boundary so you can import it again
- Export KML: downloads the boundary already registered — useful for taking the farm map to another system or to Google Earth
- Show all fields: also draws the neighboring fields, so you can check whether the new boundary fits without overlapping
- Center Latitude and Center Longitude, below the map: the center point of the field
Registering the coordinates correctly is essential for the mapping and traceability features of the platform.
🗂 Other tabs
| Tab | What it's for |
|---|---|
| Layers | Map layers associated with the field, with Name/Description, Type and Active. |
| File | Attachments for the field — sketch map, environmental license, lease agreement. Each attachment has a title and description, and the Show button opens the file in another browser tab. |
| Integration | The field as it exists in the external system — see the next section. |
| QR CODE | Generates the field's QR code, with Save QR (downloads the image) and Open QR. Use it to put a sign at the entrance of the field. |
🔗 "Integration" tab: the field in the external system
This is where you tell the system that field 08 – CAMPINAS in upCampo is the same as field 08 in John Deere — or in another system the farm exchanges data with. Without this link, upCampo doesn't look in the Operations Center for what the machines did in that field.
| Field | Description |
|---|---|
| Type | Which integration — Jonh Deere or Solinftec. |
| Description and Sector | What the field is called on the other side. Helps you check that the link is right. |
| Area | The area the other system reports, to compare with the one here. |
| Integration | The field's code in the external system. This is how both sides recognize each other. |
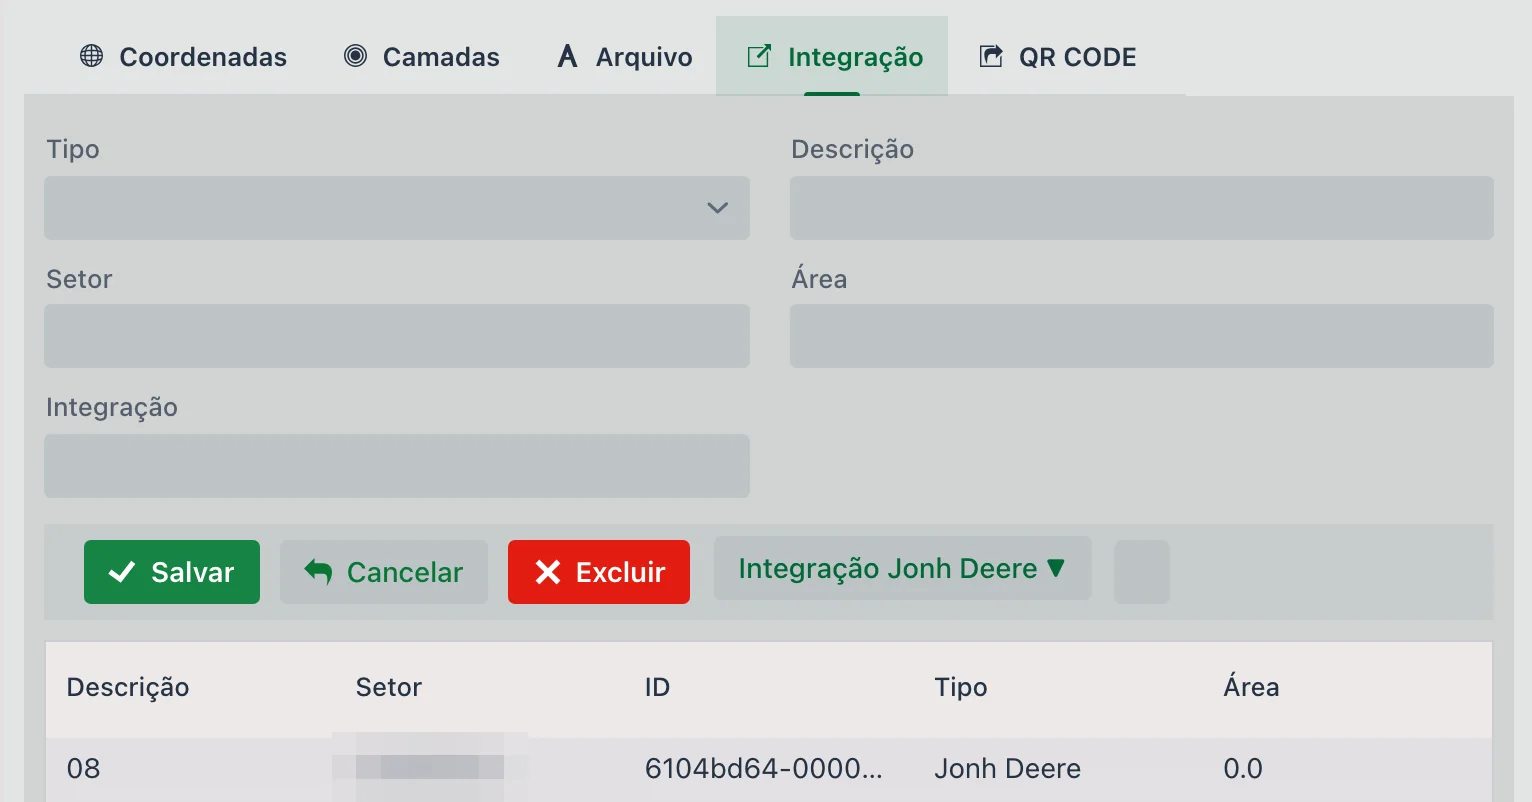
The John Deere Integration ▼ menu, next to the buttons, saves you from typing the code by hand:
| Option | What it does |
|---|---|
| Update Options | Fetches from John Deere the current list of fields in the farm's organization. |
| Select JD Field | Opens that list — name, farm, type and last change — and fills in code, description and sector when you pick one. |
| Open last JD Operation / Open All JD Operations | Open the John Deere response window with the operations John Deere returns for that field, in the technical format it sends. They're for confirming that the link responds; to interpret the content, ask the upCampo team for help. |
📊 Related reports
Fields are the basis for many reports on the platform. Some of them are:
Shows the whole planting setup with summaries by crop, variety, planted area, planting dates and expected harvest (based on the variety's cycle days).
Lists the season's fields with crop, variety, total cost, cost per hectare and average yield.
These reports help with strategic analysis and with technical and financial tracking of the season.
- You can start the Season Planting
- Operational data will be correctly organized by location
❓ Frequently asked questions
Which map formats can I import for a field?
KML (.kml) and shapefile. For shapefiles, upload the
.shp, .shx and .dbf files together — or a single .zip
with all of them. The system shows the boundary on the map so you can confirm it before saving.
I registered the field and it doesn't show up in the app. What's missing?
The field still needs to be linked to a Season Planting. Registering the field is only the first step; the planting is what makes it visible in the app.
How do I register several fields at once?
With the Import from Excel button. The spreadsheet needs the columns Code, Description, Sector, Area and Active — and delete empty rows before importing, otherwise the import fails. If instead of a spreadsheet you have the map in KML, use the Field Map Importer.
How do I know which fields still don't have a map?
Through the Has map? column in the list, which shows Yes or No for each field. You can filter by it and see at once everything that still needs a boundary.
How do I check the total registered area of the farm?
With the Total (ha) and Qty totalizer, next to the list buttons. It adds up what is being displayed — filter by sector and the total becomes that sector's total.
Can I take the map out of upCampo and use it in another system?
Yes. On the Coordinates tab, the Export KML button downloads the field's registered boundary, which can be opened in Google Earth or sent to another system.
I imported the boundary and it ended up on top of the neighboring field. How do I check?
Check Show all fields on the Coordinates tab: the map also draws the neighbors, and you can see whether the new boundary fits. To fix it, use Clear/Delete coordinates and import the right file.
What's the difference between the field area and the planted area?
The Area in the field record is the total area, in hectares, of that plot. The planted area is entered per season, on the Season Planting screen, and can be smaller.
What is the Sector field for?
To group fields, such as "North Sector" and "South Sector". It's also common to use it to separate farms when inventory and fleet records are shared.
What are the ground, aerial and border areas for?
They are refinements of the field area, in the Advanced section: how much can only be worked with ground machinery, how much receives aerial application and how much is border. There's also the Exclusion area (ha), for what shouldn't be counted — farm roads, reserve, buildings inside the field.
📘 Screen: Field Map Importer
The Field Map Importer registers the whole farm at once, from a single KML file. If the agronomist handed over a Google Earth file with the farm's 80 fields drawn, each drawing in that file becomes a field in the system, already with its boundary and the area in hectares calculated — no typing field by field.
📍 Location in the system
Menu: Crops > Field Map Importer
🧩 Main function
It is the bulk import of the farm map. Each area drawn in the KML (what Google Earth calls a Placemark) becomes a field with its coordinates. The screen shows everything it read from the file before saving, so you can check it and only then confirm.
🗺️ How it differs from the import on the Field screen
Both screens import KML, but they solve different problems:
- On the Coordinates tab of the Field screen you import the boundary of one field that is already registered (and shapefile works there too)
- Here you import several fields at once, creating the records that don't
exist yet — but only in
.kml
📝 Step by step
- Upload the
.kmlfile in the screen's upload area - Check the list the system builds — one row per area read from the file
- Click "Import fields" to save
Large files take a few seconds: the progress bar shows how many fields have already been processed.
📝 List columns
| Column | Description |
|---|---|
| Sector | Comes from the name of the KML folder the area is in. If the areas in Google Earth are organized in folders by sector (e.g., "Headquarters", "Retiro"), the sector comes in already filled |
| Code | Read from the file's extra data, when present — the system looks for ID, CODIGO or COD |
| Name/Description | The name of the area in the KML. If the area has no name, the system looks in the extra data (LEGENDA, NOME, NAME, DESCRICAO, TALHAO, DESC) and, as a last resort, generates a name from the sector and a sequential number |
| No. of points | How many points make up the boundary of that area |
| Area | Area in hectares, calculated by the system from the boundary itself — it isn't typed in |
| Status | What will happen to that row when you confirm (see the table below) |
🚦 The four statuses
| Status | What it means |
|---|---|
| New field + coordinates | No field with that name exists. The record and the boundary will be created |
| Coordinates import | A field with that name already exists. The record is kept and only the coordinates are updated |
| Duplicate name | Another area in the same file already used that name. Only the first one is imported; this one is ignored |
| No coordinates | The area has no usable polygon (fewer than three points). It isn't imported |
Only rows with the first two statuses are saved. When the import finishes, the list keeps on screen only what was not imported — so you can see the reason, fix the file and try again.
🔐 Permission
The screen uses the add permission of the Field record. Users without that permission can see the screen but can't upload the file or import.
- The whole farm is registered in minutes, with the boundary of each field
- The area in hectares comes from the drawing itself, without relying on typing
- The fields are ready to receive the Season Planting and show up in the app
- Redoing the map after a re-survey doesn't register anything again: it only updates the coordinates
❓ Frequently asked questions
How do I register all of the farm's fields at once?
Use the Field Map Importer, under Crops > Field Map
Importer. Upload a single .kml file with all the areas drawn: each area becomes
a field, with its boundary and the area in hectares already calculated.
Will the import duplicate the fields I've already registered?
No. When a field with the same name already exists, the system keeps the record and imports only the coordinates into it — the row shows the status Coordinates import. The comparison is by name and isn't case-sensitive.
Can I import a shapefile here?
Not on this screen: it only accepts .kml. For shapefiles, use the Coordinates tab
of the Field record, which accepts the
.shp, .shx and .dbf files — but there it's one field at a time.
Some fields came in with the wrong name or no name. Why?
The name comes from the name of the area inside the file. If the area has no name, the system tries to use the KML's extra data and, if it finds nothing, builds a name from the sector and a number. Rename the areas in Google Earth before exporting and the list will come in right.
A row shows "No coordinates". What should I do?
That area doesn't have a usable closed boundary — the system needs at least three points forming a polygon. Loose points, lines and empty areas aren't imported. Redraw the area as a polygon in Google Earth and export again.
Where does the sector of the imported fields come from?
From the name of the folder the area is in inside the KML. If you organize Google Earth in folders by sector before exporting, all the fields come in with the sector already filled — which helps later when filtering and grouping reports.
📘 Screen: Season
The season is the farm's production cycle — "Summer Season 2027/2028", "Second Crop 2030". In upCampo, it's the cut that separates one crop year from the next: every work order, every load ticket and every entry is tied to a season, which is why the cost and yield of one cycle don't get mixed with those of the previous one.
This is also where the harvest parameters live, by crop and product — which discounts appear on the inbound load ticket and which table each one looks up. Without that record, the harvest of that crop can't be entered.
📍 Location in the system
Menu: Crops > Season
🧩 Main function
The season is the reference point for crop entries. It is linked to:
- Season Planting
- Work Orders
- Harvest Load Ticket
- Sales Contract
- Movement of Products
📝 Record fields
To register a season, in practice only the Name/Description is required — but it's worth filling in the dates, which define the cycle:
| Field | Description |
|---|---|
| Name/Description | Required. What the farm calls the cycle (e.g., SAFRA 2025/2026, SAFRINHA 2026, VERÃO 24/25). |
| Code | Identifier of the season. |
| Start Date (from) | Start of the cycle (e.g., 09/01/2025 in a summer season). |
| End date (to) | End of the cycle (e.g., 01/31/2026). |
| Dollar Unit Value | Exchange rate used as a reference for that season. |
| Active | Defines whether the season is still available for use. |
| Cloud storage ID | Internal sync code. Should not be changed manually. |
| John Deere Season (Integration) | The matching season on the John Deere platform, used by the integration. |
| Reference ID | The season's code in the external system. In companies set up for integration, it becomes required to save. |
⚙️ The four season controls
Four checkboxes, right below the name, control what can be done in that cycle:
- Active: keeps the season in use
- Hide on login: keeps the season from being shown on the initial selection screen when logging in. Ideal for old seasons that are already closed.
- Block entries in Season Planting: prevents creating or editing plantings linked to that season.
- Block entries in W.O.: prevents that season from being used in new work orders. Useful to avoid wrong entries in seasons that are already finished.
🔄 Connect to this season
A shortcut button that switches the current season without having to log out and back in. It appears in two places: as a column in the list, with a Connect button on each row, and as the Connect to this season button at the top of the open record. When you click it, the system confirms the switch and the chosen season applies to all navigation.
🔧 The list and the view
The list shows Code, Description, Start date, End date, Active, Hide on login, Reference/Integration ID and the Connect to this season column.
At the top of the screen, next to the title, there's the View selector:
- Default: the list and the record, as described here
- Dashboard: swaps the screen for a panel of season indicators, which refreshes on its own every so often — you can choose which dashboard to show, pause the automatic refresh or reload right away
🌾 Tab: Harvest parameters
This tab is used to set up the standard discounts applied during harvest. There's one row per crop: soybeans have one set of discounts, corn has another.
| Field | Description |
|---|---|
| Crop | Required. The crop these parameters apply to. |
| Product | Required. The product that will be entered into inventory after the harvest load ticket. |
| Standard discount for Moisture, Impurity, Broken, Burnt, Damaged and Storage | The discount table the system applies to each of these items. |
| Standard Discount Table for Receiving and Others | The two remaining tables, for the receiving discount and for the others. |
| Manual moisture, Manual impurity, Manual broken, Manual burnt, Manual damaged, Manual storage, Manual receiving and Manual others | When checked, they let you type that discount directly on the load ticket instead of applying the table. |
| Fixed production cost (R$ per kg) | Optional. Only applies when the Accounting setup has the cost of production sold set to Fixed value: it's the cost per kg that the sale of this product, for this season and crop, removes from inventory in the accounting. It can also be entered in the Accounting setup. |
These parameters are applied automatically at the time of the load ticket and directly affect the calculation of the net weight that goes into inventory.
🧬 Tab: Variety - Greenhouse
This tab is used mainly in research and trial settings.
It lets you register:
- Variety grown in a greenhouse — required
- Total Area (ha) under cultivation
- Quantity per variety
- Active, to take it out of use without deleting the record
These records can later be linked in the Season Planting, ensuring traceability and control of the trial units.
📂 Tab: File
The File tab lets you organize the documents related to that season. The files are integrated with a specific Google Drive folder.
Each file has a Date, File name and Description, and the Show button opens the document in another browser tab.
Ideal for keeping the season's document history centralized and accessible — sales contract, map, technical report, all the paperwork the season produced.
- You can start the Season Planting records
- All activities, costs, contracts and production will be organized by production cycle
- Management becomes easier with the complete history by season
❓ Frequently asked questions
How do I hide old seasons from the login screen?
Check Hide on login in the season record. It no longer appears in the initial selection, which is useful for seasons that are already closed.
How do I stop people from entering data in a season that's already closed?
The screen has two independent blocks: Block entries in Season Planting and Block entries in W.O. They prevent wrong records from being created or edited in finished seasons. Checking only Hide on login isn't enough: it just takes the season off the initial selection screen.
Do I need to log out to switch seasons?
No. Use the Connect to this season button, which switches without logging out — the chosen season applies to all navigation. It's both in the list column, one per row, and at the top of the open record.
What is required to register a season?
Only the Name/Description, such as "SAFRA 2025/2026" or "SAFRINHA 2026". The rest are optional settings — with one exception: in companies set up for integration, the Reference ID is also required.
Where do the discounts applied on the harvest load ticket come from?
From the season's Harvest parameters tab, where you define, by crop, which discount table applies to moisture, impurity, broken, burnt, damaged, storage, receiving and others. That's also where you choose the product that goes into inventory after harvest.
I want to type the discount when entering the load ticket, without using the table. Can I?
Yes. On the Harvest parameters tab, check the matching manual option — Manual moisture, Manual impurity, and so on. That discount is then typed on the load ticket instead of coming from the table.
Where can I see the season indicators?
In the View selector at the top of the screen, switch from Default to Dashboard. The panel refreshes on its own every so often, and you can choose which dashboard to show, pause the refresh or reload right away.
🧩 Screen: Season Planting
The season planting is the record of what was planted in each field: which crop, which variety, on how many hectares and on what date. In upCampo, it's the intersection of field, season, crop, variety and area — and it's what makes the field exist in that cycle. With no planting entered, the field isn't available for work orders, scouting or load tickets.
It's also where the results come back: as harvest load tickets and bales come in, the field's total harvested and average yield are updated automatically, with no one typing them.
📍 Location in the system
Menu: Crops > Season Planting
🧩 Main function
Registering the season planting is essential so that:
- Fields show up in the mobile app
- Entries are linked to a specific season
- Reports and dashboards can correctly separate information by season and by variety
👁 The four views
At the top of the screen, the View selector completely changes what you see:
- By season (default): the list of fields in the current season with the record beside it — this is the mode described in this article
- By field: flips the axis, starting from the field
- Season timeline: shows the succession of seasons, useful for seeing what came before and after in the same field
- Dashboard: swaps the screen for a panel of indicators
🔎 The left panel
Besides the list of fields, the left column holds the filters and bulk actions:
- The Season dropdown and the Show season only option
- The Total (ha) and Qty totalizer, which adds up what is being displayed
- Allow the same field more than once: lets you register the same field in two plantings in the same season — for growers who plant two crops back to back
- Status: All, Not Finished or Finished
- Show only with more than 1 variety: isolates fields with more than one cultivar
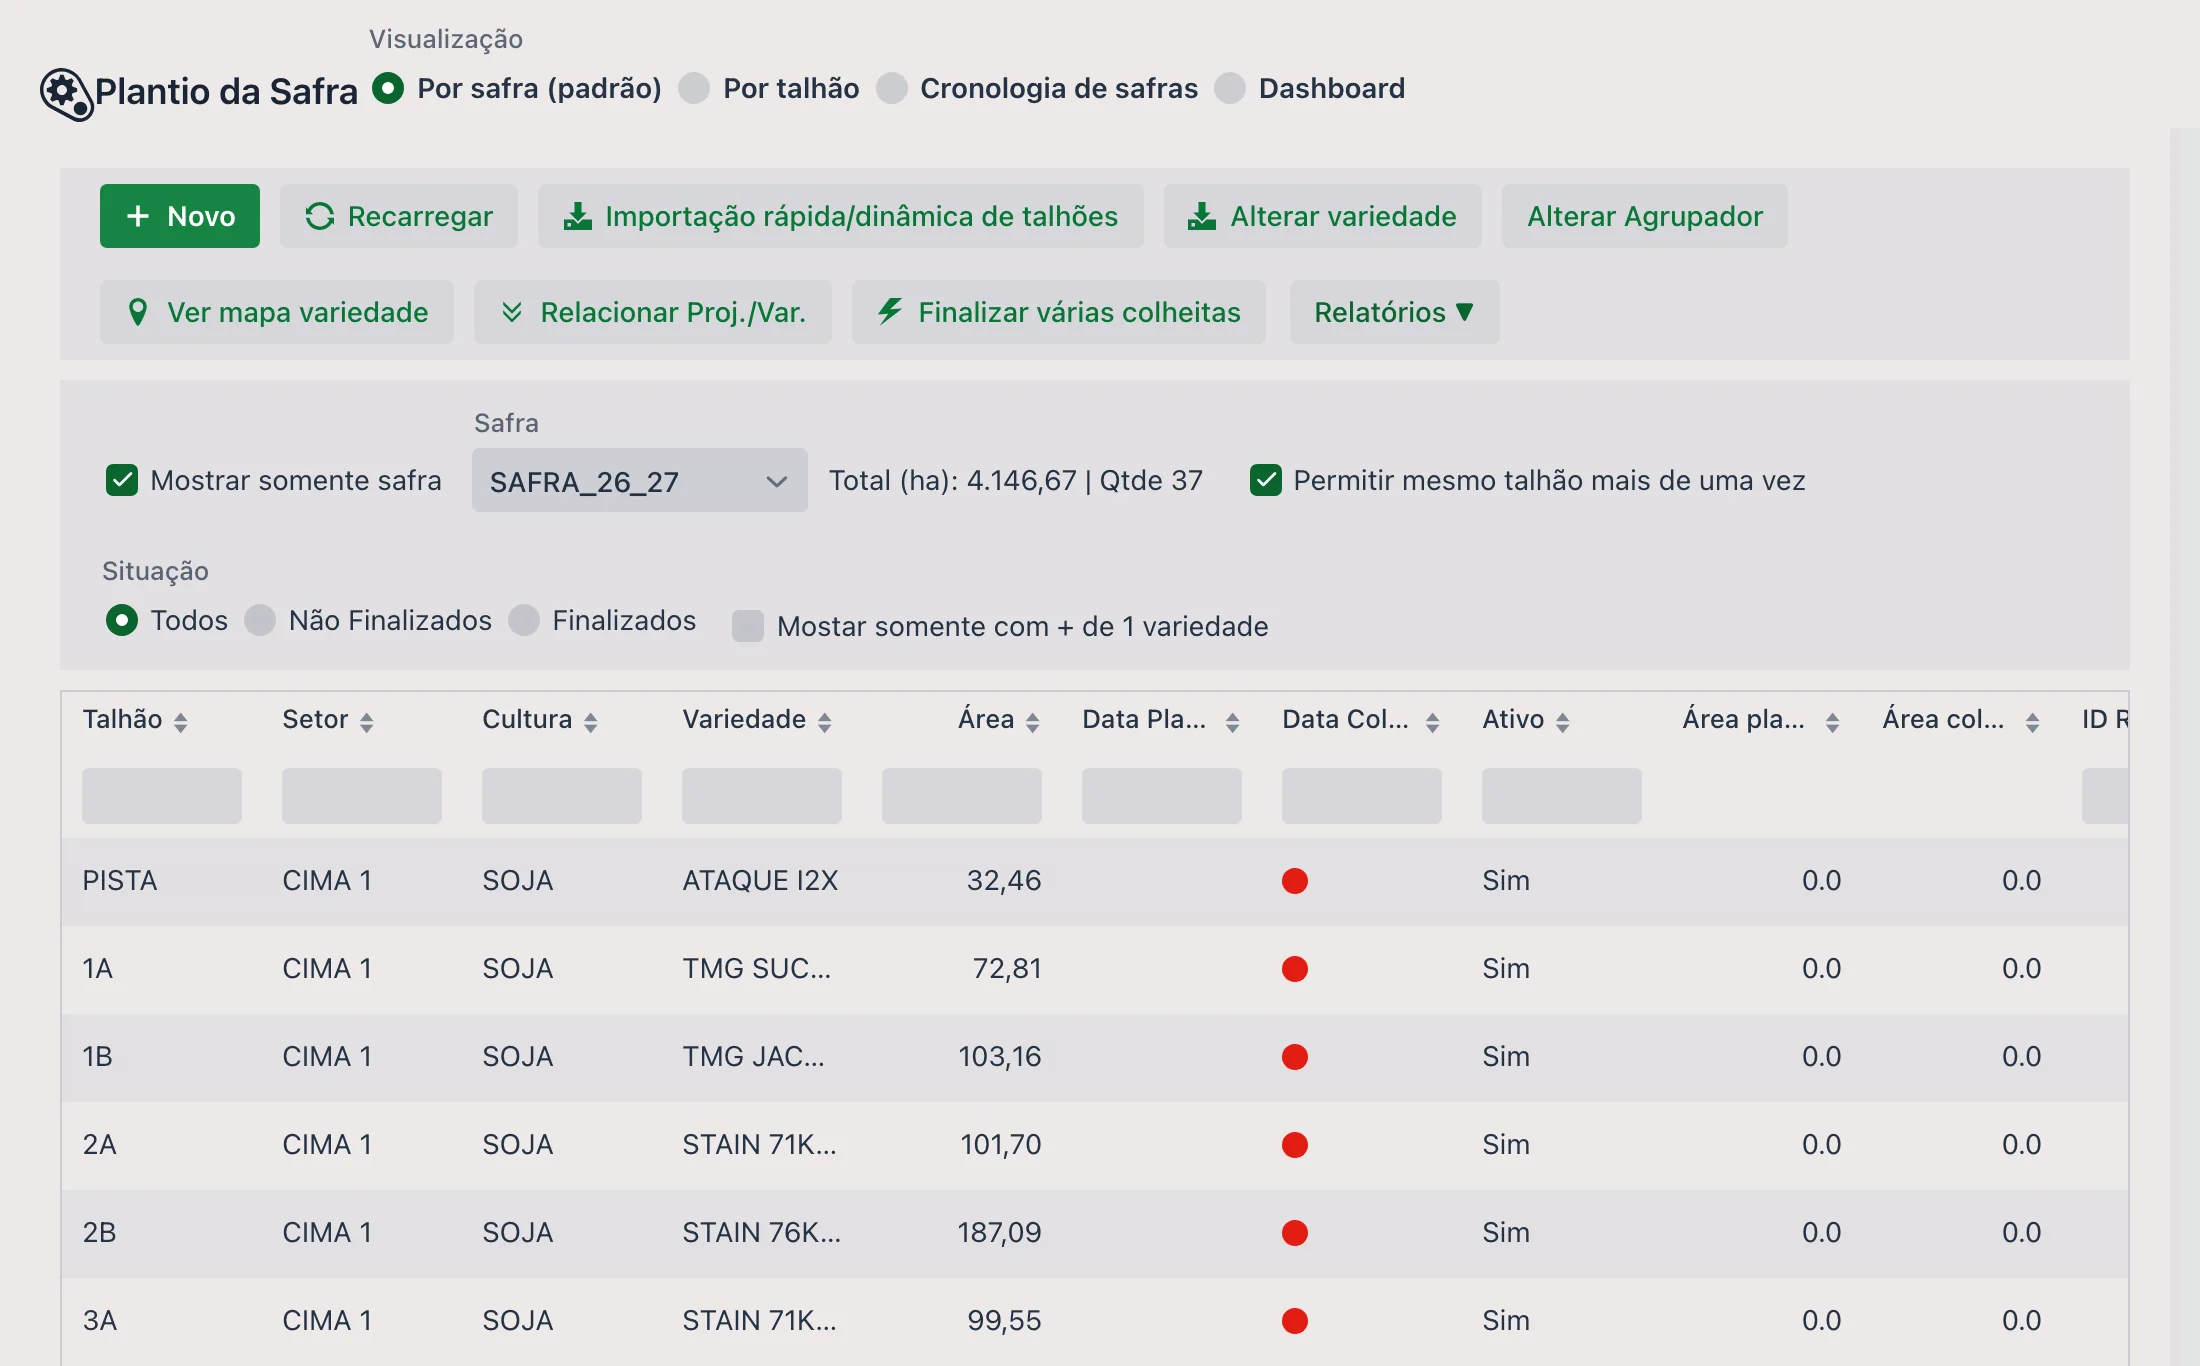
📝 Header (main information)
The form is split into three tabs at the top — Header (main information), Additional Information and Others. The header is what ties everything together:
| Field | Description |
|---|---|
| Season | The planting's season. |
| Field | The field, which already brings its registered area. |
| Crop | The crop planted. |
| Display name | Simplifies the name used in work orders and in the app — especially useful in trial plots. |
| Grouping | Free label for grouping plantings. Used to filter work orders, and it becomes a column in the field import when filled in. |
| Active | Keeps the planting in use. |
| Total Area (ha) | Area planted in that field in this season. |
| Ground area (ha), Aerial area (ha), Border area (ha) and Exclusion area (ha) | Optional. Each one is used in the work order when it belongs to that category — the aerial area in an aerial application, for example. |
| Maximum number of varieties | Optional. Limits how many cultivars can be entered in this planting. |
The header also has two sections that open and close, Planting and Harvest, with summarized dates and areas.
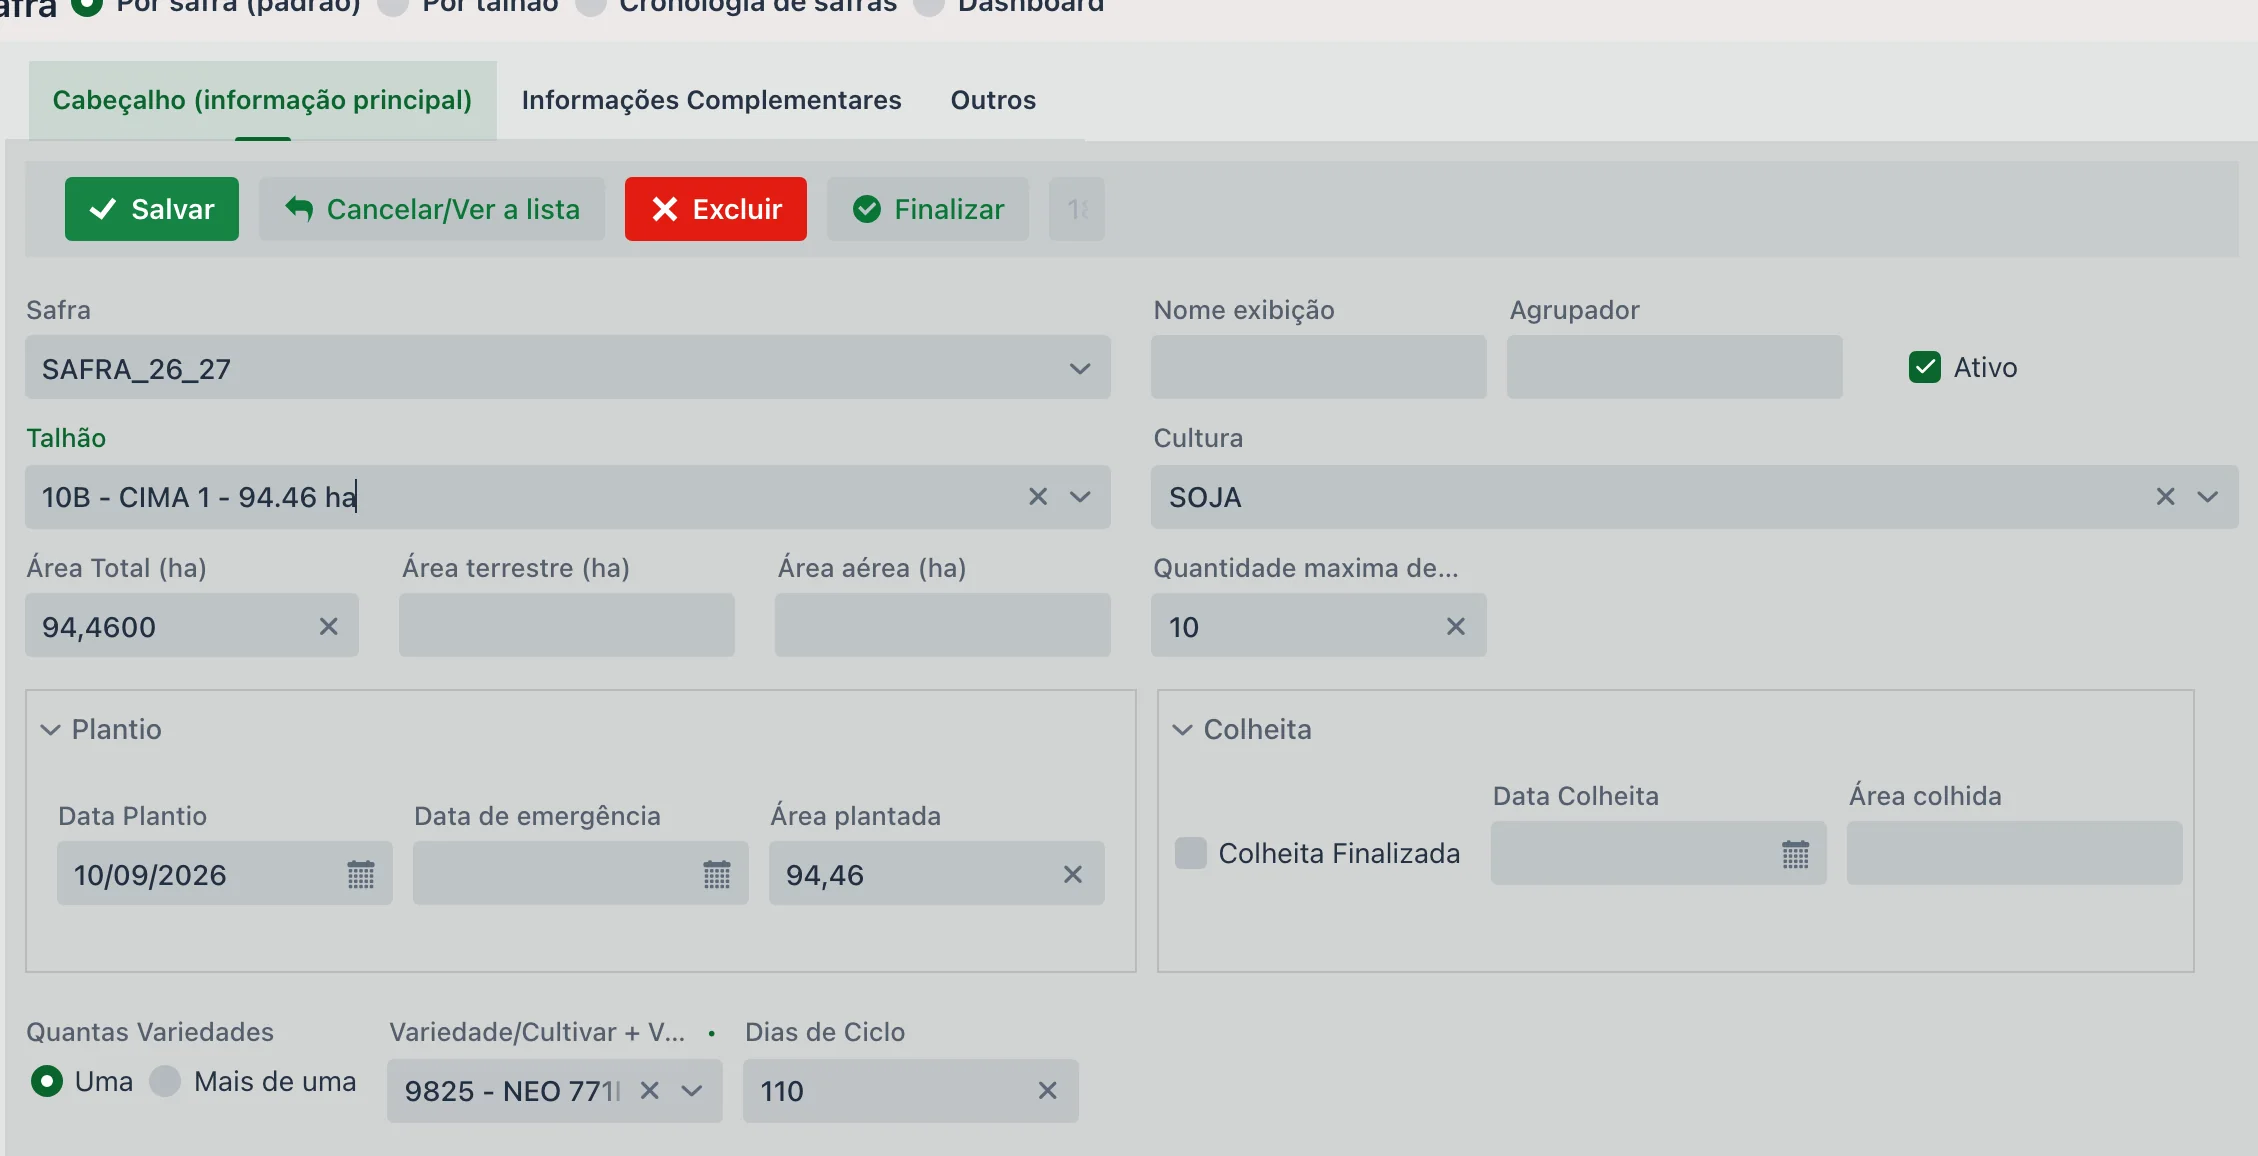
🌿 One variety or several
The How many varieties field decides the format of the record:
- One: pick the variety and the cycle days right there, in the header
- More than one: the entry moves to the Variety/Cultivar tab, one row per cultivar, each with its own area
The sum of the variety areas can't exceed the planting area.
Variety/Cultivar tab
Each cultivar gets Variety/Cultivar Area (ha), Cycle Days, Location, Display name, Quantity and Active (variety), plus the subsections:
- Planting: Planting Date, Emergence date and Planted area
- Harvest: Harvest Date, Harvested area and Harvest Finished
The grid below shows what has already been entered and pulls in the variety's technical data — PN, PMS, % Ger., Pits/m, Stes/m, KG/ha and Qde KG. The tab's buttons include Generate Several, to create several rows at once, Delete all and Finish variety harvest.
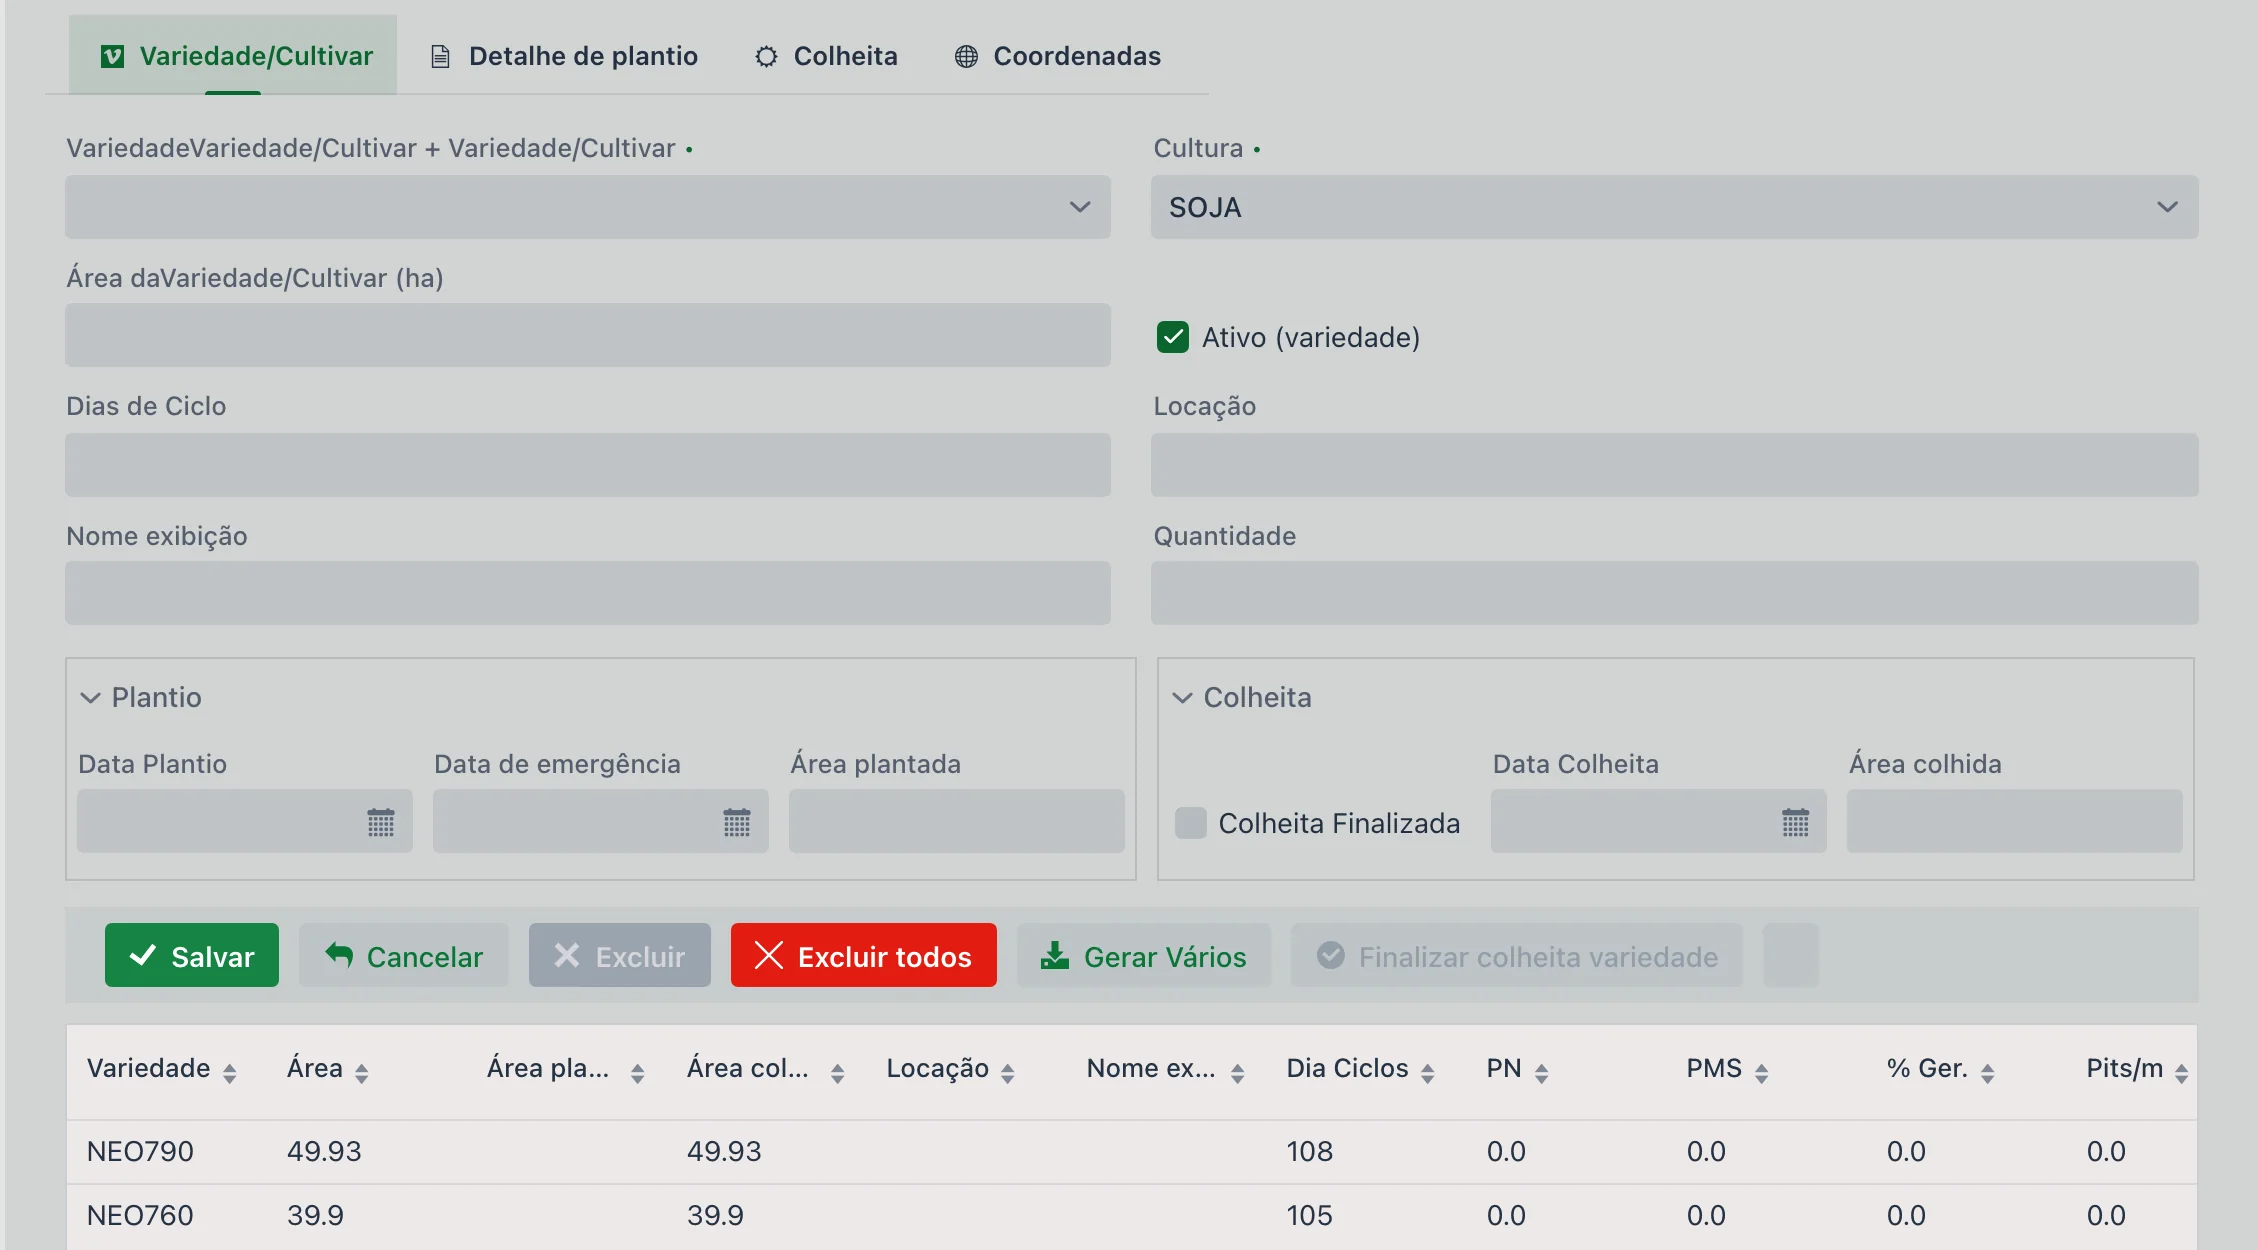
🧪 Separate by variety
When enabled, scouting and work order records are separated by variety in the app and in reports.
The separation is chosen per entry type, not all at once — there are ten independent options: In scouting (MIP), In Planting W.O., In Seed Treatment W.O., In Fertilization W.O., In Crop Protection Application W.O., In Soil Prep W.O., In Harvest W.O., In 'Other' W.O., In Evaluation W.O. and Manual. That way you can separate by variety in scouting and harvest but keep soil preparation unified — which is how most growers work.
- Field "TH 01"
- Varieties: "98YRR" and "99YRR"
- The app will show:
- TH 01 - 98YRR
- TH 01 - 99YRR
📋 Tab: Additional Information
The form's second tab, organized in blocks that open and close:
| Block | What it contains |
|---|---|
| Harvest | Final harvest average, Total harvested KG, Total harvested cotton kg, Estimated weight (KG) and Estimated yield — the actual result for that field. |
| Planned/Budget | Planned harvest average, Cost, Planned cost per ha, Planned exchange rate, Operating cost, Chemicals cost, Planned sale value and Planned by-product sale value. This is where the plan sits alongside the actuals. |
| Display mode | Six options that control where the planting appears: Show in planting dashboard, harvest, application and soil prep, plus Show in MIP and Show in Crop Work Order |
| Third-Party Owner | Third-Party Entity, Receiving Disc. % and Storage Location (default for receipts) — for third-party land, with a discount on receiving. |
| Planting details | Spacing (meters), Planting speed (km/h), Plants per meter, Plants per hectare, Total plants and Planting type. |
This tab also holds Reference/Integration ID, Cycle Reference ID and the trail of who touched the record: Created by, Changed by and Finished by, each with date and time.
🧭 Quick actions on the Season Planting screen
The left column offers important shortcuts for bulk actions. They all open a window with two lists — available on the left, added on the right — and arrows to move fields between them:
- Quick/dynamic field import: choose a crop, optionally a variety and the planting date, and apply them to several fields at once. The Show only unused fields option — checked by default — hides fields that already have a planting in that season, so the list shows only what's missing. At the bottom, the Show in MIP and Show in Crop Work Order options come checked on the records created.
- Change variety: changes the crop and variety of several existing plantings. The list shows what each field has today — crop, variety, area and planting date — so you can check before changing.
- Change grouping: changes the grouping of several plantings at once.
- View variety map: shows a map with the fields and the colors assigned to the varieties, making it easy to see the geographic distribution of varieties.
- Link Proj./Var.: links projects and varieties, used in trial areas.
- Finish multiple harvests: closes the harvest of several fields at once (see below).
- Reports ▼: opens the reports linked to the screen.
How upCampo calculates field yield
The Total harvested KG and Final harvest average fields aren't typed: each load entered updates them automatically, the moment it's saved. What changes is the source of the load and the unit divisor.
The divisor is the unit that production is traded in: 60 kg is the bag and 15 kg is the arroba — neither one is configurable.
| Field | Area | Total harvested | Math | Final harvest average |
|---|---|---|---|---|
| Soybeans — 40 load tickets | 120 ha | 792,000 kg | (792,000 ÷ 60) ÷ 120 | 110.0 bags/ha |
| Cotton — the field's bales | 90 ha | 337,500 kg | (337,500 ÷ 15) ÷ 90 | 250.0 @/ha |
Since the area is the divisor, a wrong area on the planting means a wrong yield — and the error doesn't show up right away, only when someone questions the average at the end of the season.
What "finishing the harvest" does — and what it doesn't
The window itself warns you, and it's worth repeating:
- The Harvest Date entered in the window is saved on the selected fields. To not change the date already there, leave the box empty.
- Generate new record (e.g., fallow): automatically creates a new planting right after — this is how you record fallow or the next crop in the same field.
- Show all (including finished): also shows what has already been closed, useful for checking or correcting.
You can also finish one planting at a time, with the Finish button at the top of the form, or a specific variety, with Finish variety harvest on the Variety/Cultivar tab.
📊 Related reports
The Season Planting screen is the basis for many reports on the platform. The two main ones are:
Shows the whole planting setup with summaries by crop, variety, planted area, planting dates and expected harvest (based on the variety's cycle days).
Lists the season's fields with crop, variety, total cost, cost per hectare and average yield.
These reports help with strategic analysis and with technical and financial tracking of the season.
- The field becomes available in the app
- All season management is centralized (cost, yield, applications, scouting, etc.)
- Data is organized by season, giving you a reliable history
❓ Frequently asked questions
Why is the Season Planting required?
Because it's what makes the fields show up in the app, links each entry to a specific season and lets reports and dashboards separate information by season and by variety.
Do the planting and harvest dates have to be typed in?
Not necessarily. The Planting and Harvest groups are filled automatically by Planting or Harvest work orders — but they can also be entered manually on this screen.
How do I close the harvest of a field?
Check Harvest Finished, use the form's Finish button or, for several fields at once, Finish multiple harvests. Finishing sets the harvested area to 100% and blocks new load tickets — but it does not recalculate the averages already calculated.
I finished the harvest and the date came out wrong. Why?
Because the Harvest Date entered in the finish window is saved on all the selected fields, overwriting what was there. If you don't want to change dates already recorded, leave that box empty before finishing.
How do I record fallow after the harvest?
In the Finish multiple harvests window, check Generate new record (e.g., fallow). When you finish, the system creates the next planting in that field, with no need to register them one by one.
Can I have more than one variety in the same field?
Yes. In the How many varieties field, choose More than one: the entry moves to the Variety/Cultivar tab, with one row per cultivar and its area. The sum of the areas can't exceed the planting area.
Do I have to separate by variety everywhere, or can I choose?
You can choose. The Separate by variety block has ten independent options — one for scouting (MIP), one for each work order type and the manual one. It's common to separate in harvest and scouting and keep soil preparation unified.
How do I enter the same field twice in the same season?
Check Allow the same field more than once, in the left panel. That's for growers who plant two crops back to back in the same field within the same cycle.
How do I register the planting of several fields at once?
With the Quick/dynamic field import: choose the crop, optionally the variety and the planting date, move the fields to the list on the right and confirm. The Show only unused fields option leaves in the list only what doesn't have a planting in that season yet.
🐛 Quick Guide - Pest Monitoring
Pest monitoring — or IPM, integrated pest management — is going out to the field to find out what's happening inside the field before deciding whether it's worth spraying. The scout walks into the crop, covers the area and stops along the way; at each stop, they look at the plants around them and record what they found. In upCampo this record is made on the phone, stop by stop, and the web portal combines it all into one number per field — the number the agronomist compares with the action threshold to decide whether it's time to spray.
If you've never seen this whole flow, it works like this:
- The scout goes out to the field with the app on their phone. They pick the field and start walking it.
- At each stop, they open a point and record what they saw: the crop stage, the plant phenology and the count of pests found.
- Back in signal range, the phone syncs. All the points in that field on that day make up one scouting record.
- The web portal calculates the field result and compares it with the action threshold the farm registered for that pest, crop and stage.
- The agronomist reads the result on the scouting panel and decides: spray, wait, or scout again in two days.
The field app
Data collection happens in the upCampo app, installed on the scout's phone:
- 📱 Download on Google Play (Android)
- 📱 Download on the App Store (iPhone)
The login is the same as the web portal — the scout signs in with the username and password they already use in the system; there's no separate registration for the app. What must exist is access granted: a user created for them in Users, with permission on the farm they'll scout. Without that, the app opens but shows no fields.
And it works without internet. Fields rarely have signal. The app stores everything on the device and syncs on its own when the connection comes back, so the scout doesn't need to worry about coverage in the middle of the crop.
In the app, monitoring is under the Scouting (IPM) menu. The list shows the season's fields with the crop and how long ago each one was last scouted. The scout taps the field, then the orange + button and New Scouting.
What gets recorded at each stop
There are two moments, always in this order: first the point opening, then the pest count.
The point opening records how the crop looks at that spot, and brings together two pieces of information:
- The crop stage — where the plant is in its cycle: V4, R5, and so on. This isn't red tape: the stage entered at the opening decides which action threshold range applies, because two caterpillars per meter mean different things at different points in the crop.
- Phenology — measurements of the plant itself, not the pest: height, number of nodes, internode length, stand, plants per meter; in soybeans, pods and seeds per pod; in cotton, squares, bolls and open bolls. This is what lets you track whether the crop is growing as expected for that variety.
In the app, the new point opens in the Point Opening block: the scout picks the Stage from a list, fills in the plant measurements and taps OPEN POINT. The screen already shows the Planting Date and Days After Planting, which come from the Season Planting.
Which measurements appear depends on the crop. Each opening field is turned on per crop in
File > Company/Crop Settings,
and can also be limited to a range of days after planting and to certain points of the walk — all, only the
first, or a fixed interval. In the cotton season in the example below, besides Plants/m Phen.
and STAND, the scout enters Height, No. of Nodes and
White Flower Pos. — that's what cotton calls the field that appears as
1st node height in other crops.
The pest count comes next. For each pest found, the scout enters the counting method used, how many plants were checked, the pest, the size of the individual when it's counted that way — small, medium, large caterpillar — and the quantity. When the pest is registered with preset options, they don't type a number: they mark Low, Medium or High. The app stores the coordinate, time, who did it and photos along with it.
In the app, after the opening, the same screen shows the counting Type (Plant, with the number of plants checked) and the Select a Pest/Disease field. On the first entry of the point, the app confirms the number of plants; then it opens the pest list, filtered by Type (Pest, Disease, Weeds) and by Class. Each pest opens as an accordion with the counting fields — by size, with the preset options from the record, or by number, with the − and + buttons. CLOSE POINT is at the top of the screen, and FINISH SCOUTING at the bottom. Each pest has its own Save button, which appears after something is filled in: if you don't tap it, the count doesn't go into the point. The scout's step by step, from the field to the finished scouting, is in How to scout for pests and diseases in the app.
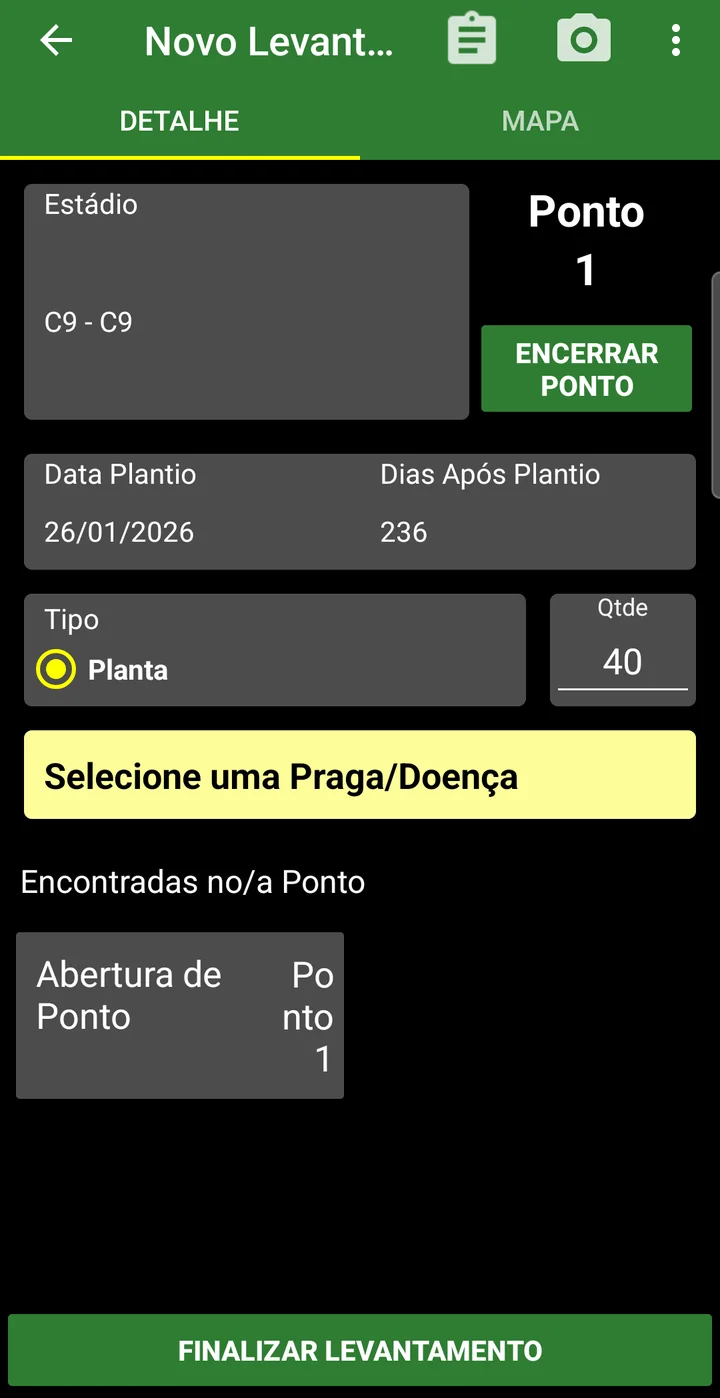
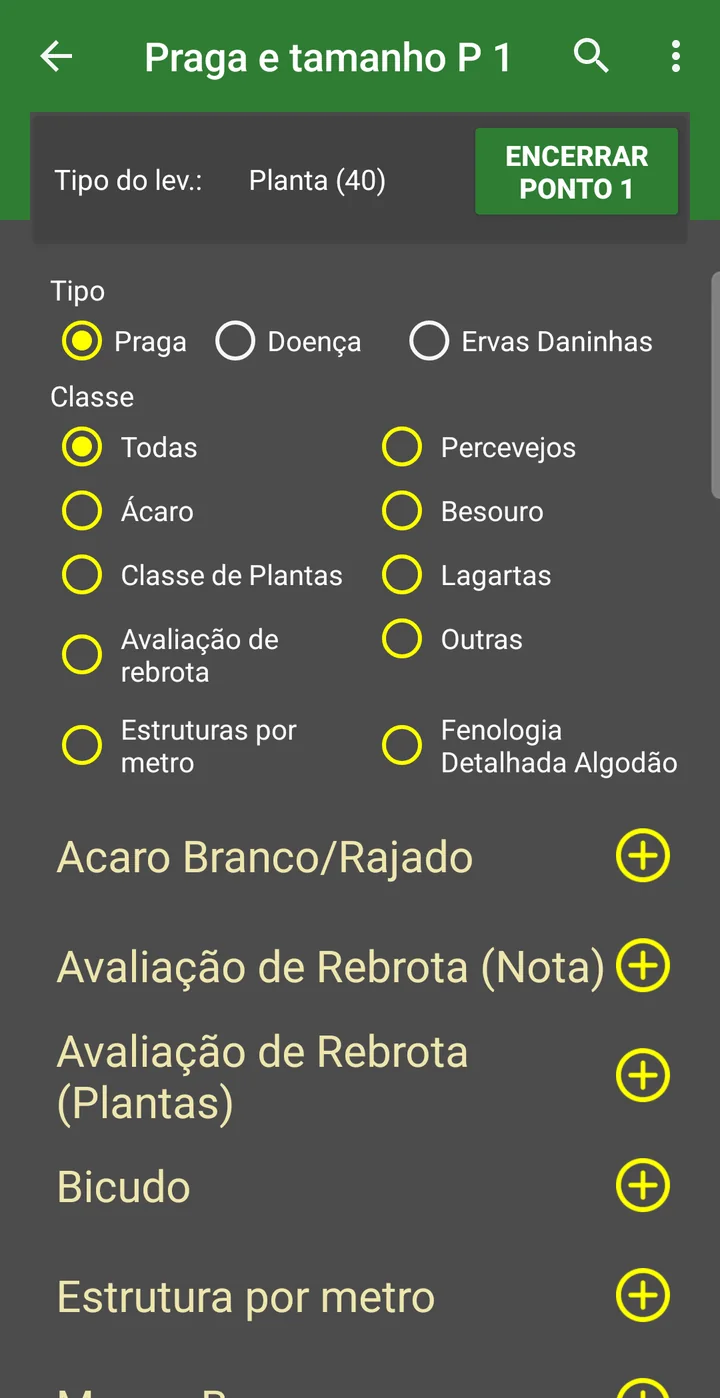
Detailed cotton phenology, node by node
In cotton, phenology can be recorded plant by plant and node by node, marking what's at each position on the fruiting branch. In the app, in the point's pest list, the Detailed Cotton Phenology class has the items Plant 1, Plant 2 and so on — one per plant checked. Tapping a plant opens its own screen:
- Enter the Height, Veg. Nodes Qty (vegetative nodes) and Veg. Buds Qty (vegetative buds).
- Tap + once for each fruiting node — − removes one. The + only works once the vegetative nodes are filled in. Total Nodes Qty is calculated automatically (vegetative + fruiting).
- Each fruiting node becomes a row in the grid, numbered from the last vegetative node — with 6 vegetative nodes, the fruiting ones are Node 7, Node 8, Node 9… —, with positions 1 to 5 on the branch.
- Tap each position until you reach what's there. Each tap moves to the next state, in legend order: Abs. (absent) → Square → Flower → Boll → Open (open boll) → Abor. (aborted) → back to Abs. The position's color shows the state.
- Tap SAVE and move on to the next plant.
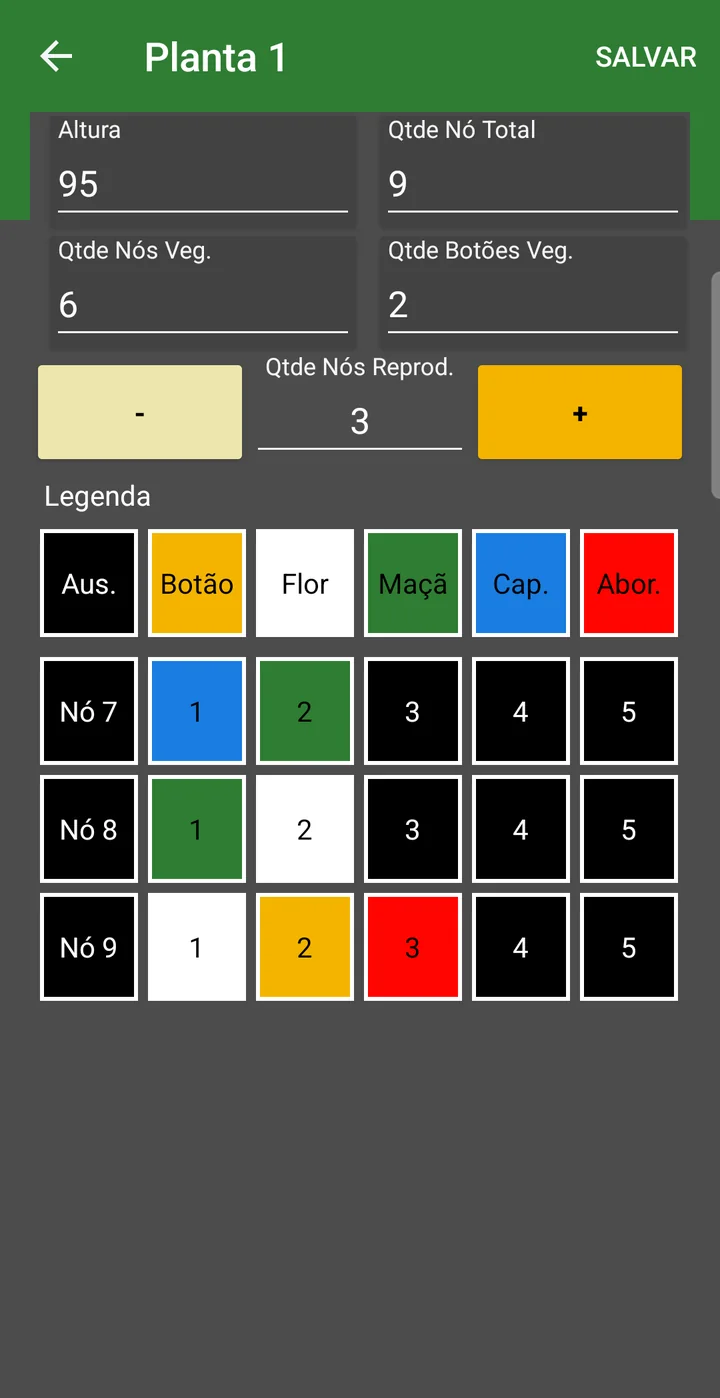
Once the plant is saved, the records show up in the point, under Found at Point, and in the field history. The history shows the day's summary — how many fruiting nodes have a square, flower, boll and open boll, the height and the nodes — and the detail for each plant, with Fruiting Squares Qty, Fruiting White Flowers Qty, Fruiting Bolls Qty, Fruiting Open Bolls Qty and Fruiting Abortions Qty
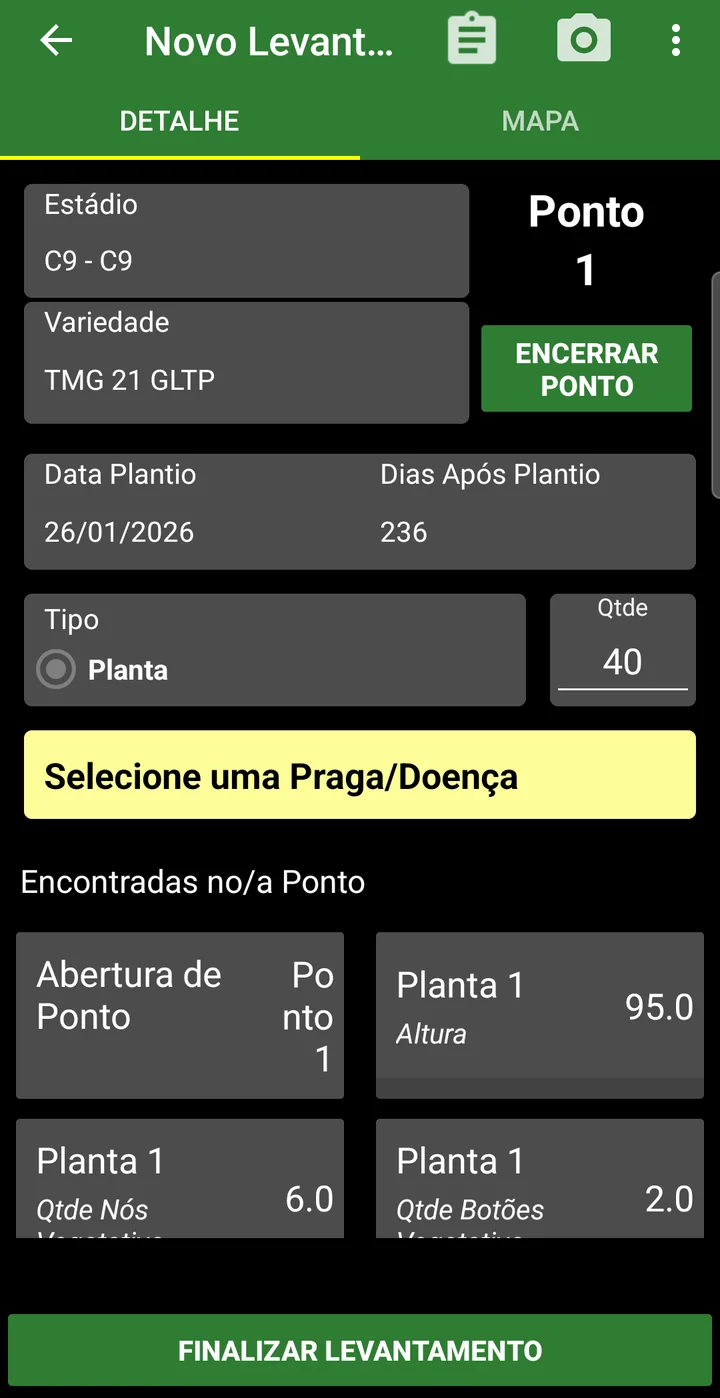
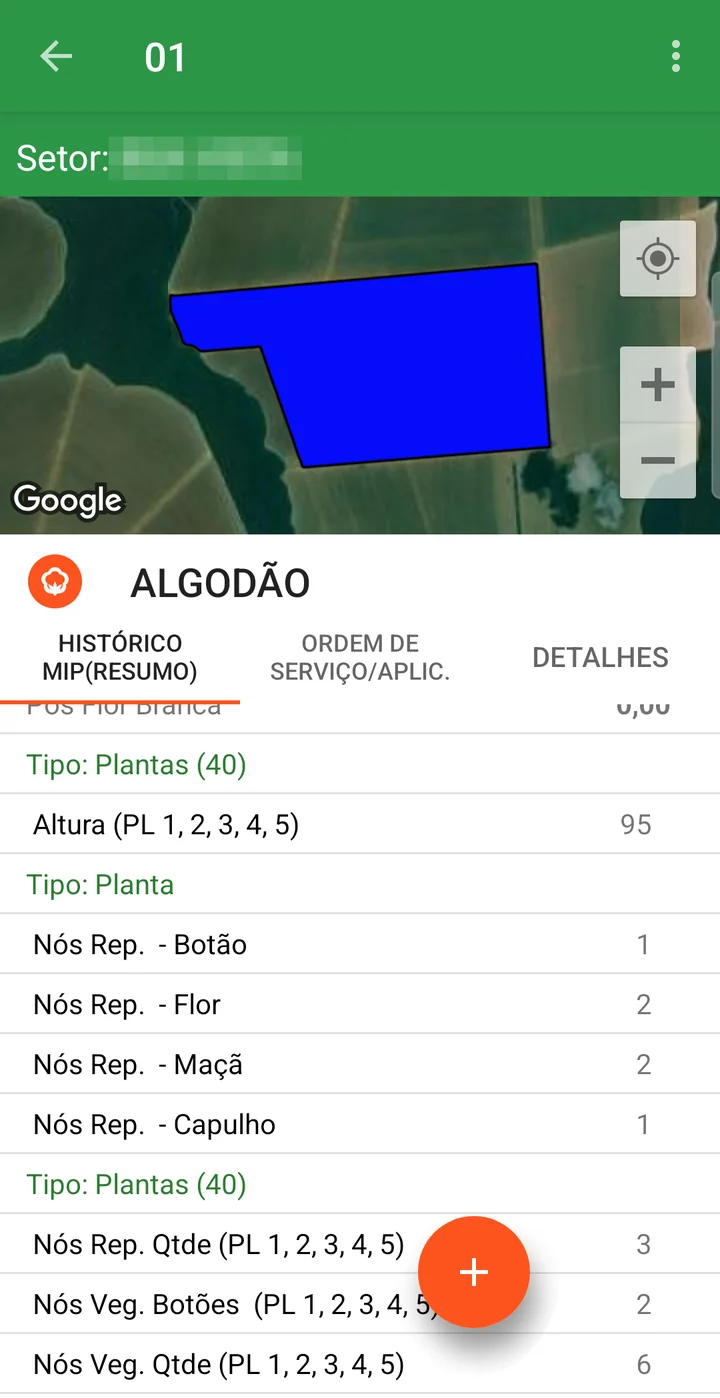
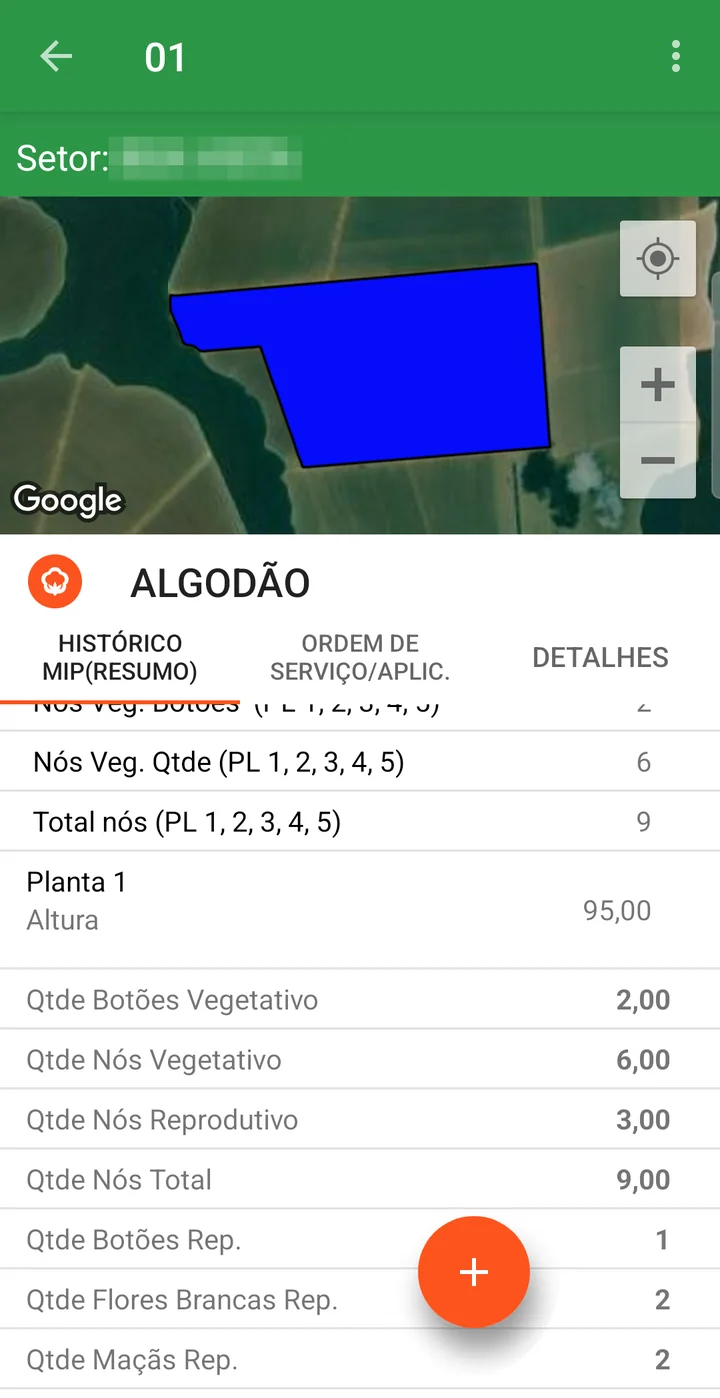
What's done with this measurement afterwards — the dashboard that draws the plant tree node by node and the node-by-node phenology reports — is in Node-by-node phenology mapping.
Counting methods
The method is how the pest was counted at that point — and it's what gives the number its meaning. Counting five caterpillars in one meter of row isn't the same information as finding five caterpillars in a hundred plants examined. There are three:
| Method | How it's done | When it's used |
|---|---|---|
| Beat cloth | The cloth is spread on the ground between two rows, the plants are shaken over it and whatever falls is counted. | The classic IPM method in soybeans: stink bugs, caterpillars and whatever drops off the plant. |
| Plant | A number of plants is chosen at the point — 10, 20 — and examined one by one, entering how many were checked. | When what matters is the share of the crop affected: leaf diseases, terminal damage, boll damage. |
| Meter | Everything in one linear meter of row is counted. | Weeds and soil pests, and much of cotton monitoring. |
What the system does with it
All the stops made in that field on that day form one scouting record — even when two scouts monitored the same field on the same date: both of their points go into the same calculation. The total number of points walked becomes the divisor of the averages, which is why stopping more often gives a truer picture of the area: with three stops, a hot spot in one corner can go unnoticed or become the whole average.
From there the system calculates one number per pest and compares it with the action threshold registered for that crop and stage. The result appears on the scouting panel of the home screen, in the pest × field matrix, with the number highlighted in the color of the range it fell into — that's what makes anything over the limit jump out, without reading row by row.
A badly entered stop doesn't just spoil itself: it goes into the average of the whole field for that day. That's why the web portal has the Scouting screen — so the agronomist can check and correct what came in from the field.
From here on: getting the system ready
Up to here was the field routine. The rest of this guide is the setup order — the sequence of records that makes this routine work, each one with its article linked along the way:
- Steps 1 to 4 — setup. They define what will be monitored, how it's counted and at what number the farm takes action. It's a one-time job: done at implementation and reviewed every season, when the crop or the strategy changes.
- Step 5 — the routine. What needs to be enabled for the scout to monitor day to day.
- Steps 6 and 7 — reading the results. Where the agronomist checks what came in and sees the big picture.
Much of this comes ready-made. upCampo maintains a pest library with scientific name, class and counting method already set up, and importing from it takes care of most of step 2. What each farm actually customizes is shorter than it looks:
- which pests to monitor — the list for your crop, not the whole catalog;
- how each one is counted — the method and the calculation method, which decide what the number means;
- at what number to act — the action thresholds, by crop and by stage. It's the one part nobody can fill in for you: it's the farm's agronomic decision;
- what gets added together — pest groups, when the decision is made for the group rather than the species.
🧱 1. Pest Class
Location in the system: Basic > Pest Class
Main function: group what will be monitored into families — Caterpillars, Stink bugs, Leaf diseases, Broadleaf weeds. The class is what organizes the list in the app and in reports.
Important: the class also separates pest, disease, weed and evaluation. Think of it as the drawer: if the scout is going to look for "caterpillar" in the app, that's what the drawer needs to be called.
✅ With the classes created, register the pests.
🐛 2. Pests, weeds and diseases
Location in the system: Basic > Pest
Main function: the module's central record. This is where you define what is counted, how it's counted and at what number the farm takes action.
What to decide for each pest:
- Calculation method — how the count from the points becomes the field number: Simple sum, Average per point, Average per occurrence or Preset value. It's the choice that changes the result the most; the difference is explained in step 6.
- Sizes — when the decision depends on the insect's stage (small, medium, large caterpillar), the Size tab lets you count each range separately.
- Preset levels — for what isn't counted as a number: the scout picks Low, Medium or High and the system calculates the percentage of points in each option.
- Crop — the pest only appears in the app for the crops checked on the Crop tab. There's an Include all crops button for those who monitor the same list everywhere.
✅ With the pest registered and linked to the crop, define the action threshold.
📈 3. Action threshold
Location in the system: Control Levels tab, inside Basic > Pest
Main function: tell the system at what number that pest becomes a problem. The action threshold is what classifies the result into a range — with a name and a color — and highlights on the panel whatever is over the limit. Without it, the scouting result is just a loose number: the system records the count but has no way of saying whether it's high or low.
Important: the threshold is registered by crop and by stage range, because the same count means different things at different points in the crop. Two caterpillars per meter at V4 aren't the same problem as at R5.
Each range is an interval with a name and a color. The system compares the field result with the range using the stage entered at the point opening, and the range runs from the starting value (inclusive) to the ending value (exclusive) — that's what the From (=<) and To (>) headers mean.
✅ Threshold set, decide whether you'll use pest groups.
🧮 4. Pest group (optional)
Location in the system: Basic > Pest Group
Main function: add up the count of several pests into a single total and give that total an action threshold, by crop and stage range.
When to use it: when the decision is made for the group, not the species. The classic case is the caterpillar complex: three different species, each below the threshold, that together justify spraying. If your farm decides pest by pest, skip this step.
✅ Setup done. Now to the field.
📱 5. Field data collection
Where it happens: in the upCampo field app, on the scout's phone — how a stop works is described at the beginning of this guide.
What needs to be ready for the scout to monitor:
- the field enabled in the app, which depends on the Season Planting;
- the pest linked to the crop of that planting, on the Crop tab of the pest record — if it isn't, it won't be offered at counting time;
- the scout with their own user, because their login is what stamps who scouted each point;
- the crop stages registered, since the stage entered at the point opening is what picks the action threshold range.
The routine belongs to the farm, not the system: how often each field is visited and how many stops are made per field are agronomic decisions. upCampo doesn't enforce a frequency or a minimum number of points: it records what was done, with date, scout and coordinate, and that's what lets you check later whether the area was really walked.
✅ With the points synced, the result is already in the web portal.
🔬 6. Scouting: from the point to the field number
Location in the system: Crops > Scouting
Main function: look up what came in from the field and, when needed, enter or correct a scouting record through the web portal.
What the scout records is the count at each point. The number the agronomist looks at is the result for the field on that day, calculated over all the points according to the Calculation method chosen in the pest record:
| Calculation method | Math | Answers |
|---|---|---|
| Simple sum | total counted, not divided | how much showed up in the field |
| Average per point | total ÷ points walked | what the average pressure on the area is |
| Average per occurrence | total ÷ points where the pest appeared | where it's present, how much there is |
| Preset value | points that chose the option ÷ total points × 100 | in what percentage of the area the level is High |
The difference between the two averages causes the most confusion. A concentrated hot spot — heavy pest in one corner and nothing elsewhere — gives a low average per point and a high average per occurrence. Choosing the wrong method is the most common reason the result comes out below the action threshold when the scout swears the pest is there.
✅ Result calculated — see it on the panels.
📊 7. The scouting panel
On the web portal's home screen, the Scouting tab gives the farm overview in three views: Default, Pest x Field — the matrix where each result appears in the color of the range it fell into — and List. There's also the period filter, field selection and the option to show only the pests found. It's the screen for whoever arrives in the morning and wants to know where to go today.
In the reports, the history by field and by pest lets you follow the trend over the season — it's what shows whether the spray worked.
🪤 Traps: the other way to count
Not every pest is counted with a beat cloth. Moths and other flying insects are monitored with a trap — the scout installs it in the field and checks it periodically to count what was caught.
- Trap Group — the type of trap, what it catches and the action thresholds for that catch. It's the equivalent of the pest record, for traps.
- Trap x Season — the installation: which trap is in which field this season, with coordinates. The Collections tab stores each count.
The logic is the same as scouting: setup first, field collection next, result compared with the threshold.
📷 Observation: the free-form record
Location in the system: Crops > Observation
Not everything you see in the field fits in a count: planting gaps, machine damage, erosion, a plant with a symptom nobody could identify. Observation is the free-form record, with photo and location, made in the same app.
It serves as the season's memory and as evidence: the photo stays tied to the field and the date.
- field counts reaching the web portal the same day, even with no signal in the field;
- each pest's result already compared with the action threshold and highlighted on the panel, instead of a spreadsheet read at the end of the week;
- the pest history by field throughout the season, to decide based on what has already happened;
- a record of who scouted, when and where — including the coordinate of each point.
Want to understand the whole module, including what it does on the scout's phone? See the up.Monitora page on the upCampo website.
❓ Frequently asked questions
Where do I start to use pest monitoring?
With the Pest Class and the Pest record — preferably using the Import standard pests button, which brings in the upCampo library ready to use. Then come the action thresholds by crop and stage. Before all that, the farm needs to have field, season and Season Planting registered, because the planting is what enables the field in the app.
How many points do I need in each field?
As many as you see fit. upCampo doesn't define a point grid, doesn't mark on the map where to stop and doesn't require a minimum number: the scout walks the field and stops wherever they think they should, and the system records each stop with date, time and coordinate. What's worth knowing is that the total number of points walked is the divisor of the averages — with few stops, a hot spot in one corner can go unnoticed or become the average of the whole field. How many stops to make and how often to return to each field is the farm's agronomic decision.
The scout monitored, but the result shows no highlight at all. Why?
The highlight comes from the action threshold. Check three things in the pest record: whether a threshold is registered for that crop, whether there is one for the stage range the crop is in, and whether the calculated result falls inside any range. A pest without an action threshold shows the number normally, just without the classification that would say whether it's high or low.
What's the difference between "Average per point" and "Average per occurrence"?
Average per point divides the total counted by the points walked and answers what the average pressure in the field is. Average per occurrence divides only by the points where the pest appeared and answers, where it is, how much there is. In a concentrated hot spot the first gives a low number and the second a high one — both are right, they answer different questions. The choice is in the Calculation method field of the pest record.
The field doesn't show up in the scout's app. What's missing?
Almost always the Season Planting. Registering the field isn't enough: the planting is what ties field, season, crop and variety together, and it's what enables the field in the app. If the field shows up but the pest doesn't, check the Crop tab of the pest record — the pest is only offered for the crops checked there.
Do I need internet in the field to monitor?
No. The upCampo field app works offline: it stores the points on the device and syncs when the connection comes back. Several scouts can monitor the same farm at the same time, and everyone's points go into the same scouting record for the day.
When should I use a pest group instead of registering pest by pest?
When the spray decision is made for the group. The classic case is the caterpillar complex: three species, each below the threshold, that together justify spraying. The Pest Group adds up the count of the chosen pests and gets its own action threshold, by crop and stage range. If the farm decides species by species, it isn't needed.
What's the difference between scouting, traps and observations?
Scouting is counting at points inside the field — the beat cloth, counting per plant or per meter. A trap is passive capture, for flying insects, counted at each visit. An observation is the free-form record, with photo, of what doesn't fit in a count — planting gaps, machine damage, a symptom to identify.
Can I enter scouting through the web portal, without the app?
Yes. The Scouting screen lets you enter and correct records through the web portal — it's the way to fix a wrong entry or record a count made on paper. The normal path, though, is the app: it already brings the crop's pest list and stores the coordinate of each point.
📘 Screen: Trap Group
The Trap Group screen is used to register the types of traps used on the farm, grouping them by purpose or target pest. Besides naming the group, this is where you define what that trap catches and from what count a catch becomes an alert.
📍 Location in the system
Menu: Crops > Trap Group
🧩 Main function
Each group represents a general classification of the trap, such as the type of pest it monitors.
Common examples:
- Boll Weevil Trap
- Caterpillar Trap
- Leafhopper Trap
This group is selected later when registering a Trap x Season.
📝 Registration fields
| Field | Description |
|---|---|
| Code | Group identifier. |
| Description | Required. Name of the group (e.g., Armadilha geral). |
| Active | Defines whether the group is available for use in other records. |
🐛 Tab: Details (items)
This is where you say what that trap catches. Each row links to the group a Pest, weed or disease that is already registered, with a free-text Description and the Active checkbox.
A pheromone trap for boll weevil, for example, has a single item; a generic light trap group can have several, because it catches more than one species. This list defines what the operator will be able to count when reading the trap in the field.
📊 Tab: Levels
Levels turn the count into decision-making information: instead of the scout seeing "37 insects" and having to remember whether that is a lot or a little, the system classifies the catch into ranges you define.
| Field | Description |
|---|---|
| Starting Qty | Count that opens the range. |
| Ending Qty | Count that closes the range. |
| Description | Required. The name of the range — this is what the reader sees (e.g., "Low", "Watch", "Action threshold"). |
| Active | Lets you take a level out of use without deleting its history. |
The buttons on this tab are Save Levels, Cancel Levels and Delete Levels, so they are not confused with the header buttons.
The level color
Each level also stores a color, and that is what the app uses: the colored bar on the side of each trap in the list and its pin on the map come from the range the last collection fell into. This lets the scout see, without opening anything, where in the area the catch went up.
An example of a group set up for the cotton boll weevil, with ranges named in BAS (boll weevils per trap per week): 0 BAS in green, 0 to 1 BAS in blue, 1 to 2 BAS in yellow and Above 2 BAS in red. The complete path for this pest is in How to monitor the cotton boll weevil.
In the app, the trap list uses these levels to visually highlight the traps that are in an alert range — whoever looks at the phone sees right away which traps need attention, without comparing number by number.
- You can associate them when registering a Trap x Season
- The operator counts in the field only what that trap actually catches
- The catch becomes an automatic classification, and the app highlights traps at an alert level
- Monitoring reports and dashboards can be organized by pest type
- Trap management in the field becomes clearer and more segmented
❓ Frequently asked questions
What is a trap group for?
To classify traps by purpose or target pest — for example, a Boll Weevil trap, a Caterpillar trap or a Leafhopper trap. This is the group you select later when registering the Trap x Season.
Do I need to register the group before the traps?
Yes. The group is a prerequisite: without it, there is no way to classify the trap in the season record.
What do I gain by organizing traps by group?
Monitoring reports and dashboards can then be organized by pest type, which makes trap management in the field clearer and more segmented.
How do I say which pests a trap catches?
On the group's Details (items) tab: each row links a pest, weed or disease that is already registered. This list is what the operator sees when counting the trap's catch in the field.
How does the system know if a trap's catch is high?
Through the group's Levels. You register ranges with a Starting Qty, an Ending Qty and a name — "Low", "Watch", "Action threshold" —, and the count automatically falls into the matching range. In the app, traps in an alert range are highlighted in the list.
I can't save the level. What's wrong?
Three things block it: the Starting Qty cannot equal the Ending Qty, the starting value cannot be greater than the ending value, and the group must be saved before you enter the levels. The level description is also required.
📘 Screen: Trap x Season
The Trap x Season screen is used to register and georeference the traps installed on the farm during a specific season.
Each trap registered here is linked to a group and ready to be used for collections through the app, the web portal or integrations with electronic traps.
Once registered, it is ready to generate collections.
🔍 What it is
An agricultural trap is a device used in crops to catch insects and identify the pests present in the field. Traps work as a form of monitoring, helping the grower know when and where a given pest is showing up.
Traps often use a pheromone, a substance that attracts the target insect and makes the catch more effective.
Traps are usually spread around the fields. Ideally, the traps should cover at least each side of a field, ensuring efficient monitoring that represents the area.
📍 Location in the system
Menu: Crops > Trap x Season
🧩 Main function
Lets you register physical or electronic traps linked to a season, grouping them by type and location.
These traps can be used for:
- Manual collections through the app
- Manual entries through the web portal
- Integrations with sensors or digital traps
📝 Registration fields
| Field | Description |
|---|---|
| Season | The season the trap is linked to. |
| Trap Group | Type/classification of the trap (e.g., Boll Weevil, Caterpillar, Leafhopper). The group defines which pests will be counted and from what count a catch becomes an alert. |
| Number | Required. Trap identification (code or sequential number). |
| Field | The field the trap belongs to. |
| QR Code | Code on the label stuck to the trap, so the operator can identify it by scanning it in the field. |
| Latitude and Longitude | Geographic position of the trap — this is what lets the app guide the operator to it and what places it on the map. |
| Active | Defines whether the trap is still in use in the season. |
The Sector appears as a column in the list, but it is not typed here: it comes from the selected field. The list shows Number, Sector, Trap Group, Field and Active, with a Season filter right above it.
📥 Tab: Collections
After the trap is registered, the user can record the collections made throughout the season.
Collections can be made in four ways:
- App: manual collection by the scout in the field, directly on the phone, with or without internet.
- Web portal: through the Collections tab on this screen, ideal for corrections or additional entries.
- Electronic trap integration: if the customer has sensors installed, the catch data is synchronized automatically with the system.
- Import Collections from Excel: a button on the list, for those who keep the records in a spreadsheet (see below).
Each collection records:
| Field | Description |
|---|---|
| Date | Required. Day the trap was checked. |
| User | Who made the collection. |
| Found? | Yes or No. Recording a "No" is as important as a "Yes": it is what separates a trap that was checked and empty from a trap nobody went to check. |
| Quantity | How many individuals were caught. |
Import Collections from Excel
A button on the list that brings in the collections from a spreadsheet all at once. The file must be .xls
or .xlsx and must have two required columns:
- data — the collection date
- quantidade — in numeric format
The window itself has an instructions section that repeats this format.
📱 Collecting in the app
The phone is where collecting really happens: the scout walks the traps with the app open, records what was found in each one and syncs when there is signal. In the Trap menu the screen opens in two tabs, LIST and MAP.
The list shows one trap per row, with the number, the sector and how long ago the last collection was — Today, N days ago or Never, for one that has not been checked yet. When the group has pests registered, the row also shows how many were found and which ones. The colored bar on the side of each row is the group's level range, and it is the same color as the pin on the map. At the top are the Trap Group, Sector, Field and Order filters.
Tapping a trap opens its record with two tabs: COLLECTIONS, with the history, and LOCATION, with the map. Each collection in the list shows the date, who made it, the quantity, whether there were pests and the classification. The (+)NEW COLLECTION button opens a new entry.
The collection screen has two fields that exist only in the app:
| Field | Description |
|---|---|
| Classify | Collection or Collection + pheromone change. Marks the visit when the pheromone lure was replaced — this is what tells you whether the trap was attractive during that period. |
| Count per pest | When the trap group has pests registered, a row with − and + appears for each one. In that case the Quantity is locked: it is the sum of the pests counted. With no pests in the group, the quantity is typed in. |
The NEW TRAP (+) button, at the top of the list, registers a trap from the phone itself, right where it is being installed: you choose the group, the number, the sector and, if the farm uses it, the QR Code. The location comes from the device's GPS.
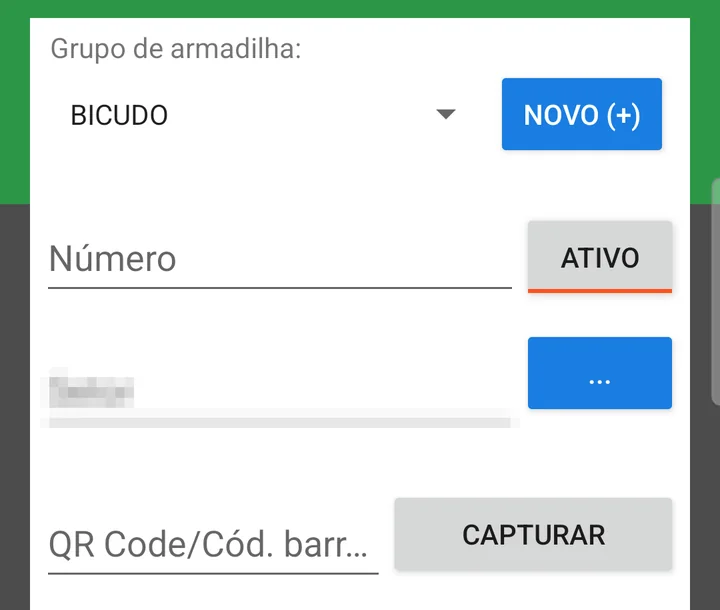
📊 What is it for?
The collection is the starting point for the system to turn raw data into useful information for the manager.
From the collections, the system:
- Automatically updates the pest dashboards and reports
- Shows maps with the geographic distribution of catches
- Shows week-by-week trend charts
- Points out trends, infestation peaks and comparisons by field or sector
This lets the manager judge whether it is time to step in, take preventive measures or apply, based on concrete data and not just on impressions.
📊 Related reports and dashboards
- MON.05.01 (formerly 002.P) - Trap scouting
- MON.05.02 (formerly 002.Q) - Trap scouting per week per sector
- MON.05.03 (formerly 002.R) - Trap scouting per week per field
- Trap trend
The Trap tab on the home screen
The portal's home screen has a Trap tab that brings together the collections from all traps in one place. It has its own filters — Season, Start date, End date, Sector and Trap Group — and two modes under Display mode: Map, which opens by default and places each collection at the point where the trap is, and Table, with one row per collection: group, sector, date, classification, field and quantity.
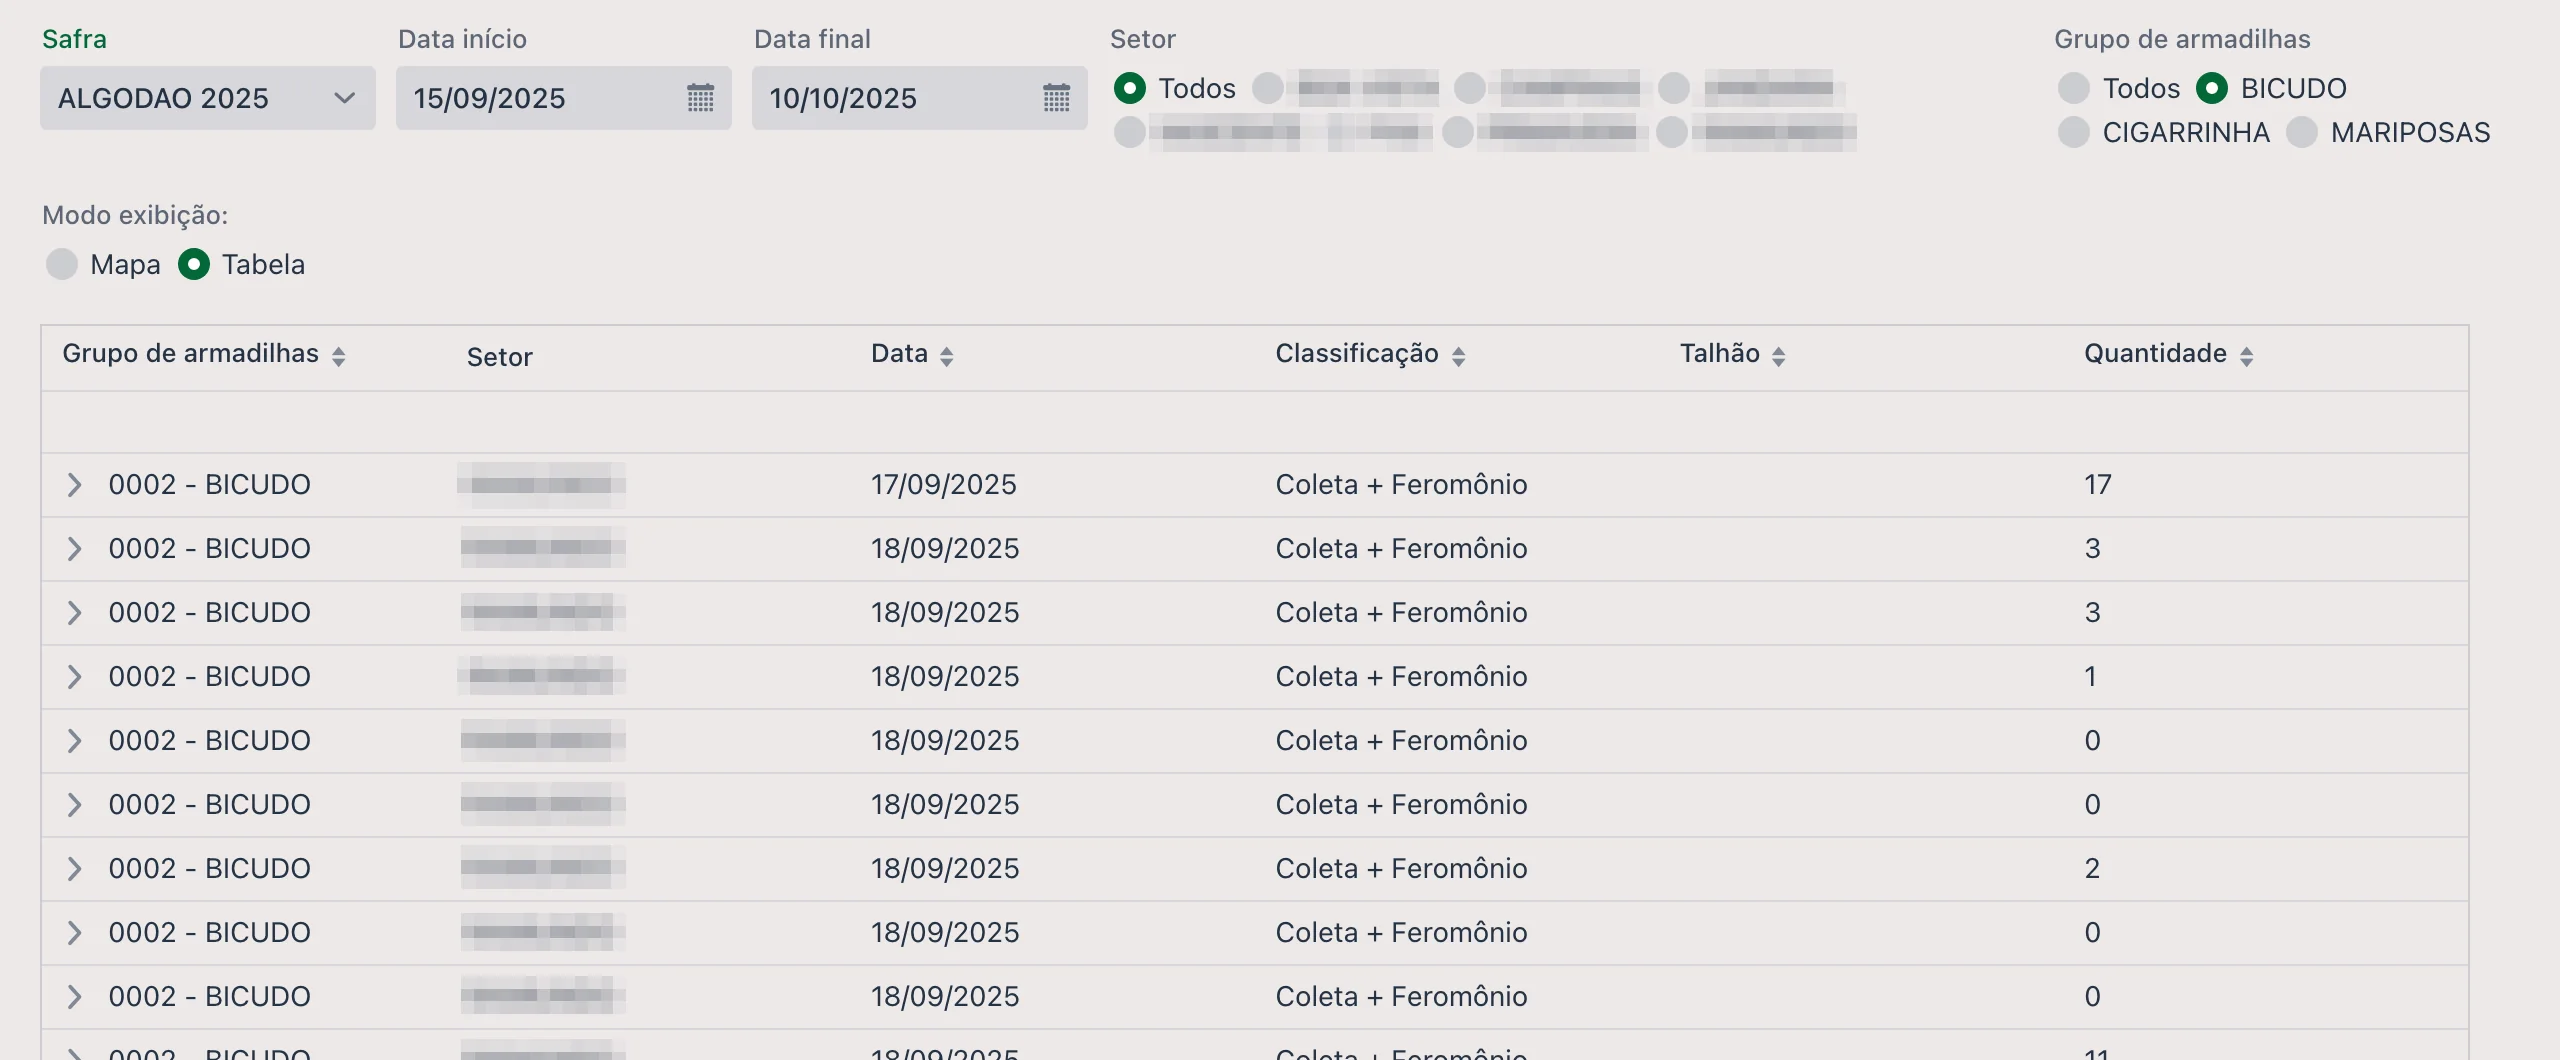
Besides these reports, the home screen has a dedicated tab, called Traps, for viewing the collections made.
- You can make collections directly in the app, including with GPS and OFFLINE
- The data will be organized by group, field and season
- Reports and dashboards will show the pests collected per point
- Electronic traps can be integrated into the system for automatic collection
❓ Frequently asked questions
What is an agricultural trap and what is it for?
It is a device installed in the crop to catch insects and identify which pests are present. Many use pheromone, a substance that attracts the target insect. They serve as monitoring: they help the grower know when and where the pest is showing up.
How many traps should I put per field?
Ideally, the traps should cover at least each side of a field. They are usually spread around the fields, so that the monitoring represents the area.
Do I need to register the traps again every season?
Yes — the record is per season, which is exactly what lets you compare history from one season to the next. Each trap is linked to the current season and to a trap group.
Can I use an electronic trap?
Yes. Once registered, the trap accepts manual collections through the app, manual entries through the web portal and also integrations with sensors or digital traps.
I checked the trap and there was nothing. Should I record it anyway?
Yes, and it matters. Enter the collection with Found? = No: that is what separates a trap that was checked and empty from one nobody went to check. Without that record, the trend chart has a gap that looks like no pests, when it is really no reading.
The system won't let me save the collection. Why?
Three rules block it: the date is required, the date cannot be later than today, and when you select Found? = Yes the quantity must be greater than zero.
I have the collections in a spreadsheet. How do I import them?
With the Import Collections from Excel button, on the trap list. The spreadsheet must be
.xls or .xlsx and have the required columns data (collection
date) and quantidade (numeric).
How does the operator find the right trap in the field?
Through the latitude and longitude, which guide the app to it, and through the QR Code, if you stick the label on the trap — then scanning the code is enough to open the collection for that trap, without searching by number in the list.
🌧️ Screen: Rain Gauge
The Rain Gauge screen lets you register fixed weather data collection points on the farm, whether they are Rain Gauges or Weather Stations.
📍 Location in the system
Menu: Crops > Rain Gauge
🧩 Main function
Lets you register the farm's rain gauges and weather stations, defining location, coverage and type of measurement (manual or automatic). These records are essential for:
- Historical weather analysis
- Agronomic decisions based on rainfall
- Technical monitoring of the fields
📝 Registration fields
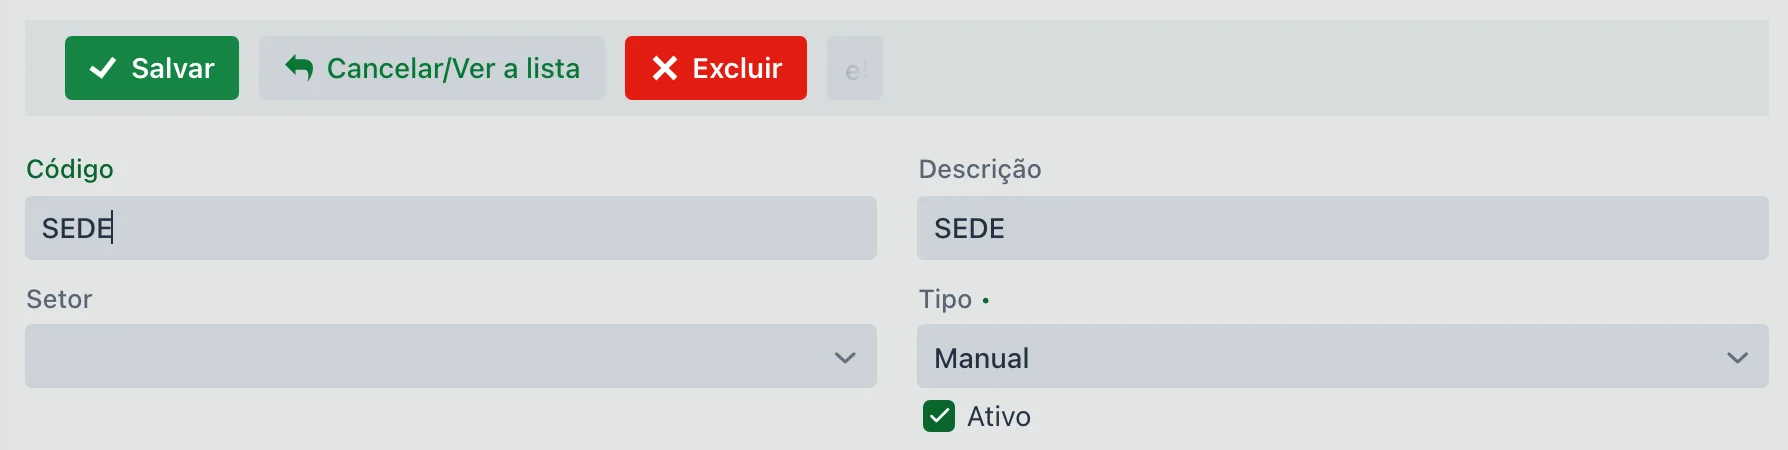
| Field | Description |
|---|---|
| Code | Identifier of the collection point. |
| Description | Name or identification of the rain gauge (e.g., South Station, TH01). |
| Sector | Internal grouping within the farm. |
| Type | Required. Manual, Davis V1 Station, Davis V2 Station or Agrosystem Station. It comes set to Manual. |
| Send to John Deere Operations Center | When checked, the rain gauge appears on the John Deere Operations Center map (Assets tab), with the rainfall and, for stations, the weather, updated every 30 minutes. It must be active, have latitude and longitude (Location tab), and the farm must be linked to the John Deere organization. See How the John Deere integration works. |
| Active | Defines whether the point is still available for new collections. |
The list shows Code, Description, Sector, Fields, Last Collection Date, Type, Has Temp., Has Hum., Has Wind Speed, API Link and Active, each column with its own search box. The Last Collection Date is the shortcut to find out which rain gauge stopped being read. The Reports ▼ button, at the top, opens the reports linked to the screen.
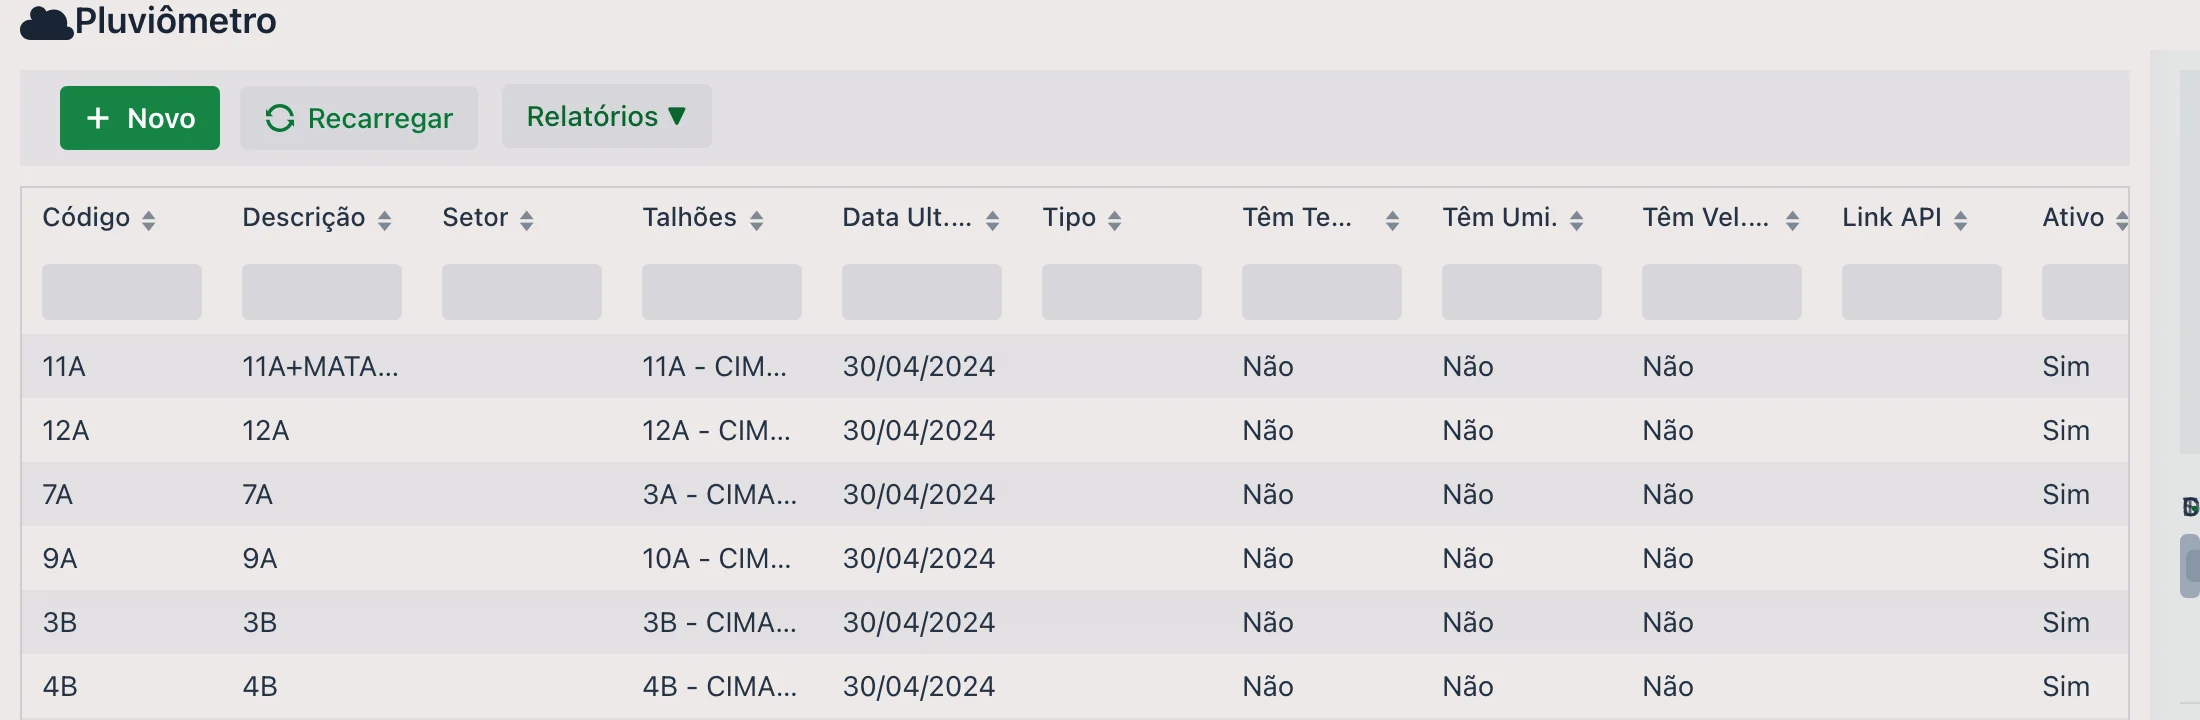
Fields that only appear for stations
When you choose a type other than Manual, the screen shows the integration fields — which stay hidden for a manual rain gauge:
| Field | Description |
|---|---|
| Key / Secret / API Link | Station access credentials, provided by the manufacturer or by the upCampo team. |
| Has Temp. / Has Hum. / Has Wind Speed | Check what that station measures: temperature, humidity and wind speed. A station that only measures rain keeps all three unchecked. |
🗂️ Available tabs
1. 🌾 Field
Lists the fields covered by this rain gauge. This ensures that, when you look up data for a field, the system knows which station to use as the reference.
You can link one field at a time, choosing it in the Field box and saving, or use the Import button: it opens the farm's list of fields, with Description, Sector and Code, so you can check several and bring them all in at once with Import selected.
2. 📍 Location
Defines the latitude and longitude of the point, allowing it to be shown on the map and used with GPS in the app.
- It can be filled in manually or captured through the app with geolocation
3. 🌧️ Collections
Lets you record rainfall collections:
- Manually in the web portal
- Automatically through the station integration
- Through the app, entering the rainfall volume collected
Each collection records:
| Field | Description |
|---|---|
| Date | Required. Day of the reading. |
| Rained? | Yes or No — it comes set to Yes. This choice defines the rest of the form (see below). |
| User | Who took the reading. |
| Minimum / Maximum Temperature | Temperatures for the day, when measured. |
| Humidity | Air humidity recorded. |
- Rained? = Yes → Millimeters appears, so you can enter the volume
- Rained? = No → Millimeters disappears and the weather Classification appears in its place: Sunny, Cloudy (few clouds), Cloudy (many clouds) or Thundering
Recording rainfall, step by step
- Open the rain gauge in the list and go to the Collections tab.
- Fill in the Date of the reading.
- With Rained? set to Yes, enter the Millimeters. If it did not rain, select No and choose the weather Classification.
- Click Save, on the Collections tab bar.
📱 The rain gauge in the app
In the field, the reading is entered through the upCampo app, in the Rain Gauge/Station menu. The list shows each rain gauge and station with the accumulated millimeters, the date of the last collection and of the last rain, and the fields it covers; stations also show temperature, humidity and wind. The other tabs are SUMMARY (rainfall charts per rain gauge), MAP and COLLECTIONS (the most recent readings from all of them).
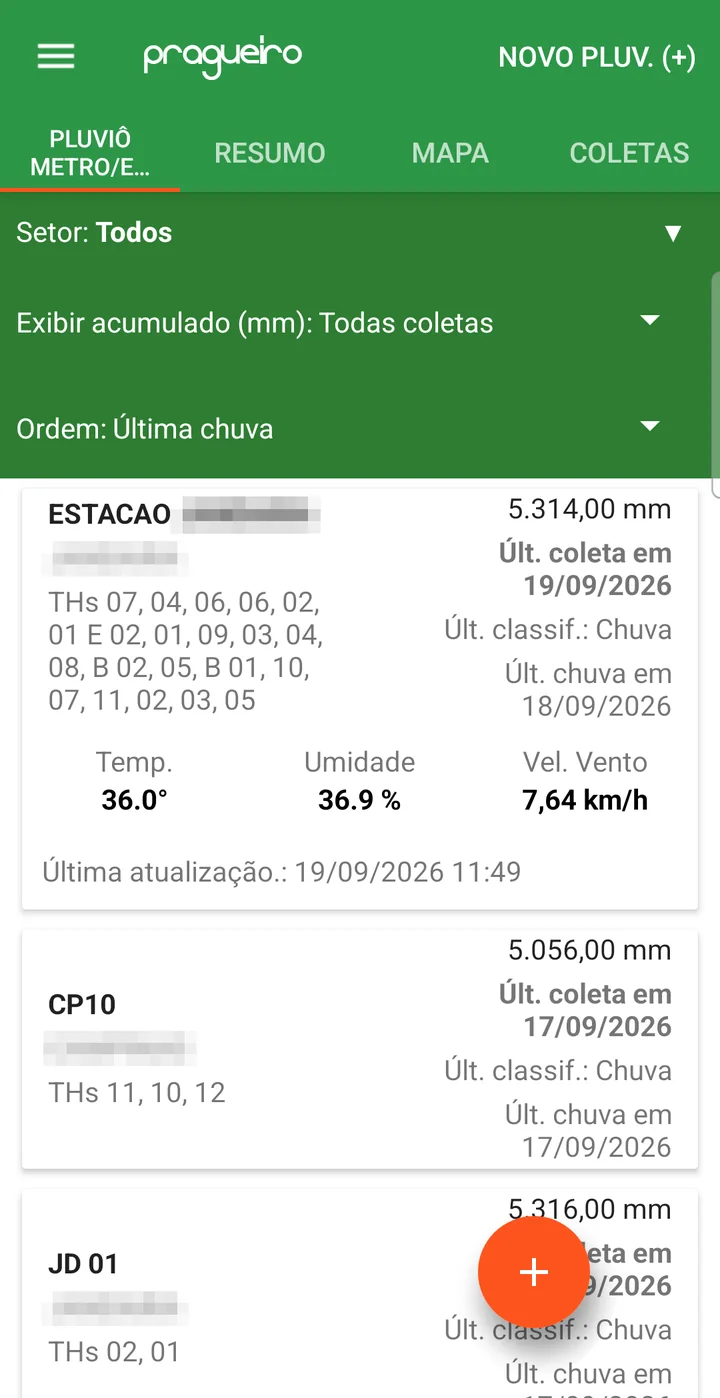
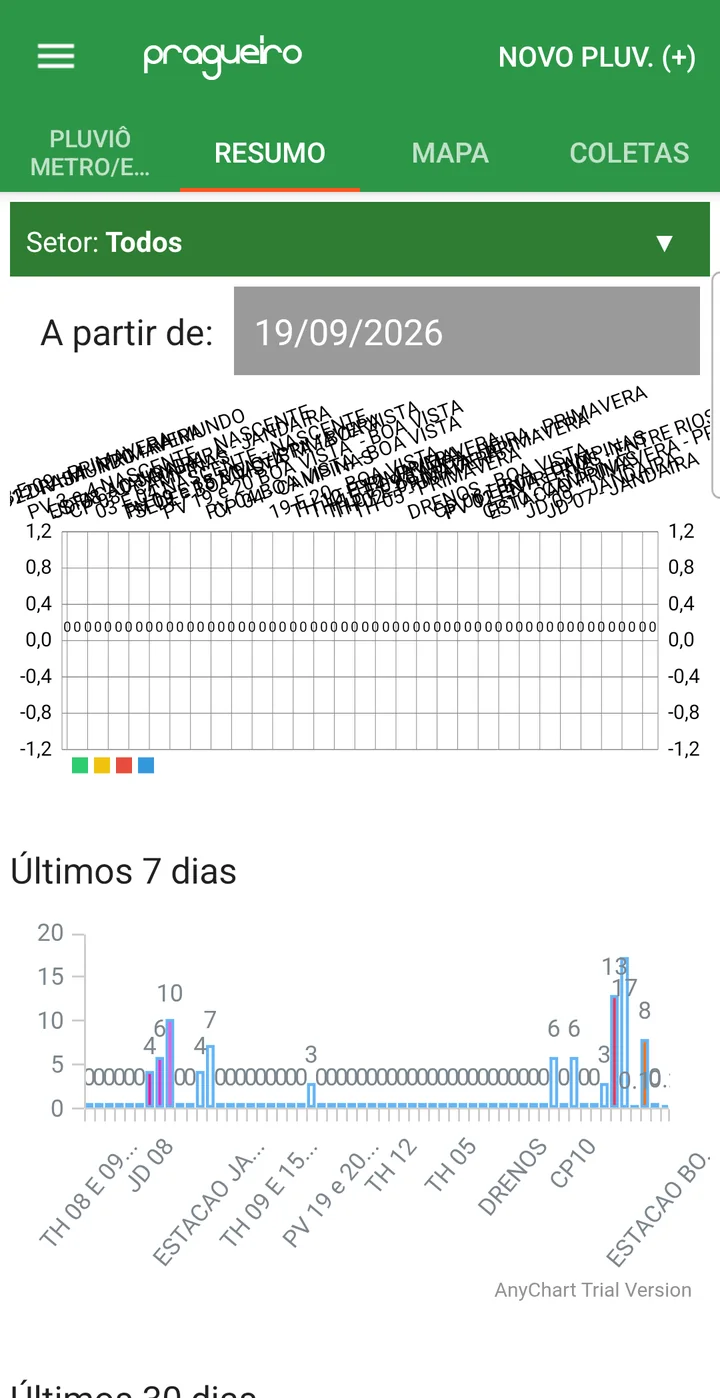
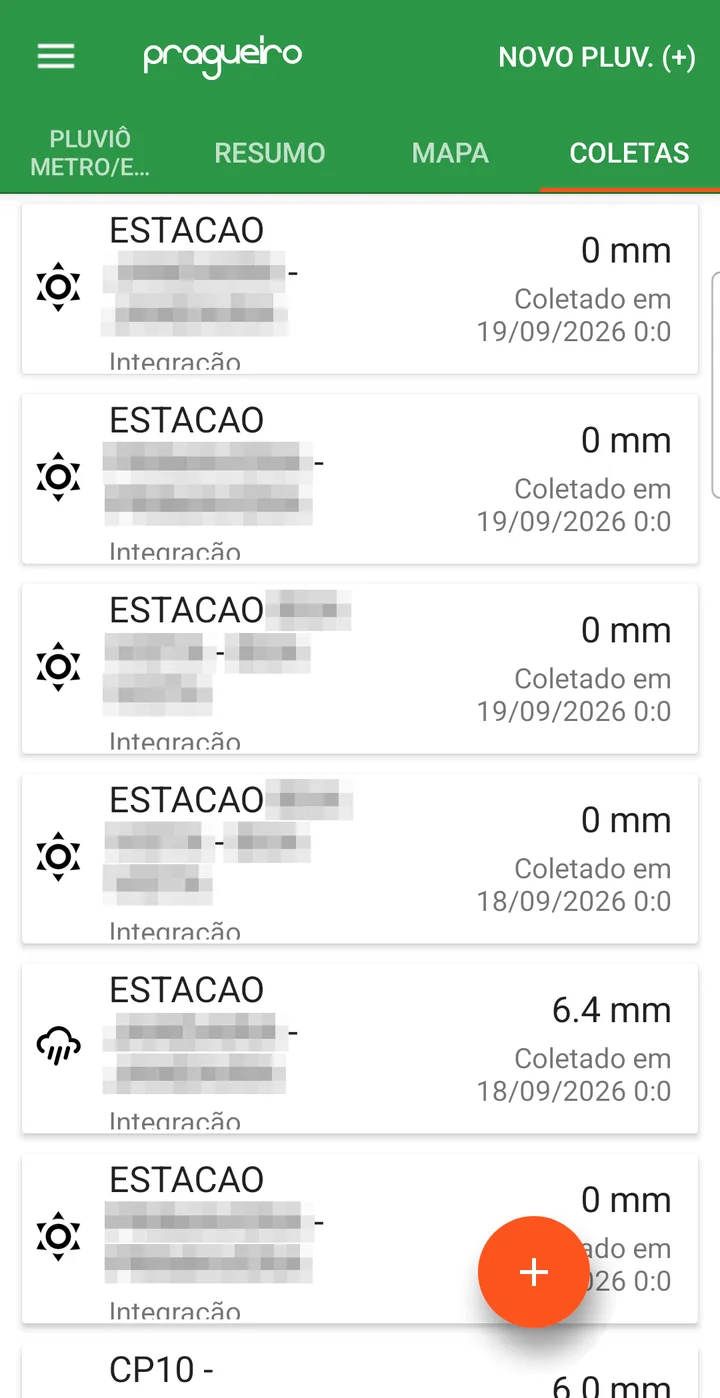
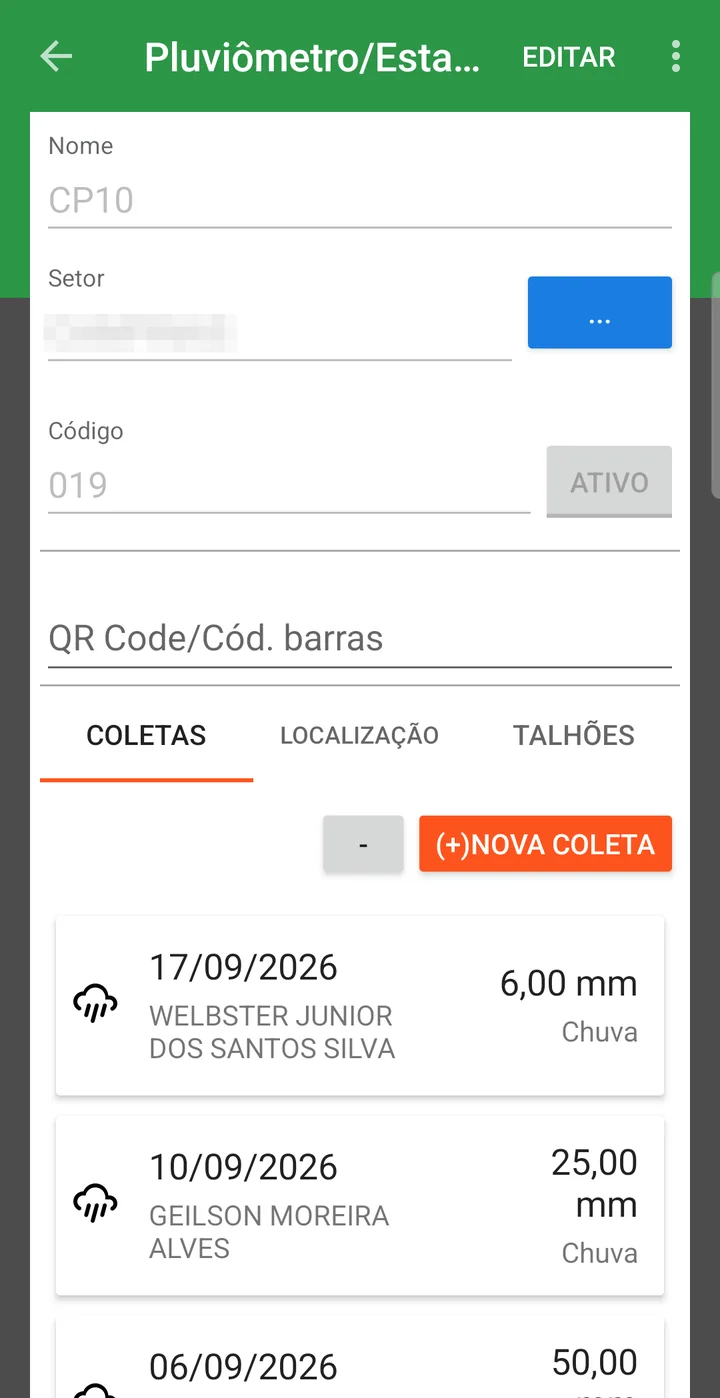
Recording rainfall in the app
- Tap the rain gauge in the list and, on the COLLECTIONS tab, tap (+)NEW COLLECTION.
- Check the Date, leave Rained? set to Yes and enter the Millimeters.
- Select the Type — Rain or Irrigation — and, if you have them, the maximum temperature, minimum temperature and humidity.
- Tap SAVE.
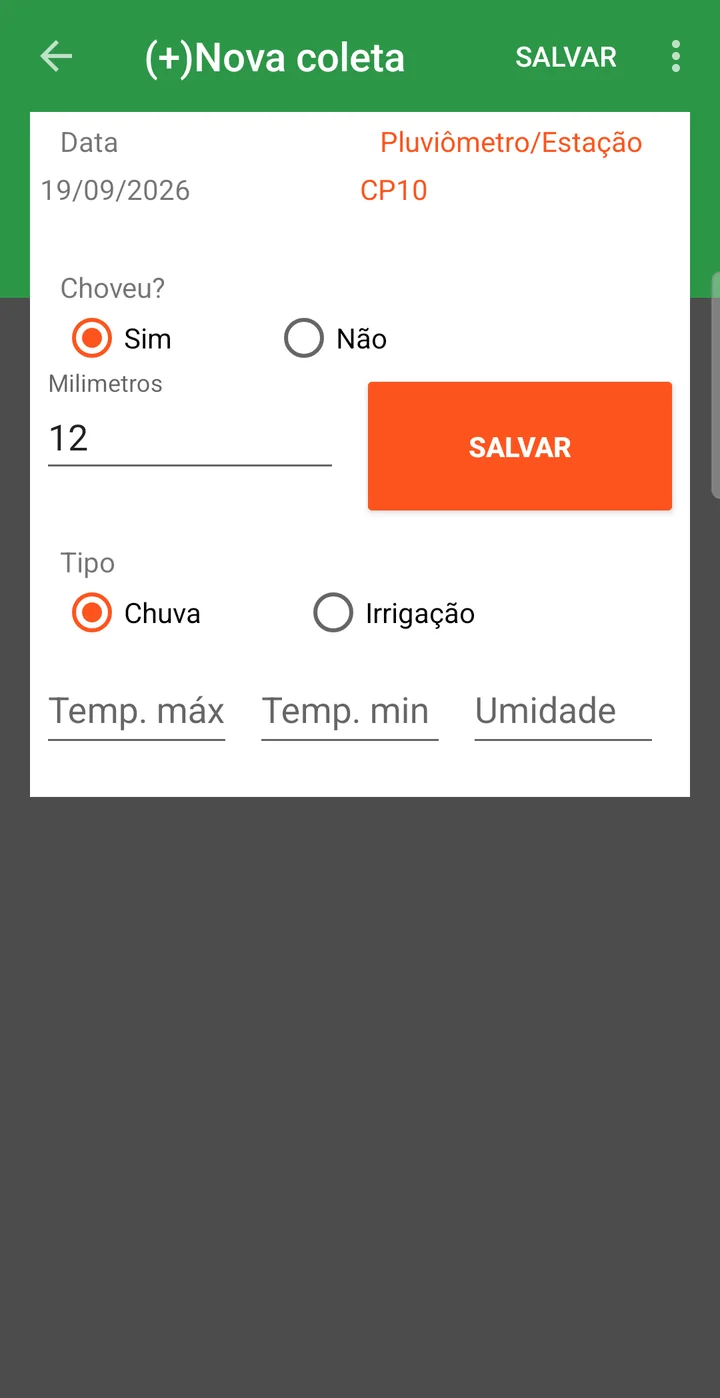
📊 Reports and dashboards
Available reports:
Gives an overview of the collections made per rain gauge.
Details each collection with date, volume and source (manual or automatic).
Weather & Stations & Rain Gauges dashboard
On the platform's home screen, there is a dashboard dedicated to weather tracking:
- It shows the rain gauges on a map with the rainfall recorded at each location
- It also offers a table view with historical data
Rainfall ranges
To classify rainfall as low, medium or high, the system uses:
- An automatic average based on the minimum and maximum values recorded
- Or ranges defined manually on the company settings tab
- You will have organized, historical rainfall data
- Reports and dashboards will bring data per field automatically
- Weather-based decision-making will be more accurate
- It enables integration with automatic weather stations
❓ Frequently asked questions
How do I record the farm's rainfall in the system?
On the rain gauge's Collections tab. It can be recorded in three ways: manually in the web portal, through the app in the field, or automatically, when the point is an integrated weather station.
What is the difference between a rain gauge and a weather station in upCampo?
It is the Type field in the record. A Manual rain gauge depends on someone recording the reading; stations — Davis V1, Davis V2 and Agrosystem — send data automatically through integration and require a key, secret and API link. In both cases the record is created on this same screen.
My station measures temperature and wind. Do I need to set anything up?
Yes: check Has Temp., Has Hum. and Has Wind Speed according to what that equipment measures. These options only appear when the type is a station, and they are what make the system expect (or not) that data in the integration.
How does the system know which rainfall to use for each field?
Through the Field tab, where you list the fields covered by that collection point. That link is what makes the reports bring rainfall per field automatically.
How do I record a day without rain?
Select Rained? = No in the collection. The Millimeters field disappears and the weather Classification appears in its place — Sunny, Cloudy (few clouds), Cloudy (many clouds) or Thundering. Don't enter zero millimeters with "Yes": the system refuses it, because with "Yes" the volume must be greater than zero.
How do I link several fields to the same rain gauge at once?
On the Field tab, use the Import button: it opens the farm's list of fields so you can check as many as you want and confirm with Import selected. One at a time also works, through the Field box.
How do I find out which rain gauge stopped being read?
Through the Last Collection Date column in the list, which shows the date of the last reading for each point. Sorting by it brings the forgotten rain gauges to the top.
How does the system classify rainfall as low, medium or high?
By default it uses an automatic average, calculated from the lowest and highest values recorded. If you prefer your own criteria, define the rainfall ranges manually on the company settings tab.
📘 Screen: Scouting
Scouting is the record of pest monitoring done in the field: the scout walks the field, stops at a few points along the way and records what was found at each stop. There is no fixed grid or position set by the system — where to stop and how many times is up to the scout and the farm's routine. In upCampo this work is done on the phone, point by point, and this screen is where the agronomist reviews, corrects and — occasionally — adds what came in from the app.
From these points the system builds the field's result: the average occurrence of each pest and the comparison with the registered action threshold, which tells you whether it is time to spray. Since the total number of points walked is the divisor of the averages, stopping more often gives a truer picture of the area. And a point entered wrong doesn't spoil only that point — it goes into the average for the whole field on that day.
📍 Location in the system
Menu: Crops > Scouting
🧩 Main function
Scouting is done in the field, with the app — that is where the scout opens the point, counts the pest and takes the photo. This web portal screen exists for what the app doesn't handle: reviewing what came in, correcting a wrong entry and making an occasional addition, when someone scouted without the phone or forgot to enter it.
It is ideal for:
- Reviewing the data received
- Correcting small pieces of information
- Occasionally adding a point that was not entered in the app
- Deleting wrong records
Each record contains:
- Date and time of the scouting
- Crop, field, variety
- DAE, plant height and nodes
- Collection points and quantities of pests found
- Photos taken at the time of collection
🔎 The list
The list opens filtered by Season and Date — the date is required, and it defines the scouting day you are reviewing. The columns are Field, Variety, Crop, Date, Stage, User, Point, Opening, Pests, Size, Preset Value and Value, each with its own search box.
📝 Record fields
| Field | Description |
|---|---|
| Date and time | When the point was scouted. |
| Point | Number of the point within the field. |
| Season Planting | The planting scouted — it is what ties together field, crop and season. |
| Variety | The cultivar at the point, when the planting is split by variety. |
| Stage | The growth stage at the time of collection, among those registered for the crop. |
| Latitude and Longitude | Where the point was taken. They come filled in when the record came from the app. |
| User | Who did the scouting. |
🔀 "Point Opening": two different records on the same screen
The Point Opening checkbox swaps the whole form. It is what separates the record of the plant from the record of the pest:
Unchecked — pest count
This is the entry for a pest found at the point:
- Type: Plant, Beat Sheet, Meter or Assessment — the method used for the count
- Plant Qty: how many plants were assessed
- Pests: the pest, weed or disease found
- Size: the stage/size of the individual, when the pest is counted that way (small, medium, large caterpillar)
- Value: the count
When the selected pest or size has preset values registered, a list of ready-made options to select appears instead — this speeds up counting in the field and feeds the Preset Value column in the list.
Checked — plant data
This is the point opening record, with the growth measurements. Everything related to pests disappears and a grid of checkbox + value pairs appears: you check what was measured and enter the number next to it. The fields cover:
- Growth: height, number of nodes, internode distance, height of the first to the fifth node and depth
- Population: stand, plants per meter and number of stems
- Soybean: number of pods, height of the first pod and seeds per pod
- Cotton: squares, bolls (small, medium, large and total), bolls by position — from 1 to 5 —, rotten boll, open bolls and boll weevil
These are the measurements that feed the comparison with the ideal vegetative growth of the variety and the crop.
🧮 How upCampo turns points into a result
What the scout enters is the count at each point. The number the agronomist looks at — and that is compared with the action threshold — comes from a calculation over all the points in that field on that day. The form of that calculation comes from the Calculation method field in the pest record:
An example: 10 points walked, pest found in 4 of them, 20 individuals counted in total.
| Calculation method | Math | Result |
|---|---|---|
| Simple sum | — | 20 |
| Average per point | 20 ÷ 10 | 2.0 per point |
| Average per occurrence | 20 ÷ 4 | 5.0 per point with pest |
The difference between the two averages is what usually causes confusion: Average per point spreads the pest across the whole field and answers "what is the average pressure on the area"; Average per occurrence looks only where it appeared and answers "where there is some, how much is there". A concentrated hot spot gives a low average per point and a high average per occurrence — and that contrast is exactly what indicates a localized infestation rather than a widespread one.
In the IPM Standard, the result depends on the type of scouting: for beat sheet and m², it is the average per point; per linear meter, the value is expressed per meter; for counting per plant, it becomes a percentage.
📊 Dashboards and overall view
On the platform's home screen there is a dedicated dashboard called Scouting, where the data is analyzed in a consolidated way.
There the agronomist can:
- See scouting grouped by date and field
- Analyze each collection point in detail
- See the map with the georeferenced points
- Check the photos taken in the field
- Check the crop stage at the time of collection
- Access the pest history by field, with comparative data
📱 Scouting in the app
What this screen shows in the web portal starts in the app, in the Scouting (IPM) menu. That is where the scout opens the points and counts the pests — the step by step, with screenshots, is in the Quick Guide - Pest Monitoring. Besides collecting, the scout can look up on the phone itself what has already been done:
- Field history — tapping the field, the app shows the map of the area and, on the IPM HISTORY (SUMMARY) tab, each scouting with the date, who did it, the stage, days after planting, number of points and the values recorded, with the REPORT and DETAIL buttons. Next to it are the WORK ORDER/APPL. and DETAILS tabs.
- MAP — the farm's fields on the map, with a sector filter and legend.
- IPM MGMT ANALYSES — the management view of scouting, by period and user.
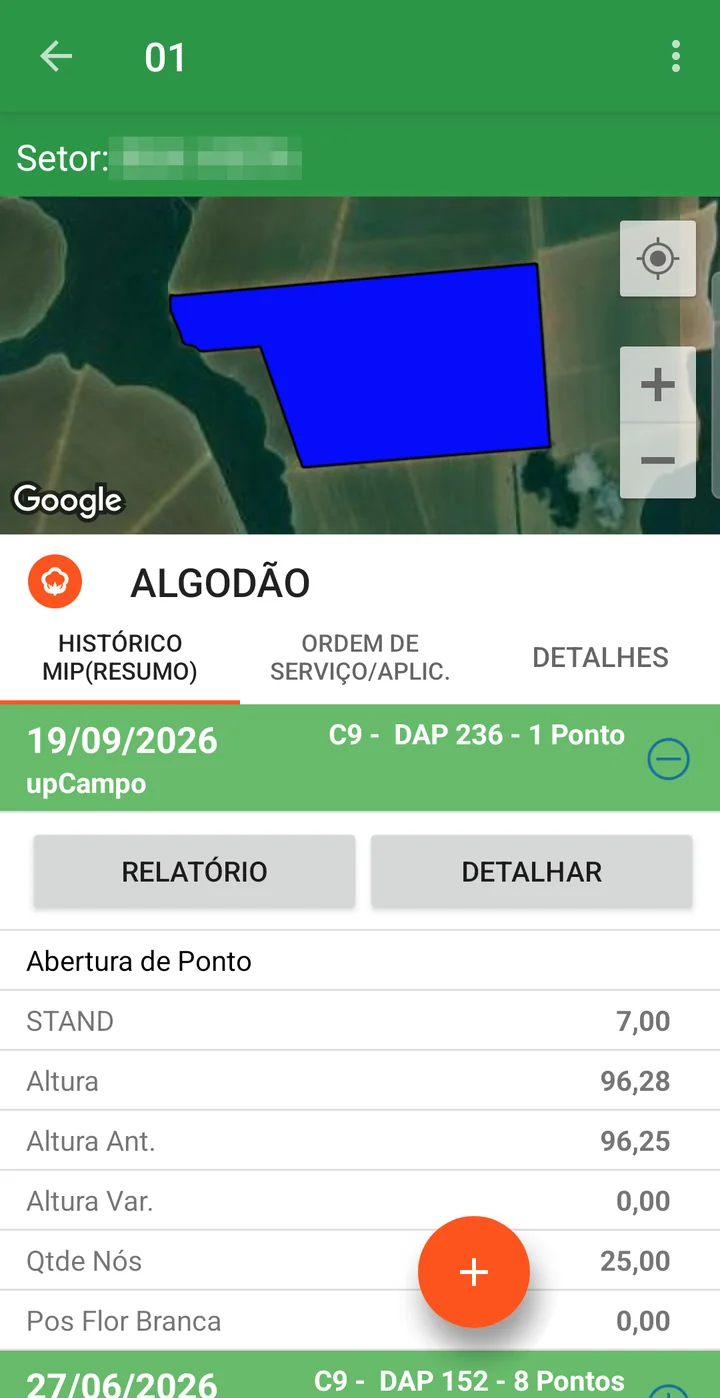
📊 Related reports
Crops serve as the basis for several reports on the platform. Some of them are:
Shows the scouting in detail, point by point, pest by pest, as well as the location of the points taken, plus photos and observation. ⚠️ Important: be careful with the period — since the report has photos, maps and lots of detail, generating it for long periods can be slower.
A bit more condensed, without the map, ideal for large volumes of data.
Shows overall statistics for the scouts, ideal for team management.
- The system gives a clear view of the crop's pest and disease situation
- Management decisions become more accurate
- The pest history by field lets you spot patterns and act preventively
Scouting on the phone is up.Monitora, upCampo's pest monitoring module.
❓ Frequently asked questions
How do I enter pest scouting through the web portal?
You can, but it is not the normal path: scouting is done in the field, with the app. Use the New button on this screen for an occasional addition — a point someone scouted without the phone, for example — or to correct and delete what already came from the app.
What is the "Point Opening" checkbox for?
It swaps the form. Unchecked, you record a pest found: count type, pest, size and value. Checked, you record the plant measurements — height, nodes, stand, pods, bolls, open bolls and so on. They are two different records at the same point.
What is the difference between Plant, Beat Sheet, Meter and Assessment?
It is the counting method used at that point. Which ones are available for your crop is defined in the Crop record, in the pest monitoring section — where you also choose which one is selected by default.
What is the "Preset Value" shown in the list?
These are ready-made count options, registered for that pest or size. When they exist, the operator selects the option instead of typing the number — which speeds up collection in the field and standardizes the record.
What information comes from the field with each scouting?
Date and time, crop, field and variety, DAE, plant height and nodes, the collection points with the quantities of pests found, and the photos taken at the time of collection.
Where can I see scouting in a consolidated view?
On the Scouting dashboard, on the platform's home screen. There the agronomist sees the data grouped by date and field, the map with the georeferenced points, the photos, the crop stage and the pest history by field.
I recorded a scouting wrong in the field. Can I fix it?
Yes. This screen lets you adjust small pieces of information and also delete the record when it is wrong.
🧩 Extra: Node-by-node phenological mapping
Node-by-node phenological mapping is the plant-by-plant record of what is at each position of each reproductive node of the cotton plant: square, flower, boll, open boll or aborted structure. In upCampo it has three parts: collection in the app, done by the scout in the field; the phenology dashboard, which draws the plant node by node from that collection; and the reports, especially MON.02.01 (formerly 001.N) - Summary Phenology and MON.02.05 (formerly 001.M) - Detailed Phenology.
What this map answers is where the plant is holding its load and where it is losing it: at which nodes the bolls set, at what height on the plant abortion is concentrated, how much has already opened. That is information the count of squares and bolls per meter doesn't give, because it says how much there is, but not where.
- The scout measures the plant in the app, within the scouting: height, vegetative nodes and, node by node, what is at each position on the branch.
- The phone syncs and, within a few minutes, upCampo turns each plant into a drawing of the plant.
- The agronomist reads the plant on the dashboard, in the field summary or plant by plant, and compares dates or fields side by side.
- The reports bring the same data in numbers and on paper: MON.02.01 (formerly 001.N) with the field's percentages and averages, MON.02.02 (formerly 001.M2) with each plant's drawing.
📍 Where each part is
| Part | Where |
|---|---|
| Collection | App, Scouting (IPM) menu → field → New Scouting → Detailed Cotton Phenology class |
| Dashboard | The Phenology page, opened at the dedicated address upCampo gives the farm — it is not in the web portal menu |
| Reports | Web portal, Reports menu, Survey theme: MON.02.01 (formerly 001.N) - Summary Phenology and MON.02.05 (formerly 001.M) - Detailed Phenology |
1. Collection in the app
App: Scouting (IPM) > New Scouting > Detailed Cotton Phenology
The measurement happens within a regular scouting. After opening the point, the scout selects the Detailed Cotton Phenology class in the pest list, chooses the plant (Plant 1, Plant 2…) and fills in its screen:
- Height, Veg. Node Qty (vegetative nodes) and Veg. Square Qty (vegetative squares).
- One tap on + for each reproductive node. The grid gets one row per node, numbered from the last vegetative node — with 6 vegetative nodes, the first reproductive one is Node 7. The Total Node Qty is calculated automatically.
- On each node, positions 1 to 5 on the branch, from closest to the stem to farthest. Each tap advances one state: Abs. (absent) → Square → Flower → Boll → Open (open boll) → Abor. (aborted).
- SAVE.
The complete step by step for the plant screen, with all the screenshots, is in the Quick Guide - Pest Monitoring.
Absent positions are not saved. The app saves one record for each measurement and one for each position marked with a state; whatever was left as Abs. does not become a record. This matters when reading the percentages, further below.
Counting structures per meter
A second measurement goes into the same scouting; it is not by node and feeds the MON.02.03 (formerly 001.O) report: the Structure per meter pest. It appears in the point's pest list, inside the class of the same name, and instead of a grid it opens four fields to type in:
| Field | What to enter |
|---|---|
| Meters assessed | The stretch of row walked at that point. How much to measure is up to the farm — in the cotton scouting for the 2026 season, most use 5 meters per point. |
| Total plants | How many plants there are in that stretch. This is where the report's stand per meter comes from. |
| Total structures | How many structures were counted in the stretch. |
| Average weight | The average weight of the structure, in grams. It goes straight into the arroba estimate; in the 2026 season the values entered range between 4 and 5.5 g. |
The report adds up the field's points: with 6 points of 3 meters, for example, it shows 18 meters assessed and the total plants and structures from all of them. This count produces the stand, the average per meter and the estimated @ in MON.02.03 (formerly 001.O).
2. The phenology dashboard
Phenology page (the farm's dedicated address)
The dashboard shows the cotton plant as it is in the field: the stem in the center, the reproductive nodes rising and alternating sides, and on each branch positions 1 to 5 with the letter and color of what was found. It opens with the header and an empty comparison area.
In the header:
| Item | What it does |
|---|---|
| Legend | B Square (orange), F Flower (white), M Boll (green), C Open boll (blue), A Abortion (dark red) and P Rotten (brown). The app doesn't have the Rotten state in the plant grid, so it doesn't show up in collections made there. |
| Side by Side / Vertical | How comparisons are arranged: all in the same strip, one next to the other, or one below the other. |
| Add comparison | Opens another comparison area (Comparison 2, 3…), each with its own filters. |
In each comparison:
| Field | Description |
|---|---|
| Field | The field, variety and scouting date, on a single line — for example, 03 - … - TMG 21 GLTP - 30/06/2026. Each measured date is one item: the same field appears once per collection day. |
| Type | Summary, Summary with % or Per plant (point by point) — explained below. |
| Zoom | Size of the drawings, from 50 to 200. Increase it to read the percentages. |
| Date | Filters the Field list to show only scouting from that day. Left empty, the list shows all dates. |
| Remove | Takes the comparison off the screen. |
Each drawing has, in the corner, the ‹ and › arrows, which change the order of the drawings, and the ✕, which removes that drawing from the screen. None of this changes data: the dashboard is view-only, and whatever you rearrange goes back to normal when the page is reloaded.
Summary
A single plant drawing, representing the field on that day. At each node and position, the most frequent state among the plants measured appears. It is the quick read: where the load is, where the abortion is.
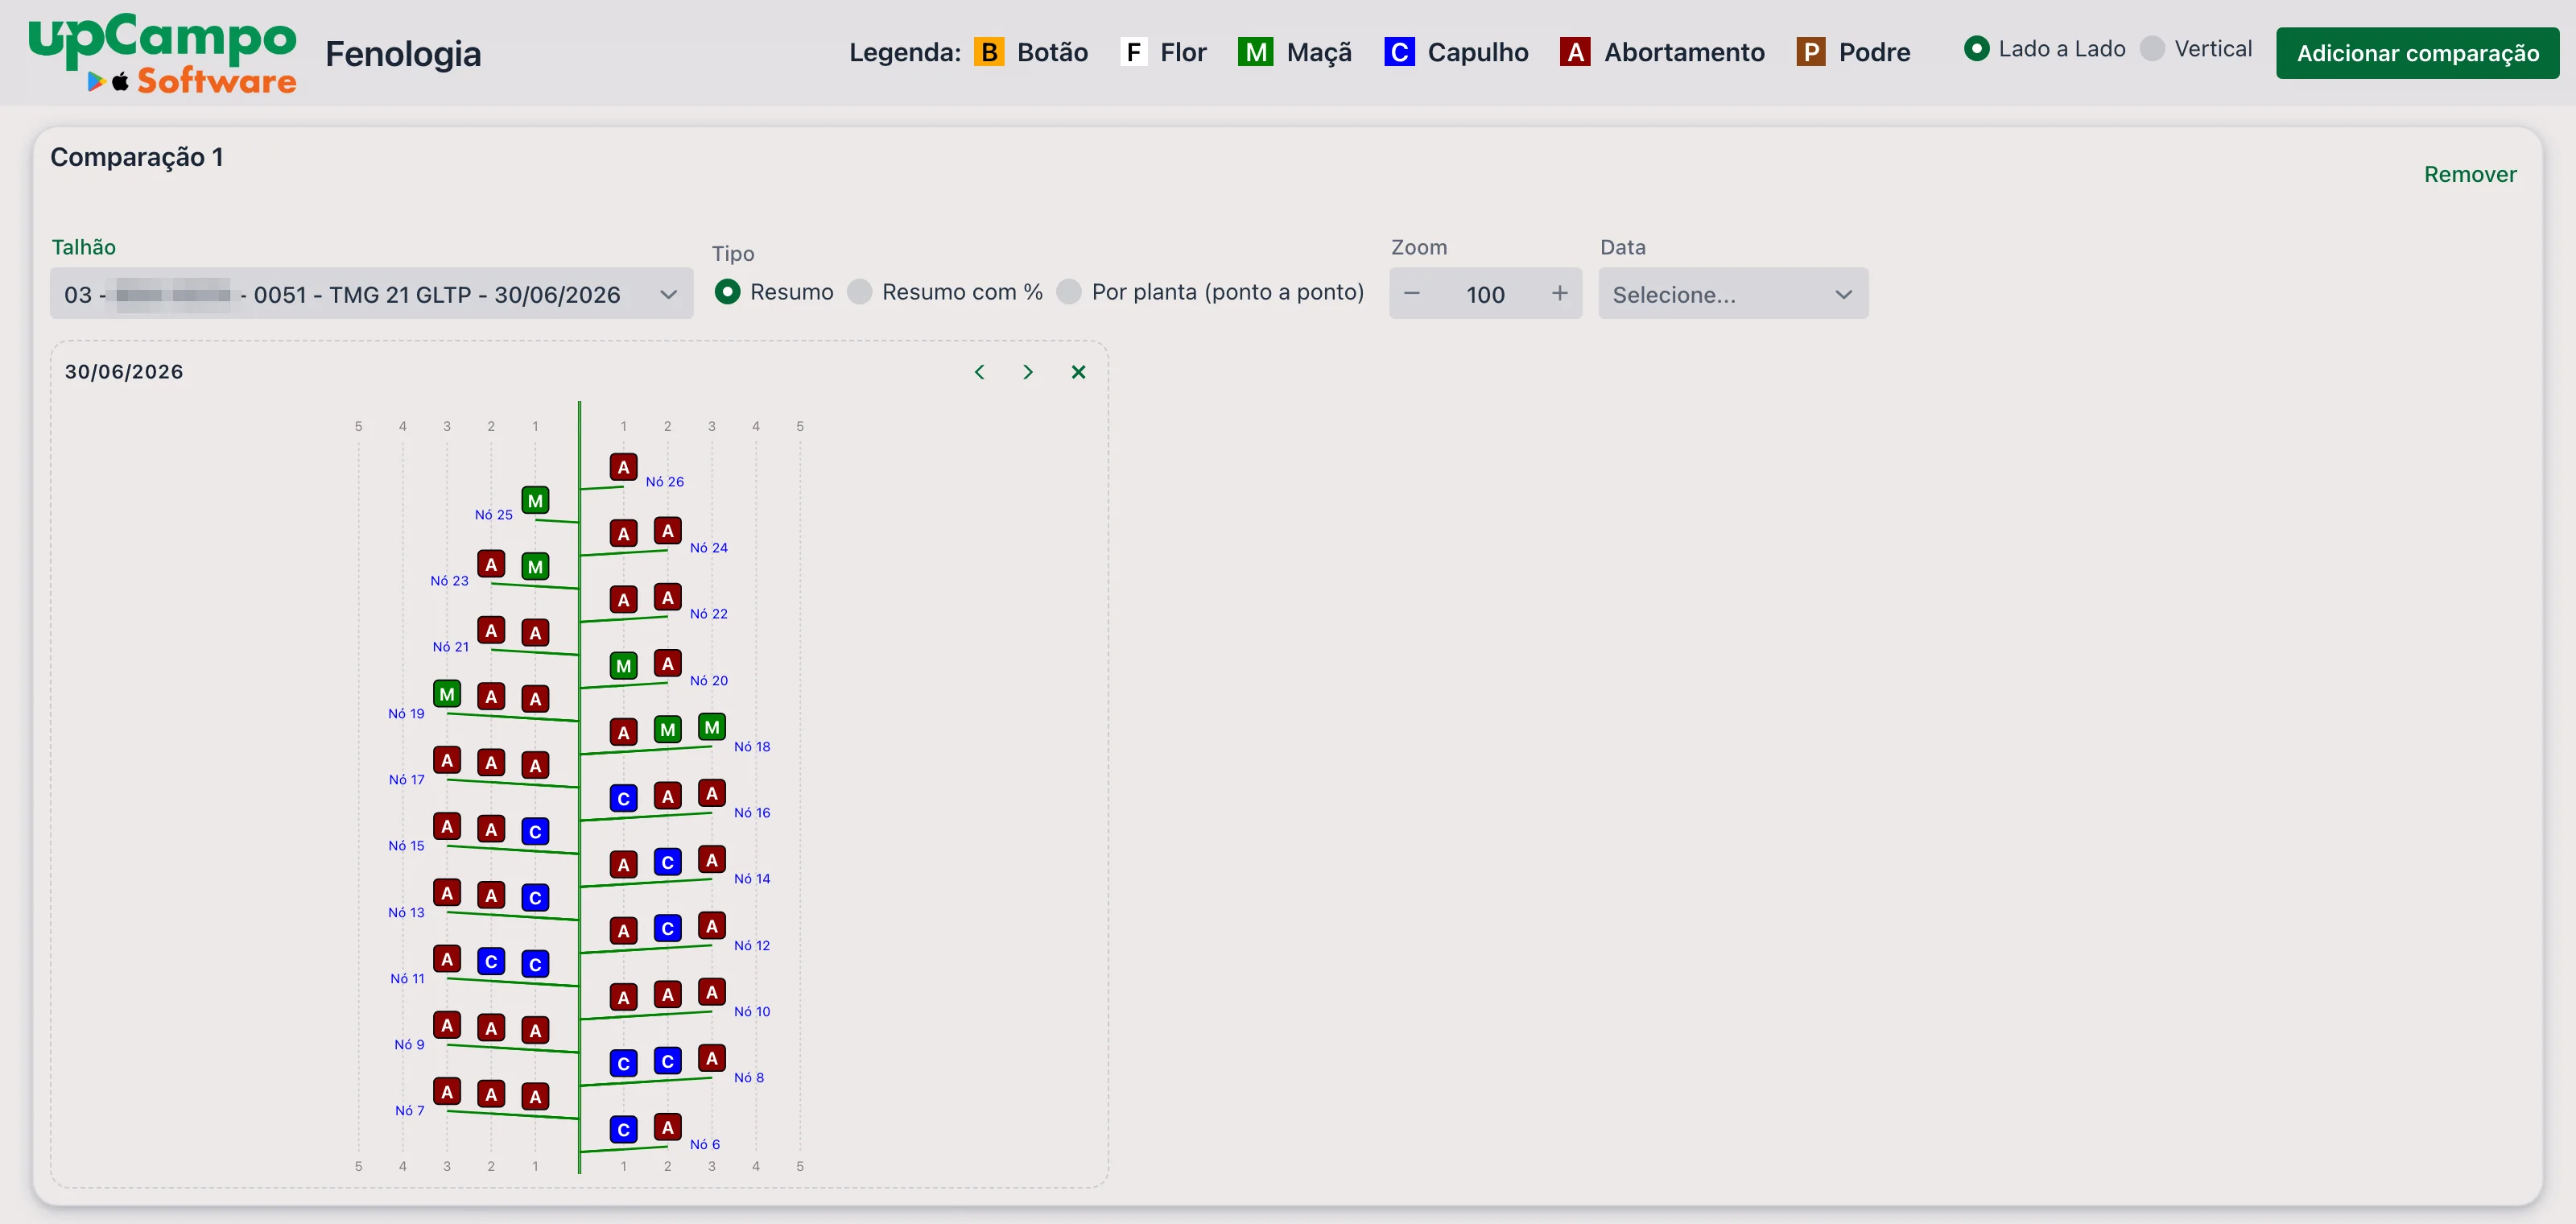
Summary with %
The same drawing, but at each position all the states found appear, stacked, each with its percentage. In the example below, position 1 on Node 25 shows A 50% and M 50%: half the plants had an aborted structure there, half a boll.
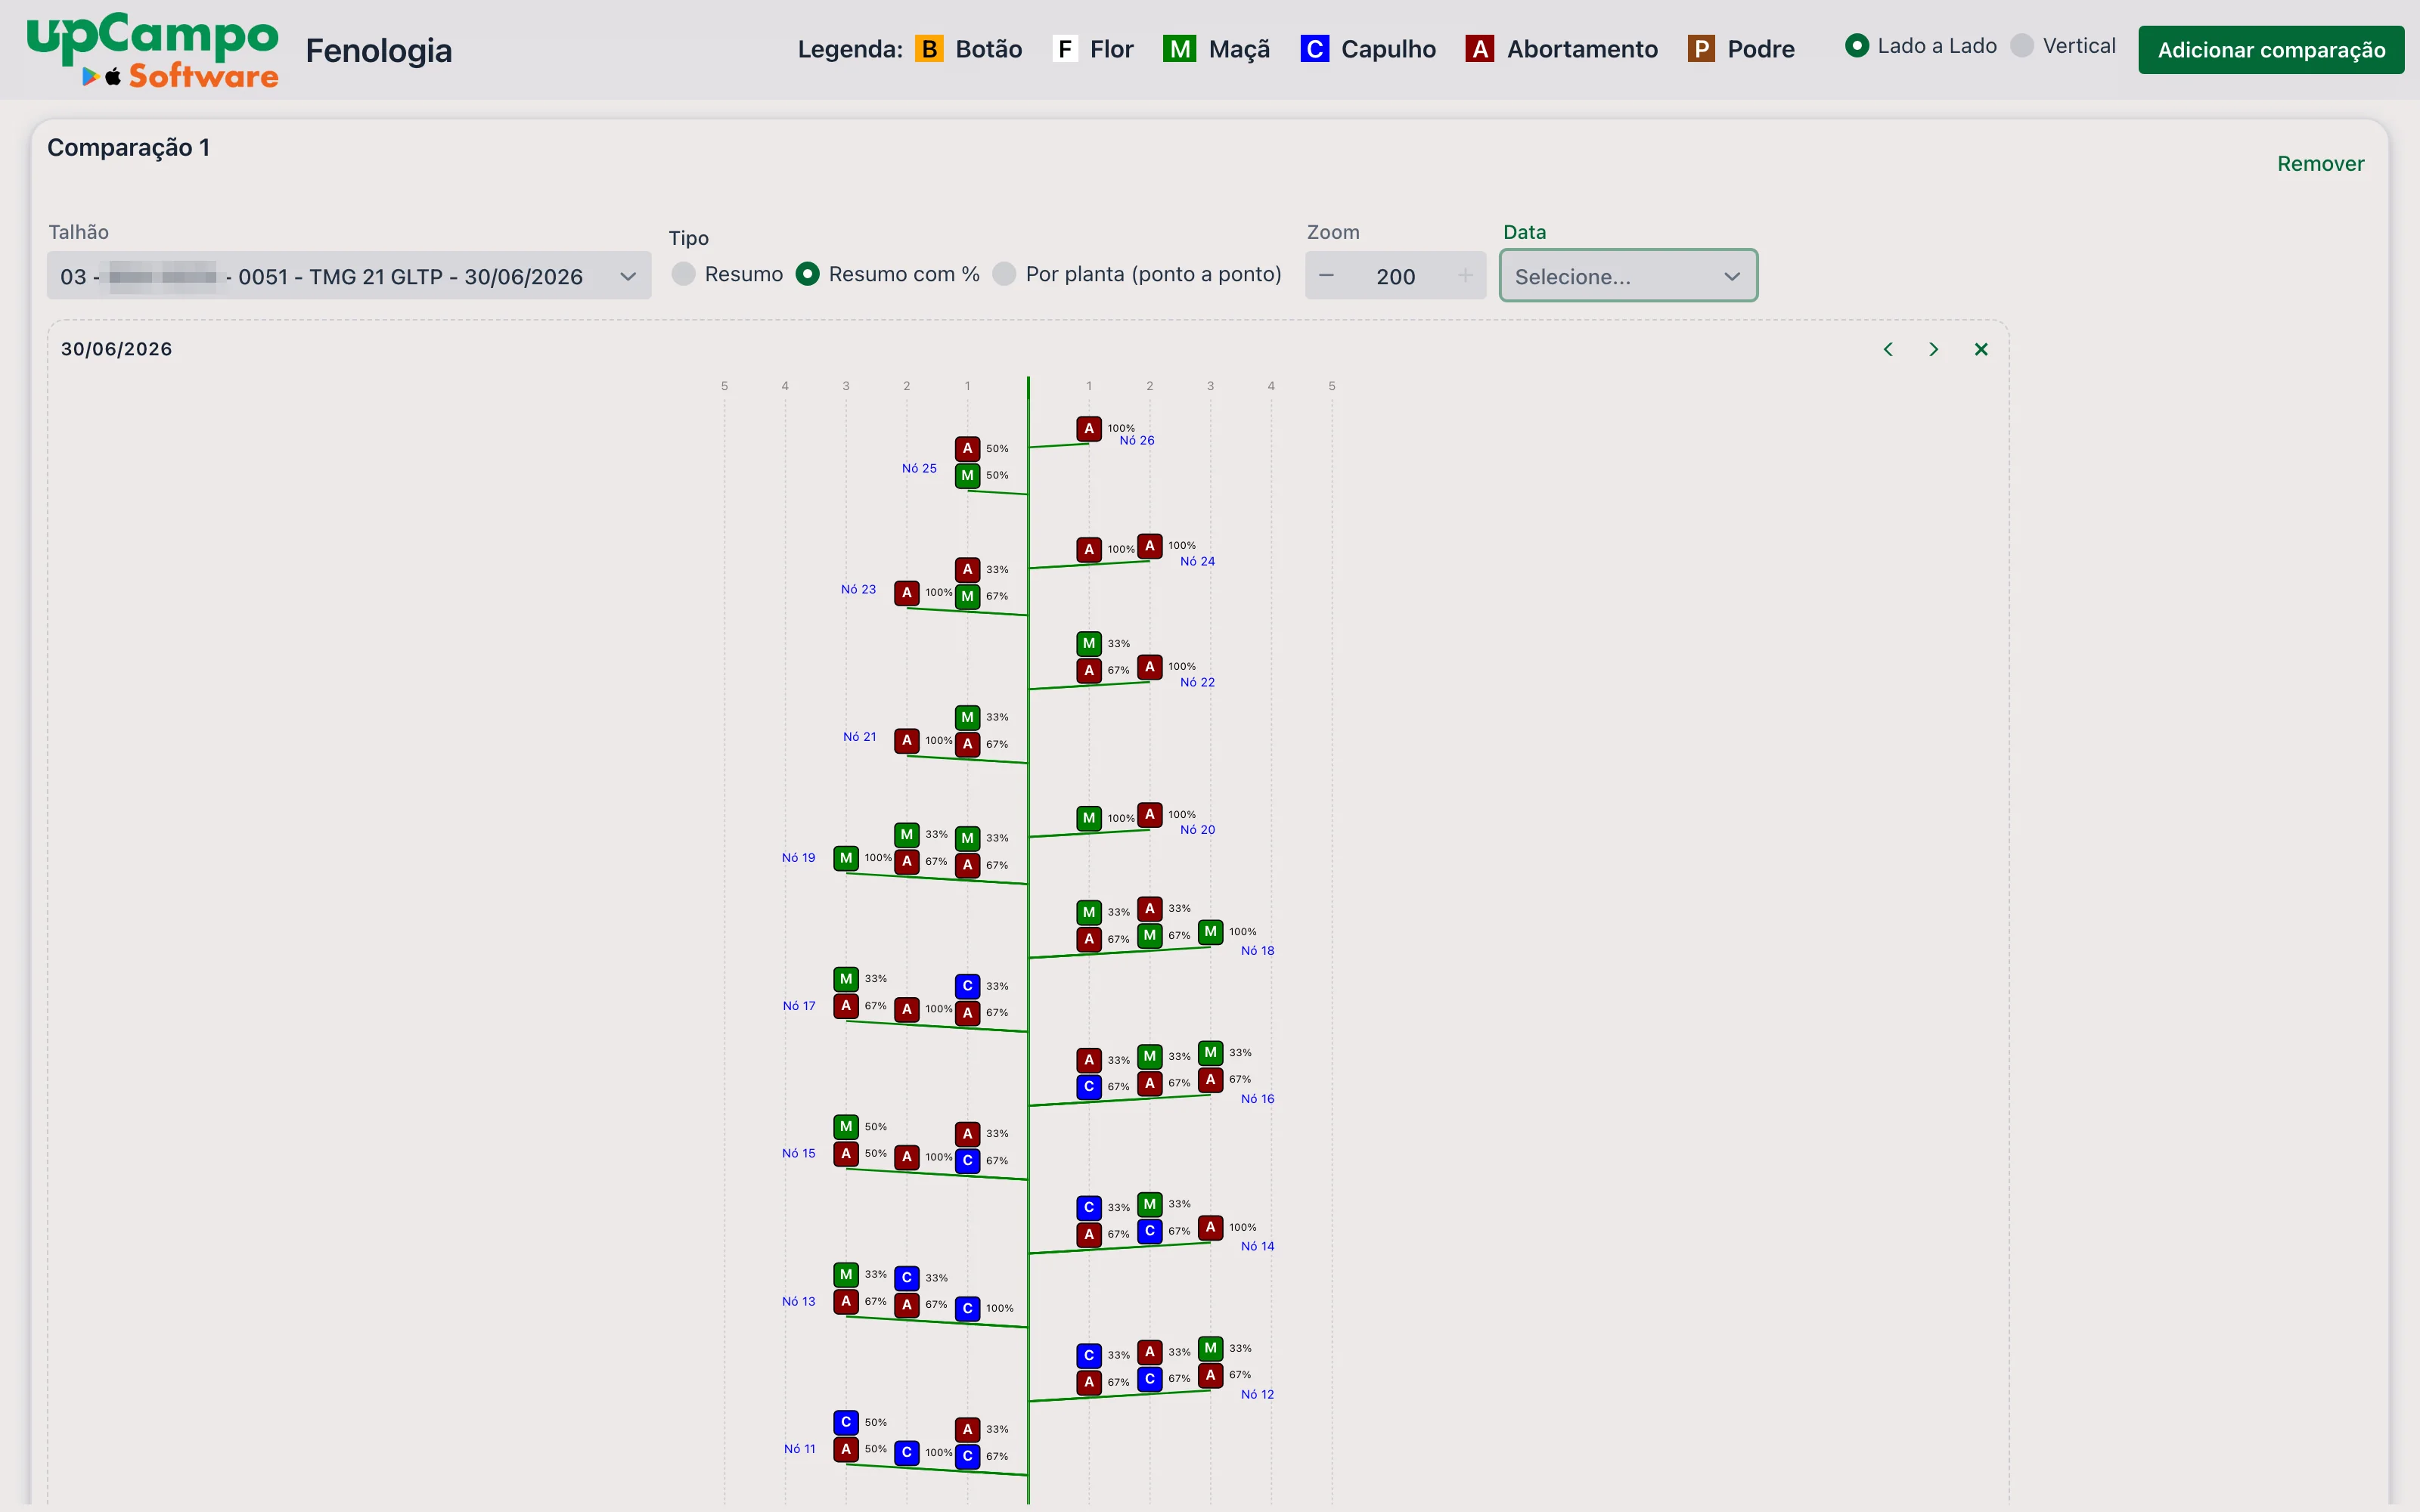
Per plant (point by point)
One drawing for each scouting point — that is, for each plant measured. The title of each drawing shows the date, the scout who measured and the point number. This is where you check the variation between plants and find a measurement that is out of line.
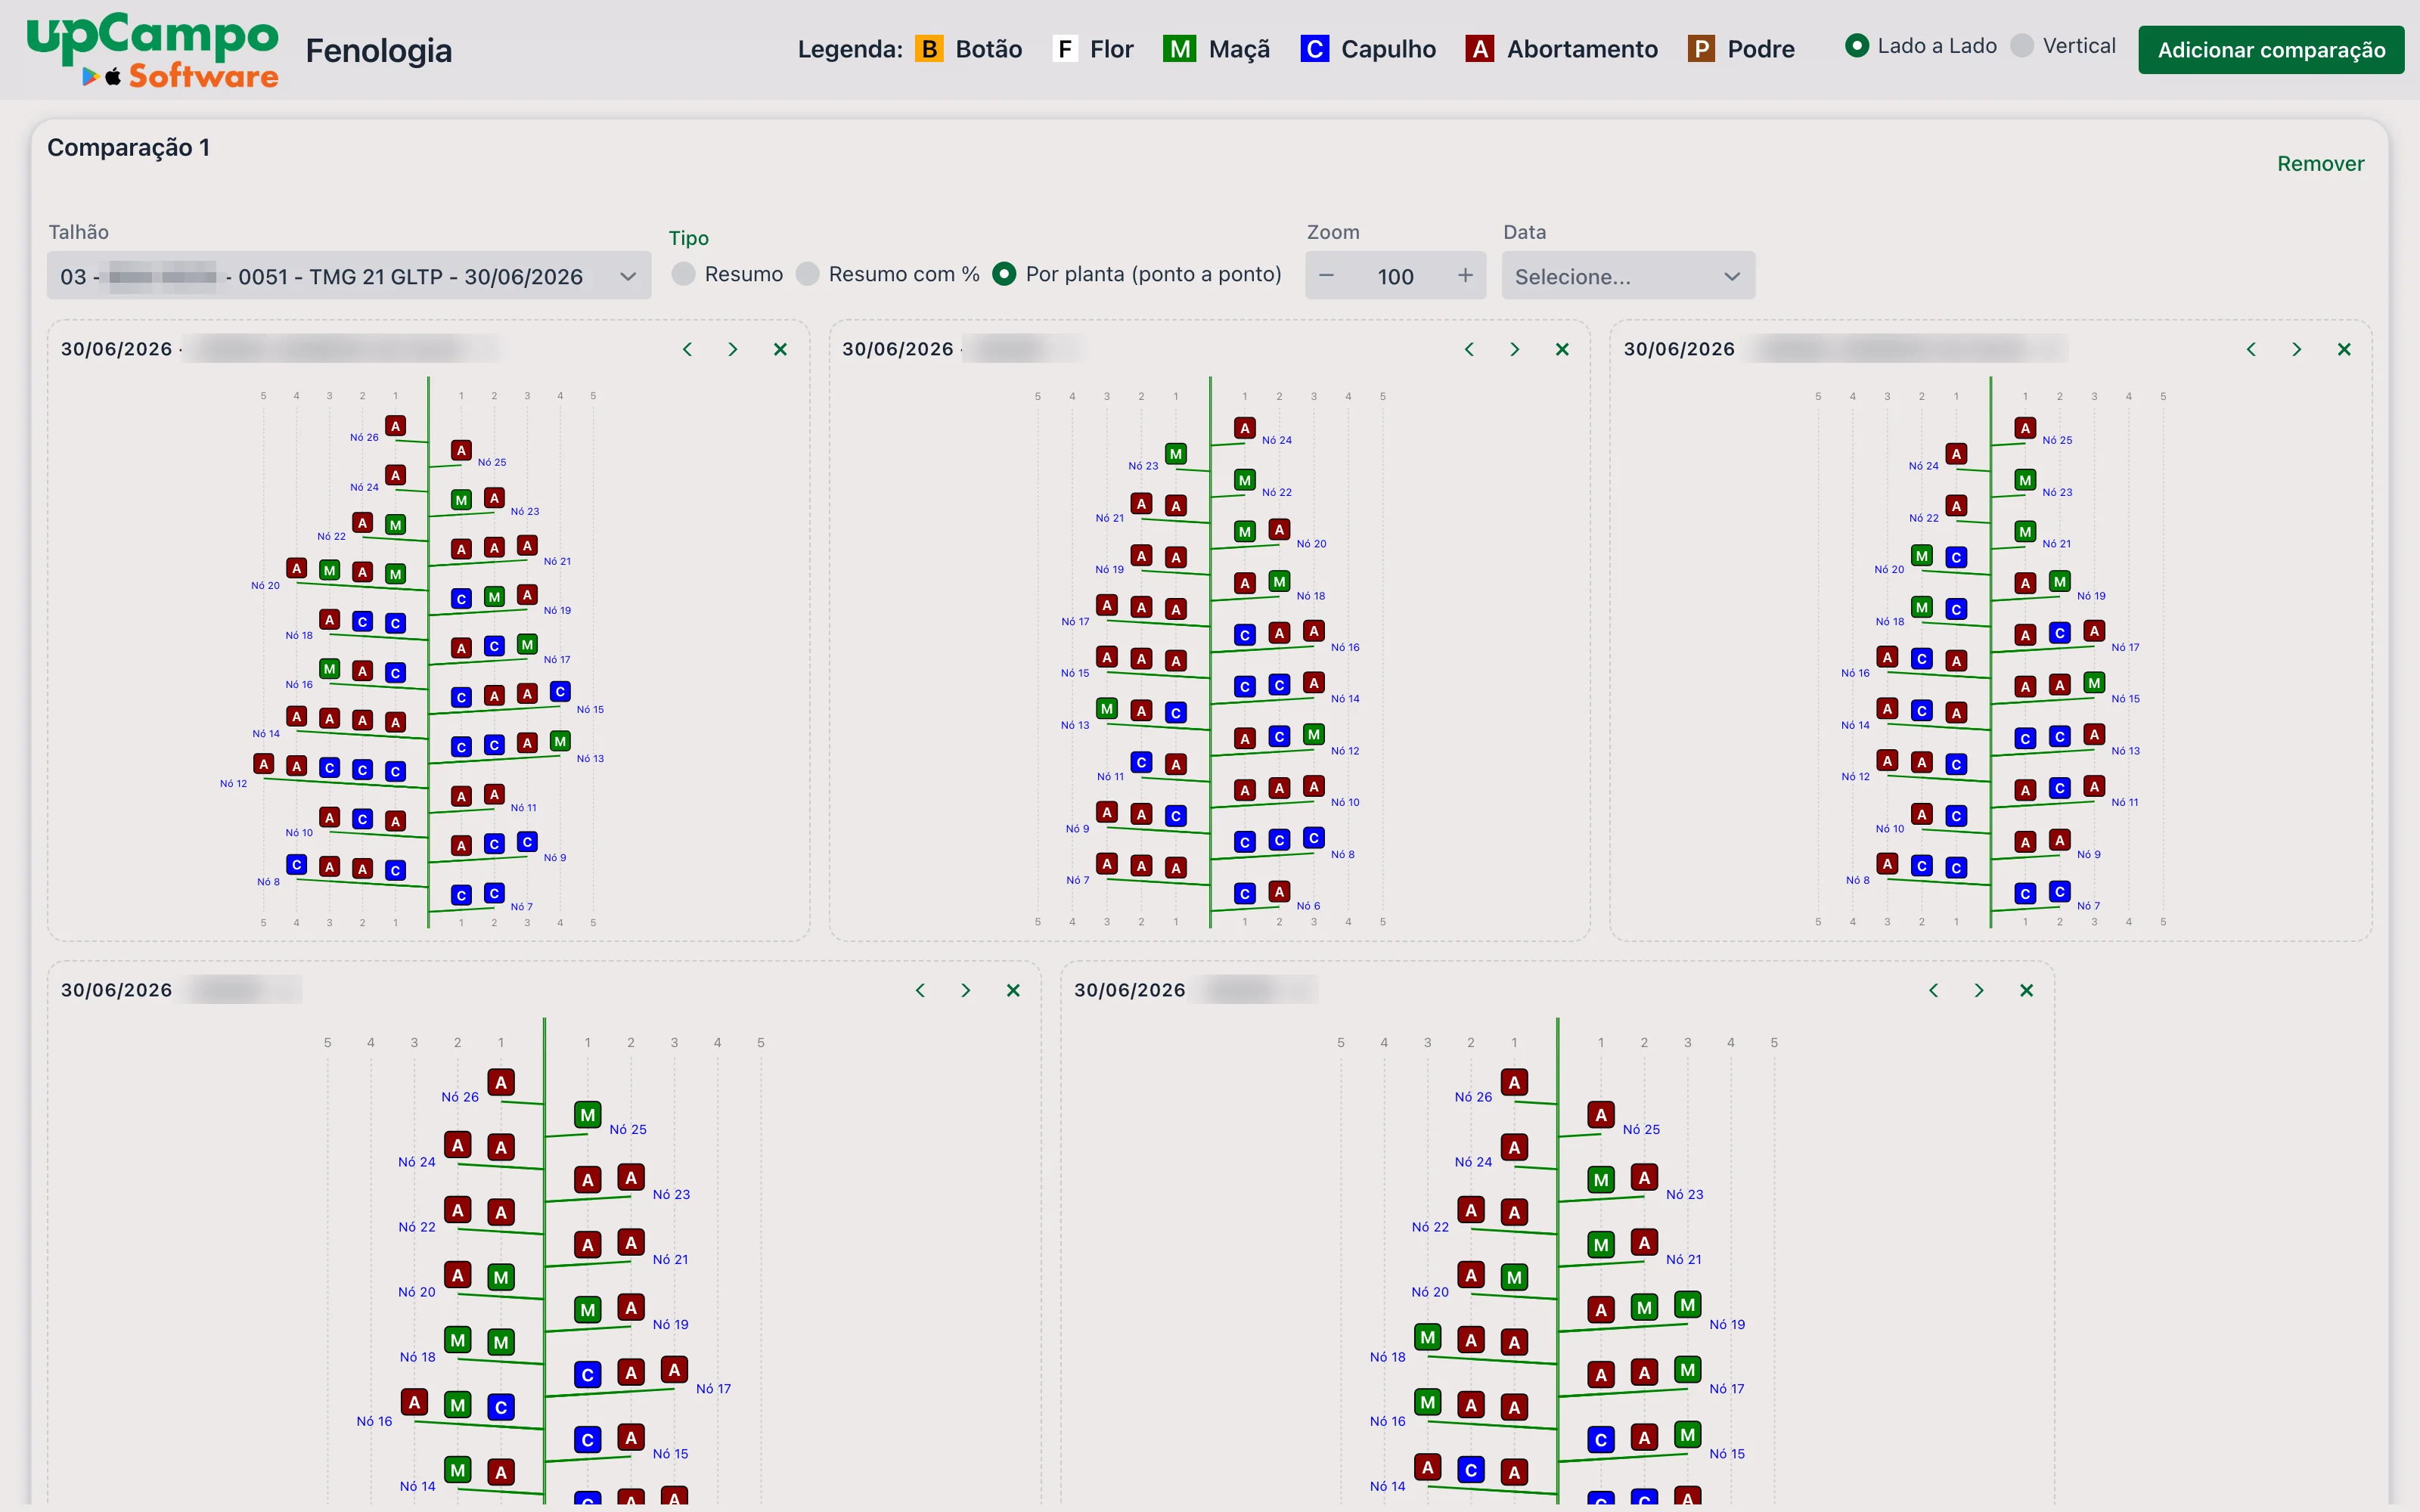
Comparing dates or fields
With Add comparison, the screen gets a second area with its own filters. The most common use is the same field on two dates, to see the plant develop; it also works for putting two fields, or two varieties, side by side on the same date.
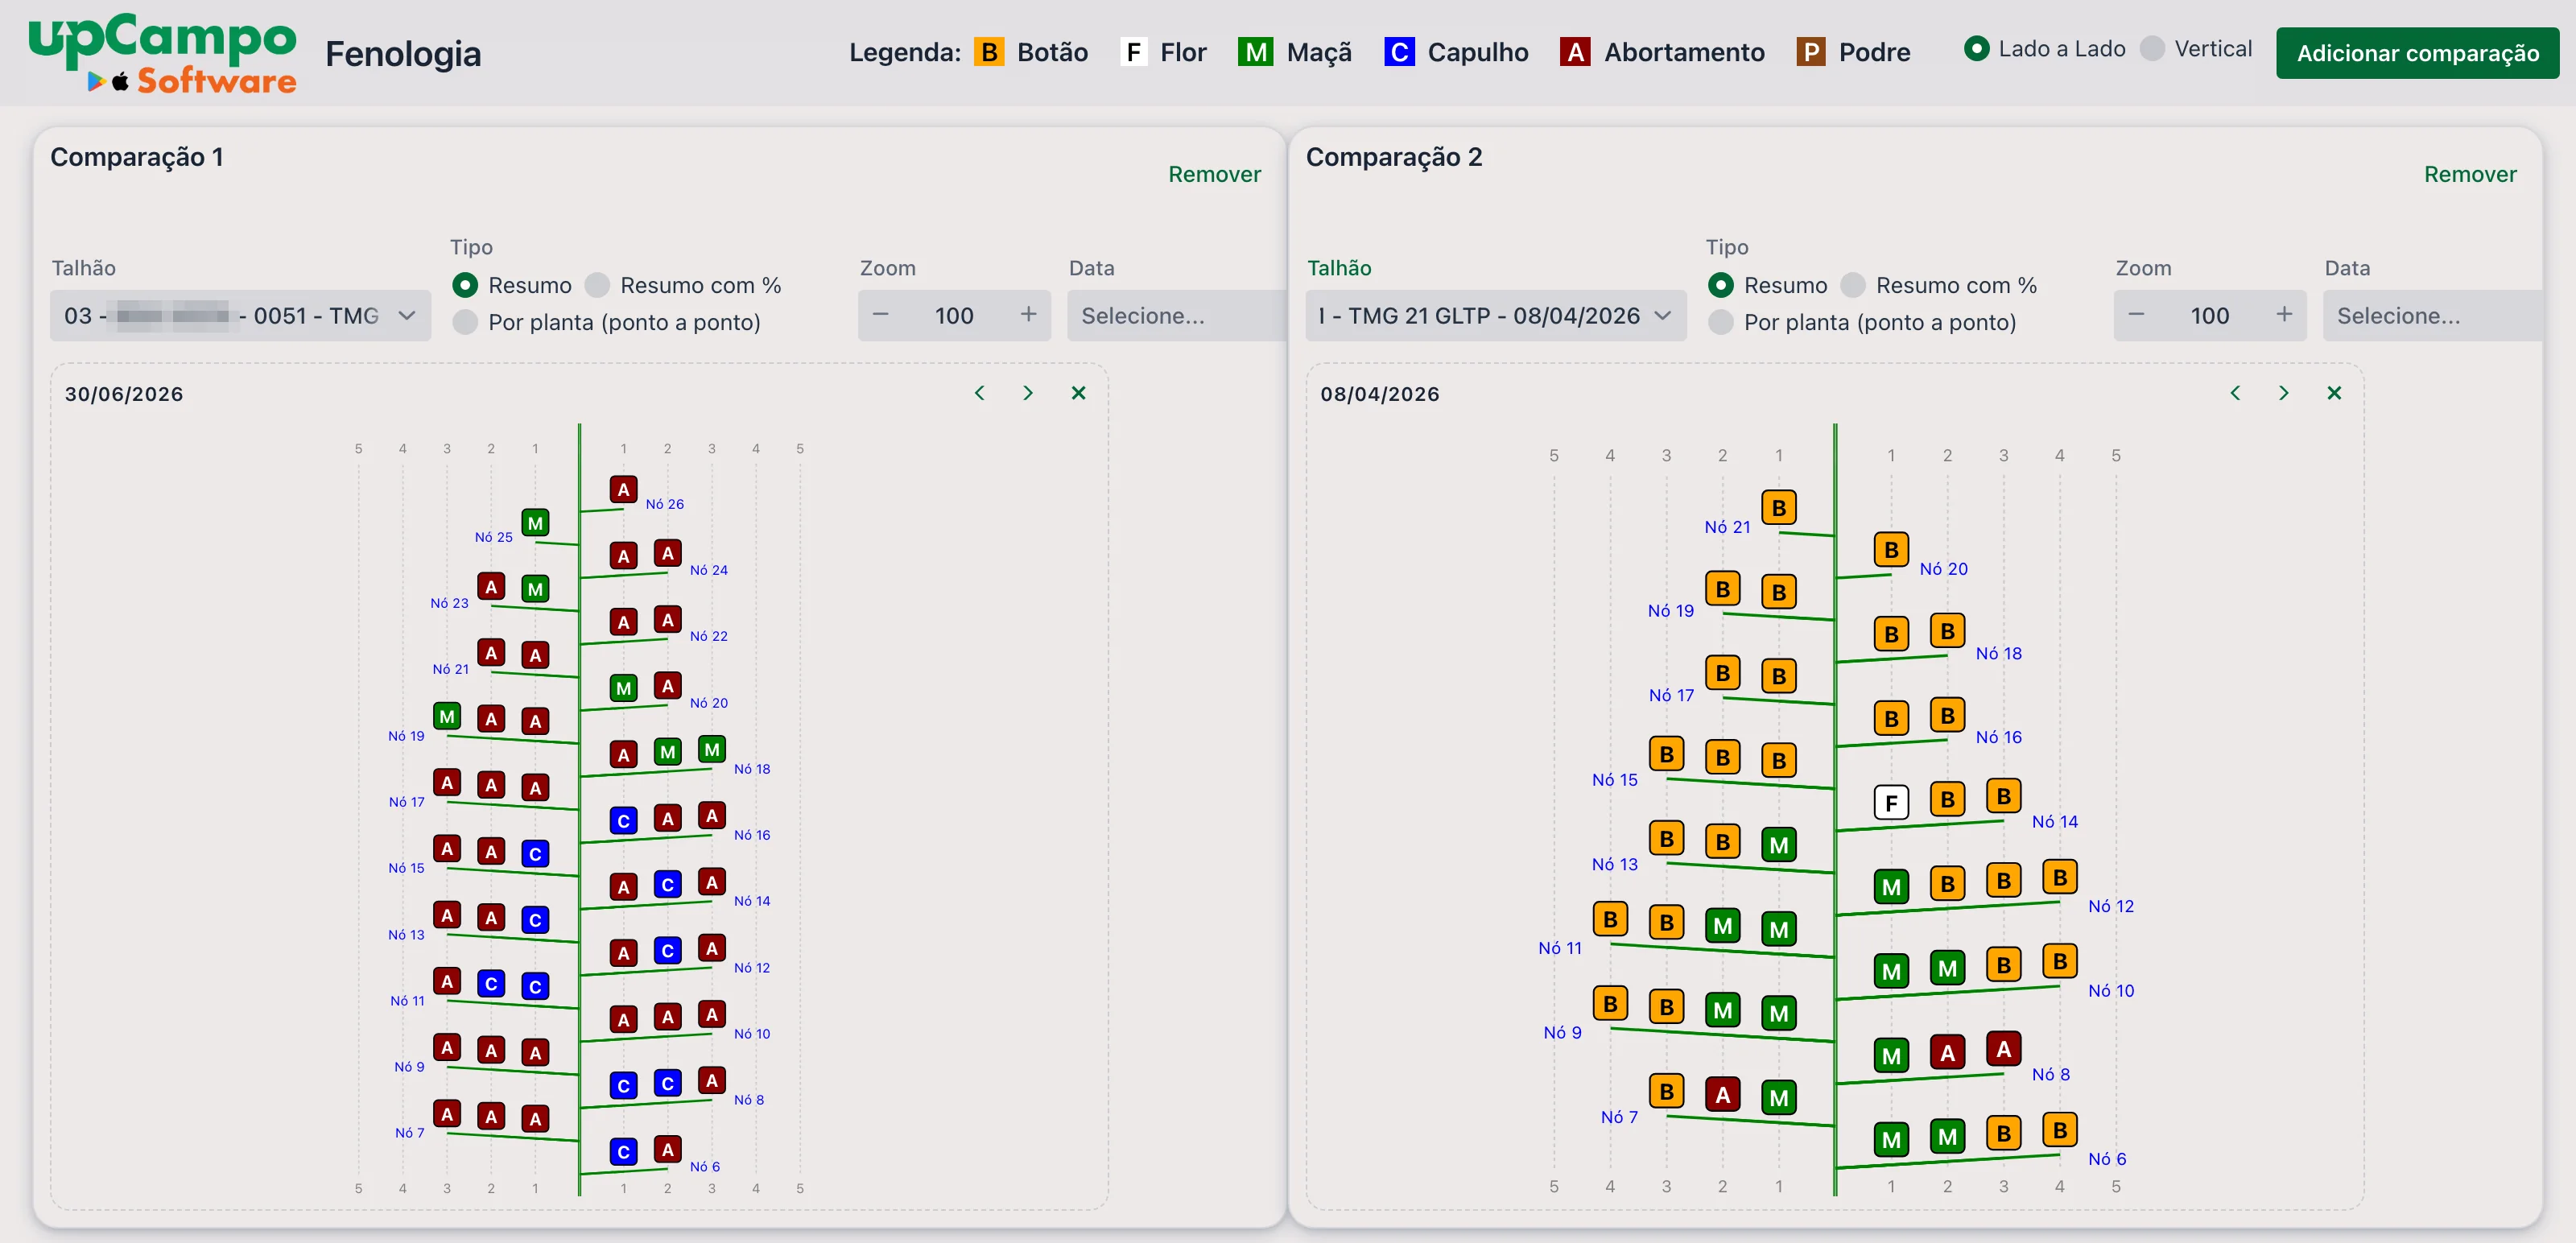
When the measurement shows up. The drawings are not built the moment the page opens: an upCampo routine prepares them every 7 minutes, from what has already synced. Counting the phone's sync, a plant measured in the field usually shows up within a few minutes. The dashboard reads the data when it opens — to see what came in afterwards, reload the page.
Height, and ideal height, on the dashboard
Web portal: upCampo > Scouting
The Scouting tab on the home screen shows each scouting in a column, with the field, crop, variety, days after planting and after emergence, stage and who measured — and, further down, the plant measurements.

Among the measurements are STAND, Height, Node Qty and a -- Ideal Height row: the height the crop should have on that day, according to the registered curve. In the example, the plant is at 96.28 cm and the ideal for that moment is 100 cm — in other words, practically as expected.

Value history, day by day
The value in the grid is a button. Clicking the height — or any other measurement in the column — opens the Value History window, with the whole season for that field in a single chart:
- the Height line, with what was measured at each scouting;
- the Ideal Veg. Growth line, which is the registered curve;
- the Work Order/Activity bars, marking the days when there was an application.
The bottom axis shows the date and DAE of each point. Below the chart, a table repeats the numbers and adds the Difference from previous, the Average per day and the Average per DAE — the growth between one scouting and the next. The Map tab, at the top, shows where the points were taken.
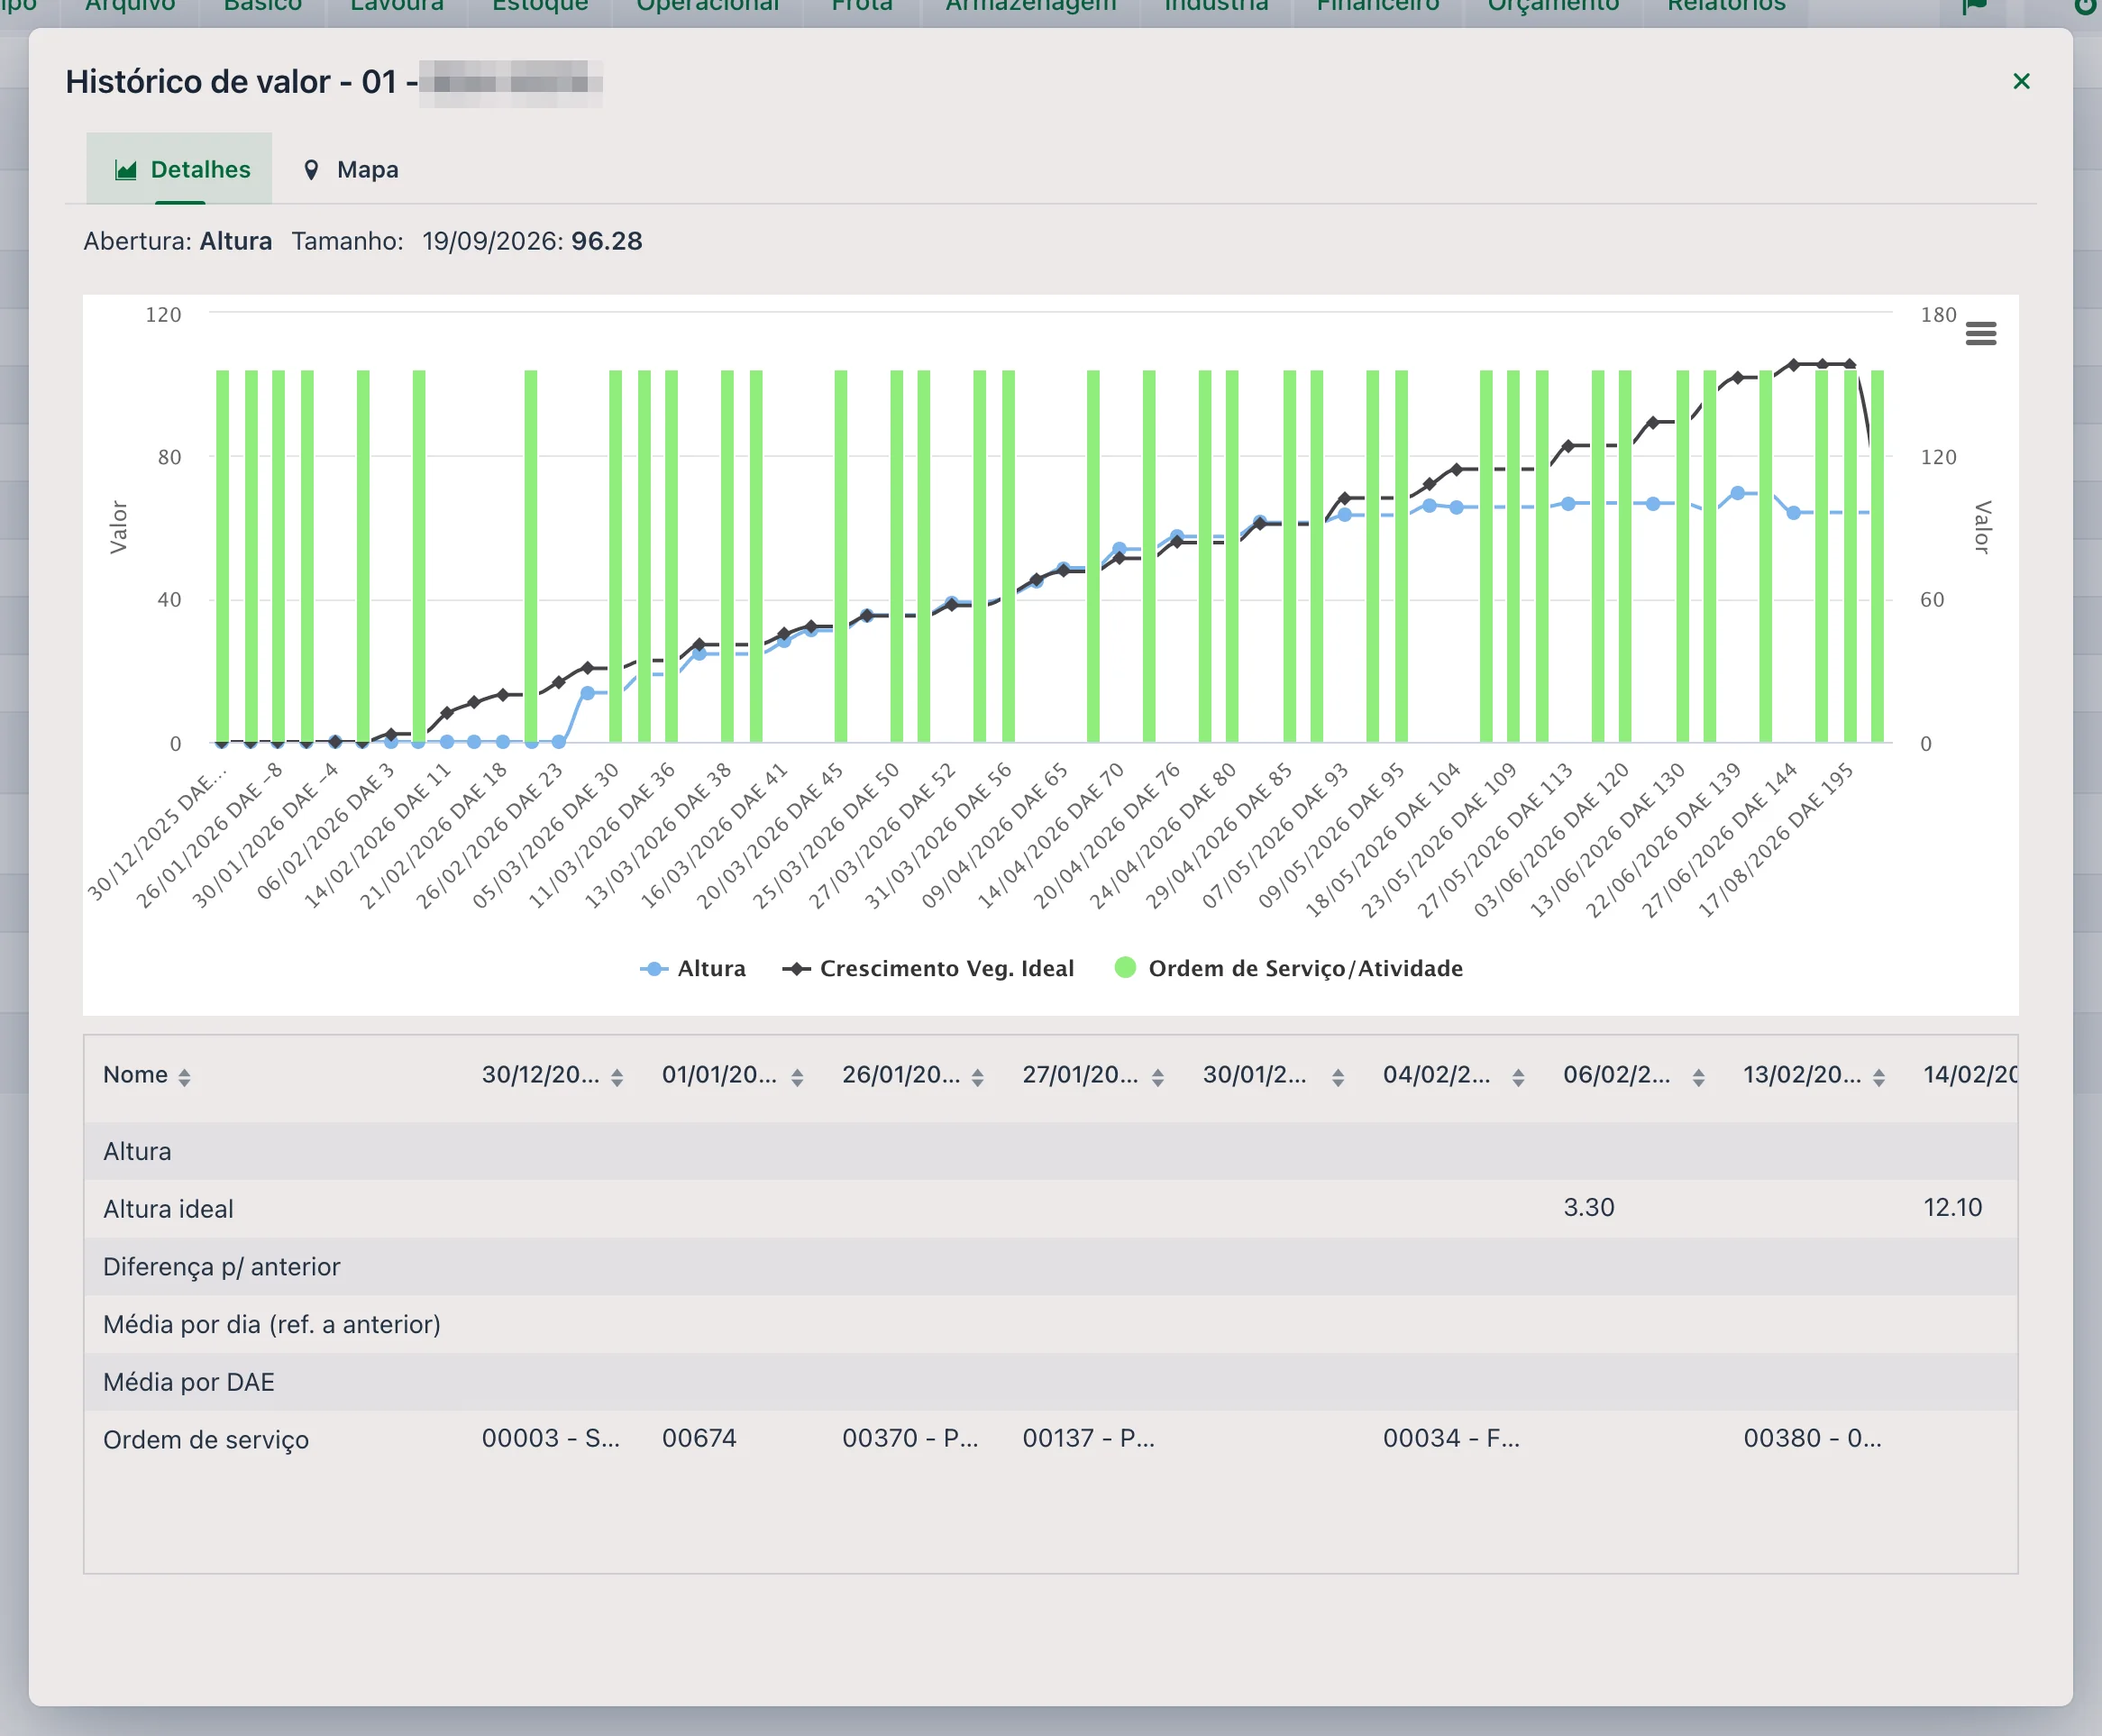
This is the reading that shows the pace: two equal measurements can mean different things depending on how the plant was growing before — and the work order bars help connect a change of pace to an application.
3. The reports
Web portal: Reports → Survey theme
The reports below ask for the same filters (MON.02.03 (formerly 001.O) also has Estimated weight): Date (period, required), Quadra(s) and Sector. Quadra is the old name for a field; left blank, all are included. They only consider the cotton phenology pest — the same one the dashboard uses. How to run and export reports is in the Quick Guide - Reports.
The field in numbers: one row per field and scouting date, with Variety, D.A.E and D.A.P (days after emergence and after planting, counted from Season Planting), Pla. (how many plants were assessed), Last STAND (the last stand recorded up to that date), Last White Flower Pos. and the averages of Veg. Node Qty and Rep. Node Qty. Then comes a block for each state found in the period — Square, Flower, Boll, Open boll and Aborted —, each with three columns:
- Average — how many structures of that state per plant;
- Total — how many were marked in the field;
- % — that state's share of all structures marked in the field on that day.
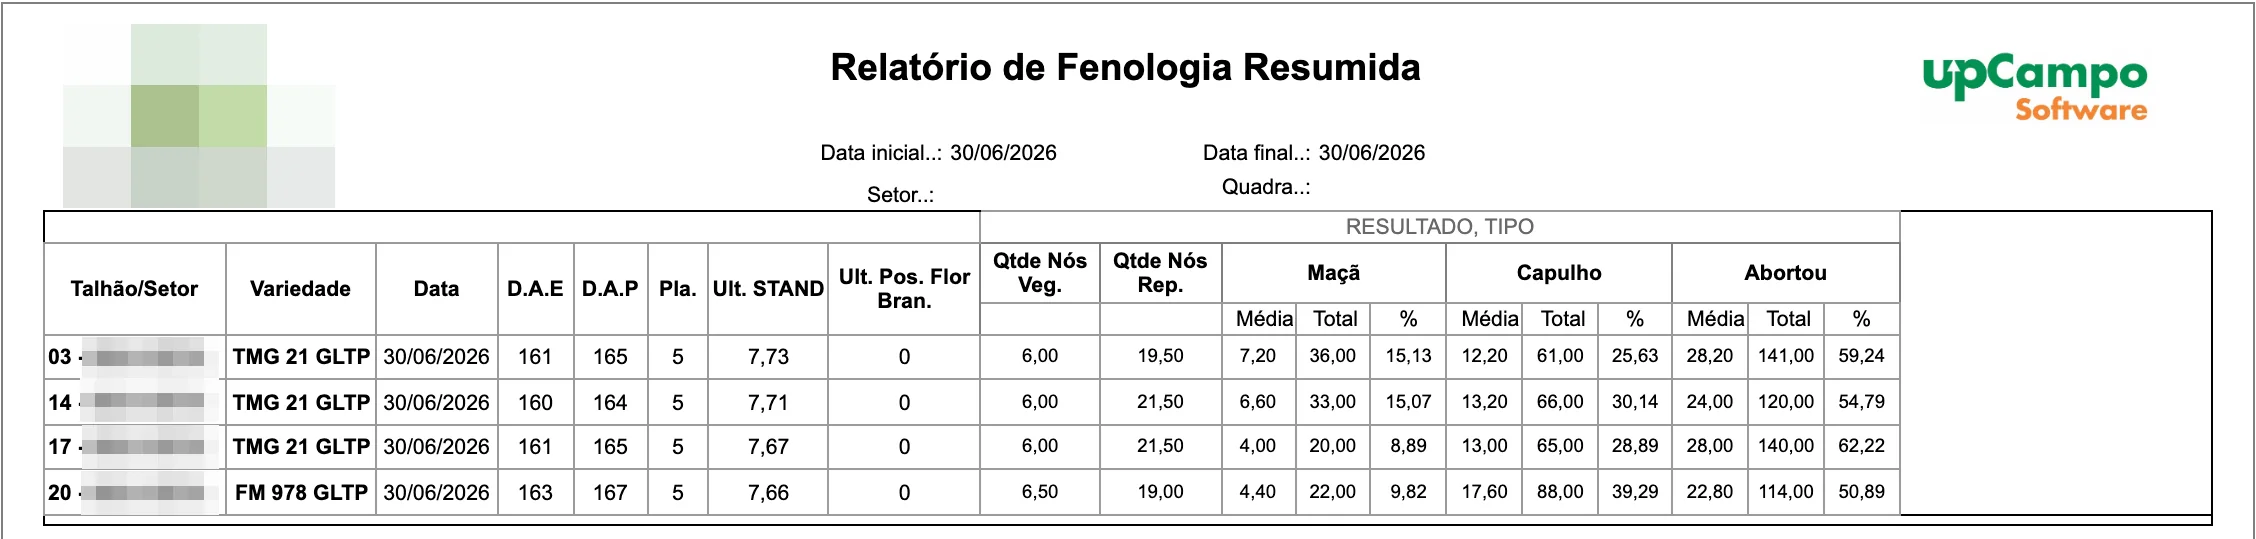
Each plant's sheet, grouped by field and by point (with the scout who measured): Height, Total Nodes, Veg. Nodes, Veg. Squares and Rep. Nodes, and the count of Square, Flower, Boll, Open boll, Aborted and the Total for that plant. At the end of each field, a Summary (average) of the measurements. It is for checking the collection plant by plant. To see the plant drawn node by node, use MON.02.02 (formerly 001.M2), just below.

The most complete report for node-by-node mapping, and the one that takes the dashboard's plant drawing to paper. It opens with two tables for the period:
- Summary phenology — the same numbers as MON.02.01 (formerly 001.N) (plants, Last STAND, nodes and, per state, Average, Total and %), field by field;
- By position (average) — for each state, how many structures per plant there are at each position on the branch, from 1 to 5. This is where you see, for example, that abortion is concentrated at positions 1 and 2 and barely reaches 4.
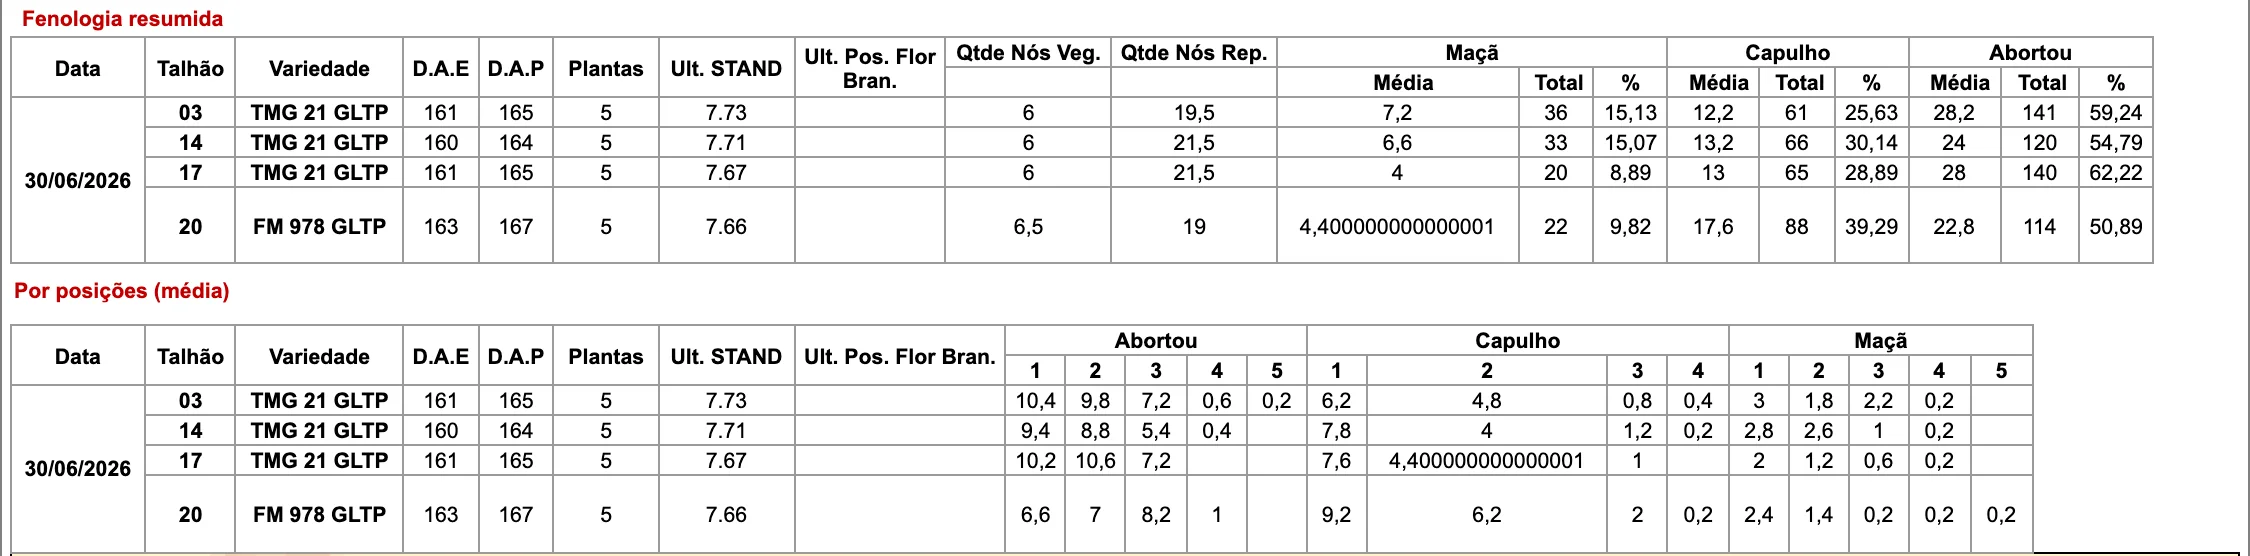
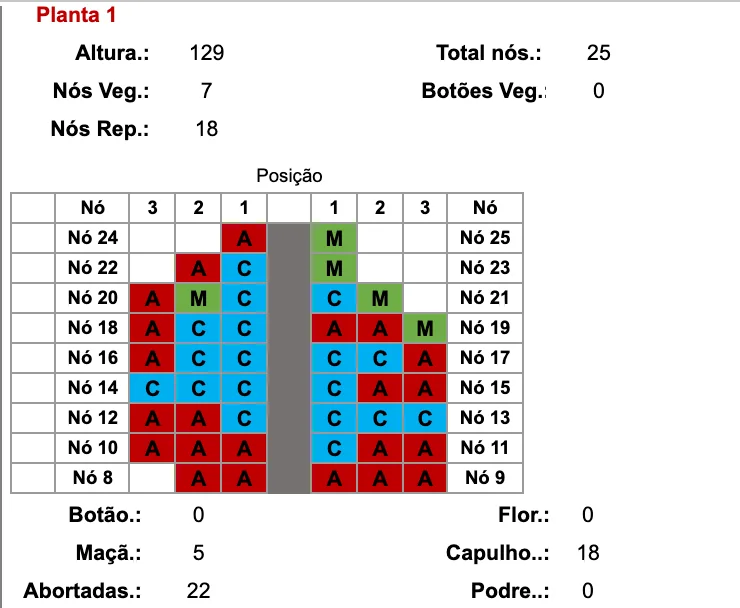
It doesn't use the node-by-node measurement: it reads the Structure per meter pest, entered in the same scouting in the app. The report shows, by field and date:
- STAND — total plants ÷ meters assessed;
- Average per meter — total structures ÷ meters assessed;
- Estimated @ — the estimated yield in arrobas per hectare, using the calculation below.
The 11,111 is the meters of row per hectare at 0.90 m row spacing, and that number is fixed in the calculation — for a field planted with a different spacing, the estimate has to be adjusted by hand. The 15 converts kilograms into arrobas. In the screenshot example, 90.89 structures per meter × 5 g ÷ 1,000 × 11,111 ÷ 15 gives 336.62 @/ha. The numbers are from a real field and are there to show the calculation, not as a yield benchmark.
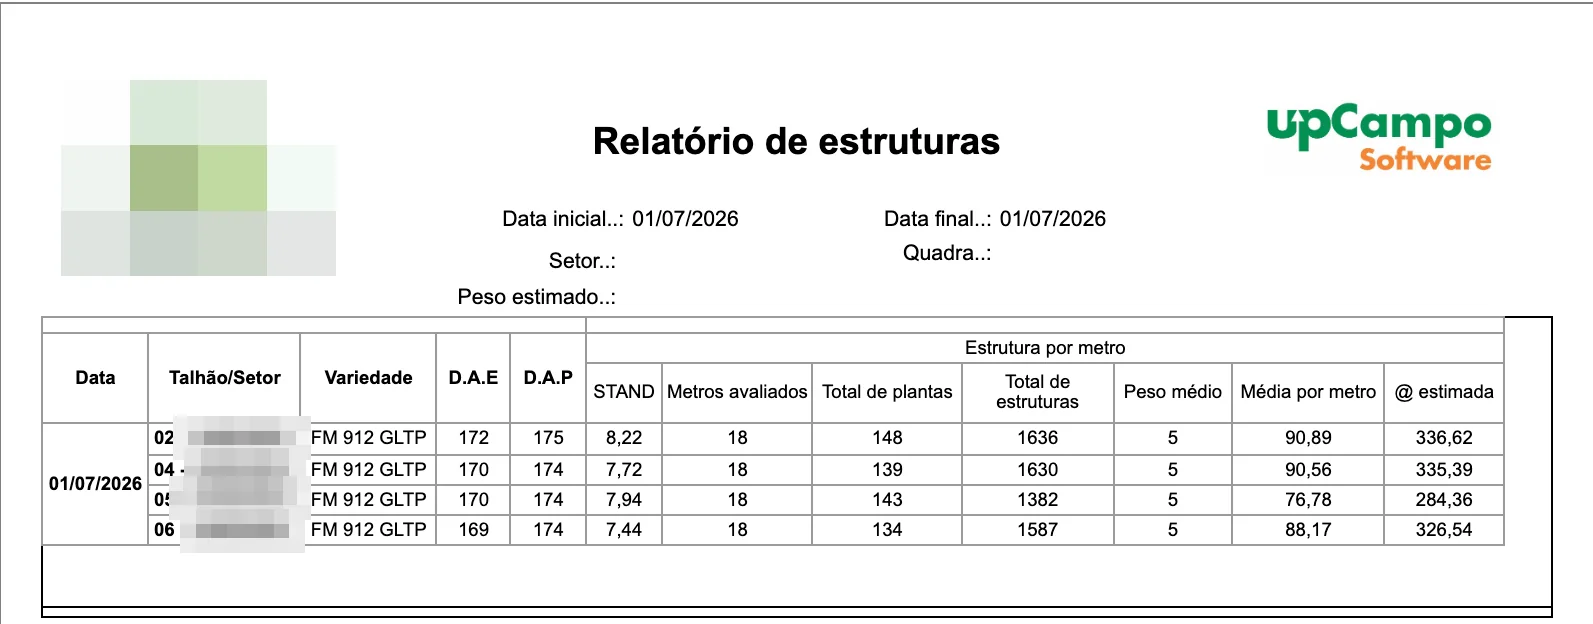
Other cotton phenology reports under the same theme, for those who need a specific cut: MON.02.P05 (formerly 001.Qb) - Phenologies: Height, STAND, Node Qty, MON.02.P06 (formerly 001.R) - White Flower Position & Node Qty and MON.02.11 (formerly 001.H) - Phenology - Summary - Last of each WEEK.
- The farm sees where the plant is holding its load and where it is aborting, node by node, and not just how much there is per meter
- The field's development becomes visible by comparing dates side by side, from square to open boll
- Variation between plants shows up in Per plant, and an out-of-line measurement is caught before it becomes part of an average
- The numbers in MON.02.01 (formerly 001.N) and the sheets in MON.02.05 (formerly 001.M) are ready for season follow-up and for the records
❓ Frequently asked questions
I measured the plant in the app and it didn't show up on the dashboard. Why?
In upCampo, the phenology dashboard drawings are prepared every 7 minutes from what has already synced. Check that the phone synced, wait a few minutes and reload the page — the dashboard only reads the data when it opens. If it still doesn't show up, check that the measurement was made in the Detailed Cotton Phenology class, and not as a regular count.
What is the difference between Summary and Summary with % on the dashboard?
Summary shows, at each node and position, only the most frequent state among the plants measured. Summary with % shows all the states found at that position, each with its percentage. The first is the quick read; the second shows how divided the field is.
Does the position percentage count the plants where it was empty?
No. In upCampo, a position marked as absent in the app is not saved, so the dashboard percentage is out of the plants that had some structure at that position. A position that existed on only one plant can show 100%. To see how many plants it existed on, use the dashboard's Per plant type or the MON.02.02 (formerly 001.M2) - Detailed Phenology - Plant Map report.
Can I measure more than one plant at the same point?
The app allows it, but the phenology dashboard draws one plant per point, and the two plants would fall into the same drawing, overlapping. In upCampo, the node-by-node mapping routine is to open a new point for each plant measured.
Which report do I use to follow cotton phenology field by field?
MON.02.01 (formerly 001.N) - Summary Phenology: by field and date, it shows the percentage, total and average per plant of squares, flowers, bolls, open bolls and abortions, plus the last stand and the averages of vegetative and reproductive nodes. To see each plant drawn node by node, use MON.02.02 (formerly 001.M2) - Detailed Phenology - Plant Map.
How do I compare the same crop on two dates?
On the phenology dashboard, choose the field with the first date, tap Add comparison and choose the same field with the second date in Comparison 2. With Side by Side selected, the two drawings sit next to each other.
Can my farm use node-by-node phenological mapping?
It is a custom-built feature: it is currently configured for one specific customer's Cotton 2026 season. To use it on another farm, contact upCampo support — collection depends on how the cotton phenology pest is registered, and the dashboard is prepared for each farm and season.
📘 Screen: Observations
The Observations screen works as a complement to pest monitoring. It shows records entered directly from the app, containing free-form notes, evidence and photos taken in the field.
📍 Location in the system
Menu: Crops > Observations
🧩 Main function
Like the Scouting screen, this screen is not for adding new records, but for:
- Viewing observations recorded in the app
- Adjusting or deleting information, if needed
Observations can include:
📊 Dashboards and overall view
Observations are analyzed from the Scouting home dashboard, where they appear grouped together with the scouting.
On the dashboard, the agronomist can:
- View observations by date and field
- Analyze the images captured
- See the map with the georeferenced points
- Follow the crop's growth stage
- Look up the history of the observed pest by field, if there is a reference
- The system keeps a visual and descriptive field history
- Crop analysis becomes richer and more complete
- The scout better understands the context of agronomic decisions
❓ Frequently asked questions
What is the difference between an Observation and Scouting?
Scouting is the structured pest collection, with points and counts. An Observation is a free-form note: descriptive text with photos, field, crop, location and date, made when the scout wants to record something that doesn't fit the form.
Can I record an observation in the web portal?
No. Observations are entered through the app, in the field. In the web portal you can only view, adjust or delete them.
Where do observations show up?
On the Scouting home dashboard, grouped together with the scouting — with the images, the georeferenced map and the crop's growth stage.
📘 Screen: Analyses
The Analyses screen stores in the system the results of samples collected in the crop: the field's soil analysis before planting, the leaf analysis done mid-cycle, the compaction test. Each analysis is tied to the field, the season and the variety, with the levels at each sampled point and the lab report attached.
📍 Location in the system
Menu: Crops > Analyses
🧩 Main function
To centralize the farm's analysis history. Instead of the lab report sitting in an email or a folder on the computer, it is recorded on the field it belongs to — with the levels typed in point by point and the original PDF attached. In the next season, you can open the field and see what the analysis showed.
📝 Main fields
| Field | Description |
|---|---|
| Type | Required. Soil Analysis, Leaf Analysis, Compaction or Other. It comes set to Soil Analysis |
| Code | Analysis number. When you click "New", the system suggests the next free number |
| First Collection Date | Date sampling began. It comes filled in with today's date |
| Season | The season the analysis refers to |
| Field | Required. The field sampled |
| Variety/Cultivar | Required. The variety planted in the area |
| Notes | Free-text field — the lab that did the analysis, crop condition on the collection day, whatever is useful to record |
🗂 Additional tabs
Details (analysis points)
This is where the results go. An analysis usually has several collection points within the same field, and each point is a row on this tab:
| Field | Description |
|---|---|
| Point | Number of the collection point within the field |
| Collection date | Collection date for that point. It comes filled in with today's date |
| N, P, K | Nitrogen, phosphorus and potassium |
| Ca, Mg, S | Calcium, magnesium and sulfur |
| B, Cu, Fe, Mn, Zn | Micronutrients: boron, copper, iron, manganese and zinc |
| Notes | A note for that specific point |
Levels are typed in as the lab report gives them — the system doesn't convert units or recalculate anything. Each point is saved separately, with the tab's own Save button.
File
Attaches the original report to the analysis: the lab PDF, the spreadsheet with the results, the photo of the soil pit. Each attachment has a Title, Description and Notes, and the View button opens the file in another tab. PDF, images, spreadsheets, text documents, audio, video and compressed files are accepted.
🔧 List features
The list shows Number, Collection date, Type and Field, with search by column. At the top there is a quick filter by type — All, Soil Analysis, Leaf Analysis, Compaction and Other — which comes set to All.
- The report stays on the field it belongs to, not lost in an email
- You can compare the fertility of the same field across seasons
- Fertilizer and lime recommendations start from a history, not from memory
- The original report stays attached, available for checking and for audits
❓ Frequently asked questions
Where do I keep the farm's soil analysis results?
On the Analyses screen, under Crops > Analyses. You create the analysis
tied to the field, season and variety, type in the levels for each collection point on the
Details tab and attach the lab PDF on the File tab.
Can I enter several collection points in the same analysis?
Yes — that is exactly what the Details (analysis points) tab is for. Each point sampled within the field becomes a row, with its number, its collection date and the levels of N, P, K, Ca, Mg, S, B, Cu, Fe, Mn and Zn.
Can I attach the lab report?
Yes, on the File tab, which accepts PDF, images, spreadsheets and text documents. The View button opens the attached file in another browser tab. You need to save the analysis before attaching.
What types of analysis does the system accept?
Four: Soil Analysis, Leaf Analysis, Compaction and Other. The type is required and also works as a quick filter on the list, to find only the soil analyses for a season, for example.
I can't save the analysis. What's missing?
Three fields are required: Type, Field and the date. The variety is also requested in the record. Once those are filled in, the record saves normally.
📘 Screen: Bales
The bale — or module — is the roll of seed cotton the picker leaves in the field. In upCampo, each bale is a record with a number, field of origin, variety and harvest date: it is the traceability unit of cotton, which lets you go from a lint bale sold months later back to the field that produced it.
The bale is created here without a weight. It gets its weight at collection, when the truck that takes it to the gin is weighed — and that weight is what adds to the total harvested from the field. A bale recorded with the wrong field means wrong yield in two fields at the same time.
📍 Location in the system
Menu: Crops > Bales
🧩 Main function
Each bale is recorded with its agronomic and geographic characteristics:
These records can be used later for traceability and logistics control, and they are the basis for collection and storage operations.
🔎 The list and the totals
The screen is called Cotton bales/Tracking item and opens filtered by Season, Start date (from) and End date (to). Next to the filters are three totals for what is being displayed: Farm weight, Gin weight and Qty — the quick way to close out production for a period.
The list shows Code, QR Code/Barcode, Date, Field, Variety/Cultivar, Farm wt., Gin weight, Hectares, Collected?, Bale collection, Fleet, Collection date, Start user, Check user, Collection user, Origin, Border, Burst, Notes and Reference/Integration ID.
📝 Bale fields
| Field | Description |
|---|---|
| Where | In the field or Collected — where the bale is now. |
| Format | Cylindrical or Square, depending on the picker. |
| Shift | 1st Shift or 2nd Shift. |
| Date, Hour, Minute and Second | When the bale was produced. The date is required. |
| Code | Required. The bale's identification. |
| Field and Variety/Cultivar | Required. Where the cotton came from. |
| QR code | The code on the label stuck to the bale — it is how the bale is tracked at collection. |
| Module ID | The module identifier on the picker, used by the integration. |
| Farm wt. | Weight recorded at the farm. |
| GIN weight | Weight checked at the gin — comparing the two is what reveals losses or scale discrepancies. |
| Diameter and Hectares | The bale's measurements and the area it represents. |
| Border | Flags a bale harvested on the edge of the field, which tends to have a different yield. |
| Burst | Flags a bale that burst — a loss to account for at closing. |
| Latitude and Longitude | Where the bale was dropped. This is what lets you find it on the map. |
| Fleet / Asset Harvest | Required. The picker that produced the bale. |
| Notes and Notes/Integration | Free-text fields; the second receives the text coming from the integration. |
⚡ Batch tools
Bales are a high-volume record — one season can run past a thousand. That is why the screen has tools to handle many at once:
Generate multiple in batch
Creates several bales at once, for when the harvest has already happened and nobody entered them bale by bale. Enter Field, Variety, Number of bales, Date, Farm wt., Hectares, shift and border.
- The Get auxiliary qty from WO executions button pulls the quantity from what has already been executed in the harvest work orders — instead of you counting
- Initial QR Code: leave it blank to not generate QR Codes. If you enter one, the system increments it for each bale (0050, 0051, 0052…)
Batch adjustment
Corrects one field on many bales at once. Choose what to change — Field, Variety/Cultivar, Shift, Border, Burst, Farm weight, Gin weight or Hectares —, enter the new value, check the bales in the grid and confirm. It is the way to fix a repeated mistake: the wrong field for a whole shift, the shift entered incorrectly.
View on Map
Shows the bales positioned on the map, based on each one's latitude and longitude — useful for planning the pickup route and for finding a bale that was left behind.
📲 Where records come from
1. From the app
The most common way to record bales is in the app:
- The technician enters the bale as soon as the picker produces it
- Usually a QR Code is stuck on the bale
- The code is scanned later for tracking. For this, you can print numbered labels with report POS.04.02 (formerly 009.A) - Bale labels
In the app, the menu is Bale/item tracking. The BALE/ITEM LIST tab filters by Status, Fleet, Sector and Field, shows the Total items and, for each bale, the number, field, variety, up code, farm weight, status and date. The SUMMARY tab adds up the quantity, pending bales, weights and the average per hectare, with a breakdown by field.
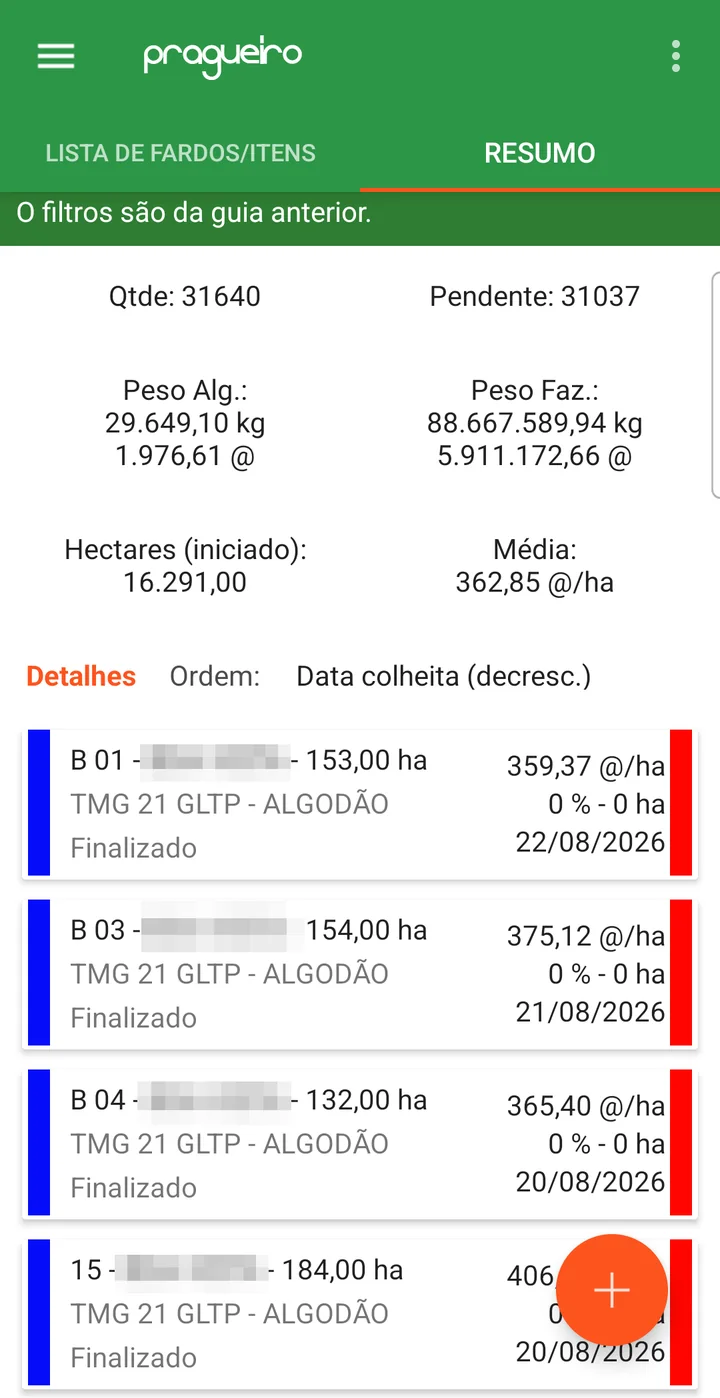
Tapping a bale opens its record: up code, QR Code/Barcode (with the CAPTURE button next to it), Field, Notes, Fleet/Equipment, Operator/Employee, Date, Status, shift (1st Shift or 2nd Shift), Border, farm weight, gin weight and ha. The list's NEW (+) opens the same form blank, already with the next up code, and the button at the bottom is SAVE + NEW, so you can enter one bale after another.
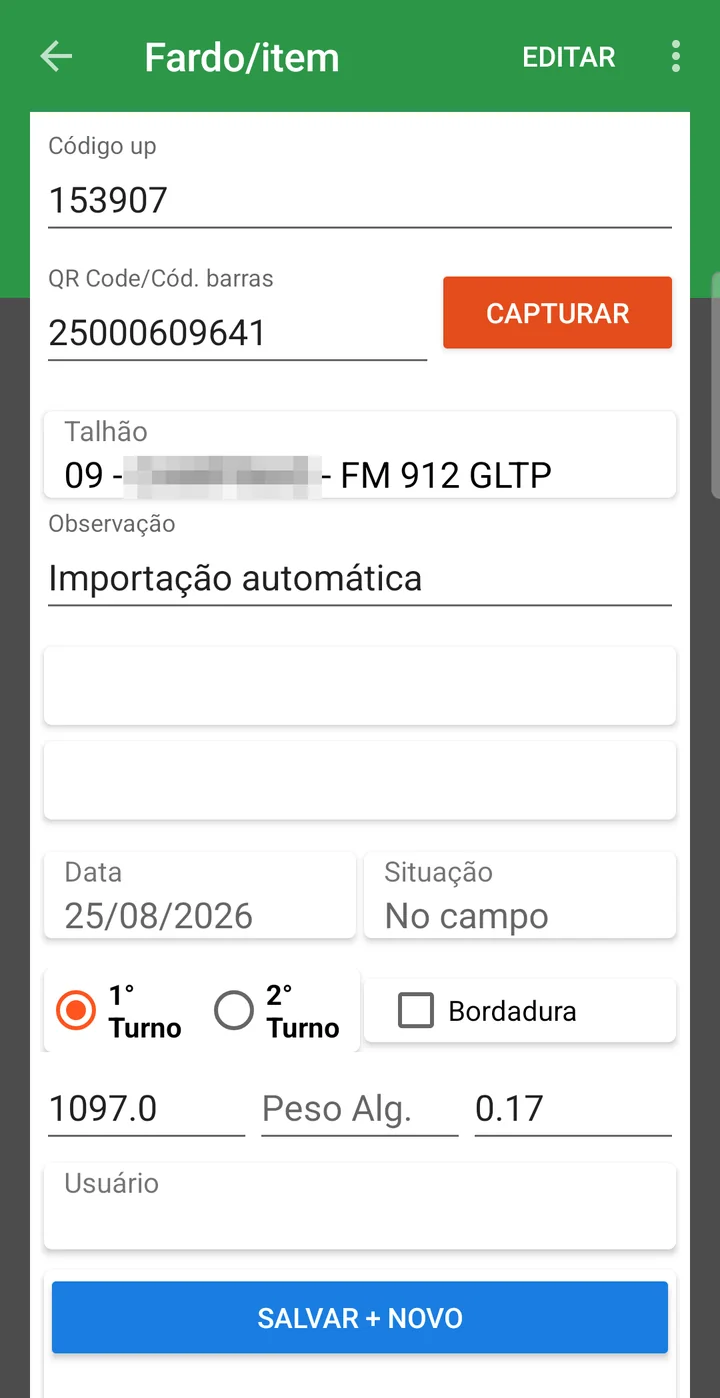
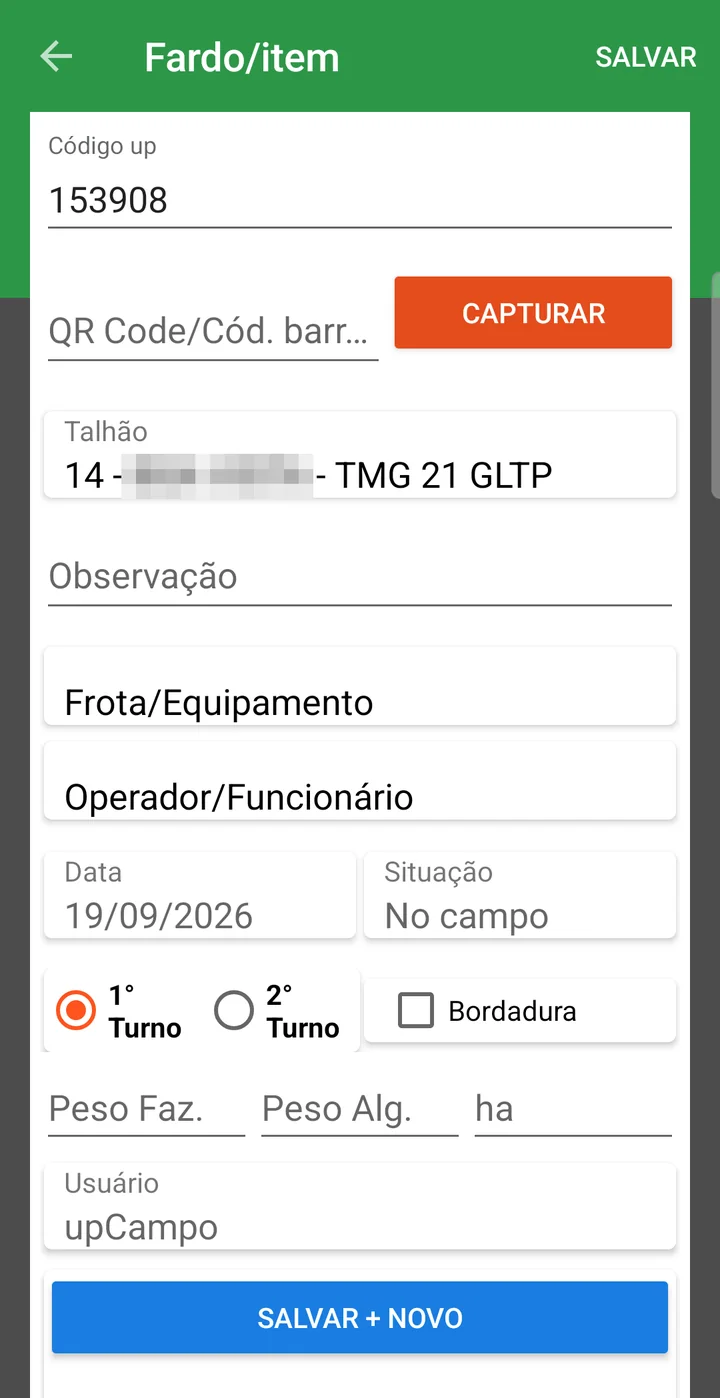
2. From the web portal
- Manual entry by the team, filling in the data
3. Through the John Deere picker integration
- Requires setup by the upCampo team to enable the integration and sync the data automatically
- The Origin column in the list shows where each bale came from —
Manualfor those entered by hand - The Import without module button opens the Import JD bales without module window, which lists what John Deere recorded without the module identifier, with date, field, equipment, variety, hectares, weight and operator. Force selected brings those bales in anyway
4. From the machine file
- The Import bales from machine Excel file button, next to the filters, loads the bales from the file generated by the picker itself
🔗 After ginning: the lint bales
When the module goes to the gin and is ginned, the resulting lint is pressed into lint bales — which have their own screen, a GS1 code and separate weights for lint, seed, linters and trash. Each lint bale points to its source module, and that is how traceability runs from the sale back to the field.
🔗 Relationship with Bale Collection
After the bale is recorded, it moves to another stage of the process: bale collection.
- The bale is weighed at collection (manually or through the integration)
- If the picker reports the weight automatically, it is taken into account too
- The recorded weight is used to calculate the field's yield, one of the most important agronomic indicators
- Collection is done in another menu, where you enter where the bale was taken, weight, type of loading, etc.
- Both records are linked and form the bale's complete history
📊 Related reports
- Production traceability is guaranteed
- Field logistics are easier to control
- You can integrate with storage, sales and quality systems
Bale control is part of upCampo's cotton solution — see how the whole module works, from the field to the gin.
❓ Frequently asked questions
The field doesn't show up on the bales screen. Why?
Because the crop must have the Allows bales option checked in the Crop setup. Without it, the field is not available in the feature.
How are bales recorded in practice?
In three ways: through the app, which is the most common — the technician enters the bale as soon as the picker produces it; manually through the web portal; or through the John Deere picker integration, which requires setup by the upCampo team.
How do I track a bale later?
Usually a QR Code is stuck on the bale and scanned later for tracking. The numbered labels come from report POS.04.02 (formerly 009.A) - Bale labels.
What information is stored for each bale?
Season, field, crop, variety, GPS location and the date it was produced — the basis for traceability, logistics and collection and storage operations.
The harvest is over and nobody entered the bales. How do I fix it?
Use Generate multiple in batch: enter field, variety, number of bales, date, weight and hectares, and the system creates them all at once. The Get auxiliary qty from WO executions button can also pull the quantity from the harvest work orders already executed.
I generated the bales in batch and they have no QR Code. Why?
Because the Initial QR Code field was left blank — when blank, the operation creates the bales without a QR Code on purpose. If you enter a starting number, the system increments it for each bale (0050, 0051, 0052…) and they all come out traceable.
I entered several bales in the wrong field. Do I have to fix them one by one?
No. Batch adjustment changes at once the field, variety, shift, border, burst flag, farm weight, gin weight or hectares of the bales you check in the grid.
What is the difference between Farm wt. and Gin weight?
Farm wt. is the weight recorded at the farm; Gin weight is the one checked at the gin. Keeping both is what lets you see in-transit losses and scale discrepancies — the list totals the two separately at the top.
How do I find a bale left behind in the field?
With the View on Map button, which positions the bales by each one's latitude and longitude. The Collected? column in the list shows which ones are still in the field.
📘 Screen: Lint Bales
The lint bale is the bale of lint that comes out of ginning at the gin. While the bale (the module) is what the picker produces in the field, the lint bale is what is left of it after ginning — and it is what gets sold, invoiced and tracked by its GS1 code. This screen is where each lint bale is recorded, with its weights and the module it came from.
📍 Location in the system
Menu: Crops > Lint Bales
🧩 Main function
To close the traceability loop between the field and the sale. Each lint bale points to its source module, and the module points to the field and the variety — so, from a GS1 code that was sold, you can trace back to the field that produced that lint. It is also where the weights used to invoice the lint, the cottonseed, the linters and the trash come from.
📝 Main fields
| Field | Description |
|---|---|
| Date | Date the lint bale was ginned |
| Code | Four-digit sequential number, suggested by the system when you click "New" (0001, 0002…) |
| Bales | Required. The source module, chosen by code or by QR code. When you select it, the field and the variety are filled in automatically |
| Field | Filled in automatically from the module — not typed |
| Variety/Cultivar | Also comes from the module. This field's name may be different in your company, depending on the variety setup |
| QR code | The code on the label stuck to the lint bale, for scanning in the yard and at shipping |
| Net weight | Weight of the lint — this is the weight that counts for the sale |
| Gross weight | Weight of the lint bale with its wrapping |
| Tare weight | Weight of the wrapping alone |
| Cottonseed weight | Cottonseed separated when that module was ginned |
| Linters weight | Linters resulting from ginning |
| Trash weight | Trash from ginning |
| Block | The ginning block/lot the lint bale belongs to |
| Type/Visual Grade | Lint grade, as reported by the gin |
| GS1 | The lint bale's GS1 code — the standard used in the cotton market to uniquely identify a lint bale |
| Machine | The press/machine that produced the lint bale |
| Notes | Free-text field |
🔧 List features
The list shows Code, the source module, Field, Type/Grade, GS1 and the three weights (net, gross and tare), with search by column. It also has the invoice columns, which show in which inventory movement each lint bale has already been invoiced.
Change Weights
A list button that bulk-fills the cottonseed, linters and trash weights of the modules, from a percentage. It is the shortcut for when the gin reports the turnout as a percentage, instead of weight by weight:
- Choose the field to fill: Cottonseed wt., Linters wt. or Trash wt.
- The window lists the modules in the season that already have lint bales and do not yet have that weight linked to an inventory movement
- Check the modules and enter the percentage
- Click Change selected and confirm
💸 Link to invoicing
The weights recorded here are what support invoicing of the lint, cottonseed, linters and trash. Once a lint bale has been linked to an inventory movement, the invoice columns in the list show that link — they are how you see what has already gone out and what is still in inventory.
- Traceability runs from the GS1 code sold back to the source field
- Lint, cottonseed, linters and trash weights are kept separate and ready to invoice
- The invoice is built from the recorded weight, with no retyping
- You can tell, at any time, what has already been invoiced and what is still in inventory
The lint bale is the final link in cotton traceability in upCampo — see how the whole module works, from the field to the lint sold.
❓ Frequently asked questions
What is the difference between a bale and a lint bale in the system?
The bale (or module) is what the picker produces in the field, recorded on the Bales screen. The lint bale is the bale of lint that comes out of ginning at the gin, with the seed already removed — it is the one that has a GS1 code and is sold. Each lint bale points to the module it came from.
Do I need to type the field for the lint bale?
No. When you choose the source module in the Bales field, the field and the variety are filled in automatically and locked for editing — that is how traceability is guaranteed.
The gin gave me the turnout as a percentage. How do I enter it?
With the Change Weights button, in the lint bale list. Choose whether the percentage is for cottonseed, linters or trash, check the modules, enter the percentage and confirm — the system calculates and saves the weight for all the selected modules at once.
How do I know whether a lint bale has already been invoiced?
From the invoice columns in the lint bale list: they show the inventory movement in which that weight was entered. A lint bale with nothing in those columns has not gone out yet.
What is the GS1 code for?
It is the identification standard used in the cotton market: each lint bale gets a unique code that stays with it through sale and storage. Keeping it here is what lets you go from a buyer's code back to the field that produced that lint.
📘 Screen: Bale Collection
Bale collection is the load that hauls the bales from the field to the gin. In upCampo, it is the document that groups the bales of one load and receives the weighing on arrival — and it is that weighing, divided among the bales in the load, that gives each bale its weight.
This makes collection the step that closes out the cotton harvest: before it, the bale exists but has no weight; after it, the weight adds to the total harvested from the field and makes up the area's yield. Since the harvest produces many bales and hauling is done a little at a time, each trip is a collection.
📍 Location in the system
Menu: Crops > Bale Collection
🧩 Main function
This screen is used to record the loading of bales onto trucks or trailers. Each entry corresponds to a "load", with information such as:
- Vehicle
- Driver
- Collection date
- Bales included in the load
This is usually done in the app, at the moment the load is put together.
🔎 The list
The list opens filtered by Season, Start date (from), End date (to) and Status — All, Pending or Finalized. Next to them are the totals Collections Qty and Bales Qty, which tell you right away how many loads and how many bales went out in the period.
The columns show Date, Code, Situation, Fleet / Asset, Driver, Bales Qty, the codes of the load's Bales, Gin Status, Sector, Reference/Integration ID, Tare weight, Gross weight, Net weight and Notes.
📝 Collection header
The screen numbers the two steps: 1 - Edit / Save Header and, on the Bales tab, 2 - Add / Save Details.
| Field | Description |
|---|---|
| Code and Date | Identification and day of the load. The date is required. |
| Sector | Required. Which sector of the farm the load came from. |
| Destination | The gin that will receive it — chosen from the registered entities. |
| Fleet / Asset | Required. The truck or trailer that hauled the bales. |
| Driver | Who drove the load. |
| Tare weight, Gross weight and Tarp weight | The vehicle weighings. Tarp weight deducts the tarp that covers the load. |
| Net weight | Calculated by the system: gross weight − tare weight − tarp weight. It recalculates on its own with every change. |
| Yield | The yield measured for the load. |
| Notes and Reference/Integration ID | Free-text field and the code in the external system. |
| Status and Finalized By | Read-only: the collection's status and who finalized it. Next to them are Start user and Changed user. |
📦 Tab: Bales
This is where you build the load, bale by bale. The Type field decides how:
- Existing bale: picks a bale already recorded on the Bales screen — the normal path
- New bale: creates the bale on the spot, for one that was not entered before
Each item also records Shift, UP code, QR code, Border, Burst, Farm weight, Yield and the Collection Order — the sequence in which the bales were loaded, which helps check the unloading in the same order.
The Import multiple button brings in several bales at once, instead of one by one, and the Qty counter shows how many are already on the load.
⚖️ Weighing at the gin
When the truck arrives at the gin:
- The gross weight of the loaded vehicle is recorded
- After unloading, the tare weight is recorded
How upCampo assigns a weight to each bale
The scale weighs the truck, not the bale. The individual weight comes from an equal split among the bales of that load:
| Step | Value |
|---|---|
| Gross weight (loaded truck) | 38,400 kg |
| Tare weight (empty truck) | 14,200 kg |
| Tarp weight | 200 kg |
| Load net weight | 24,000 kg |
| Bales in the collection | 12 |
| Weight per bale | 2,000 kg |
A bale that already arrives with its own weight — from the picker through the integration, for example — is not overwritten by the split: the division only fills in bales that had no weight.
Added up by field, these weights make up the total harvested and the average yield in Season Planting, in arrobas per hectare.
🔐 Finalizing the collection
- The screen has a Finalize button
- Once finalized, the collection is "sealed" and can no longer be edited
- This ensures the security and traceability of the load
- If you need to fix something later, the same button becomes Reopen — the system asks for confirmation first
- In the list, Finalize multiple closes several loads at once: you check the collections in the grid and confirm
The header keeps the Status and Finalized By, so there is a record of who sealed each load.
✅ Bale check
In practice, when the truck arrives, there is no time to check every bale at the scale.
- That is why the Bales tab has the Check Bales button
- This check is done later, at unloading
- The goal is to confirm that the bales entered in the app are really the ones that were on the load
- If the check was done by mistake or needs to be redone, Remove Bale Check undoes it
Progress shows up in two places: in the Gin Status column of the list, which shows Pending while the load has not been checked, and in the grid on the Bales tab, which shows the status per bale and the Check user — who checked each one.
📊 Related reports
📱 Bale collection in the app
In the app, the menu is Bale/item collection. The list shows the collections with filters for Sector, Equipment and Status and the total items; each collection shows the number, the truck, the status, how many bales it has and how many have been confirmed. Tapping it opens the load: Fleet/Equipment and Driver (each with its own NEW (+)), the gin, the status, the sector and the date. Right above the load's list of bales are FIND BY QR CODE, FIND BY MANUAL ENTRY and NEW BALE, and the SORT button.
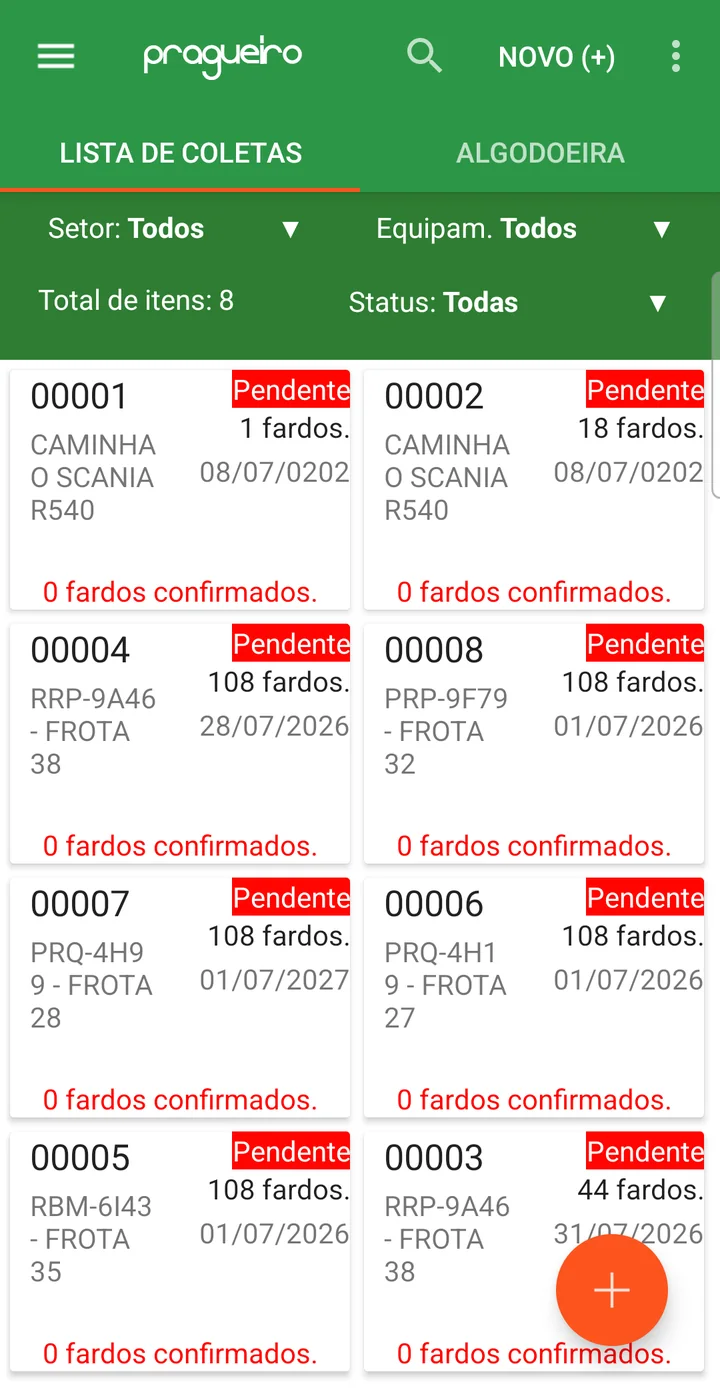
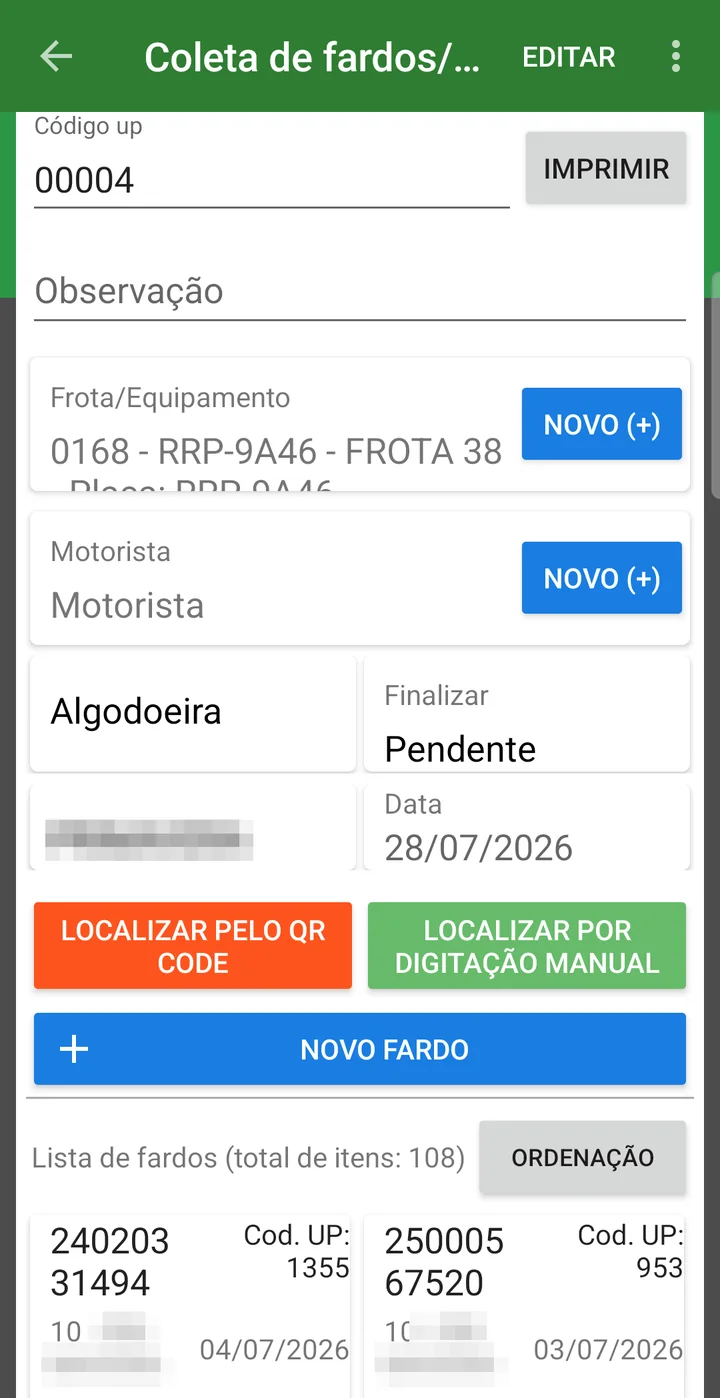
- Each bale's weight is determined
- Yield per field is calculated automatically
- You have complete traceability of production from harvest to arrival at the gin
Collection is the link between the picker and the gin — see how upCampo tracks cotton end to end, from the field to the lint bale sold.
❓ Frequently asked questions
How is each bale's weight determined?
By the weighing at the gin. You record the gross weight of the loaded truck and, after unloading, the tare. The system calculates the load's net weight — gross minus tare minus tarp — and divides it equally among the bales in that collection. They all get the same weight; that is why you should not mix bales from different fields on the same load when you want accurate yield per field.
How does the system calculate the area's yield?
By adding up the bale weights per field. Since each bale gets its weight from the load split, the total per field gives that area's yield.
I need to fix a collection that is already finalized. Is that possible?
Yes. When finalized, the collection is sealed and no longer accepts edits — but the Finalize button becomes Reopen for whoever needs to make a correction. The system asks for confirmation first, and the header keeps who finalized it in the Finalized By field.
How do I know which loads have not been checked at the gin yet?
From the Gin Status column in the list, which shows Pending while the load has not been checked. Inside the collection, the grid on the Bales tab shows the status bale by bale and the Check user — who checked each one.
I checked the bales wrong. Can I undo it?
Yes. On the Bales tab, the Remove Bale Check button undoes the check, and Check Bales redoes it afterwards.
How is the load's net weight calculated?
It is the gross weight minus the tare weight minus the tarp weight. The Net weight field is filled in by the system and recalculates on its own whenever you change one of the three weighings.
Do I have to add the bales to the load one by one?
No. On the Bales tab, the Import multiple button brings in several bales at once. For a bale that was not recorded before, change the Type to New bale and create it on the spot.
How do I close several loads at once?
With the Finalize multiple button, in the list: check the collections in the grid and confirm. Before closing, it shows the date, code, situation, fleet, driver and number of bales of each load.
What is recorded for each load?
Vehicle, driver, collection date and the bales included. The entry is usually made in the app, at the moment the load is put together.
📦 Quick Guide - Product Receipt into Inventory
To correctly receive a product into inventory (such as when an invoice arrives), follow this sequence:
1️⃣ Create the Product Class
Menu: Inventory > Product & Service Class
Use it to organize products into categories such as Seeds, Fertilizers, Parts, Fuels, etc.
2️⃣ Set up the Product
Menu: Inventory > Product & Service
Enter data such as: code, description, unit, brand, formulation type, active ingredient, among others.
3️⃣ Define the Storage Location
Menu: Inventory > Storage Location
Set up where the products will be stored (e.g., Chemical Shed, Warehouse, Fuel Station).
4️⃣ Set up the Entity
Menu: Inventory > Entity
Set up the invoice's supplier, filling in basic data such as name, CNPJ/CPF and address.
5️⃣ Record the Purchase Order (optional, but recommended)
Menu: Inventory > Purchase Order
Create the order with the desired products, quantities and amounts. It can be used for control and approval before the invoice is received.
6️⃣ Enter the Inbound Movement
Menu: Inventory > Inventory Movement (In & Out)
This is where you record the invoice into inventory.
Fill in the invoice data, select the products and quantities, and indicate the destination location (inventory).
Use report EST.01.01 (formerly 012) - Current inventory to see the balance after the movement.
Use the "View Inventory" button, available on every screen that involves products. It shows the current balance of all products in each storage location.
❓ Frequently asked questions
What is the sequence for entering a purchase invoice into inventory?
Six steps: create the Product Class, set up the Product, define the Storage Location, set up the Entity (supplier), record the Purchase Order (optional) and, finally, enter the inbound Movement.
Do I have to type all the supplier's data by hand?
No. When you type the CNPJ in the entity record, use the Retrieve data button next to the field: it queries the Receita Federal and brings in the company's complete data.
Is the purchase order required?
No, it is optional — but recommended, especially when the input takes a while to arrive, because it lets you track what was ordered and has not come in yet.
📘 Screen: Active Ingredient
The Active Ingredient screen is a simple setup used to keep a standardized list of the active ingredients in the farm's products (such as crop protection products, fertilizers, etc.).
📍 Location in the system
Menu: Inventory > Active Ingredient
🧩 Main function
Lets you record active ingredients in one central place so that they can later be linked to the products set up in the system.
This makes organizing, searching and generating technical and regulatory reports easier when they require identifying the active ingredient used in a given operation.
📝 Setup fields
| Field | Description |
|---|---|
| Code | Internal identifier. |
| Description | Name of the active ingredient (e.g., Glyphosate, Sulfur, Imidacloprid). |
| Notes | Free-text field for additional notes. |
| Active | Defines whether the ingredient is available for use in the system. |
- Linking them to products becomes standardized
- Technical reports are easier to generate
- Traceability of field applications improves
❓ Frequently asked questions
Why set up the active ingredient separately from the product?
To keep a standardized list. Several commercial products share the same active ingredient — for example, Glyphosate — and keeping a central record makes searching easier and avoids different spellings for the same thing.
Where is the active ingredient used after it is set up?
It is linked to products, on the Active ingredient tab of the Product & Service record. A product can have more than one active ingredient.
What is this for in practice?
To generate technical and regulatory reports that require identifying the active ingredient used in each operation, and to improve the traceability of field applications.
📘 Screen: Formulation Type
The Formulation Type screen is used to set up the different physical and chemical forms of the products applied on the farm, especially crop protection products. This setup is essential to ensure the correct mixing order of products in a spray tank.
📍 Location in the system
Menu: Inventory > Formulation Type
🧩 Main function
This setup is the basis for the "Formulation type" field found:
- In the Product setup
- In the Work Order, where the correct application sequence appears
This is essential to:
- Ensure the tank mix is effective
- Avoid incompatibility between products
- Follow technical application protocols
📝 Setup fields
| Field | Description |
|---|---|
| Code | Internal identifier. |
| Description | Name of the formulation (e.g., SC - suspension concentrate, WG - water-dispersible granules). |
| Order | Number that defines the order in which it goes into the spray tank (e.g., 1 for SC, 2 for WG, etc.). |
| Notes | Additional notes. |
| Active | Defines whether it is available for use. |
- The tank mix will be built in the correct order
- Field application follows technical standards
- Work Orders will be safer and more standardized
❓ Frequently asked questions
Why do I need to set up the formulation type?
Because it defines the order in which products go into the spray tank. The wrong sequence undermines the mix's effectiveness and can cause incompatibility between products.
How do I set the mixing order in the tank?
With each formulation's Order field — for example, 1 for SC (suspension concentrate), 2 for WG (water-dispersible granules). That order then appears in the Work Order, guiding whoever prepares the tank mix.
Where is the formulation type used?
In the Product setup and in the Work Order, where the system shows the correct application sequence.
📘 Screen: Product & Service Class
The Product & Service Class screen lets you create the groupings for the items used on the platform, both products (such as crop protection products and seeds) and services (such as maintenance or sample collection).
📍 Location in the system
Menu: Inventory > Product & Service Class
🧩 Main function
Organizes products and services into categories. Common examples:
- Products: Seeds, Fungicides, Insecticides, Fuels, Parts
- Services: Sample collection, Soil analysis, Transportation
This classification is used for:
- Report filters
- Organizing the product setup
- Grouping by type in work orders
📝 Setup fields
| Field | Description |
|---|---|
| Code | Internal identifier. |
| Description | Name of the class. |
| Abbreviation |
Important for generating product codes automatically.
|
| Type | What the class groups: Fuel, Part, Lubricants, Input, Service or Other. |
| Notes | Additional notes. |
| Active | Defines whether the class is available for use. |
The class on the invoice item
Since October 8, 2026, each item in the Movement has a Product class field: it brings in the product's class, which can be changed on that line only, and on a direct purchase, with no product set up, it is chosen by hand. When the invoice is finalized and the supplier or customer has no management account, upCampo uses each item's class to find the account for the bill — and, if the items fall into different accounts, the bill is split by the items' amounts.
🔄 Importing standard classes
In the screen's main list there is an "Import product class (standard)" button, which offers:
- The most common classes ready to select
- An easier start during implementation
- Inventory organization is more intuitive
- Reports can group items by type
- Product numbering follows an automated standard
❓ Frequently asked questions
What is the product class for?
To group items into categories — Seeds, Fungicides, Insecticides, Fuels, Parts — and also services, such as sample collection or transportation. The classification is used in report filters and for grouping in work orders.
How is the product code generated automatically?
From the Abbreviation defined in the class. For the class "SEMENTE", for example, products come out as SEMENTE001, SEMENTE002 and so on.
Do I have to create all the classes from scratch?
No. The screen's list has the Import product class (standard) button, which brings in the most common classes ready to use — handy during implementation.
📘 Screen: Product & Service
The Product & Service screen is the main setup for the items used on the platform. It brings together technical, commercial, agronomic and inventory information about the products and services used in operations.
📍 Location in the system
Menu: Inventory > Product & Service
🧩 Main function
Centralizes the setup of every item used:
- Farm inputs (fertilizers, crop protection products, seeds)
- Warehouse items (fuels, parts, materials)
- Services (maintenance, transportation, sample collection)
📝 Main setup fields
| Field | Description |
|---|---|
| Code (Internal) | Generated automatically by the system, using the class abbreviation. |
| Reference (External) | Supplier reference. Accepts several codes: type each one and press Enter. |
| Description | The name the product will be searched by on every screen. |
| Product & service class | Required. Defined beforehand in the class setup. |
| Unit | Required. Liter, kilogram, unit, meter… |
| Brand/Manufacturer | — |
| Main NCM | The product's tax classification (NCM, Brazil's Mercosur product code). |
| Standard Dose, Minimum dose and Maximum dose | The product's general rates, used when there is no specific rule by farm and crop. |
| Standard unit price | The product's reference price. |
| Notes | Free-text note. |
| Reference/Integration ID and Ref./Int. Description | Used when the product comes from an external system. |
Product flags
Next to the code are checkboxes that change how the product behaves on other screens:
| Flag | What it changes |
|---|---|
| Active | When unchecked, the product disappears from selection lists without deleting its history. |
| Fuel | Identifies the item as fuel, for fueling control. |
| Seed | Identifies the item as seed, which is what enables the seed-specific information on the lot. |
| Require lot | Makes the lot required on the product's movements — this is what ensures crop protection products can be traced down to the field. |
| Show in ops. reports | Makes the product appear in the operations reports. |
| Mobile Item | Flags the item as mobile, for tracking items that move between locations. |
| Organophosphate | Flags the product as an organophosphate. A work order that includes this product will require the employee on the execution and will block anyone who has already applied on 6 days in the last 30 — see Organophosphate exposure. |
Crop protection product info
A collapsible block with the regulatory fields: MAPA number (registration with Brazil's Ministry of Agriculture), toxicological classification, application method and other information about the crop protection product.
🗂 Setup tabs
Active ingredient (List)
Links one or more active ingredients to the product, each with its Concentration (in the same unit as the product). The grid also shows the ingredient's name in English. The Quick/dynamic import button speeds up data entry.
Lot
The product's lots. Each one has a Code/Number, Expiration Date and Farm — all required —, plus Package size, Current Location, notes and the Active flag. For a product flagged as seed, the Seed block also opens.
Dose x Farm x Crop
Sets up label rates by farm and crop — see the next section.
NCMs & References
This is the supplier code cross-reference: for each entity (required), you record the NCM, the Reference code and the Reference description it uses. This is what lets the system recognize the product when the invoice arrives with the supplier's name and code.
Inventory
A lookup tab: by Location, it shows Balance, Lots Qty, Last cost and Average Cost. It is where you answer "how much is there, where is it and what did it cost coming in".
File
Stores documents such as the label, the SDS (FISPQ, the safety data sheet) and the emergency sheet.
🌱 Dose x Farm x Crop
This tab is optional, but it changes how the work order behaves: when filled in, it makes the system suggest the rate when the product is chosen in the order, and check the application limits.
Each line applies to one farm and crop combination:
| Field | Description |
|---|---|
| Farm | Required. The farm the rule applies to. |
| Crop | Required. The crop the rule applies to. |
| Maximum number of applications | How many times the product can be applied. |
| Interval in days | Minimum interval between one application and the next. |
| Block | Do not allow this product to be used on this crop. |
| Per Hectare | Standard, minimum and maximum rate per hectare. |
| Per Volume | Standard, minimum and maximum rate by volume (ml or g), plus the label volume (L or KG). |
In the work order, the result of these checks appears in the Check field, next to the product balance. This is what prevents applying above the recommended rate or repeating an application before the planned interval, without relying on whoever is entering it to remember the label.
🔧 Main list features
The list shows Code, Description, Reference, Brand, Class, Unit, Dose, Group, Active, Notes and Balance, with a search field on each column and the total number of products next to the buttons. At the top, the View selector switches between Standard (the list) and Dashboard (indicators).
Import 'standard' company
Opens a list of ready-made products, maintained by upCampo, with Description, Active ingredient, Class, Brand, Unit and Formulation. Check the ones you want and import them — it is the way to start your setup without typing in each crop protection product.
Import from Excel
Bulk entry from a spreadsheet (.xls or .xlsx). The window warns that
no record is replaced: only new ones are added. The columns, in any
order, are:
| Column | Rule |
|---|---|
| descrição | Required, formatted as text. |
| Unidade | Required, as text. |
| Código | Optional, as text. |
| Referência | Optional, as text. |
Formatting the columns as text in the spreadsheet keeps Excel from turning codes into numbers and dropping leading zeros.
Change multiple
Bulk update of Brand, Class, Unit of measure, Formulation type and Toxicological classification.
Inside the record there is also the Import data button, which brings in information for the open product.
🔍 View Inventory
A feature available on several screens of the system, it lets you:
- Check the current balance
- Filter by product, class, location
- See the complete movement history
- Check the lots and their balances
📊 Related reports
Besides the main ones listed below, there are many other product-related reports, such as consumption by operation, products by crop, etc.
The system's home screen also has the Inventory dashboard, with charts and indicators for products in stock, recent movements and storage locations.
- Inventory management is more accurate
- Use in work orders is safe and standardized
- Reports and dashboards reflect consolidated, reliable data
❓ Frequently asked questions
How do I get the system to suggest the right rate in the work order?
Fill in the product's Dose x Farm x Crop tab, entering the standard rate for that farm and crop. When you choose the product in the order, the system suggests that rate automatically.
How do I stop a product from being used on a certain crop?
On the Dose x Farm x Crop tab, create the line for that farm and crop and check Block: do not allow this product to be used on this crop.
How do I control the number of applications and the interval between them?
With the Maximum number of applications and Interval in days fields on the Dose x Farm x Crop tab. The system checks these limits and shows the result in the work order's Check field.
What can I set up on this screen?
Every item used in the operation: farm inputs (fertilizers, crop protection products, seeds), warehouse items (fuels, parts, materials) and also services (maintenance, transportation, sample collection).
My supplier uses a different code than mine. Can I record it?
Yes, in two ways. The Reference (External) field accepts several codes — type each one and press Enter. And, to keep the code and description that each supplier uses, there is the NCMs & References tab, where you enter the entity along with the reference.
How do I make the lot required on the product's movements?
Check the Require lot box in the product setup. From then on, receipts, issues and write-offs will ask for the lot — this is what keeps the crop protection product traceable down to the field where it was applied.
Do I have to set up every crop protection product from scratch?
No. Use the Import 'standard' company button in the list: it opens a catalog of ready-made products, with active ingredient, class, brand, unit and formulation, and you choose the ones you use. For your own list, the way is Import from Excel.
Where can I see how much I have of a product and in which location?
On the product's own Inventory tab: it shows, by location, the balance, the number of lots, the last cost and the average cost. The View inventory button, at the top, opens the full lookup with the movement history.
Where is the crop protection product's regulatory information?
In the crop protection product info group of the setup, with fields such as MAPA number, toxicological classification and application method.
Is the product code generated automatically?
Yes. The internal code is generated automatically by the system, using the abbreviation of the product's class.
📦 Extra: Product Lot
The Lot screen is used to classify products and set the expiration date of each one, ensuring accurate control of receipts, issues and traceability in inventory.
🧩 Main function
A lot represents a group of products with the same characteristics (e.g., manufacturing date, expiration date, supplier, etc.).
It lets you track which shipment an item came from, identify expiration dates and keep inventory information consistent.
📝 Ways to set it up
A lot can be created in two ways:
- Directly from the Product screen (
Inventory > Product & Service): ideal for setting up known lots ahead of time. - During the inbound inventory movement (
Inventory > Movement): when you select the product, choose "New" in the lot field and set it up.
When you save the movement and its products, the product is received with its lot into the selected storage location, and the system starts tracking that lot's balance.
🔄 Movements and balance control
- Each lot keeps its own balance.
- On issues, the user must select the lot the product is being taken from.
- When a lot's balance reaches zero (or goes negative), it is automatically deactivated, but it stays visible in the product's history.
📥 Import lot
The movement screen also has an "Import Lots" function, which only appears when the movement type is Standalone Outbound, and shows all of the company's lots — expired, short-dated and long-dated.
When you import a lot into a standalone outbound movement, the system:
- Automatically imports the related product with the lot's remaining balance
- Zeroes the lot's balance
- Deactivates the imported lot, keeping the operation's history
- Complete product traceability
- Automatic control of expiration and balance
- Easier inbound and outbound movements
- An accurate history of each product shipment
❓ Frequently asked questions
What is lot control for in the farm's inventory?
To know which shipment each item came from and to control expiration dates. A lot groups products with the same characteristics — manufacturing date, expiration date, supplier — and is what makes inventory traceable.
How do I set up a lot?
In two ways: ahead of time, from the Product & Service screen, when the lot is already known; or during receipt, in the Movement — when you select the product, choose "New" in the lot field and set it up on the spot.
Does each lot have its own balance?
Yes. Each lot keeps its own balance, and on issues the user has to indicate which lot the product is being taken from.
A lot disappeared from the list. What happened?
Its balance probably reached zero (or went negative) — in that case the system deactivates the lot automatically. It is still visible in the product's history.
📘 Screen: Storage Location
The storage location is where a product is kept on the farm: the chemical shed, the seed room, the warehouse, the fuel station. In upCampo it is not just an address label — it is the unit in which the balance is counted. The same product can have 400 liters in one shed and none in another, and it is the location chosen on the entry that decides where the quantity comes out of.
Every screen that deals with products goes through it: receiving an invoice in the inventory movement, issuing stock for the work order, fueling, transfers and stock counts.
📍 Location in the system
Menu: Inventory > Storage Location
🧩 Main function
Create and configure the locations where products will be stored, with options for balance control, fueling and per-user permissions.
📝 Main fields
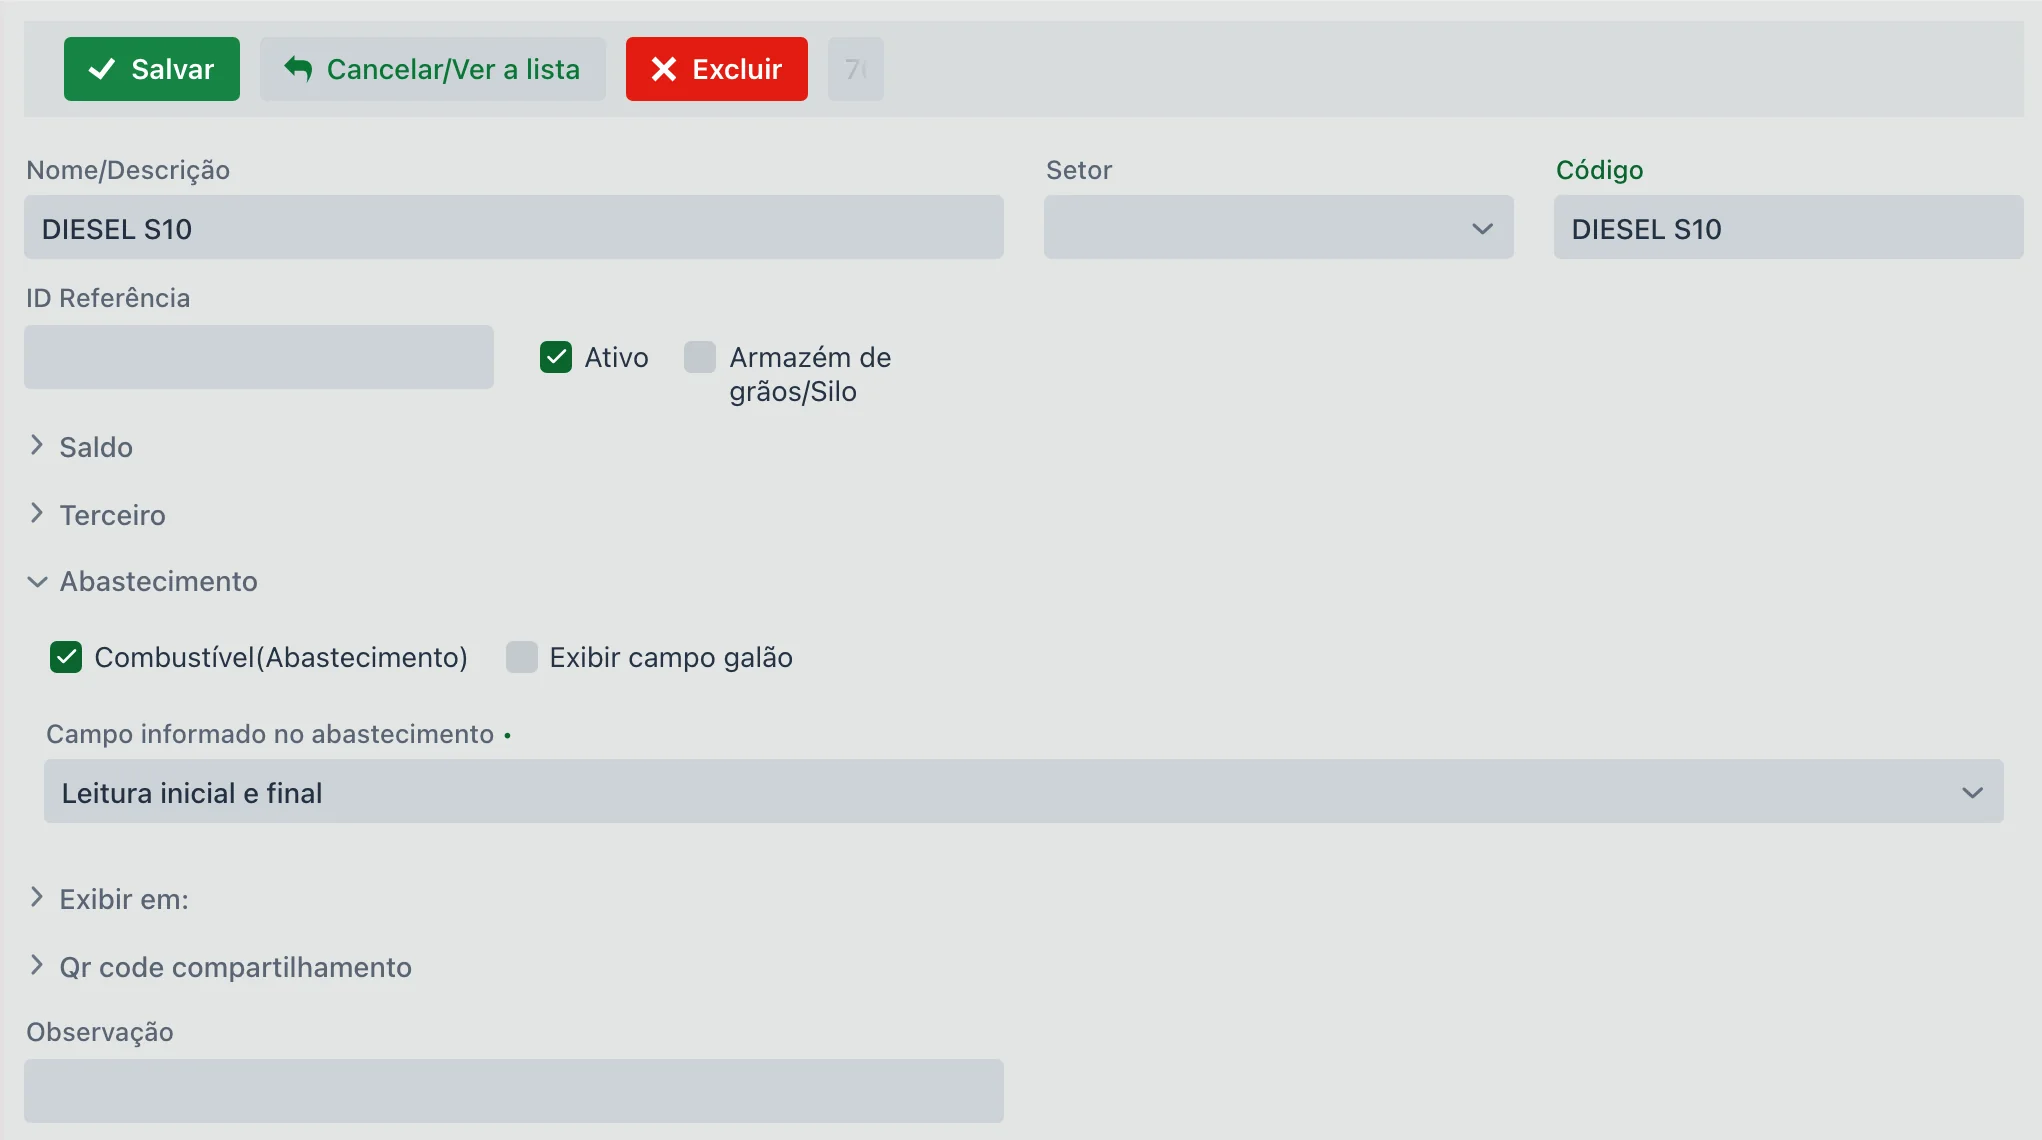
| Field | Description |
|---|---|
| Location description | E.g., "Main Fuel Station", "Chemical Shed". |
| Controls balance | If checked, the system prevents a negative balance. There is a field called "Send e-mail if balance goes negative, to:", where you can enter the e-mail addresses to be notified if the balance goes negative. |
| Grain warehouse | Marks the location as a grain storage facility so it can be filtered on the grain storage screens. |
| Third party | Defines whether the location belongs to another entity (e.g., a contracted warehouse). |
| Fueling |
|
🔒 What "Controls balance" changes
It is the most important decision in the setup, and the only one that changes how other screens behave.
When checked, the location cannot go into the red: an issue that would take the balance below zero is blocked at the moment it is entered. The block appears in the transfer between locations and in the stock issue for the field work order, which are the paths through which product goes out in quantity.
When unchecked, the entry goes through and the balance goes negative. This is not necessarily a mistake by whoever entered the issue: a negative balance almost always means a receipt that has not been entered yet — the invoice for the fertilizer that arrived and is sitting on the office desk, not fertilizer that vanished from the shed.
That is why the "Send e-mail if balance goes negative, to:" field exists: it notifies whoever needs to chase down the invoice, instead of the problem only showing up at month-end closing.
📲 QR Code
- Generated automatically
- Contains a link with direct access to the current inventory, ideal for sharing
🗂 Additional tabs
-
Inventory: shows the products stored at the location. It lets you define:
- Internal location (shelf, section, etc.)
- Minimum/maximum stock
- This enables the restocking reports
-
User: defines which users can access this location.
- If left empty, all users will see the location.
- When filled in, that user will only see the locations they have access to. You can see the user's view in their settings, in the File menu, which shows all the locations they have access to.
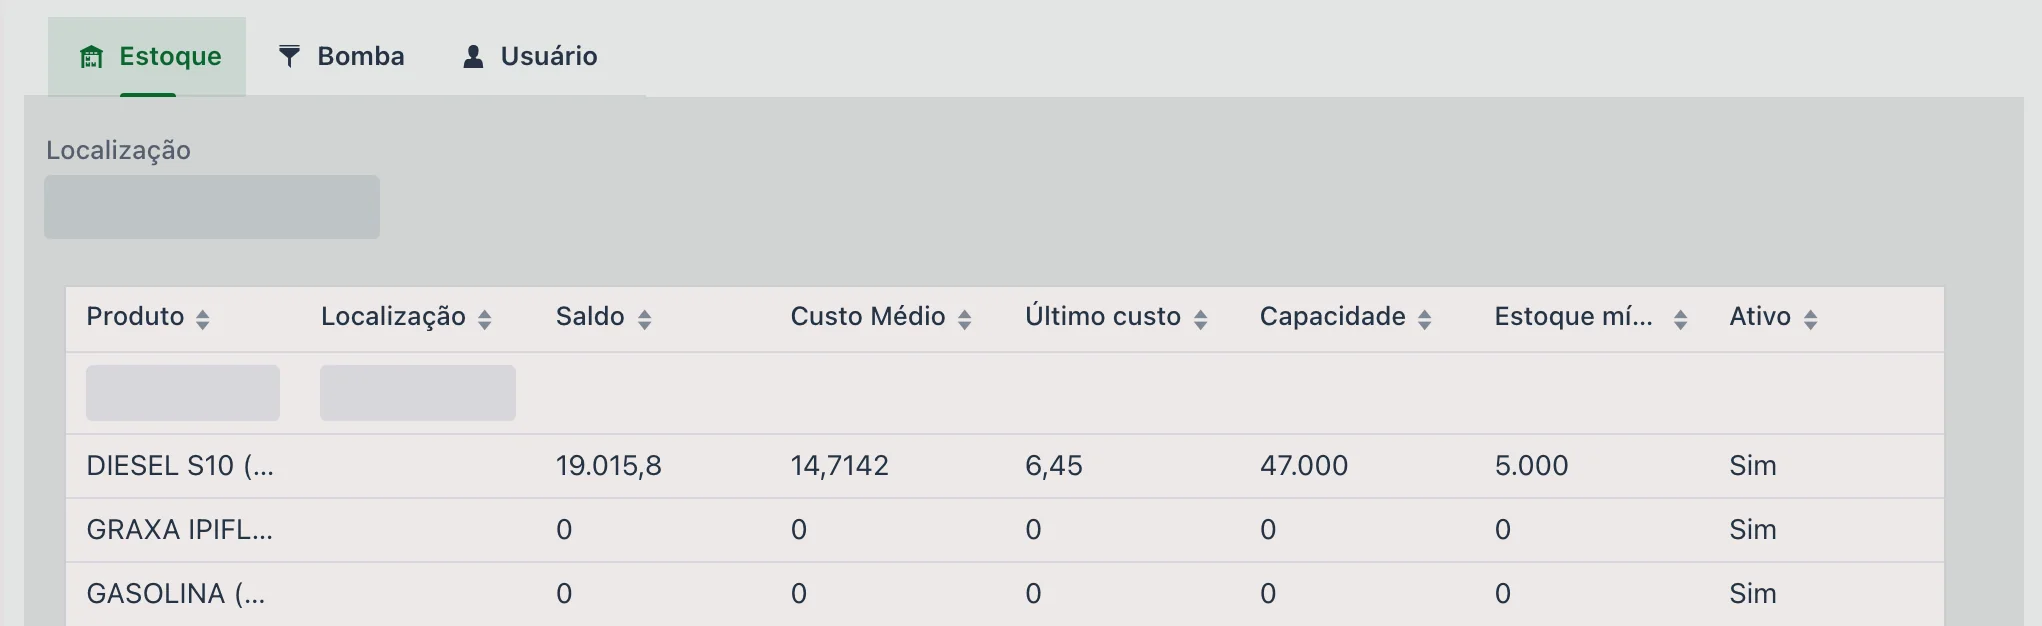
📊 Reports and dashboards
On the home screen there is a tab called Inventory, which shows charts and summaries related to storage locations and their products.
📱 Inventory in the app
In the app, the Inventory menu has three tabs. STORAGE LOCATIONS lists the locations with how many products each one has, with a Type filter and the TRANSFER BETWEEN LOCATIONS button. INVENTORY shows each product's balance and which location it is in, with filters for location, class and balance, and a search. MOVEMENT lists the inbound and outbound invoices for the period, with filters for status, product, entity, cost center, purchase order and sector.
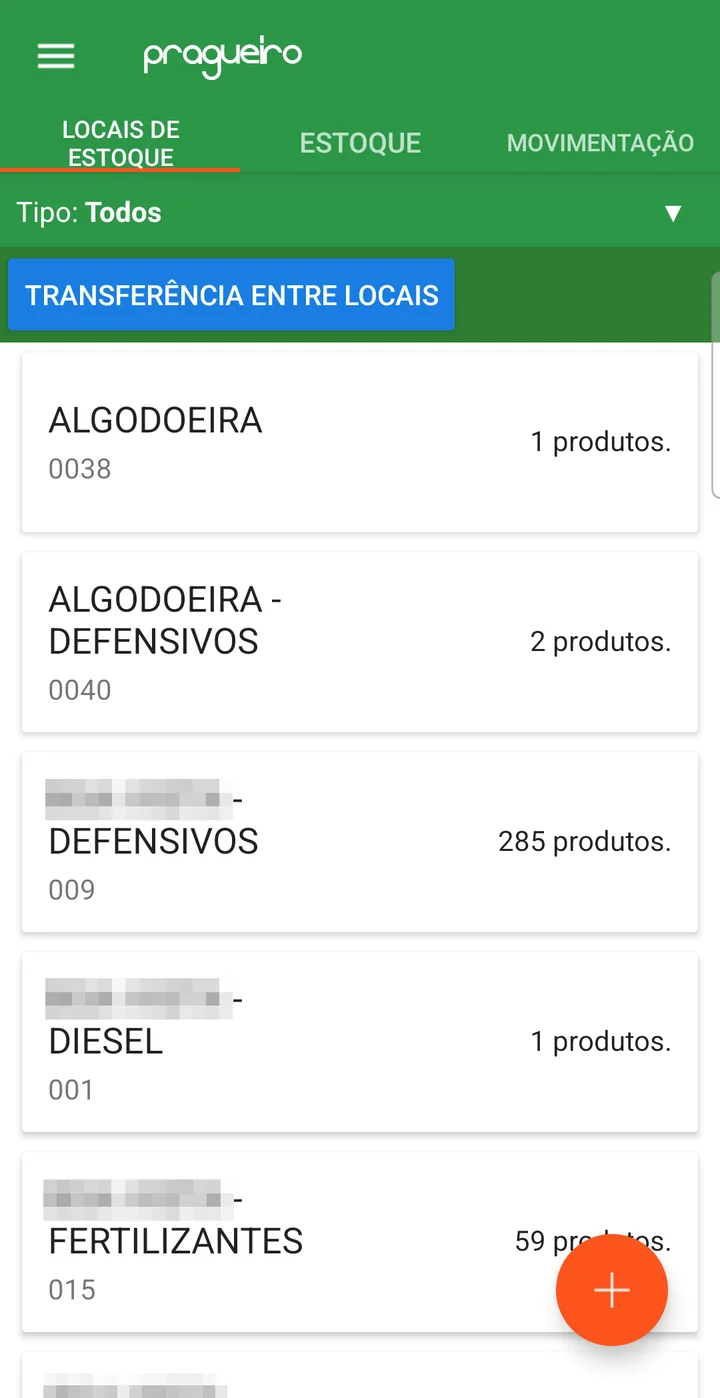
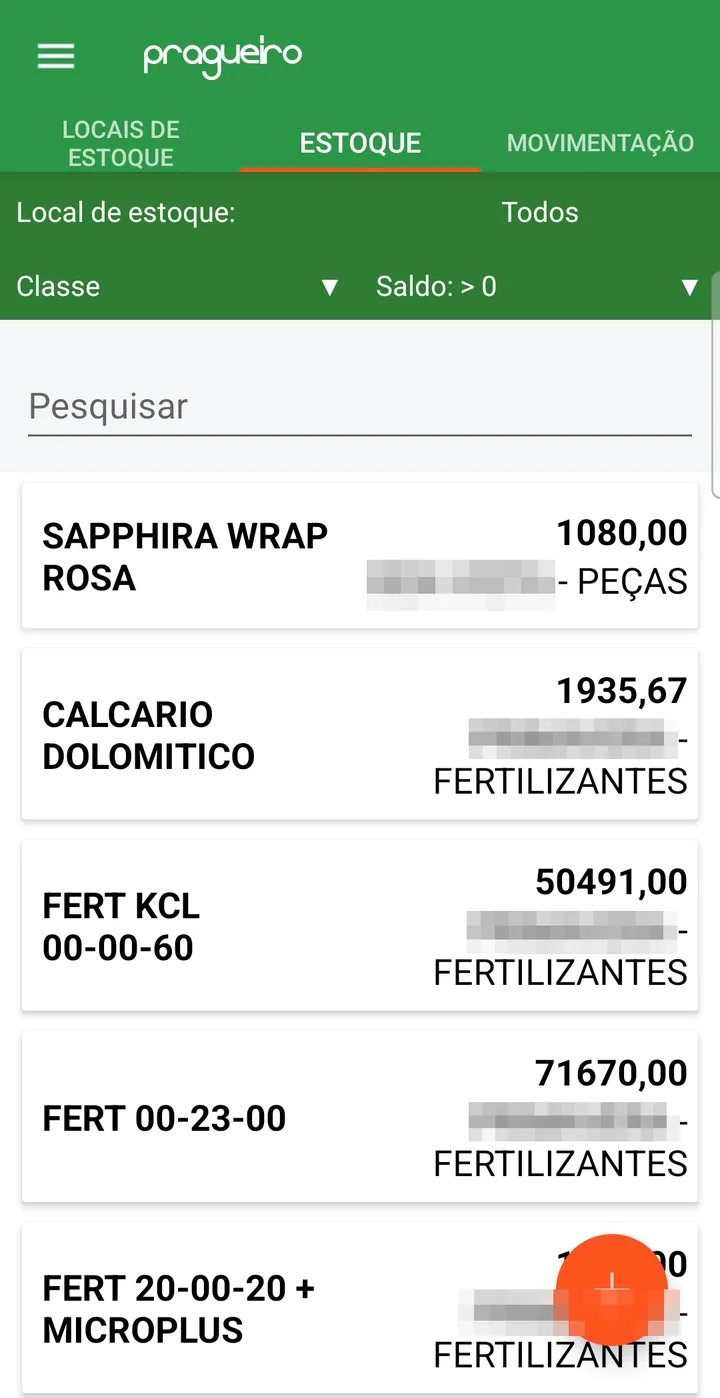
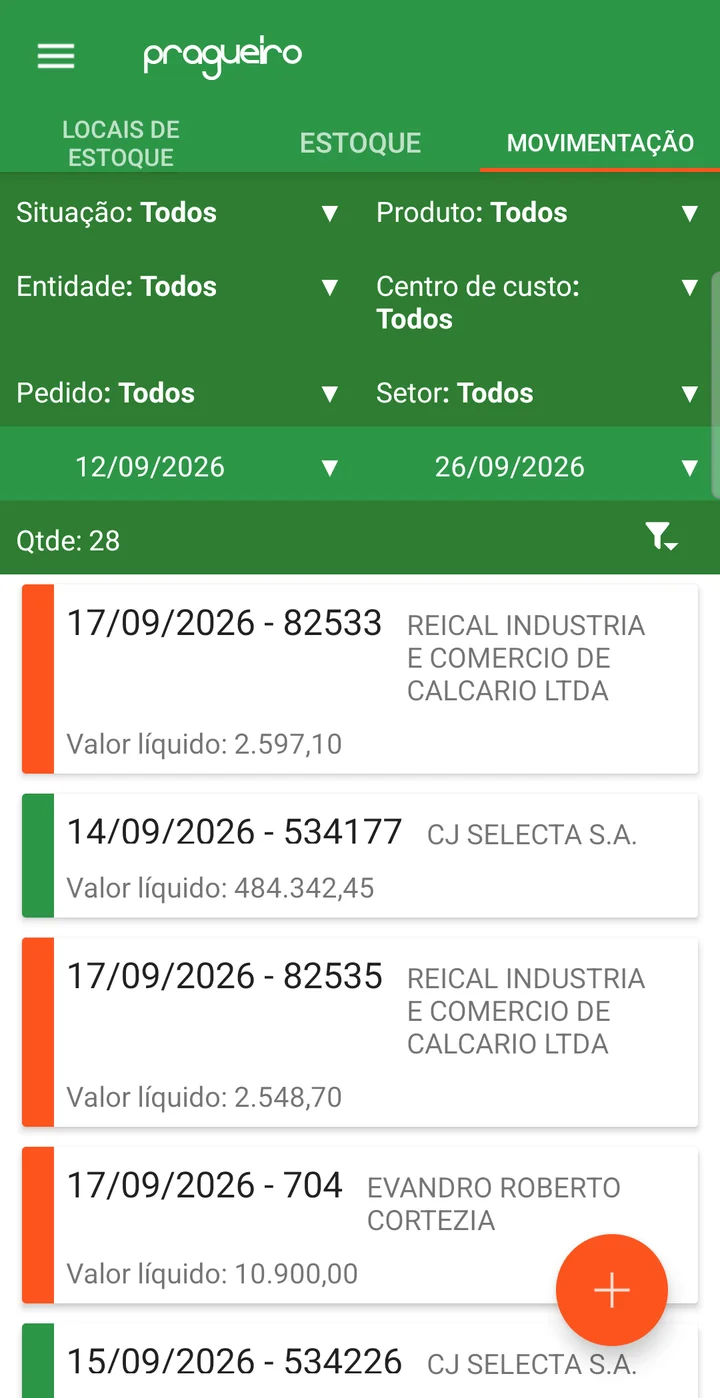
- Stock count control is more accurate
- Each item has a defined physical location
- Consumption by location becomes safer and auditable
❓ Frequently asked questions
How do I keep the farm's inventory from going negative?
Check the Controls balance option in the location setup. With it on, the system blocks issues that would leave a negative balance. In the same place there is the "Send e-mail if balance goes negative, to:" field, where you enter who should be notified if that happens.
Can I limit which users see each storage location?
Yes, with the location's User tab. If it is left empty, all users see the location. As soon as you link someone, that user will only see the locations they have access to. To check what a person sees, open their settings in the File menu.
How do I set up a third-party warehouse that does not belong to the farm?
Check the Third party option and indicate the entity that owns the location — for example, a contracted warehouse. The location still appears in movements, but it is identified as belonging to a third party.
How do I track fuel at an on-farm fuel station?
Set up the station as a storage location and use the Fueling section: there you define whether the reading is by hour meter or odometer and set up the pumps associated with the location.
How do I know which products are below minimum stock?
Enter the minimum and maximum stock on the location's Inventory tab. This enables report
EST.01.06 (formerly 012.C) - Inventory below minimum level, which lists the products that need restocking.
📘 Screen: Stock Count
The Stock Count screen is used to make accurate balance adjustments based on the physical inventory you have checked. It is an essential tool to make sure the system matches what is actually in the storage location.
📍 Location in the system
Menu: Inventory > Stock Count
🧩 Main function
Adjust product balances in a specific storage location. The system automatically works out whether to create a receipt or an issue based on the counted balance.
🖥 The list
At the top are New, Reload, View inventory and Reports ▼, plus a type filter (All, Internal, External or Automatic) and the period (Start date and End date).
The grid shows Code, Description, Storage Location, Date, Person in charge, Count Date, Status, Finalized (date and time it was applied), Products and Type.
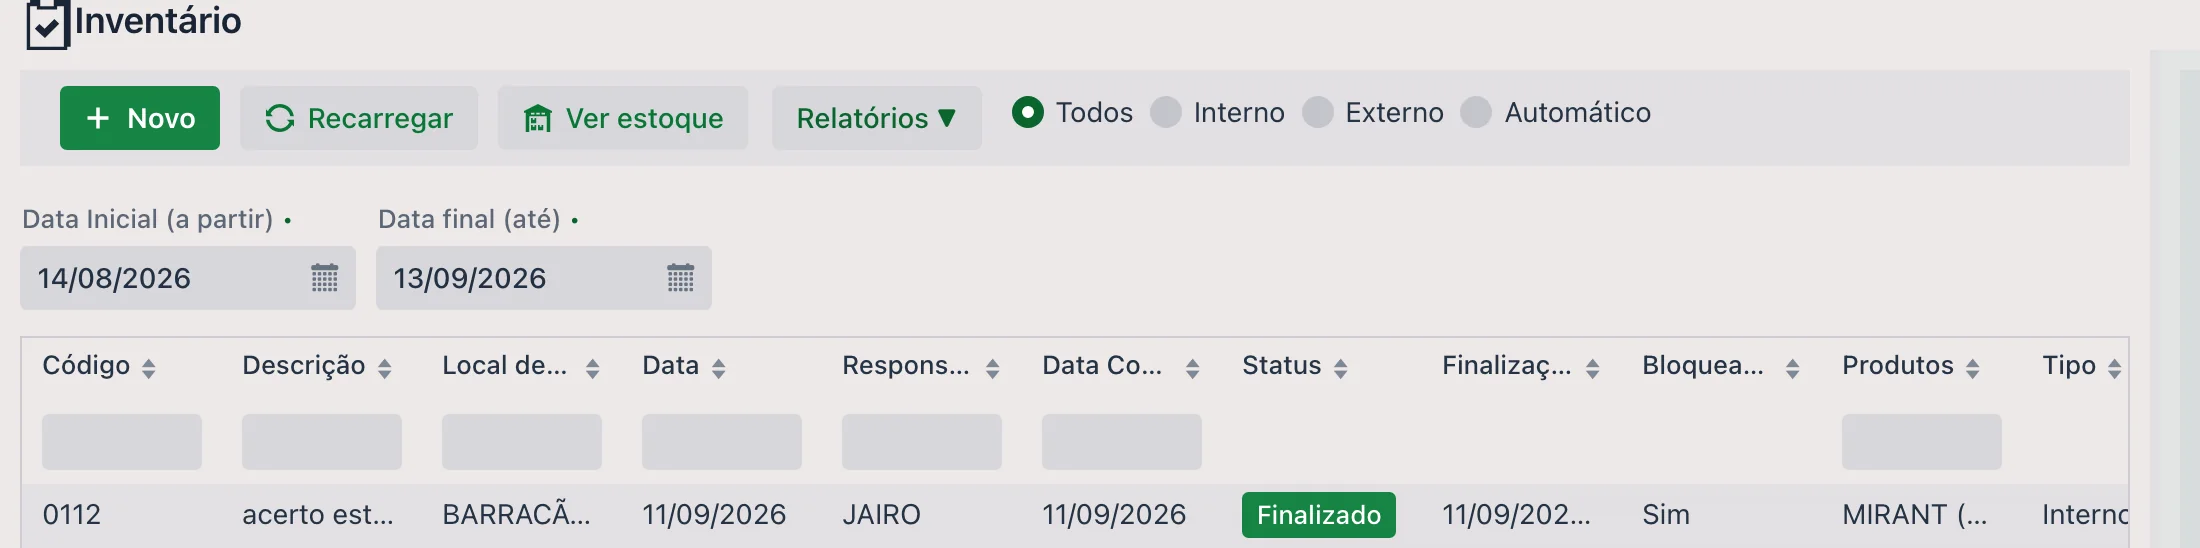
📝 Stock count header
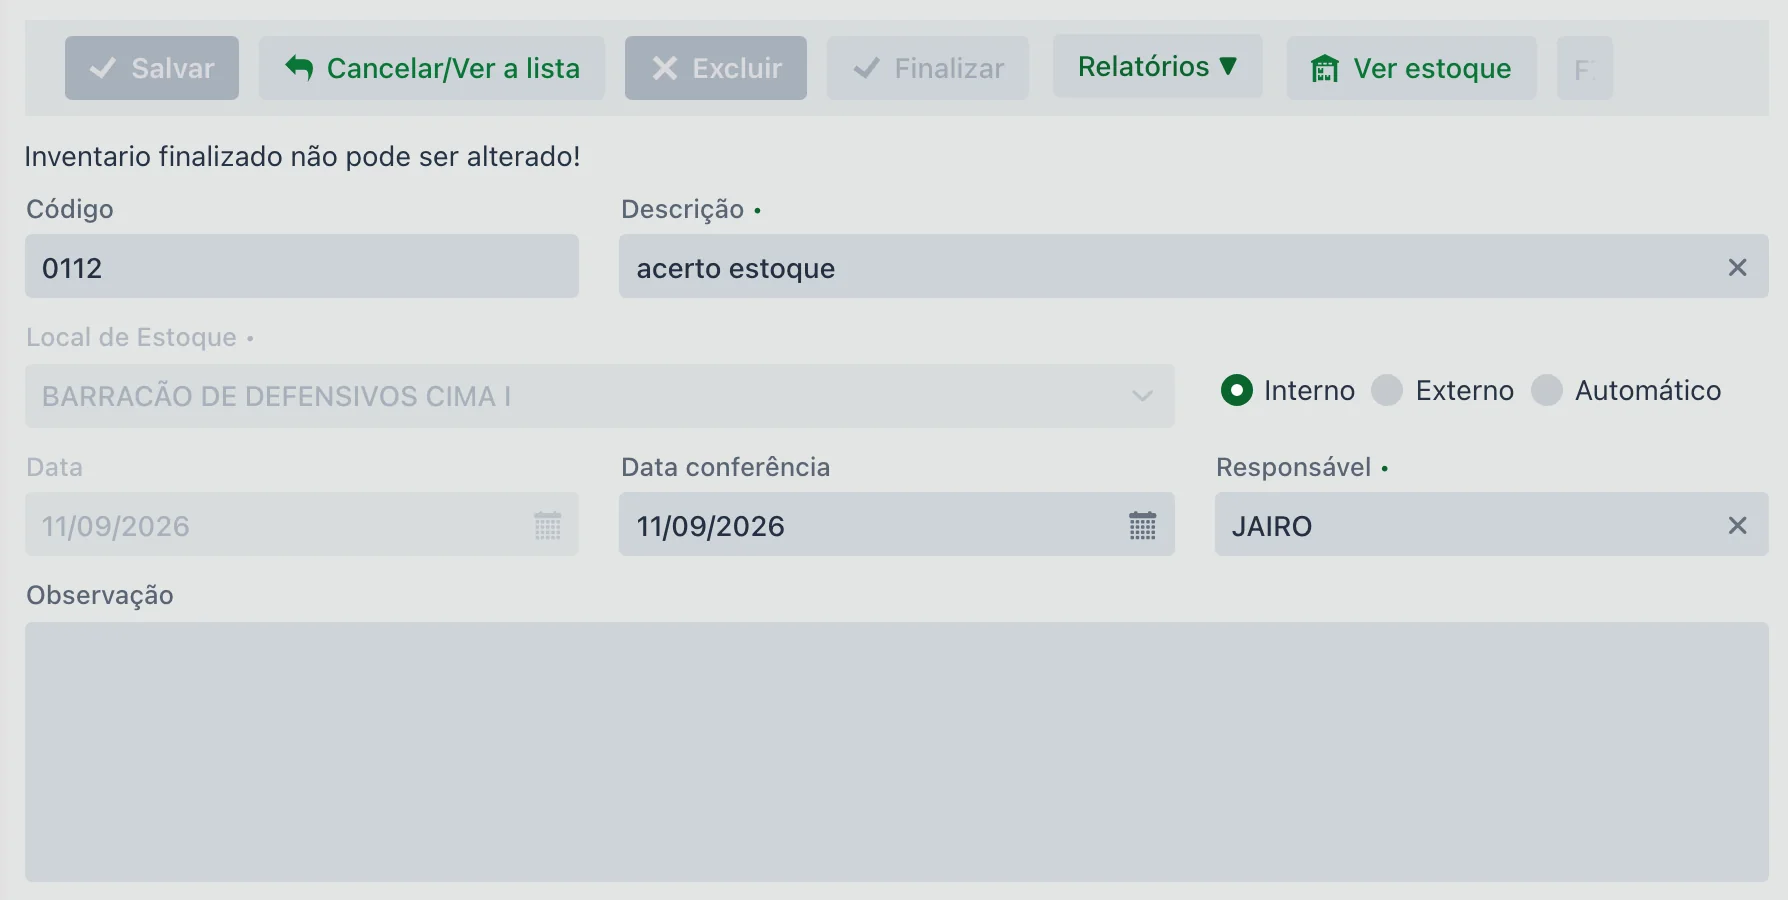
- Storage Location (required): defines where the count is being done
- Description (required): enter a clear name for the stock count
- Type: Internal (default), External or Automatic — classifies the count and works as a filter in the list
- Date and Check date: the document date and the date of the physical count
- Person in charge (required): the person who did the count
- Notes: we recommend describing the reason for the count, approvals, the context of the check, etc.
🗂 Product details
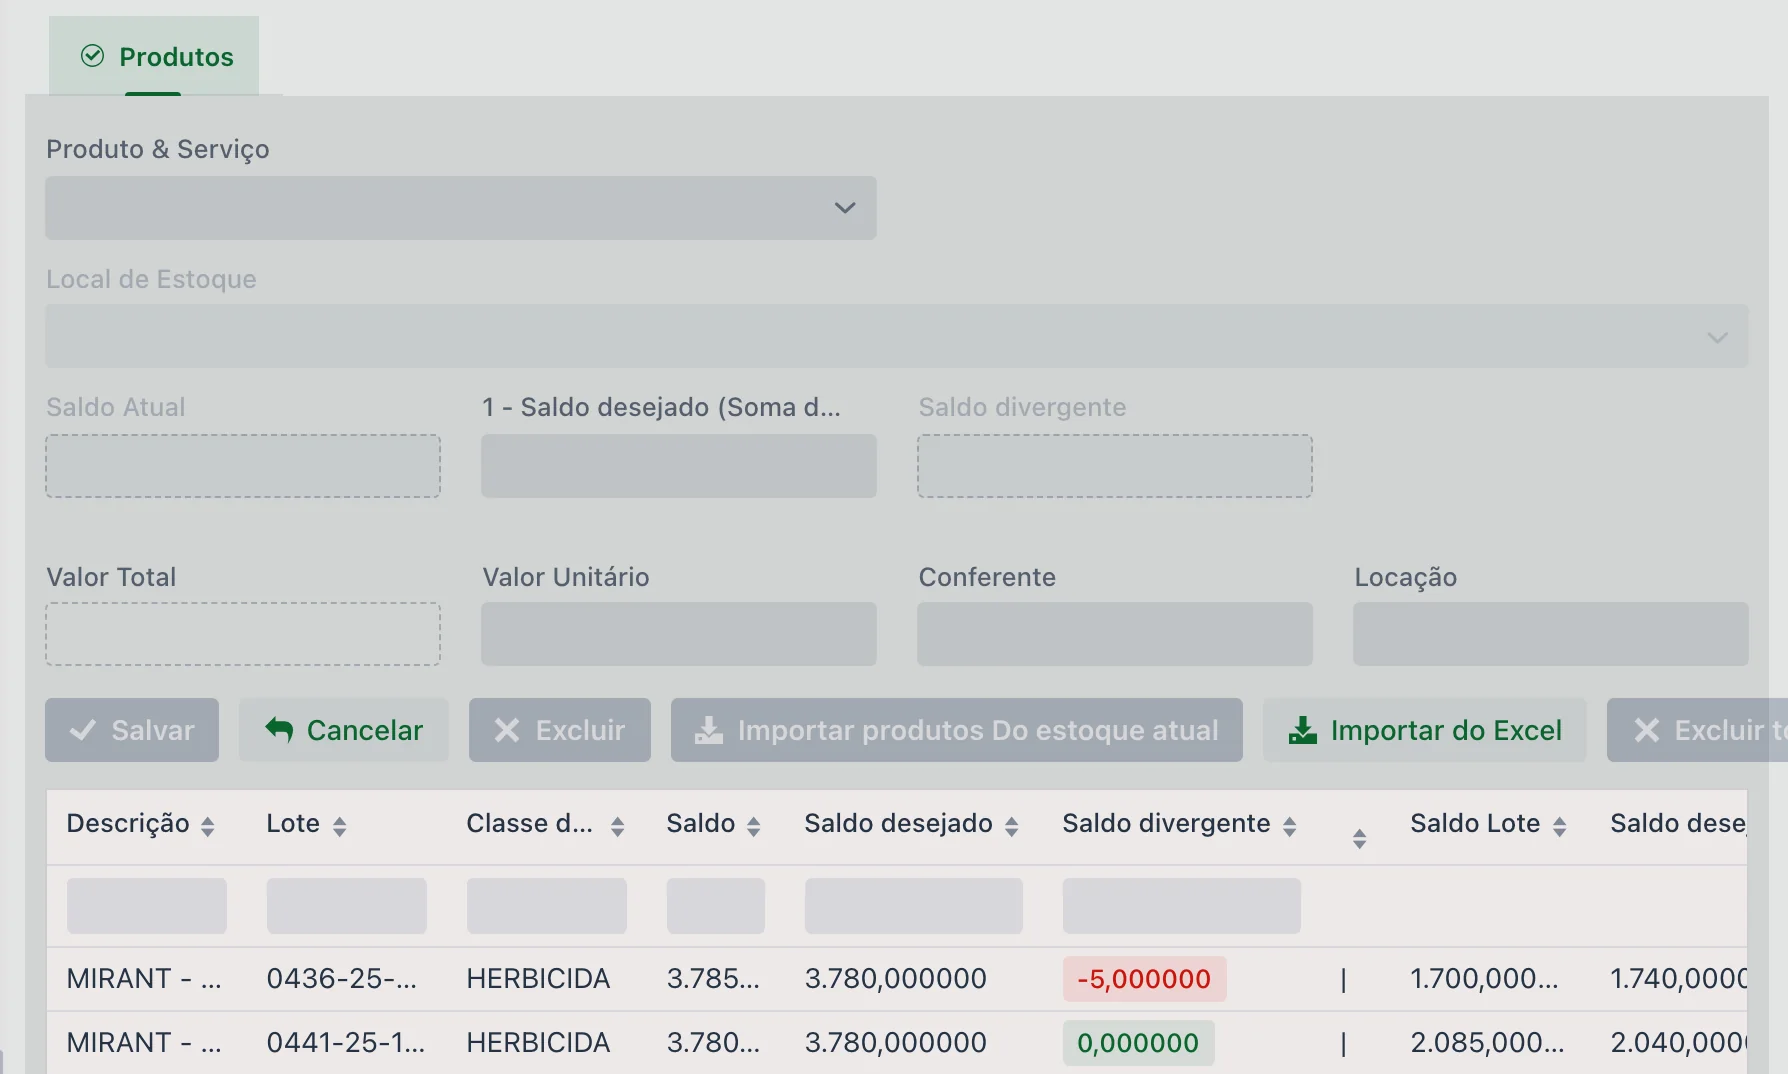
- Product & Service and Lot (when the product tracks lots)
- The item's Storage Location
- Current Balance and Current Balance - Lot — provided by the system
- Counted balance — what was counted; this is what will be applied when you finalize (see below, for lots)
- Difference and Difference - Lot — calculated by the system
- Unit Price and Total Amount, for the financial adjustment
- Counter — who counted that item, which may be different from the person in charge of the count
- Bin location — where the product is kept inside the location (shelf, aisle, block)
🔢 Products with lots: count by lot
When the product has lots, the screen shows two pairs of balances, numbered on the screen itself:
| Field | Who fills it in |
|---|---|
| 1 - Counted balance (Sum of all lots) | The system. It is the product's total at the location, adding up the lots. |
| 2 - Counted balance (For the specific lot) | You. Enter here how much was counted of that lot. |
In other words: with lots, the count is always lot by lot. You enter each one's balance in field 2, and field 1 keeps updating with the sum — no need to add it up by hand or type the product's total.
📥 Available imports
Import products From current inventory: opens a window with the location's products, broken down by lot, showing Balance - Product and Balance - Lot, plus reference, brand, class, unit and bin location. Three checkboxes control what the window lists:
- Show all products
- Show only not included — checked by default, so you don't repeat what is already in the count
- Show products with balance
Check the products and choose, at the bottom, how they come in:
- Import with CURRENT balance: brings the counted balance already filled in with what the system has — good for checking and fixing only what differs
- Import with ZERO balance: brings everything in at zero, so you type the count from scratch
Import from Excel:
- Requires the columns: Product, Lot (if applicable), Counted balance
- The product description must be identical to the setup
- We recommend exporting a products report first to make sure the names are standardized
See the instructions in the system, in the "Instructions" group.
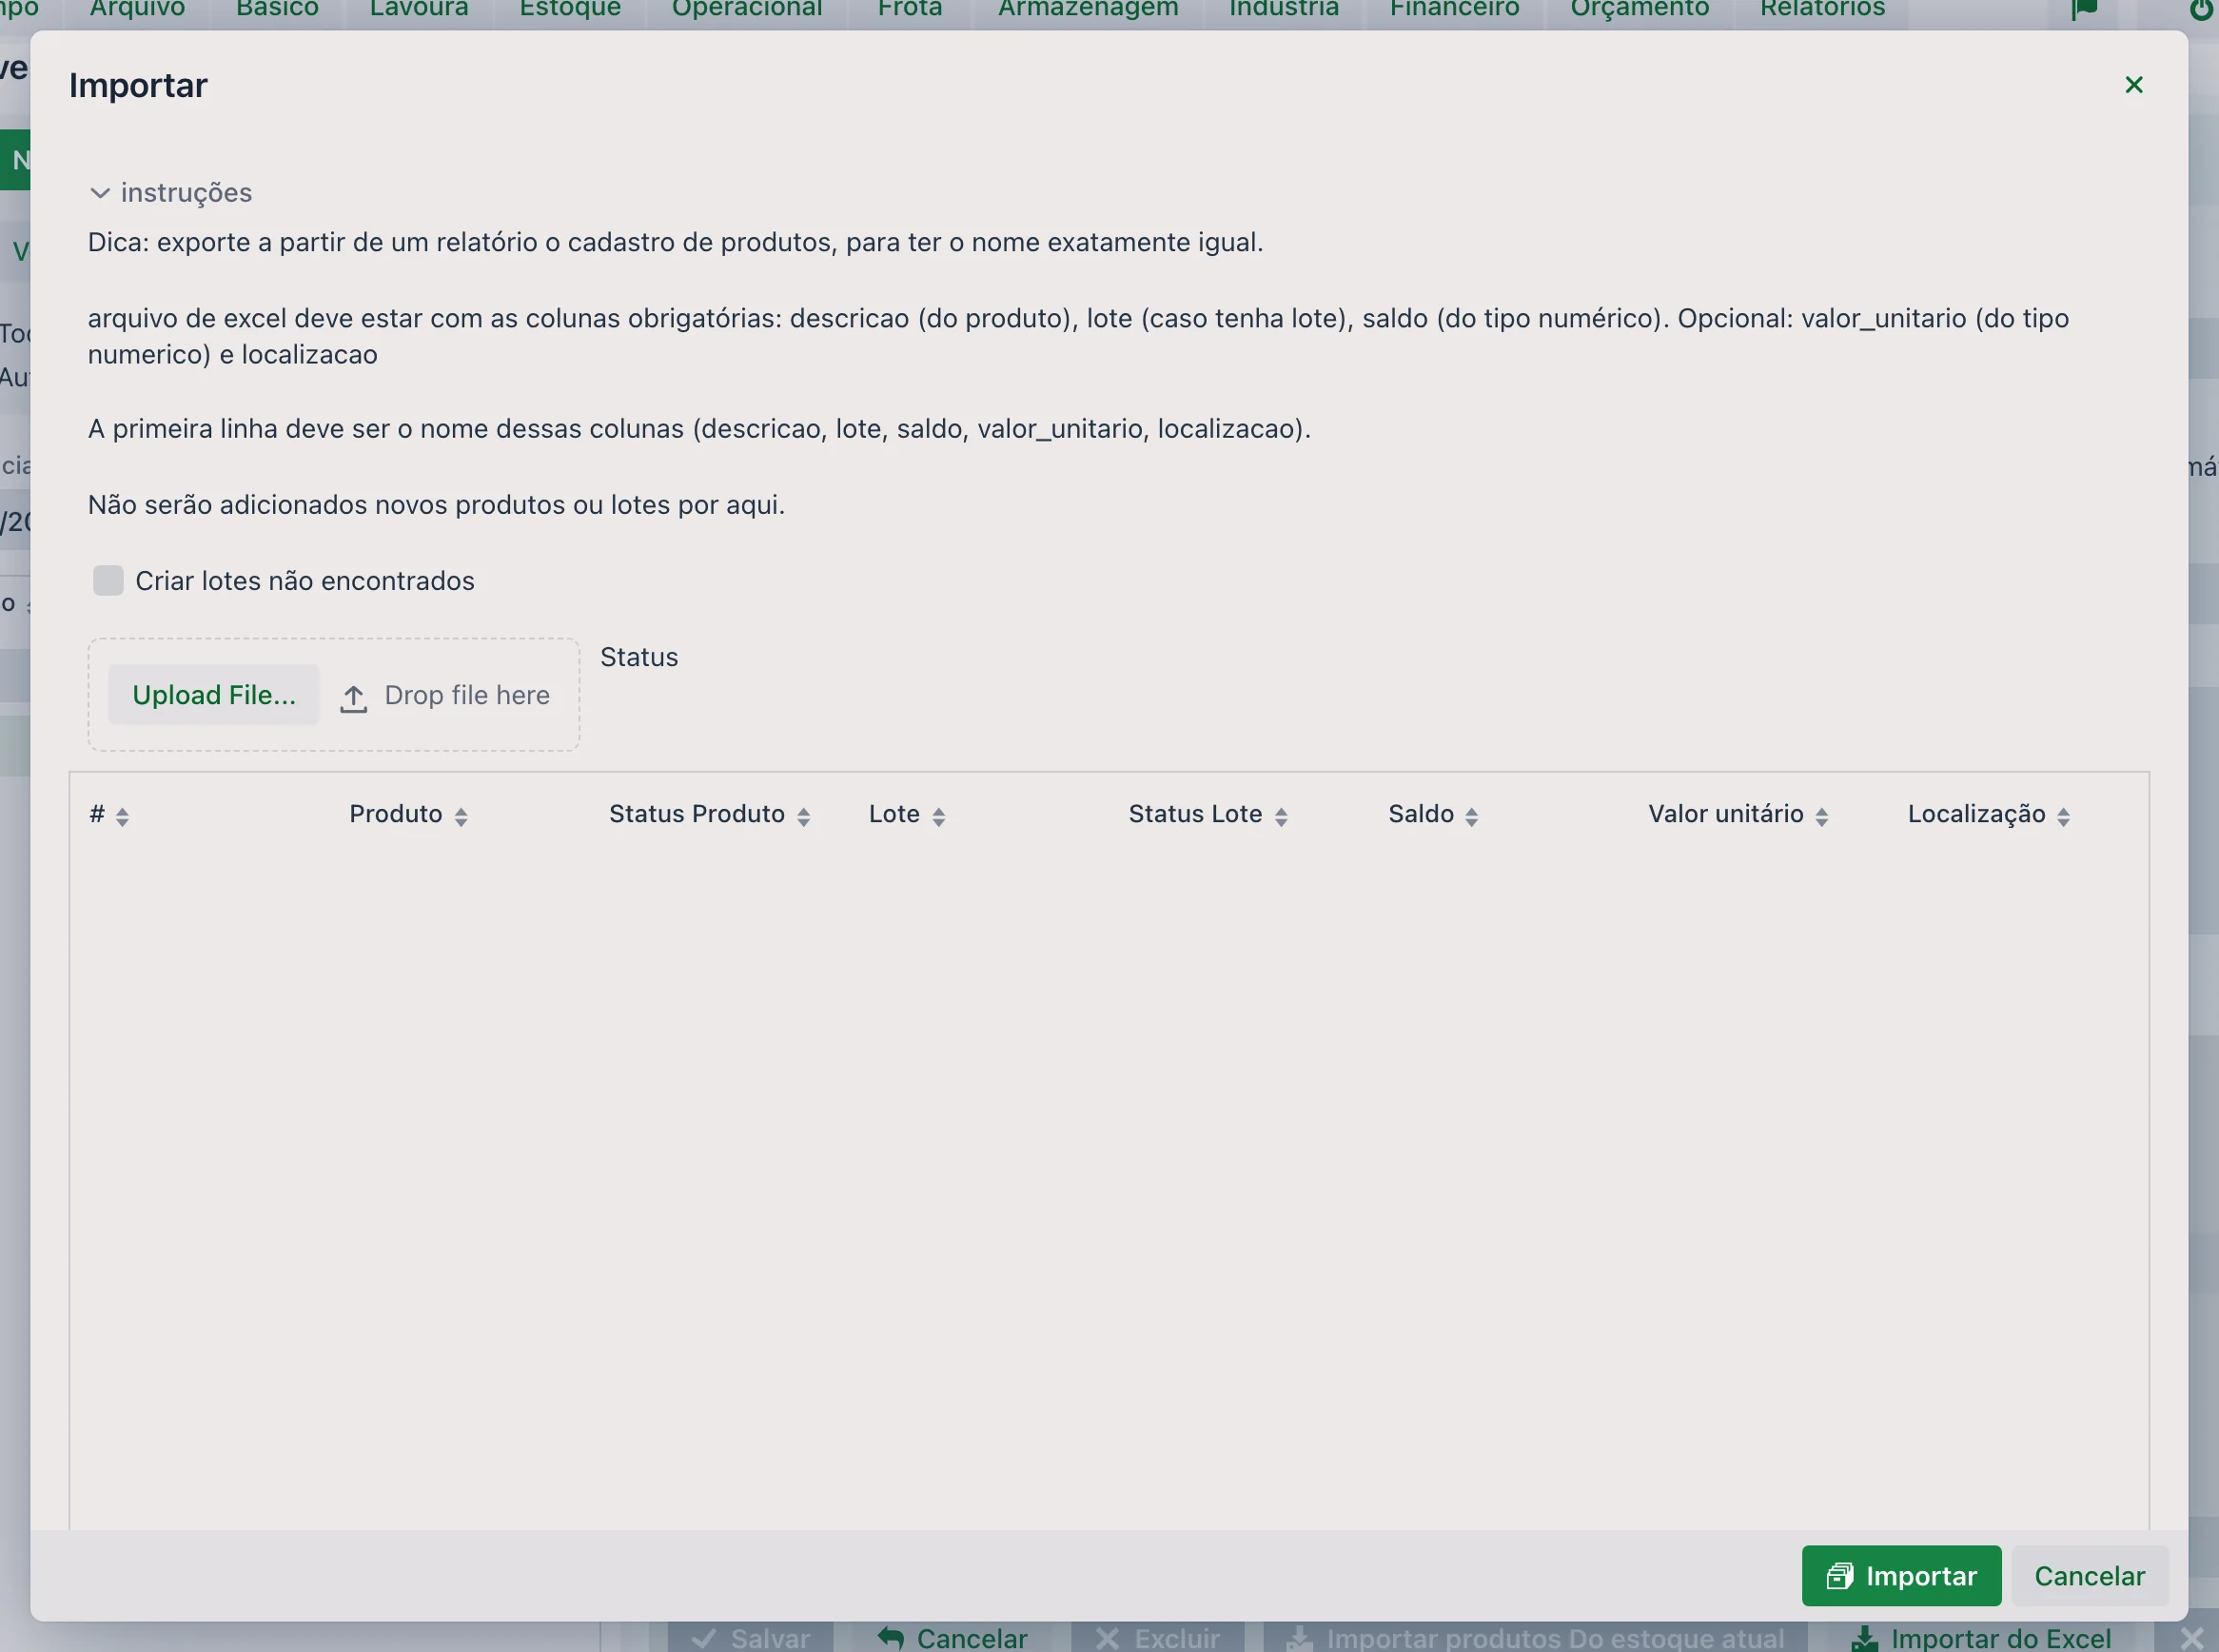
🛠 Finalizing
For the stock count to be applied to inventory, you have to click the "Finalize" button in the header.
- Only finalized stock counts affect the current inventory
- Once finalized, the stock count cannot be changed
- Any later correction must be made with a new stock count
📊 Related reports
On the home screen, the Inventory tab also shows dashboards with graphical summaries of balances and movements by location.
- It lets you correct balances without entering receipts and issues by hand
- Everything is properly documented, with history
❓ Frequently asked questions
I did the stock count and the balance didn't change. Why?
It probably still needs to be finalized. The stock count is only applied to inventory after you click Finalize, in the screen's header.
Do I need to calculate the difference between what I counted and the system?
No. You only enter the Counted balance — what was physically counted. The system calculates the difference and decides on its own whether to create a receipt or an issue to reach the correct amount.
The product has several lots. Do I enter the total or lot by lot?
Lot by lot. Fill in the "2 - Counted balance (For the specific lot)" field with what was counted for each lot; the "1 - Counted balance (Sum of all lots)" field is calculated by the system, adding up what you entered. No need to add it up by hand.
I only want to check what is wrong. How can I speed up data entry?
Use "Import products From current inventory" with the Import with CURRENT balance option: the products come in with the system balance already filled in, and you only change the lines where the count differed. For a blind count, use Import with ZERO balance.
Can I count more than one storage location at the same time?
No. The Storage Location is required in the header and defines where the count is being done — one stock count per location.
What else is worth recording in the stock count besides the numbers?
The Person in charge of the count and, in the Notes, the reason for the count, approvals and the context of the check. That is what makes the adjustment traceable later.
📘 Screen: Transfer Between Storage Locations
Used to move a quantity of product from one storage location to another: from the central warehouse to the depot at farm B, from the diesel tank at headquarters to the fuel truck, from the seed shed to the edge of the field. The farm's total quantity does not change — what changes is where the product is.
📍 Location in the system
Menu: Inventory > Transfer Between Storage Locations
🧩 Main function
Record the product leaving one location and entering the other in a single document, with date, quantity, lot, who delivered and who received — keeping each location's balance correct and a history of who took what where.
🖥 The list
The screen opens with the list of transfers for the period. The filters are Start Date (from) , End Date (to), Origin Storage Location and Destination Storage Location.
The grid shows Code, Date (with the status in a colored tag), Entry Date, Origin Loc., Destination Loc., the products in the transfer, Invoice No. and a Print button on each row — handy for sending the receipt along with the load. At the top, besides New and Reload, the View Inventory button checks the balance without leaving the screen.
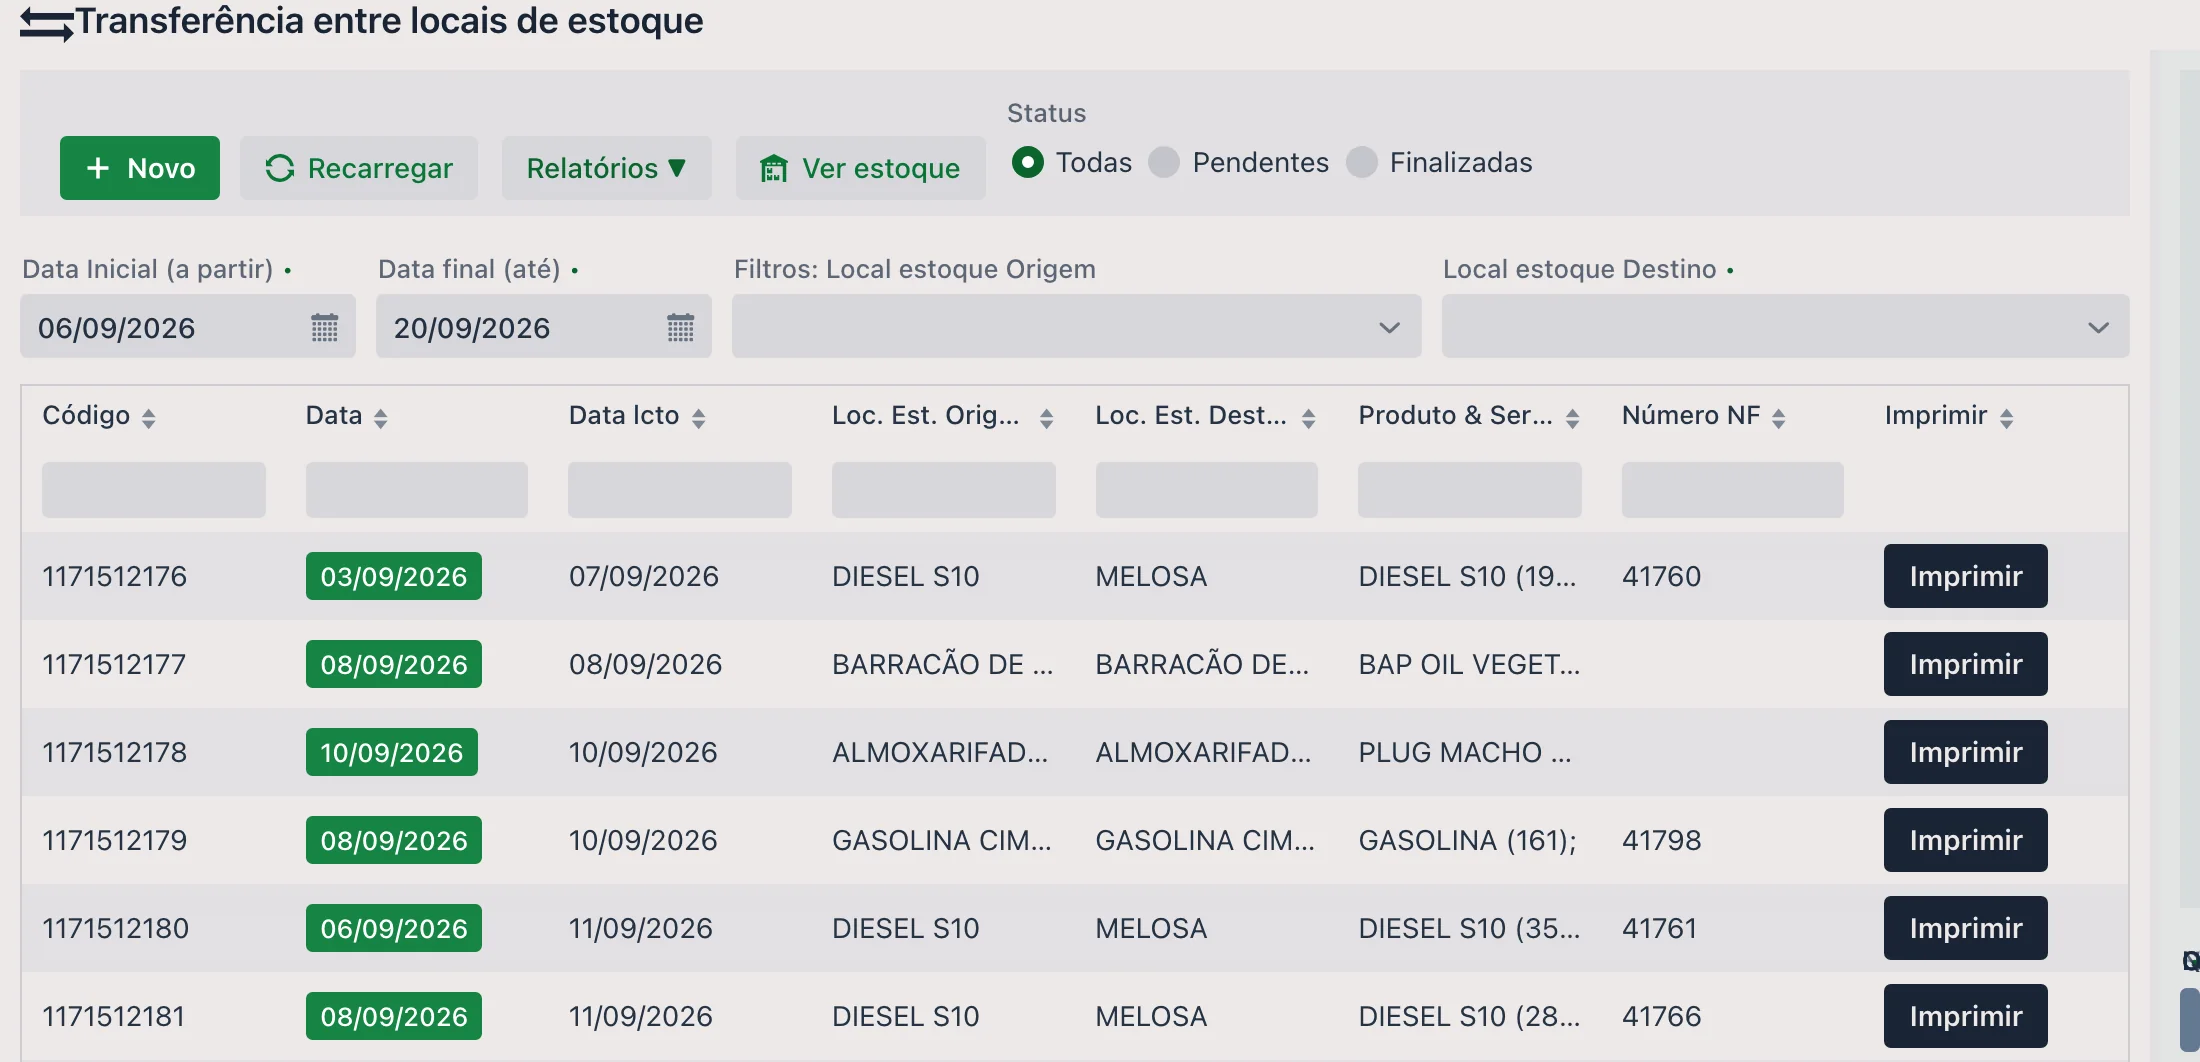
📝 Header fields
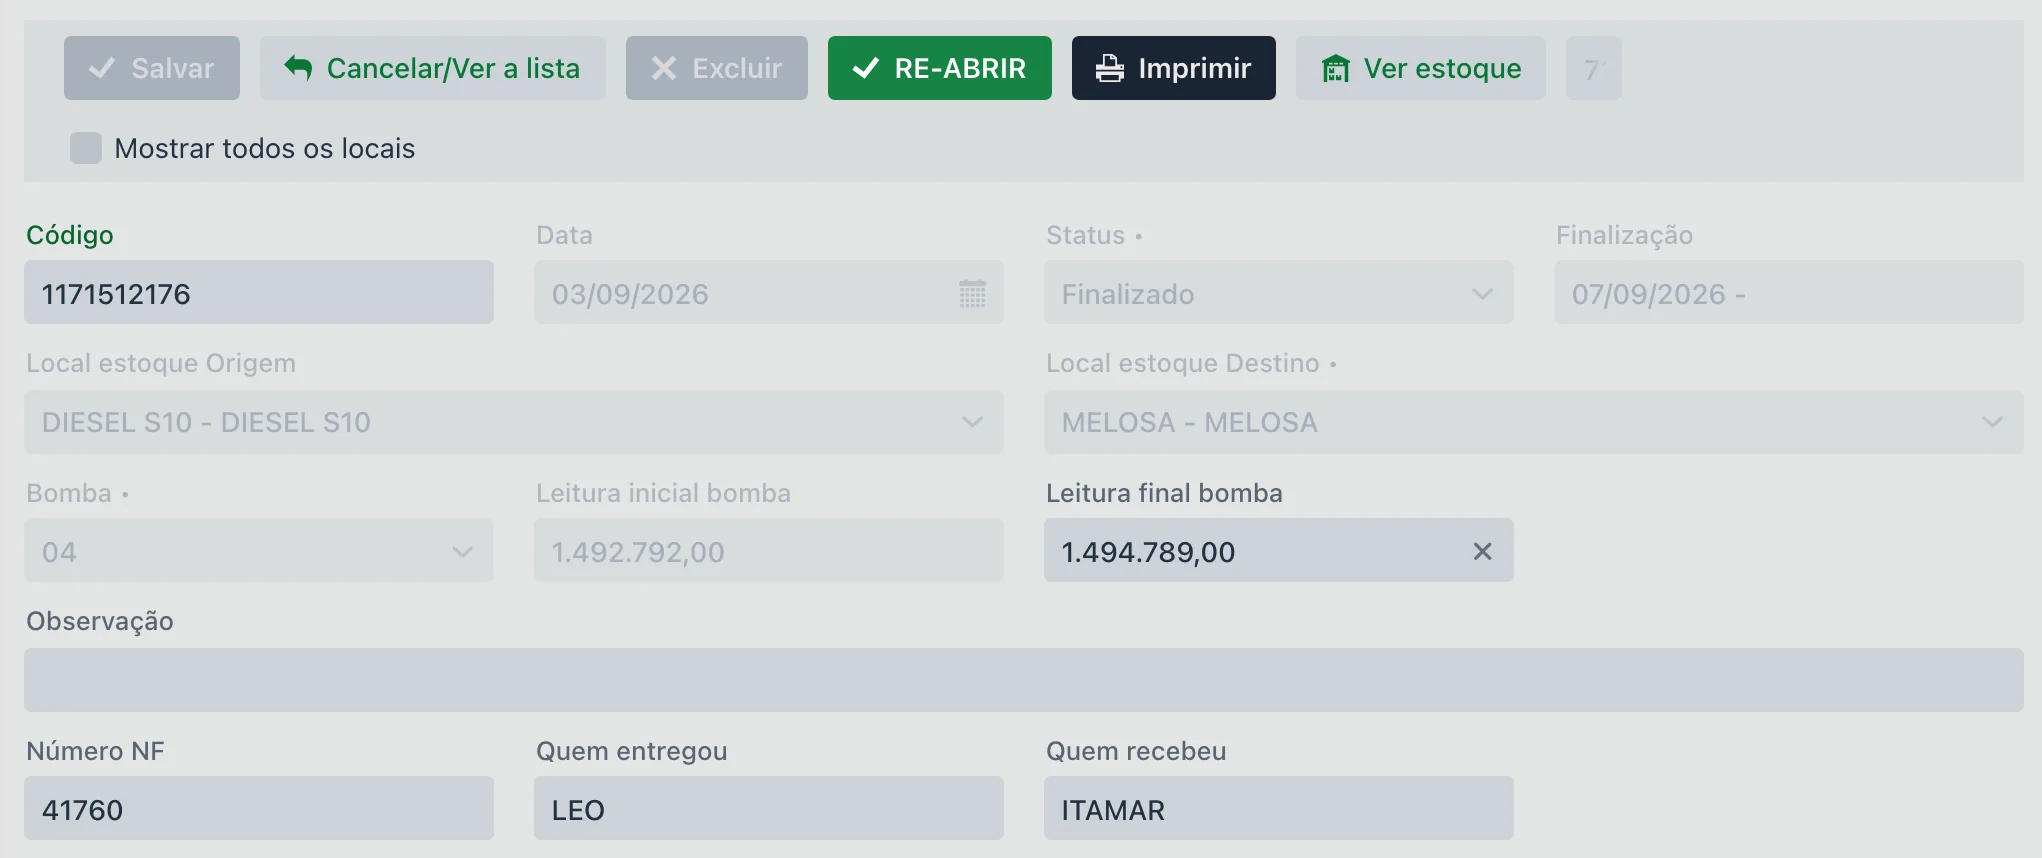
| Field | Description |
|---|---|
| Code | Transfer number, suggested by the system. |
| Date | Day of the transfer. Future dates are not accepted. |
| Status | Open, Sent or Finalized. It is not typed: the Finalize button is what changes it. |
| Origin Storage Location | Required. Where the product leaves from. |
| Destination Storage Location | Required. Where it goes. |
| Pump, Start reading and End reading | Appear when the origin location is a fueling location. In that case the pump is required, and the readings record the meter before and after the withdrawal. |
| Invoice No. | Invoice that travels with the load, if any. The system does not accept the same number twice in the branch. |
| Delivered by and Received by | The names of both ends. This is what settles the question of "who took the product" weeks later. |
| Notes | Free note about the transfer. |
| Show all locations | Expands the list of locations offered beyond the usual ones. |
| Reference/Integration ID | Filled in when the transfer came from an external system. |
📦 The transferred products
Each product goes in as an item. A single transfer can carry several products between the same pair of locations.
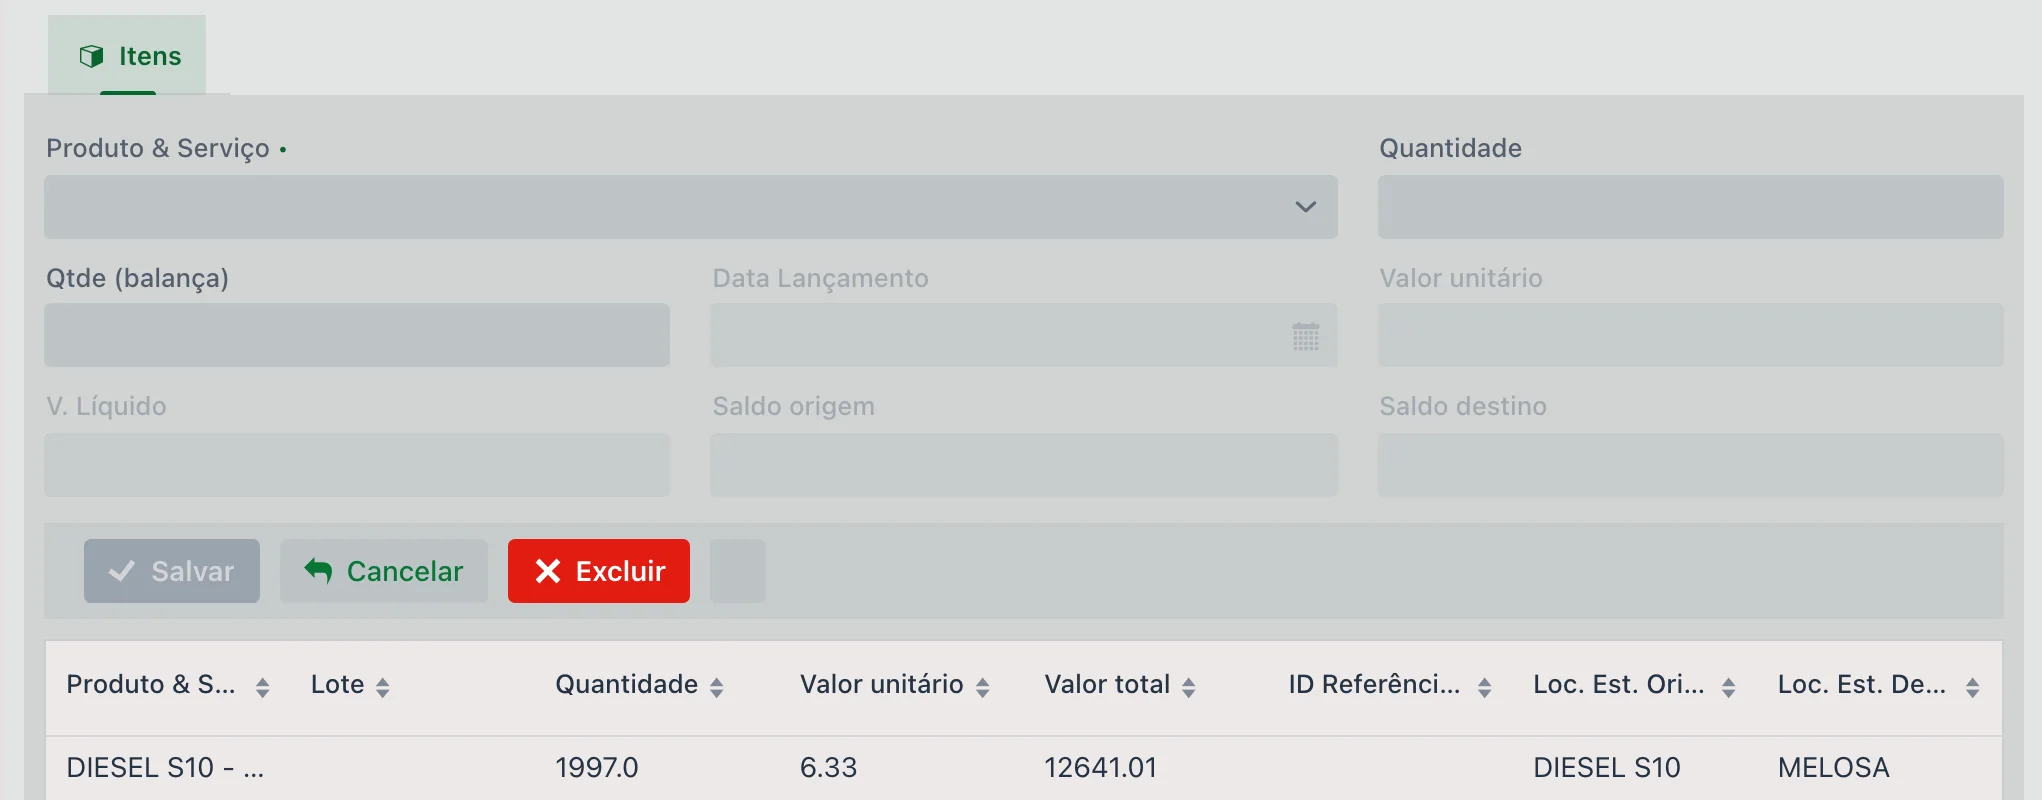
| Field | Description |
|---|---|
| Product & Service | Required. What is being transferred. |
| Lot | Required for products that track lots — it is what keeps traceability of the crop protection product all the way to the field where it was applied. |
| Quantity | How much leaves the origin and enters the destination. |
| Qty (scale) | Weight checked on the scale, when the load is weighed. |
| Entry Date | When the movement was recorded in the system, which may differ from the day of the transfer. |
| Unit price R$ and Net value R$ | Product price and item total — this is how the cost travels with the product to the new location. |
| Origin balance and Destination balance | Show how each side stands, so you can check as you enter the item. The balance only actually changes when the transfer is finalized. |
⚠️ What the system does not allow
- Leaving the origin balance negative, when the origin location has "Controls balance" checked in the location record. The message is straightforward: the balance would go negative and the transfer is not saved.
- Entering with a future date.
- Repeating the invoice number in another transfer of the same branch.
- Finalizing with no items — first add the products, then finalize.
✔️ Finalize: it is what moves the balance
While the transfer is open, it is just a draft: you can add, change and delete items, and inventory stays untouched at both locations.
The Finalize button is what carries out the movement — the quantity leaves the origin location and enters the destination location — and locks the document for editing. That is why a transfer entered and forgotten in open status does not show up in the balance: for the system, the product has not moved yet.
If something needs fixing, the same button reopens the transfer, after confirmation.
📱 Transfers in the app
In the app, transfers are inside the Inventory menu, under the TRANSFER BETWEEN LOCATIONS button. The list filters by origin location, destination location and status; each transfer shows the code, date, both locations and the products. Tapping it shows the same data as the web portal: status, origin and destination, Invoice No., who delivered, who received, notes and the products with quantity and value.
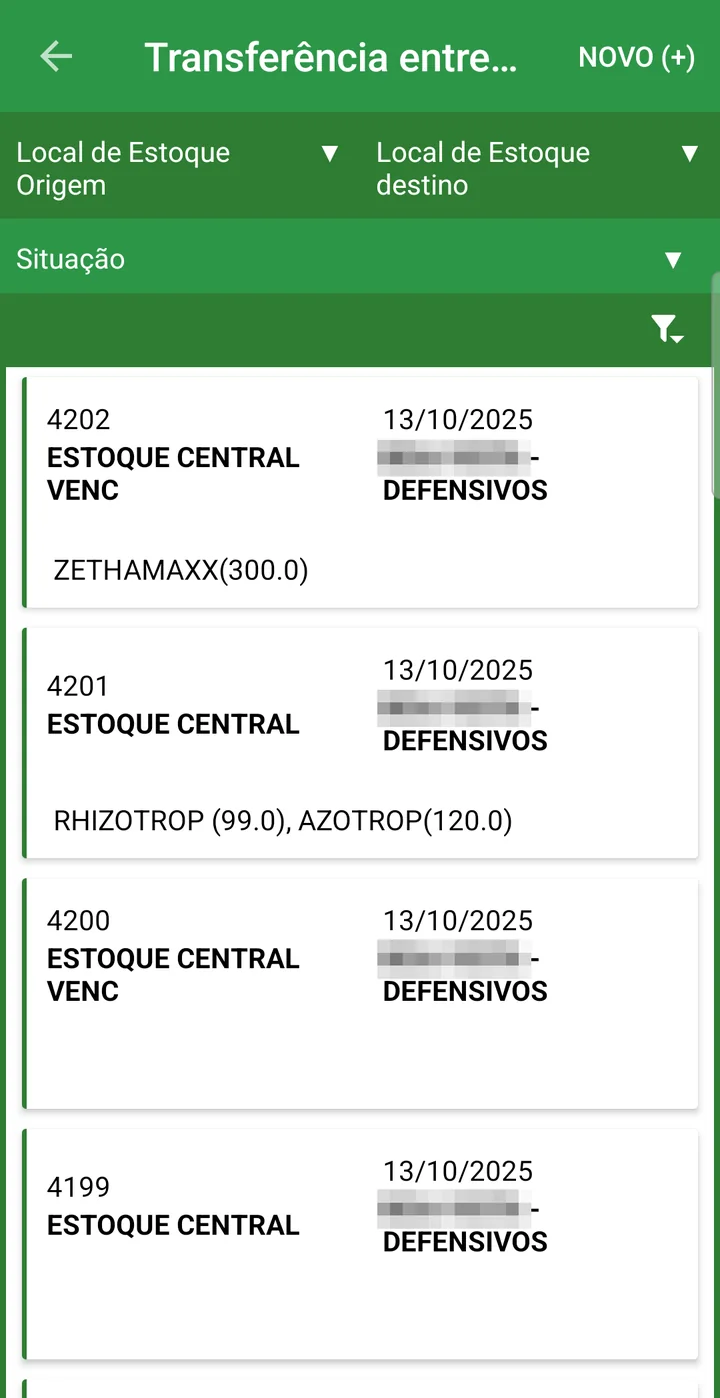
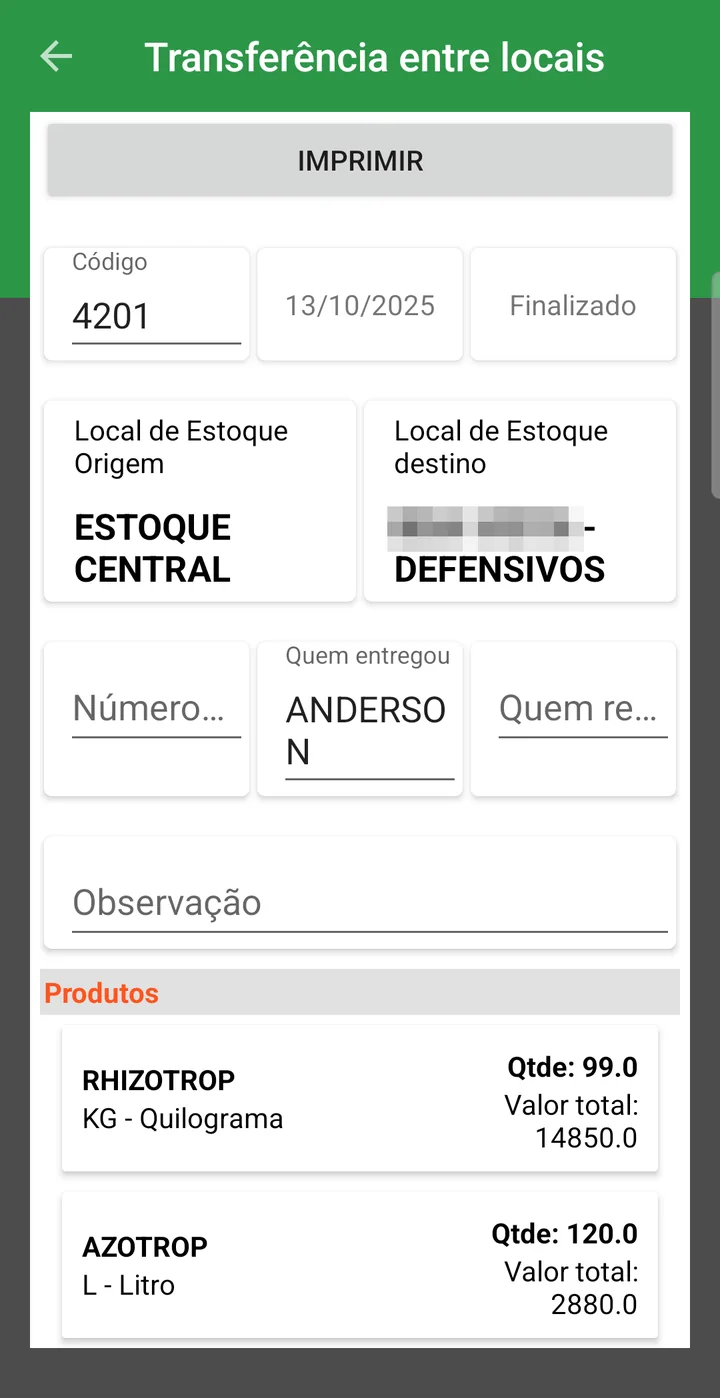
Entering a transfer in the app
- Tap NEW (+). The code and today's date are already filled in.
- Choose the Origin Storage Location and the Destination Storage Location.
- Under Products, tap Select here: the list shows the products at the origin location, with their balance. Enter the Total Qty and tap ADD; repeat for each product.
- Tap SAVE.
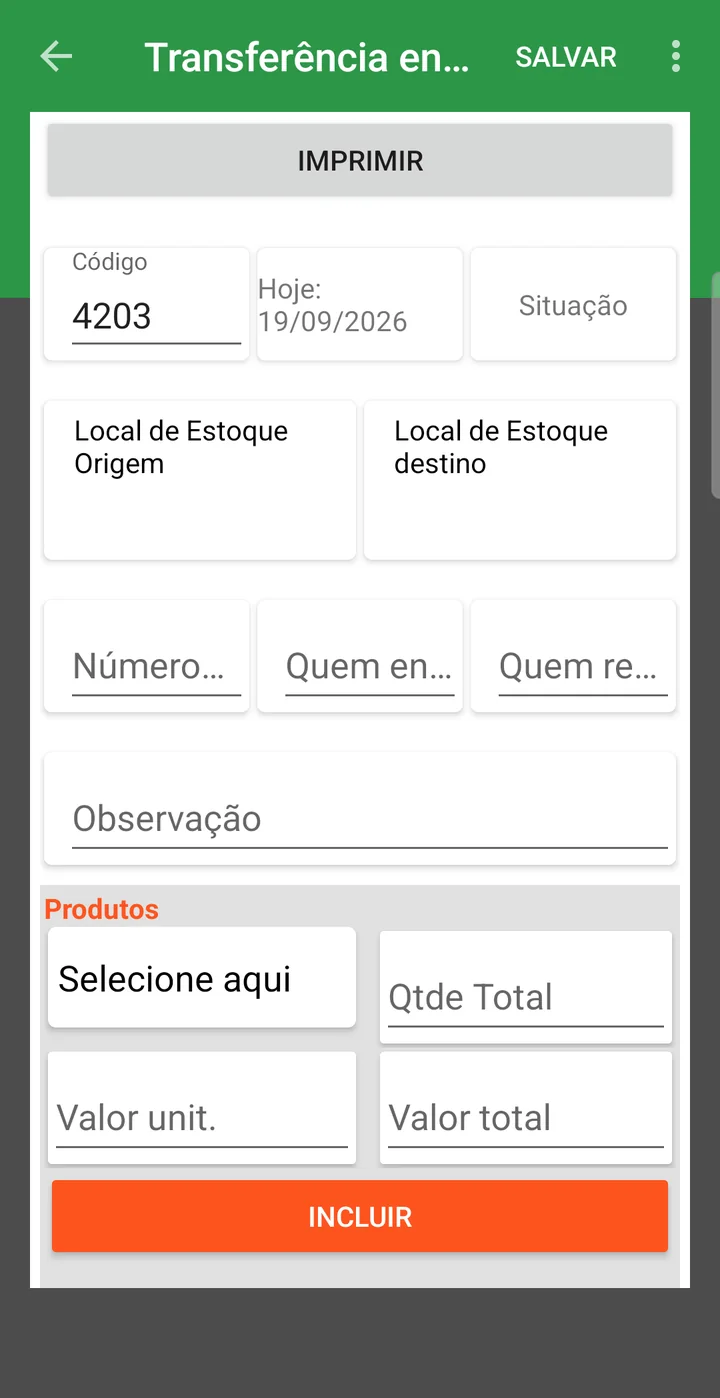
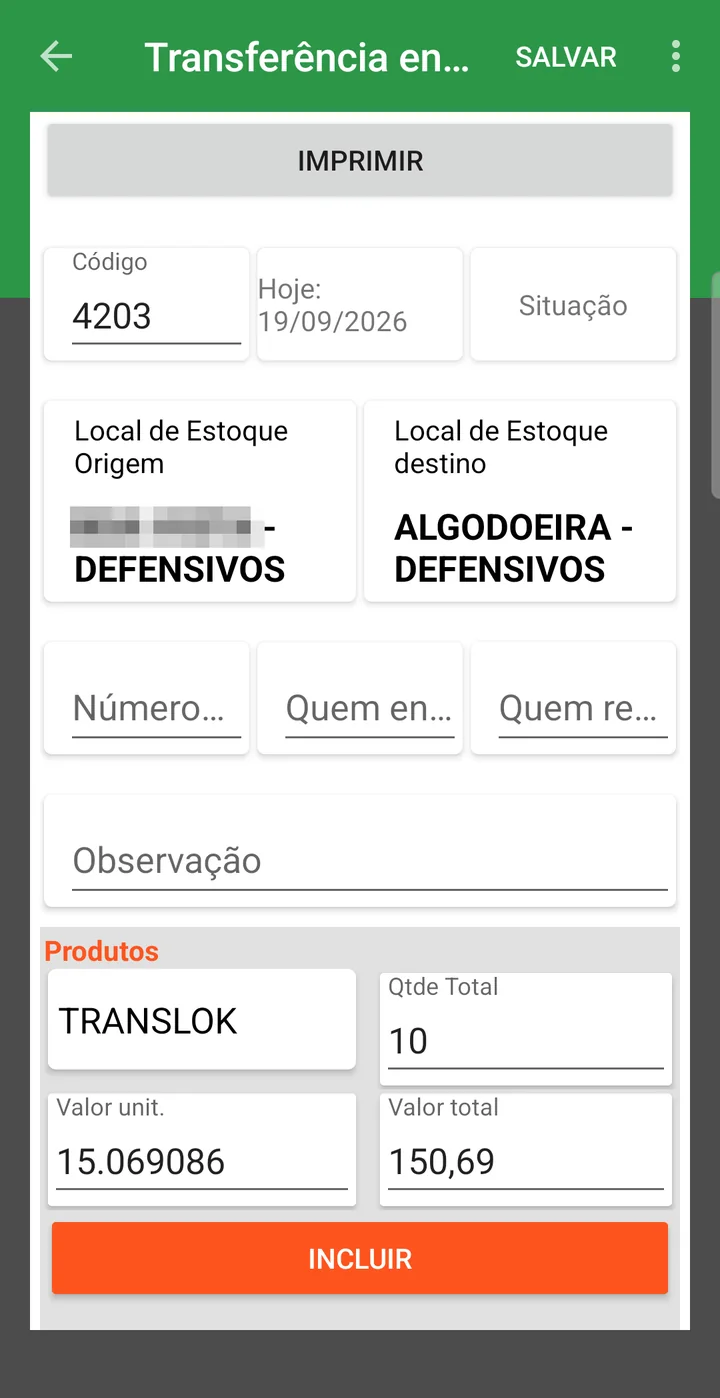
- Correct balance at each farm, depot or tank
- Lot traceability that follows the change of location
- Printed receipt to travel with the load
- Record of who delivered and who received, with the date
❓ Frequently asked questions
How do I record product that left the central warehouse for another farm's depot?
Use the Transfer Between Storage Locations screen: click New, enter the origin and destination locations, save the header, add the products with their quantities and click Finalize. Finalizing is what takes the quantity out of the origin balance and puts it into the destination, without changing the farm's total.
I entered the transfer and the location balances did not change. Why?
The transfer is probably still open. Finalizing is what carries out the movement: until the document is finalized, the product still counts at the origin location and does not appear at the destination. Open the transfer and click Finalize.
What is the difference between a transfer and an inbound/outbound movement?
A transfer only moves the product from one place to another: the farm's total stays the same. The Movement (Inbound & Outbound) screen is what records what comes into the farm — product or service, by purchase or return — and what actually leaves it.
I got a message that the origin location's balance will go negative. What should I do?
That storage location is set to control its balance, and there is not enough product recorded there for the quantity entered. Check whether the product's receipt was entered at the right location, or adjust the transfer quantity.
I transferred diesel from the headquarters tank to the fuel truck. Why does the system ask for the pump?
Because the origin location is marked as a fueling location. In those cases the pump is required and the start and end readings record the meter before and after the withdrawal, which lets you check the fuel later.
I need to fix a transfer that was already finalized. Is that possible?
Yes. Select the transfer and click Finalize again: the system asks whether you want to reopen it. Once the document is reopened, the items can be changed again.
📘 Screen: Entity
The Entity screen is used to register people or companies that have some relationship with the farm. It covers suppliers, customers, carriers, drivers, agronomists, and others.
📍 Location in the system
Menu: Inventory > Entity
The same screen also appears under Financial > Entity — it is a single record, used
by both areas.
🧩 Main function
Record the entity's registration data and define the kind of relationship it has with the farm. This record is the basis for modules such as financial, tax, contracts, inventory movements and harvest.
📝 Main record fields
| Field | Description |
|---|---|
| Type | Required. Legal Entity or Individual — this is what determines whether the screen asks for a CNPJ (company tax ID) or a CPF (individual tax ID). |
| Active | Uncheck it to remove the entity from selection lists without erasing its history. |
| CNPJ / CPF | The entity's document. Next to it is the Retrieve data button, which looks up the registration data from the CNPJ entered — it saves typing and avoids mistakes in the legal name. |
| Legal name and Trade name | How the entity appears on documents and in selection lists. |
| State registration and Municipal registration | Tax data. |
| Address | Block with street address, number, neighborhood, ZIP code (CEP), city and additional details. |
| Phone, Website and Email | General contacts. |
| Code, Reference ID and IBGE Municipality Code | Control and integration codes. |
| Account and Cost Center | Defaults used in the entity's financial entries. |
| Notes | Free note. |
What the entity is
A set of checkboxes defines the role — and you can check more than one: the same company is often both a supplier and a carrier.
- Supplier, Customer, Third party and Third party for harvest intake
- Cotton gin, Carrier, Driver and Agronomist
- Require Cost Center — makes the cost center mandatory in that entity's entries
These checkboxes are what make the entity appear (or not) on each screen: only entities checked as Driver show up in the driver selection of the MDF-e, for example.
🗂 Additional tabs
- Address: lets you register multiple addresses, each with its own state and municipal registration, used mainly for tax purposes (e.g., a customer with several locations). It also has the same payment details block described below
- Payment details: the supplier's bank, branch, account and PIX key — this is what lets you pay them by file, in the payment batch
- Movements (invoices): lists all movements made with the entity (purchases, sales, services)
- Contract: informational tab with the contracts linked to the entity
- File: lets you attach various documents, such as PDFs, spreadsheets and images
- Contact: the contact people at that entity — the salesperson, the manager, whoever handles things day to day
💳 Tab: Payment details
This is where you state how the supplier gets paid. Without these fields, the farm can record the account payable, but cannot send the payment to the bank by file: the payment batch does not generate the remittance for a supplier with no PIX key and no account.
| Field | Description |
|---|---|
| Bank and Bank code | The payee's bank. The code is the three-digit clearing code — "077 for Inter, 001 for Banco do Brasil, 341 for Itaú", as the field help says. |
| Branch and Branch check digit | The branch, with the check digit in its own field. |
| Account No. and Account check digit | The account, with the check digit in its own field. The help explains why: "Required in the file: an account without it does not receive." |
| Account type | Checking, Payment or Savings. It matters: "A savings account sent as checking comes back as an invalid account." |
| PIX key type | CPF/CNPJ, Email, Phone or Random key. The type is what tells the bank what to look up — a key saved without its type is not used. |
| PIX key | The key exactly as registered at the payee's bank. "A truncated key does not exist in DICT and the payment bounces." |
| ISPB | The first eight digits of the CNPJ of the payee's bank. Only required for banks without a clearing code and for PIX by bank details. |
| Payment note | Free note about paying that supplier — it appears as a tip in the batch's "How it will be paid" column. |
The PIX key takes priority over the account when both exist: it settles instantly, has no fee and does not depend on business days. To see how each payment will go out before generating the file, use the How it will be paid column on the Installments tab of the payment batch.
🔧 Features in the list
The list shows Code, Legal name/Name, Trade name, CNPJ, CPF, Management account/Category, Cost Center and Active, with a quick filter by role at the top: All, Customer, Supplier, Third party, Driver, Cotton gin, Agronomist and Harvest third party.
-
Change multiple: bulk editing tool that lets you change:
- The entity's cost center
- The account used in financials
📊 Related reports
- The tax, financial and operational modules work together
- Documents can be kept organized by entity
- Harvest, transport and contract operations run more efficiently
❓ Frequently asked questions
Do I need to register suppliers and customers on different screens?
No. This screen registers any person or company related to the farm. The role is defined by the entity type, and you can check more than one option: Supplier, Customer, Third party, Cotton gin, Carrier, Driver, Agronomist, among others.
A customer with several locations: how do I register the addresses?
Through the Address tab, which lets you register multiple addresses for the same entity — used mainly for tax purposes.
Where can I see everything I have bought from a supplier?
On the record's Movements (invoices) tab, which lists all movements made with that entity: purchases, sales and services.
Do I have to type in all the company's data by hand?
No. Enter the CNPJ and click Retrieve data: the system brings in the legal name, trade name and address, and you just check them. Besides saving typing, it avoids legal-name mismatches when you enter the invoice.
The entity does not show up for selection on a screen. What should I check?
The record's checkboxes. Each screen only offers entities checked with that role — a driver shows up where you choose a driver, a carrier where you choose a carrier. Also check that it is Active.
Can I attach documents to the record?
Yes, through the File tab, which accepts PDFs, spreadsheets and images.
How do I change the cost center of several entities at once?
With the Change multiple tool in the screen's list, which bulk-edits the cost center and the account used in financials.
Where do I register the supplier's PIX key and bank account?
On the Payment details tab of the entity record, in upCampo. For PIX, fill in the PIX key type and the PIX key; for a wire transfer (TED), the bank with its code, the branch and the account with their check digits, and the Account type. When one of the supplier's branches is paid into a different account, register the block on that branch's address: there it overrides the entity's. This data is what the payment batch uses to generate the bank remittance file.
📘 Screen: Contractor Agreement
The Contractor Agreement screen is used to record and track services provided by third parties, such as drivers, operators, general service providers and others. It lets you control payments and deductions and keep the whole financial history linked to an entity.
📍 Location in the system
Menu: Inventory > Contractor Agreement
🧩 Main function
Record the service agreement with a third party, linked to a previously registered entity.
This agreement is always linked to a Season.
🖥 The list
The filters are Season and Type (All, Pending or Finalized). The grid shows Date, Code, Code (supplier), Status, Entity, Total Value, Deduction Value, Advance Value, Net Value and the start and end dates — you can see, without opening anything, how much has already been advanced and how much is still left to settle with each contractor.
📝 Header fields
| Field | Description |
|---|---|
| Status | Required. Open or finalized. |
| Active | Uncheck it to take the agreement out of circulation. |
| Date | Required. Document date. |
| Start date and End date | Term of the agreement. |
| Season | Required. An agreement always belongs to one season. |
| Number and Number (supplier) | Your own numbering and the one the provider uses. |
| Entity | Required. The contractor on the agreement (driver, operator, provider). |
| Sector | Responsible sector. |
| Total value, Deduction Value, Advance Value and Net Value | Read-only: they are summed from the items. The net value is what remains to settle after deductions and advances. |
| Service/agreement description | Required. What was contracted — "Harvest Season 23/24", "Lime transport". |
| Notes | General notes. |
🗂 Tab: Details (items)
Each item has Description, Unit price, Quantity, Total value (required), notes and the Advance Value checkbox — it is what indicates whether that entry is an advance rather than a service provided. The Import button brings in entries that already exist in the system, and Delete all clears the list.
There is also the File tab, for attaching the signed agreement, invoices and receipts.
Besides recording payments and deductions, the Import button brings entries from other parts of the system into the agreement:
- Fuelings
- Movements (invoices)
- Requisitions for item consumption
- Agricultural Work Orders
These imports make it easier to build the agreement's history from real data recorded in the system. You can also add informational payment and deduction records (not yet entered in accounts payable):
- Advances (e.g., R$ 2,000 on 04/10)
- Deductions (e.g., R$ 50 for a tire repair)
- Other items such as meals, packed lunches, lodging, etc.
These items make up the history of how the final amount to receive/pay was reached.
📄 Finalization and receipt
When the services are complete:
- The user can print a summary of the agreement with all the informational entries
- Issue the final receipt
- Finalize the agreement, preventing further edits
This ensures proper documentation of the service relationship with the contractor, improving organization and security in the farm's financial operations.
📊 Related reports
- Better control of amounts paid, advances and deductions
- All entries are recorded in a single place
- You can link real entries and issue official reports
❓ Frequently asked questions
What is the contractor agreement for?
To record and track services provided by third parties — drivers, operators, providers in general — controlling payments, deductions and the whole financial history linked to that entity.
Do I have to enter everything in the agreement by hand?
No. The Details tab imports entries that already exist in the system: fuelings, movements (invoices), consumption requisitions and agricultural work orders.
How do I record an advance paid to the contractor?
Enter the amount as an item on the Details tab and check Advance Value. It then adds up in the agreement's Advance Value field and is deducted from the net value — all of this even before the payment is entered in Accounts Payable.
Where can I see how much I still owe the contractor?
In the Net Value field, which is calculated from the items: total value minus deductions and advances. It also appears as a column in the list, next to each agreement's Total Value and Advance Value.
Can an agreement cover more than one season?
No. An agreement is always linked to one season, in addition to the term set by the start and end dates.
📘 Screen: Allocation Setup
An allocation is a rule for splitting a cost by percentage, set up once and reused. Instead of splitting the bill by hand every time, you build the rule — 40% to field A, 35% to field B, 25% to field C — and then choose that allocation in the entry, instead of pointing to a single field.
📍 Location in the system
Menu: Inventory > Allocation Setup
🧩 Main function
Set up the farm's allocation rules: the rule's name and the list of destinations with the percentage for each one. Destinations can be fields in the season (with a variety, when the field is split by variety) or fleet and facility items.
📝 Header fields
| Field | Description |
|---|---|
| Code | Rule number. |
| Description | Required. The name the rule will be chosen by later — it pays to be specific: "Pivot electricity — fields 1 to 4" says more than "Allocation 1". |
| % Total | Sum of the percentages entered so far. It serves as a check while you build the rule. |
| Active | Uncheck it to take the rule out of circulation without erasing the history of entries that already used it. |
📊 Destinations and their percentages
Each row is an allocation destination. Save the header first — without it, destinations cannot be entered.
| Field | Description |
|---|---|
| Field | The field in the season that receives its share of the cost. |
| Variety/Cultivar | Required when that field is set up to be split by variety. |
| Fleet / Facility | Alternative to a field: the share goes to a machine or facility. |
| Percentage (%) | Required. How much of the cost belongs to that destination. |
Each row must have either a field or a fleet item — a row with neither is not accepted.
⚠️ The 100% warning
When the total goes over 100%, the system warns: "WARNING: The total percentage has exceeded 100%". Check the % Total field before leaving the screen — a rule that adds up to 90% allocates less cost than it should, and one that adds up to 120% allocates more.
- Split rule set up once and reused
- Same criterion applied by everyone, no matter who enters it
- Percentage checked on the spot in the % Total field
❓ Frequently asked questions
How do I split a cost among several fields without calculating it by hand every time?
Set up the split once in Allocation Setup: give the rule a name and enter each field with its percentage. In entries that accept allocation, you choose the rule instead of pointing to a single field, and the amount is distributed according to the percentages set up.
Does the allocation have to add up to exactly 100%?
The system warns when the total goes over 100%, but does not stop a rule from staying below that. Since the percentage determines how much of the cost lands on each destination, it normally adds up to 100% — check the % Total field before using the rule.
Can I allocate to a machine instead of a field?
Yes. Each allocation row accepts a field or a Fleet / Facility item. That is how you split a cost among pieces of equipment, or among facilities, instead of among planted areas.
Why is the system asking for the variety in the allocation destination?
Because that field is set up to be split by variety in the season. In that case the cost needs to know which variety it belongs to, and the Variety/Cultivar field becomes required.
I cannot delete an allocation rule. What should I do?
Rules already used in entries cannot be deleted, so the cost history is not broken. Uncheck the Active field: the rule no longer appears for selection and the old entries stay intact.
📘 Screen: Requisition
A requisition is the internal request: the mechanic needs a bearing, the foreman needs more oil, the sprayer operator needs an adjuvant. Instead of a note left on the warehouse counter or a stray WhatsApp message, the request is recorded with date, requester, priority and what was requested.
What happens to that request depends on a single field, the Type of each item: what is already in the warehouse leaves inventory — so that requisition is, in practice, an inventory issue — and what is not there goes to purchasing.
📍 Location in the system
Menu: Inventory > Requisition
The same screen also appears under Fleet > Requisition.
🧩 Main function
Record what each department is asking for, with quantity and priority, and send each item to the right place: an inventory issue, when the product is available, or into the purchasing chain (Requisition → Quote → Purchase Order).
🔀 The Type: leaves inventory or goes to purchasing
Item type
This is the choice that sets the destination, and it is on each requisition item:
| Item type | What it means |
|---|---|
| Request to purchase | Default. The item does not leave inventory: it goes into the purchasing queue, to be quoted and ordered. |
| Inventory issue | The product already exists and will be handed out: this is an inventory issue. The screen then asks for the Storage Location (and the lot, when the product tracks lots) and shows the Inventory balance and the Quantity Fulfilled. |
| Request to purchase for Inventory | Restocking purchase: the item goes to purchasing and you already state which storage location it should go into when it arrives. |
A single requisition accepts items of both kinds: what is on hand leaves inventory, what is missing goes on to quoting.
Header type
At the top of the requisition there is a Type that guides the whole document and simplifies the screen:
| Type | Effect |
|---|---|
| General | Regular requisition: shows the Maintenance Work Order and Activity fields, and all item types are available. |
| Inventory issue | Meant for handing out what already exists: hides the maintenance work order fields. |
| Item to purchase | Meant for purchasing: hides the maintenance work order fields and blocks the "Inventory issue" type on the items. |
🖥 The list
Besides New and Reload, the top has View Inventory — to check whether what is being requested is already in the warehouse — and the Reports ▼ menu.
| Filter | Description |
|---|---|
| Start Date (from) and End Date (to) | Period of the requisitions shown. |
| Status | All, Open or Finalized. |
| Priority | All, Low, Medium or High. |
| Maintenance Work Order | All, With W.O. or Without W.O. — separates what came from a maintenance job from stand-alone requests. |
In the grid, Status and Priority appear as colored tags, next to Code, Date, Description, Department, Maintenance Work Order, Fleet, Products and Total value R$.
📝 Header fields
| Field | Description |
|---|---|
| Code | Requisition number, suggested by the system. |
| Status | Read-only. In the list it shows as Open or Finalized; the finalize button is what changes it. |
| Date | Day of the request. Future dates are not accepted. |
| Total Value | Read-only: sum of the items. |
| Description | The subject of the request — "Parts for combine 3", "PPE restock". |
| Department | Department responsible for the request. |
| Requester | Who is asking. |
| Maintenance Work Order | Links the requisition to an open maintenance work order — the case of a mechanic asking for a part for a specific repair. |
| Activity | Details in which stage of the maintenance work order the item will be used. |
| Fleet / Facility | Charges the request to a machine or facility, when no maintenance work order is involved. |
| Cost Center | Cost center that will absorb the expense. |
| Priority | Low, Medium or High. It helps the buyer decide what to handle first. |
The Maintenance Work Order, Activity and Fleet / Facility fields disappear when the header Type is Inventory issue or Item to purchase — they only appear with the General type.
📦 Items tab
Below the header there are two tabs: Items, where the request is built, and Internal info, which keeps track of who created, changed and finalized the document.
| Field | Description |
|---|---|
| Type | Request to purchase, Inventory issue or Request to purchase for Inventory — see above. It is the field that changes the item's behavior the most. |
| Product & Service | The item requested, when it already exists in the product records. |
| Description | Describes the item requested — this is how you request something that is not yet registered. |
| Storage Location and Lot | Appear for the types that involve inventory: which location the product leaves from (Inventory issue) or which location it should go into when it arrives (Request to purchase for Inventory). The lot is asked for when the product tracks it. |
| Quantity | How much is being requested. |
| Inventory balance | Read-only, shown for Inventory issue: how much of the product is at that location. It avoids promising what is not there — and avoids buying what is sitting in the warehouse. |
| Quantity Fulfilled, Quantity in Quote and Quantity in Purchase Order | Read-only. They show, respectively, how much has been fulfilled, how much went into a quote and how much became a purchase order — these three numbers are how you follow the progress of what was requested. |
| Unit price and Total Value | Item amounts. |
| Date | Item date, already filled in with the header date. |
| Notes | Request details: part number, preferred brand, urgency. |
The Delete all button clears the item list at once.
🛣 Trail tab: the path of each item
A requested item usually passes through several hands before reaching the mechanic: it becomes a quote, then a purchase order, then the invoice comes in through Movement. Finding out where the item got stuck used to mean opening one screen after another. The Trail tab shows that whole path in a single tree.
The complete chain, from start to finish, is this:
It is usually the maintenance work order that starts it all: the mechanic needs the part, the work order generates the requisition, the requisition becomes a purchase. But not every item goes through the whole chain, and the tree shows the shortcuts as they are:
| Node | What it is |
|---|---|
| Work Order | The maintenance work order that led to the part request. An item with no work order starts directly at the requisition. |
| Requisition | The document in which someone requested the material. |
| Item | Each product or service requested, with the quantity asked for. The branches below come from it. |
| Inventory issue | An item that was already in the warehouse and was handed out directly — it did not go through any purchase. |
| Quote | The quote the item went into for price comparison. |
| Order | The purchase order. It can come from the quote or be linked directly to the item, when it was bought without a quote. |
| Movement | The invoice that brought the item in. Both the one that came through the order and the one entered directly against the item appear. |
The columns show Type (which node the row is), Product & Service, Document, Quantity, Unit price, Total value, Date and Status.
The starting point depends on the screen
The tree is the same on the three screens where it appears; what changes is where it starts:
| Screen | Where it is | Starts at |
|---|---|---|
| Requisition | Trail tab | At the items of this requisition, with the documents each one generated. |
| Quote | Trail tab | At the maintenance work order, going down through requisition and item to the invoice — the most complete tree of the three. An item with no work order starts at the requisition. |
| Maintenance Work Order | Requisition tab, in the Requisition / Trail selector | At the requisition — the work order does not appear as a node because it is already the open screen. |
📤 Send to Purchasing or Finalize
This is the button that closes the requisition. Before saving, the system opens a review screen with the items (sequence, description, product and quantity) — the chance to see whether anything is missing or was typed twice.
Once confirmed, the requisition becomes Finalized: the items marked for purchase become available to be imported into the quote. The Finalize + New button closes it and opens the next requisition right away, handy if you enter several in a row. A finalized requisition can be reopened, with confirmation.
- Record of who requested what, when and how urgently
- What exists leaves inventory as an issue; what is missing goes to purchasing
- Balance checked at request time, before promising or buying
- Link to the maintenance work order or machine that prompted the request
- Tracking of what has already been quoted, ordered and fulfilled
❓ Frequently asked questions
How do I record the mechanic's part request without losing the note?
Use the Requisition screen: click New, enter the description, requester and priority, save and add the items with their quantities. Then click "Send to Purchasing or Finalize" — the request is recorded and available to the buyer.
The product is already in the warehouse. Do I still need a requisition?
Yes, and it is the right way to do it: enter the item with the "Inventory issue" type. With that type the requisition works as an inventory issue — you enter the location (and the lot, if any), see the available balance right away, and the hand-out is recorded under the name of whoever asked for it.
What is the difference between "Inventory issue" and "Request to purchase"?
"Inventory issue" hands out what already exists: the product leaves the storage location entered. "Request to purchase" is for what does not exist: the item goes into the purchasing queue, to be quoted and ordered. There is also "Request to purchase for Inventory", for restocking purchases, where you state up front which location the product will go into when it arrives.
What is the difference between a requisition and a purchase order?
A requisition is internal: someone on the farm asking for what they need. The purchase order is the document addressed to the supplier, with a settled price. In between there is usually a quote.
How do I know if what I requested has already been bought?
Through the requisition's own Trail tab: it shows, as a tree, each item and the documents created from it — the quotes, the purchase orders and the invoices that have already arrived, with number, date and amount. It is the most direct way to find out where the part is stuck.
On the items, the Quantity in Quote, Quantity in Order and Quantity Fulfilled fields answer in numbers: how much of that item has gone into a quote, how much became an order and how much has been fulfilled.
The part is for a specific repair. How do I tie the requisition to the maintenance job?
In the header, with the Type set to "General", choose the maintenance work order in the "Maintenance Work Order" field — and, if you want more detail, the stage in the "Activity" field. If the expense goes straight to the machine, with no maintenance work order, use the "Fleet / Facility" field.
I finalized the requisition and forgot an item. Can I reopen it?
Yes. Select the finalized requisition and use the reopen option, confirming the system's prompt. It goes back to Open status and accepts new items.
Can I request something that is not registered as a product?
Yes. The requisition item has a Description field, where you write what is being requested even with no registered product. That is the way to request specific parts and one-off services.
📘 Screen: Quote
This is where you ask several suppliers for prices and compare them before buying. You build the list of what you need — usually pulling it straight from the requisitions —, send the form to each supplier, receive the prices and choose the best offer item by item. Once the choices are made, the purchase order is generated from the quote with the Generate order button.
📍 Location in the system
Menu: Inventory > Quote
The same screen also appears under Fleet > Quote.
🧩 Main function
Centralize price gathering: one quote, several suppliers, side-by-side comparison and generation of the order from the best combination — with no side spreadsheet and no dependence on the buyer's chat history.
🖥 The list
The screen opens on the list of quotes for the period. The filters are Start Date (from), End Date (to) and Status (All, Open or Finalized). At the top are New, Reload, View Inventory and the Reports ▼ menu.
The grid shows Date, Code, Status in a colored tag (green for Finalized, red for Open), Description, Product & Service, Purchase Order (the number and date of the order generated, if any), Equipment, source Requisition and a Print button on each row. Each column has a search box below its title.
The Purchase Order column is the quick way to see what has already turned into a purchase and what is still only quoted.
📝 Header fields
| Field | Description |
|---|---|
| Code and Date | Quote number and day. |
| Description | The subject — "Combine 3 overhaul", "Fertilizer for season 25/26". |
| Fleet | Read-only: the machines or department the items came from, when the quote originated from maintenance requisitions. |
| Notes | Free note about the quote. |
🗂 The quote tabs
There are six: Product & Service, Price Collection (Supplier), Supplier, Simulation & Generate order, Requisition and File. They follow the natural order of the work: what to quote, for how much, with whom, what to buy.
Product & Service — what will be quoted
The list of items. Each row accepts a registered product or just a description, for something not yet registered, plus the quantity. The grid shows Product & Service, Quantity, the source Requisition (with number, date and sequence) and the Equipment.
- Import requisition — brings in the items from requisitions that have been finalized, which is the normal path: the buyer does not retype what the departments requested
- Delete all — clears the item list
- View Inventory — checks the balance before going out for quotes
Price Collection (Supplier) — the prices received
This is where each offer is recorded: you choose the product under Products in this quote and the Supplier — both required — and enter Quantity, Unit price, Total value, Discount Value or Discount %, arriving at the Net Value. The Brand, Consultant/Sales rep, Supplier Notes, Status and Lead time fields complete the offer. The Quantity in Purchase Order and Qty fulfilled fields are read-only and track what has already become an order and what has already arrived.
In the grid, each offer shows its status — this is where you see, for example, that a price was filled in by the supplier rather than typed in internally.
| Button | What it does |
|---|---|
| Save/Next | Saves and jumps to the next item — designed for someone typing in a whole price list. |
| Generate Collections (Suppliers) | Creates, from the item list, each supplier's price form. |
| Apply discounts | Applies a discount to everything that came from the same supplier. |
| Change supplier | Changes the supplier of the selected offers. |
| Clear Values | Zeroes the values entered, to restart the collection. |
| Delete all | Deletes all offers in the quote. |
Supplier — sending the quote to whoever will respond
Lists the quote's suppliers and, on each row, three actions:
- Send WhatsApp — sends the invitation to the supplier's contact
- Send Email — the same invitation by email
- Open Link — opens the fill-in form, the same address the supplier receives
That form is a page where the supplier enters the prices themselves, without needing a user account in the system. They fill it in seeing separately what is pending and what they have already quoted, can export and import the list as CSV and, when done, click Send to Requester — and the offer lands on the collection tab already marked as filled in by them.
Simulation & Generate order — the decision
The tab is split in two. On the left, Selected products: all the offers (product, supplier, quantity, unit price, discount and value), each with a checkbox. On the right, Order simulation: as you check and uncheck, the order is rebuilt grouped by supplier, with quantity, unit price and net value — you can see how many orders will come out and how much goes to each before deciding.
The Generate order button, at the top of the simulation, is what turns the choice into a purchase order. It is a separate step: the quote does not become an order on its own.
Requisition — the source
Lists the requisitions whose products were imported into this quote, with code, description, quantity, product, equipment, department and maintenance work order. It is the traceability of who requested what is being bought.
Trail — where each item came from and where it went
Shows, as a tree, the complete path of this quote's items — and it is the most complete of the three trails in the system, because it starts before the requisition:
At the top is the maintenance work order that led to the part request — when there is one; an item with no work order becomes a root at the requisition itself. Going down the tree come the requisition, each requested item and, below it, what happened: the quote, the purchase order and the invoice that delivered it. An item that came straight out of the warehouse appears as an Inventory issue, without going through a purchase.
The columns show Type, Product & Service, Quantity, Unit price, Total value, Date, User and Status.
It answers, without leaving the quote, the two usual questions: which work order was this requested for? and has it become an order yet, has it arrived? The trail is described in full in the Requisition article.
File — attachments
Stores the quote's documents: the PDF offer the supplier sent, the price list, a screenshot of the conversation. Everything stays with the document, not in someone's email.
🔧 The document buttons
| Button | What it does |
|---|---|
| Save / Cancel / View list / Delete | The usual document commands. |
| Finalize / Reopen | Closes the quote; on a quote that is already closed, the same spot offers Reopen. |
| Generate order | Shortcut for generating the purchase order from the chosen offers. |
| Export CSV | Downloads the quote as a spreadsheet. |
| Reports ▼ | Reports enabled for your user. |
- Prices from several suppliers side by side, in the same document
- Suppliers fill in their own offer through the link, with no retyping
- Item-by-item choice, not a closed package per supplier
- Order simulation before generating, showing how many orders will come out and for whom
- Purchase order generated from the best combination
- A history of why you bought from that supplier, at that price
❓ Frequently asked questions
How do I compare prices from three suppliers before buying?
Create a quote, build the item list (importing from requisitions, if any) and, on the Price Collection tab, use "Generate Collections (Suppliers)". With the prices filled in, the Simulation & Generate order tab shows all the offers together, and you check the best one for each item.
Does the quote turn into a purchase order on its own?
No. After choosing the offers on the Simulation & Generate order tab, you need to click Generate order — that step is what creates the purchase order. Until it is done, the quote remains just a price comparison.
Can the supplier fill in the prices themselves?
Yes. On the Supplier tab, each row has the Send WhatsApp, Send Email and Open Link buttons: the supplier receives an address, opens the page with the quote's items, enters the values and clicks Send to Requester. No user account in the system is needed, and the prices go into the quote already marked as filled in by them.
How do I know if a quote has already turned into a purchase?
In the list, look at the Purchase Order column: it shows the number and date of the order generated from that quote. A quote with nothing in that column has not yet been turned into an order.
To follow it item by item — including whether the goods have arrived —, open the quote and go to the Trail tab: it shows, as a tree, the orders and invoices generated from each requested item.
Do I have to buy everything from the same supplier?
No. The choice is item by item: you check the best offer for each product, even if they come from different suppliers. The simulation groups them by supplier automatically and generates one purchase order for each.
I don't want to retype what the departments requested. How do I reuse the requisitions?
On the Product & Service tab, use the Import requisition button: the items from finalized requisitions go into the quote with the quantities requested. The Requisition tab keeps the link between what was quoted and who requested it.
The supplier gave a discount on the offer total. Where do I enter it?
Use the Apply discounts button, choosing the supplier: the discount is spread over their offers. For a discount on a single item, fill in Discount Value or Discount % on that collection row.
📘 Screen: Purchase Order
The Purchase Order screen is used to record purchase orders for products and services on the farm.
Orders are usually created before the invoice comes in and can be linked to an earlier quote (optional).
Ideal when a purchase takes a while to arrive, such as farm inputs.
📍 Location in the system
Menu: Inventory > Purchase Order
🧩 Main function
Record product purchase requests by season, with optional approval control and traceability.
🖥 The list
At the top are New, Reload, View Inventory and the Reports ▼ menu. The filters are:
| Filter | Description |
|---|---|
| Season | Season of the orders shown. |
| Start Date (from) and End Date (to) | Period of the orders. |
| Approval | All, Drafting, Awaiting approval, Rejected or Approved — it is the buyer's and the approver's filter. |
| Status | All, Open or Finalized. |
| Department | Limits the list to the department responsible for the order. |
The grid shows Department, Payment terms, two approval columns (the first and the second), Date, Code, Code (supplier), Status, Entity, Product & Service, Total Value, Net Value, Paid Value and the receiving dates. The approval columns appear as colored tags, so you can see at a glance what is still waiting.
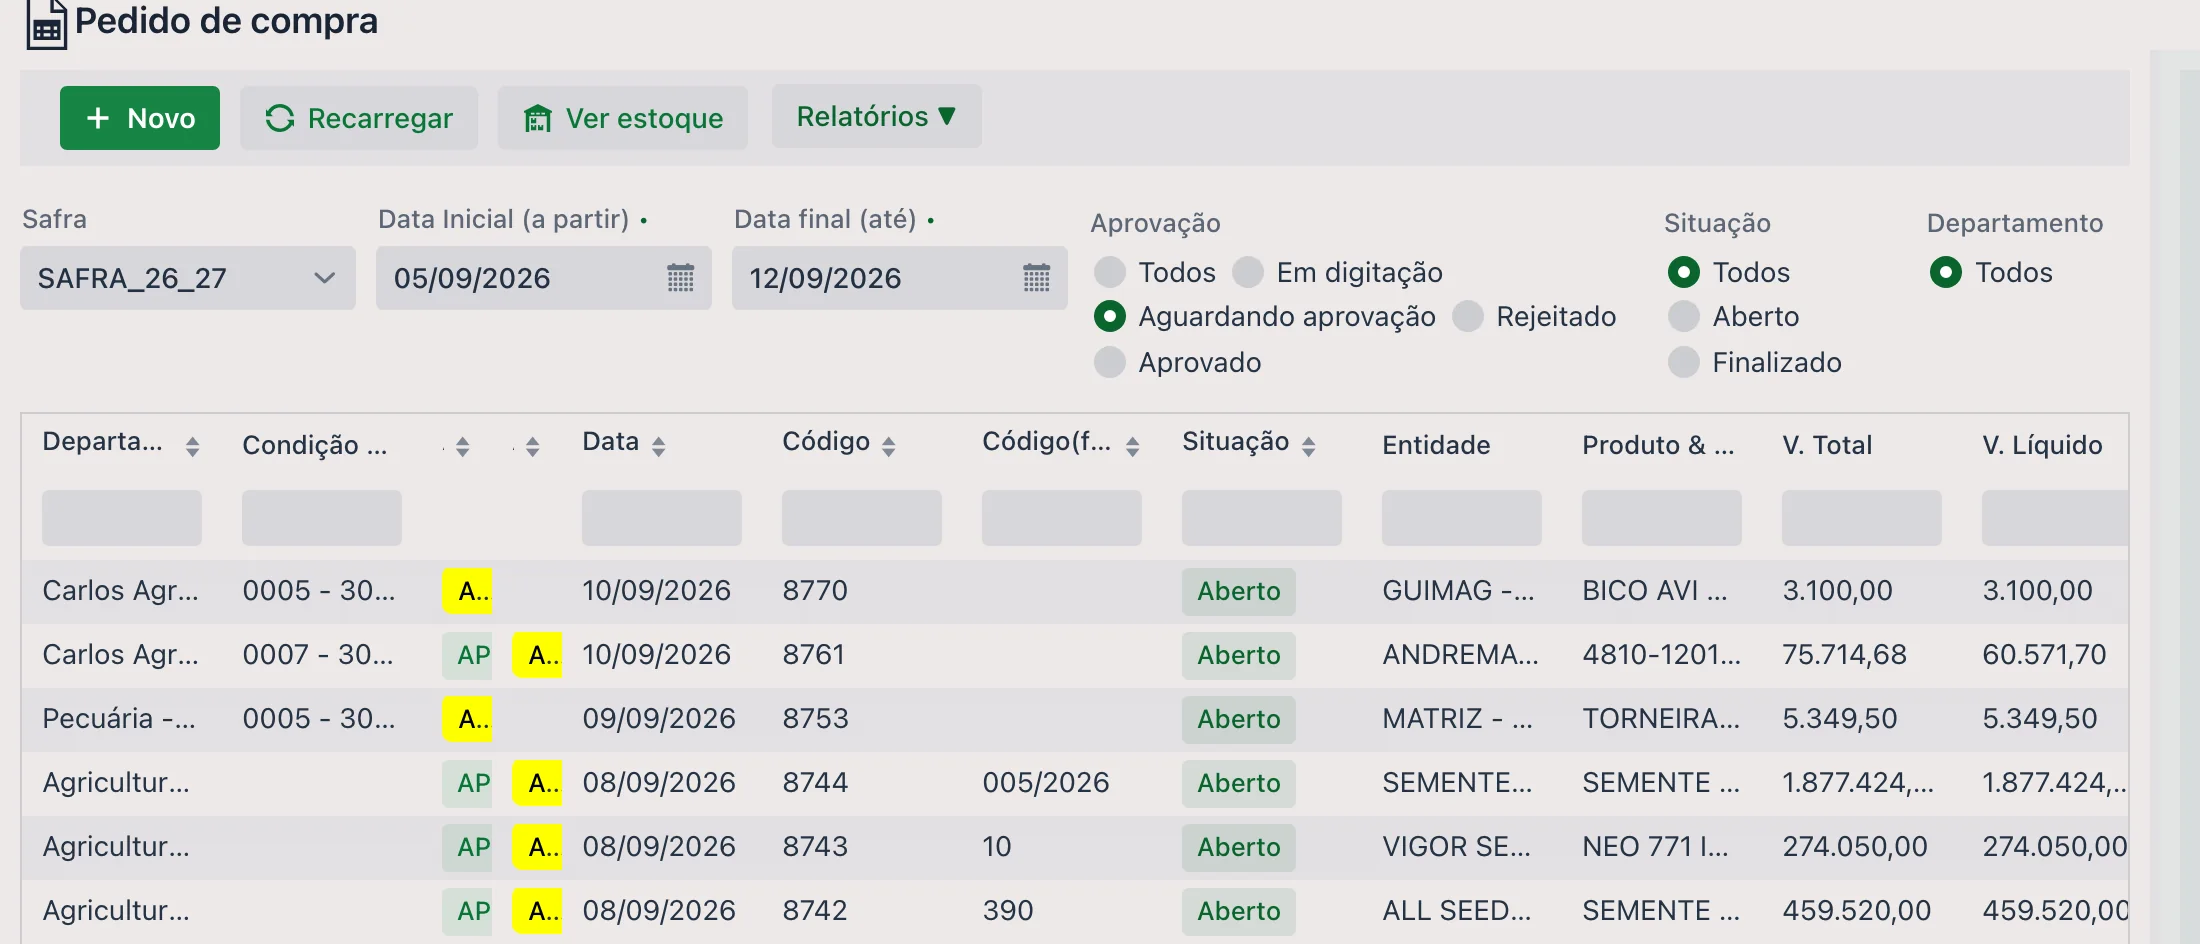
📝 Order header
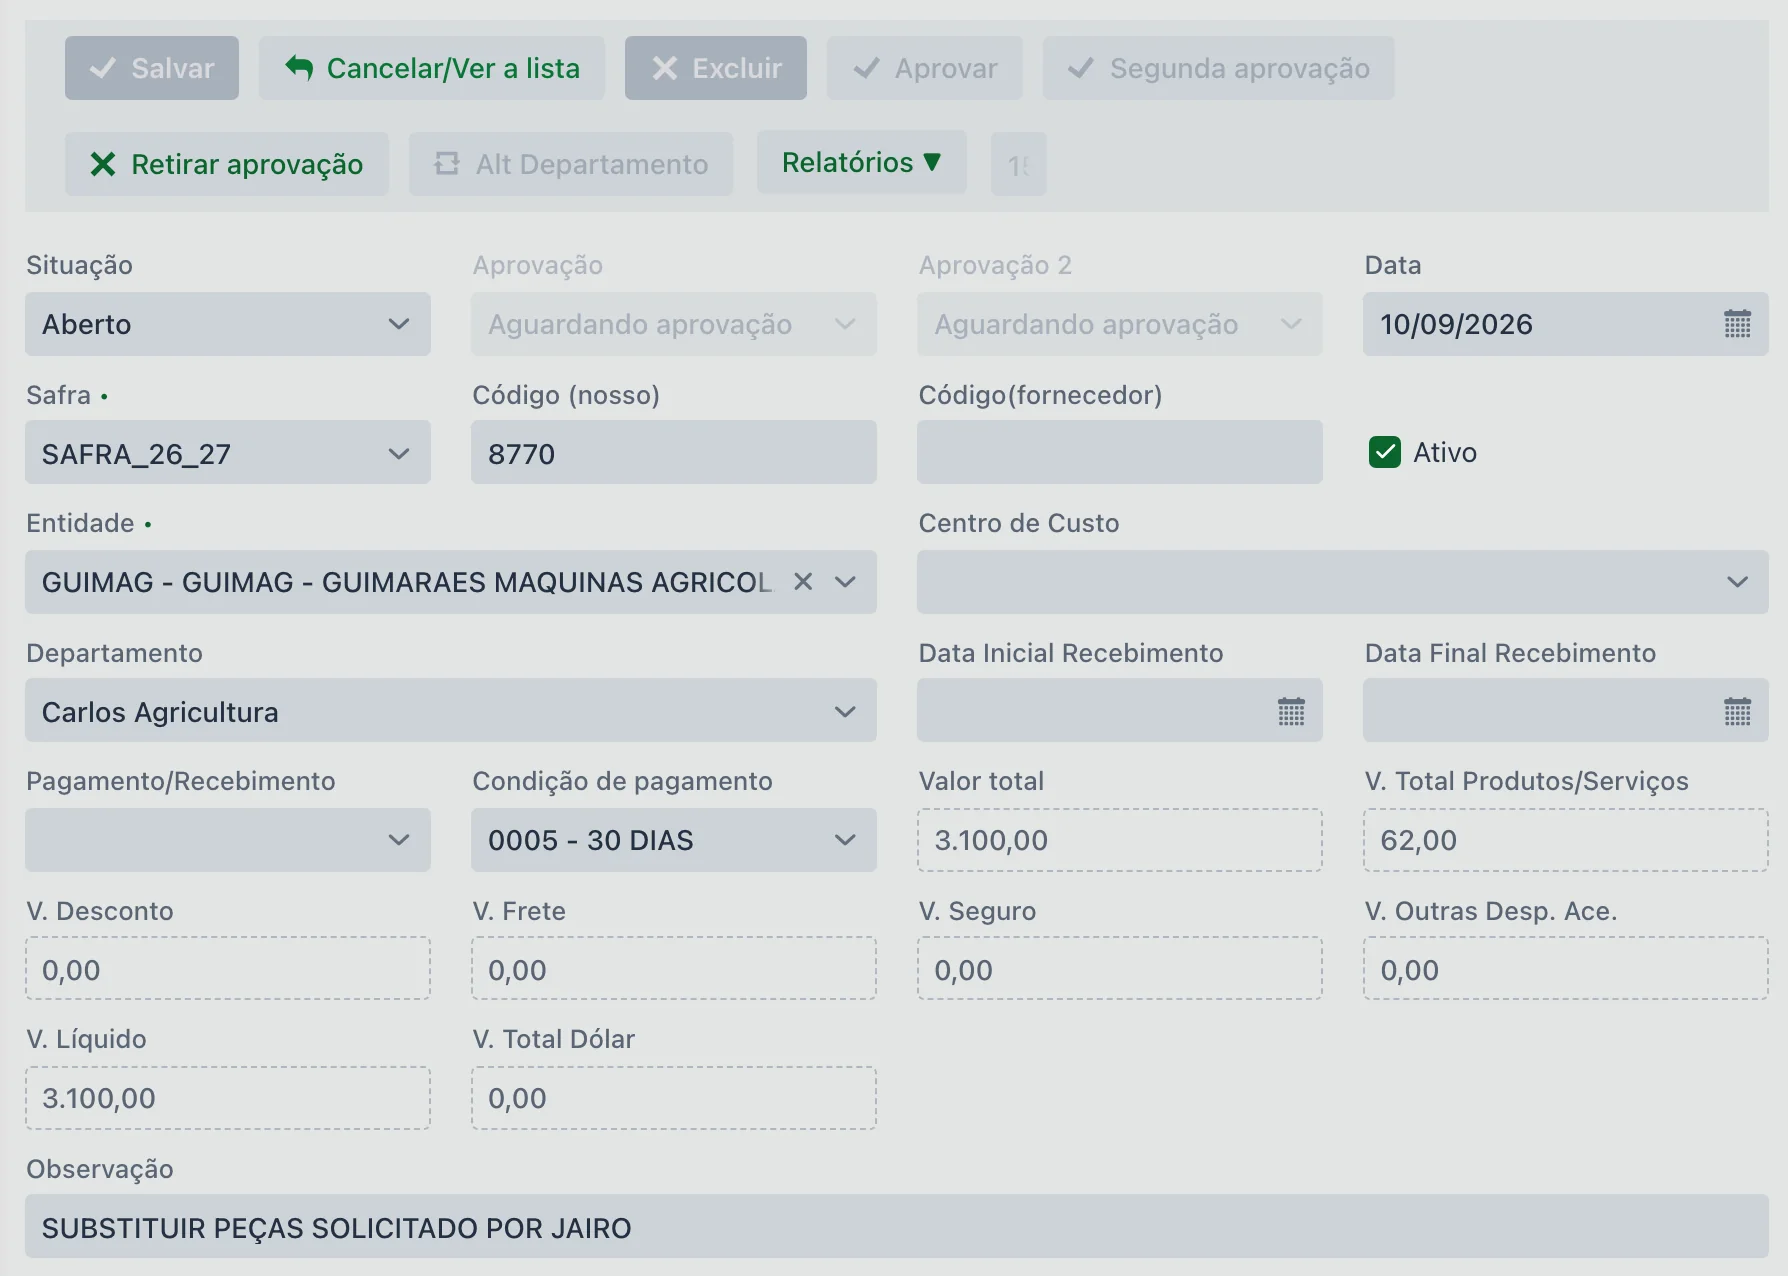
| Field | Description |
|---|---|
| Status | Open or Finalized. |
| Approval and Approval 2 | Read-only: where each of the two approvals stands — see below. |
| Date | Order date. |
| Season | Required. |
| Code (ours) | The farm's order number. |
| Code (supplier) | The reference the supplier uses, so both records can be matched. |
| Active | Uncheck it to take the order out of circulation. |
| Entity | Required. The supplier. |
| Department | Responsible department — it is what determines who can approve. |
| Cost Center | Where the expense will be charged. |
| Receiving Start Date and Receiving End Date | Expected delivery window — this is what lets you chase late deliveries. |
| Payment/Receipt and Payment terms | Agreed method and terms (e.g., "0005 - 30 DAYS"). |
| Total value, Products/Services Total, Discount Value, Freight Value, Insurance Value, Other Ancillary Expenses and Net Value | The breakdown of the order amount: the item total, the additions and deductions, and the net. |
| Total Value USD | For purchases in foreign currency. |
| Notes | Free note about the order. |
🔐 Approval
Whether approval is required is a company setting: on some farms the order goes straight through, and on others it only counts once approved. Where approval is enabled, the order goes through up to two: the Approval and Approval 2 fields show where each one stands.
| Approval status | Meaning |
|---|---|
| Drafting | The order is still being put together. |
| Awaiting approval | It is in the approver's hands. |
| Approved | Released. |
| Rejected | Turned down by the approver. |
The order's buttons follow that status:
| Button | What it does |
|---|---|
| Approve | Opens the decision window, which shows the supplier and the order amount and offers to approve or Reject. |
| Second approval | The next approval, when the farm works with two levels. |
| Remove approval | Undoes an approval (or rejection) already recorded. |
| Change Department | Changes the order's department — which changes who the responsible approver is. |
Not just any user can approve: authorization is granted by department, in the branch's user records. Anyone not linked to the order's department sees the buttons disabled.
🗂 The order tabs
| Tab | What it shows |
|---|---|
| Details (products) | The order items — see below. |
| Product x Requisition | The link between each item and the requisition it came from. |
| Movement (Invoice) | The movements that received this order's items: this is where you see what has already arrived. |
| Info | Document control data. |
| Trail | The path of each item, as a tree: from the work order to the requisition, and from there to the quote, the order and the movement that received it — or to the inventory issue. Each step shows quantity, amounts, date, user and status. |
| File | Attachments — the offer, the signed order, the receipt. |
📦 Details (products)
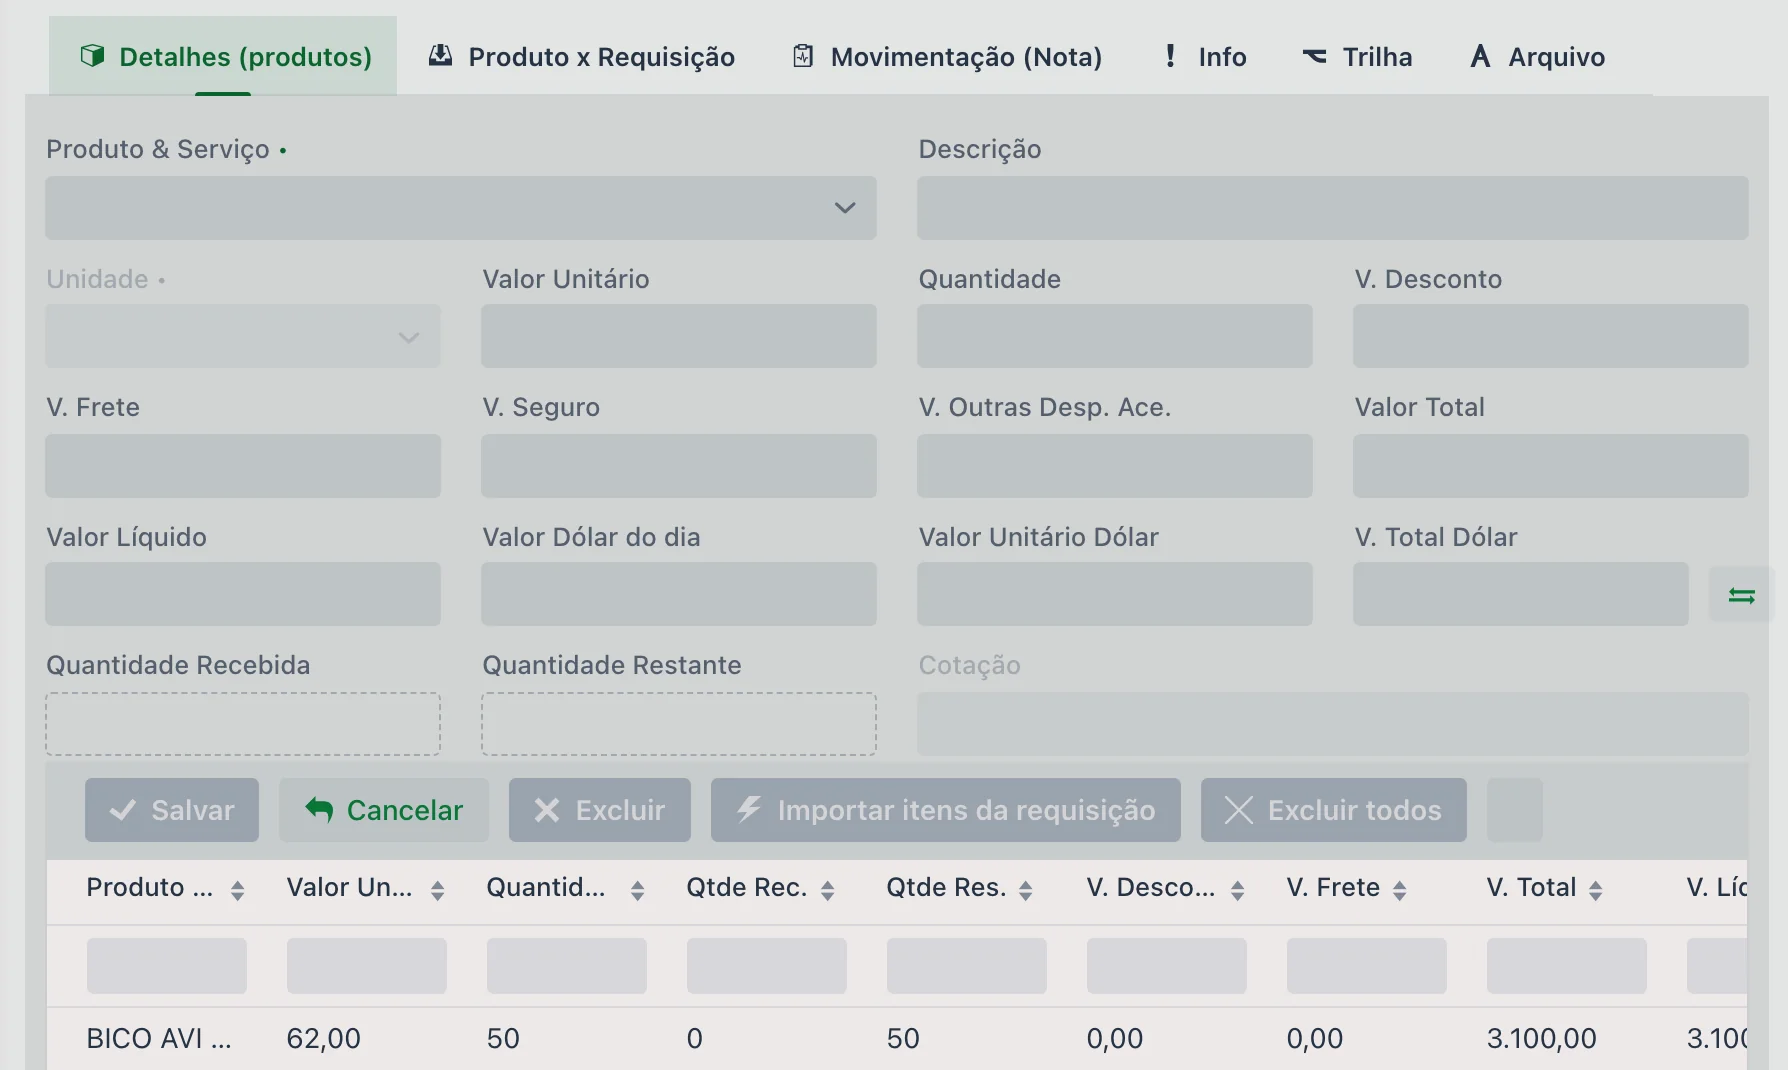
| Field | Description |
|---|---|
| Product & Service and Description | Required. What is being bought. |
| Unit | Required. The item's unit of measure. |
| Unit Price and Quantity | Price and quantity ordered. |
| Discount Value, Freight Value, Insurance Value and Other Ancillary Expenses | The item's additions and deductions, which make up the Total Value and the Net Value. |
| Dollar rate of the day, Unit Price USD and Total Value USD | For purchases in dollars. |
| Quantity Received and Quantity Remaining | Read-only. They show how much of the item has come in by invoice and how much is still due — this is how partial deliveries are tracked. |
| Quote | Read-only: the quote the item came from, when the order came from one. |
The Import requisition items button brings a requisition's items into the order, with no retyping. In the grid, the Qty Rec. and Qty Rem. columns summarize what has been received and what remains for each item.
- Orders are recorded and can be matched to inbound invoices on the Movement screen
- They make budget control, approval and purchase planning easier
- They support the purchasing flow and the traceability of inputs bought
📊 Related reports
🔁 Integration with other screens
- Can be generated with the Generate order button on the Quote screen
- Can import items directly from a Requisition
- Can be linked directly to Movements (Inbound & Outbound)
❓ Frequently asked questions
When is it worth using a purchase order?
Mainly when the purchase takes a while to arrive, as is the case with farm inputs. The order is created before the invoice and lets you track what was ordered and has not come in yet.
How do I require approval before buying?
Requiring approval is a company setting. Where it is enabled, the order starts as "Drafting", moves to "Awaiting approval" and only counts once approved — and it may also require a second approval, depending on the farm's policy.
The approve buttons are disabled for my user. Why?
Because permission to approve is granted by department: only users linked to that order's department can approve. Check the department in the order header — if it is wrong, the "Change Department" button lets you fix it.
I approved by mistake. Can I undo it?
Yes, with the Remove approval button, which also undoes a rejection. The order goes back to awaiting a decision.
How do I know what part of the order has arrived?
On the items, the Quantity Received and Quantity Remaining fields (Qty Rec. and Qty Rem. columns in the grid) show how much has come in by invoice and how much is still due. The Movement (Invoice) tab lists the receipts linked to the order.
What is required on the order?
The Season. The other header fields — entity, cost center, department, expected receiving dates and reference codes — are supplementary.
Does the order connect to the invoice later?
Yes. Orders are recorded and can be matched to inbound invoices on the Movement screen.
📘 Screen: Product Loans
This is where you track product that goes out or comes in on loan — in practice, almost always chemical inputs: the liters of glyphosate that ran short at spraying time and came from the neighbor, the insecticide lent to the grower next door, the fungicide the dealer advanced. It records who took what, how much, when — and what has already come back.
The reason for the screen is simple: the balance has to match. If product leaves the farm on loan and that is not entered, the system's inventory ends up higher than what is in the shed. Since in upCampo every product movement is recorded, a loan has its own document — instead of becoming just another issue, it keeps track of the expected return.
📍 Location in the system
Menu: Inventory > Product Loans
🧩 Main function
Record product loans in both directions and the matching returns, keeping the balance of the storage location consistent with what physically exists on the farm.
🖥 The list
Besides New and Reload, the top has View Inventory and the Reports ▼ menu. The grid lists Code, Date, Type, Status in a colored tag, Entity, Products, Total Value and Net Value, with a search box on each column.
| Status | Meaning |
|---|---|
| Pending | Entered and still open. |
| Finalized | Loan closed. |
| Is a return | The document is the return of an earlier loan. |
🔀 The three types
The Type field, at the top of the header, is the first choice and determines the rest:
| Type | When to use it |
|---|---|
| Inbound (receiving) | The farm borrowed from someone. |
| Outbound (lending) | The farm lent to someone. |
| Return | The product is coming back. In that case the Loan field appears, to point to which loan the return belongs to. |
📝 Header fields
| Field | Description |
|---|---|
| Status | Read-only: Pending, Finalized or Is a return. |
| Date and Season | Required. Day of the loan or return and the season it belongs to. |
| Number | Required. Document number. |
| Entity | Required. Who the loan is with — the neighbor, the partner, the dealer. It comes from the Entity records. |
| Delivered by and Received by | The names of both ends, so nobody has to rely on memory months later. |
| Sector | Responsible sector. |
| Total value, Products/Services Total and Net Value | Document amounts. |
| Notes | What was agreed for the loan: return deadline, conditions, anything else. |
📦 The loaned products
| Field | Description |
|---|---|
| Product & Service | Required. The item on loan. |
| Storage Location | Required. Where it leaves from, or goes into — this is what makes that location's balance follow the loan. |
| Lot | When the product tracks lots, which is common with crop protection products. |
| Quantity (invoice) | Quantity on the document. |
| Qty (scale) | Weight checked, when the load is weighed. |
| Unit price, Total Value and Net Value | Item amounts. |
| Unloading location | Where the load was delivered. |
For loans with many items, the Import from Excel button loads the list in one go; the Understand Excel file format button shows how the spreadsheet should be laid out.
Both in the list and in the entry there is a View Inventory button, to check the balance before lending.
✔️ Finalize Loan
The Finalize Loan button closes the document — it is what marks the loan as settled. The same button reopens a finalized loan, with confirmation, when something needs fixing.
- System inventory equal to what is in the shed, with no gaps from unrecorded loans
- Record of who took what, how much and when
- Return tied to the original loan
- Lot traceability preserved, which matters for crop protection products
- Visible status: what is pending and what has been closed
❓ Frequently asked questions
How do I record product I lent to my neighbor?
In Inventory > Product Loans, click New and choose the "Outbound
(lending)" type. Enter the entity, the date and who delivered, save and add the products with
quantity and storage location.
My neighbor returned the product. How do I close out the loan?
Enter a new document with the "Return" type and, in the Loan field, point to the original loan. That way the return is tied to what went out, instead of becoming a stand-alone entry.
I borrowed from another farm. Do I use the same screen?
Yes, changing the type to "Inbound (receiving)". The product goes into the storage location entered, and the record keeps who it came from — so the return can later be entered against that same document.
There are too many products to type one by one. Can I import them?
Yes. Use the Import from Excel button in the loan's product list. First, click "Understand Excel file format" to build the spreadsheet in the layout the system expects.
I lent out a crop protection product and did not record it. What happens to inventory?
The system balance ends up higher than the real one: the product left the shed and still counts as available. Enter the loan so inventory matches again — and, when the product comes back, enter the return against that same document.
What is the difference between a loan and a transfer between locations?
A transfer moves product between locations on your own farm, without changing the total. A loan involves third parties: the product leaves the farm (or comes into it) with a return expected.
📘 Screen: Movement (Inbound & Outbound)
A movement is the document that records the inbound and outbound flow of products or services on the farm. In upCampo, it is how a purchase invoice enters the system — the fertilizer that arrived, the freight that was paid, maintenance done by an outside shop —, and also standalone inbound entries without an invoice, and standalone outbound adjustments.
What a movement decides is not just the balance: it is where the cost goes. A product usually goes to a storage location; a service goes straight to a fleet, an entity or a cost center. This destination is chosen item by item, in the field this cost will GO TO:, and it is what turns the invoice into a cost of the right machine, the right field or the right season — an invoice entered with the wrong destination is cost in the wrong place, and no report can fix it afterwards.
📍 Location in the system
Menu: Inventory > Movement (Inbound & Outbound)
🧩 Main function
Mainly to record purchase invoices — for products or services — and assign the inventory and/or the cost to inventory, a fleet or an entity.
Each movement must be linked to a season and, when applicable, to a tax setting (for customers with more than one CNPJ/CPF, the Brazilian company and individual tax IDs).
📋 List features
By default, the movement list shows movements dated from the last 7 days up to 7 days ahead.
You can filter by situation: Finalized, Pending or All. Next to the filter are the totals for what is being displayed — Net Value and number of documents —, useful for checking a closed period.
The grid shows Date, Type, Number, Description, Entity, Cost Center, Products, Total V., Net V., Tax settings, Purchase order and Sector, each column with its own search field.
🔄 Buttons and shortcuts
- Import NFe from access key: imports the invoice directly from its access key, without typing item by item.
- Finalize several: finalizes several selected movements in bulk
- View inventory: quickly shows the current product balances
- View orders: shows the purchase orders related to the movements
- Edit several: lets you change the cost center, season or tax setting of several documents
- View Costs ▼: cost queries based on the movements of the period
📝 Movement header
The screen numbers the two steps of an entry: 1 - Edit / Save Header and, on the products tab, 2 - Add / Save Details. You don't need to remember to save the header first: when you save the first detail line, the system saves the header too, if it hasn't been saved yet.
-
Type: the first choice, and the one that determines what the screen will require
- Inbound with invoice: requires some invoice data, such as Entity, Number, Date
- Standalone inbound: requires only a "description"
- Standalone outbound: same as the inbound one, but outbound, usually used for one-off withdrawals
- Outbound with invoice: when the farm itself issues the invoice for the outbound shipment. The issuing itself is done in NFE Transmission, which is this same screen in a dedicated mode
- Status: Pending or Finalized
- Date and Season (required): every movement must be associated with a season
- Tax settings: when there are multiple CNPJs/CPFs, you can choose which tax identity the movement represents
- Sector and Model of the document (for example,
55 - NFe - Nota de produtos) - Entity: the supplier or recipient
- Purchase order (optional): links to the purchase request recorded earlier
- Cost Center
- Number, Issue Date and NFE Key: the invoice data
- Values: Total value, Total Products/Services V., Discount V., Freight V., Insurance V., Net Value, VAT V. and Other Ancillary Exp. V.
- Notes
At the top of the document you also have Clone, which copies the movement so you don't retype a similar invoice, Reopen, for finalized documents, and NFE Import.
Right after NFE Import is the Return ▼ menu, with two actions — Generate return and Cancel this document, both described below. It only appears with the document open, already saved: it acts on the invoice that is on the screen, not on the list. And it doesn't exist on the NF-e Transmission screen.
📦 Tab: Details (Product & Service)
On this tab you add the products or services that are coming into or going out of inventory, or going to a fleet, or to an entity.
🏷 Product class of the item
Each invoice item has a Product class field. The field's help text sums up how it works: "Comes from the product and can be changed; with no product (direct purchase), choose it manually. It gives the item's account when the entity has no account."
- With a product, the class comes from the product record, and you can change it on that line only.
- For a direct purchase, with no registered product, you choose the class manually.
- The class is what tells what was bought — Fuel, Part, Lubricants, Input, Service or Other, through the class's Type field — and it is used to suggest the management account of the bill at finalization (see Finalization).
🎯 Destination type
The first field of the item is Type — "this cost will GO TO:". It defines the path of the product or service being moved and is required:
- To inventory: adds to or removes from a storage location
- To a fleet: assigns it to a piece of equipment or a machine
- To an entity: transfers it to a supplier, customer or third party
- Standalone: moves it with no specific destination (usually for one-off adjustments)
Main fields:
- Unit and Storage Location, the latter required for inbound to inventory
- Purchase order Details: links the item to the purchase order item. Once linked, the Remaining order qty field shows how much of that order has yet to arrive, and the grid marks the line as Related
- Lot: there are two fields — Lot (with balance - I/O), to choose a lot that already exists, and Lot (no balance), for the new lot that is coming in —, plus the Expiration Date (Lot)
- NCM (Brazilian product tax code) of the product
- Quantity (invoice) and Qty (scale), when the load is weighed
- Cost Center and Standalone Load Ticket
- Unit value, Total Value, Discount V., Freight V., Insurance V., Net Value and VAT V.
Next to the button that saves the details are View inventory and View orders, to check balances and open items without leaving the entry.
🧾 Tab: Taxes
Taxation belongs to the item, not the document: each product on the invoice has its own. The tab opens with the CFOP and the purchase order number and item, and organizes the rest into blocks that expand and collapse:
| Block | What it contains |
|---|---|
| Taxed | Taxed unit value, Taxed quantity and Other Ancillary Exp. V. |
| ICMS | Origin, Tax Base Method, CST ICMS, ICMS Base, ICMS %, ICMS, Base Red. % and Exempted ICMS |
| ICMS ST | ICMS ST Tax Base Method, ICMS ST Base, ICMS ST % and ICMS ST |
| PIS & COFINS | CST, base, rate and amount for each |
| IPI | CST IPI, IPI Base, IPI % and IPI |
| Federal IBS, State IBS, Municipal IBS and IBS CBS | The taxes of the Brazilian tax reform, with CST, base, percentages (including reduction and effective rate) and amount |
| Senar | Senar Base, Senar % and Senar — the contribution that appears on rural operations |
| Fuel | A specific block, shown collapsed |
At the end there is the Additional note for the Detail/Line of the invoice, for text that must appear on that line of the invoice.
📦 Tab: Volumes
The shipping volumes — quantity, type, brand, gross and net weight. This makes up the shipping data of the issued invoice.
ℹ️ Tab: General Information
Additional document data, used mainly when issuing invoices and in tax checks.
🧾 Tab: File
Lets you attach documents.
💰 What an inbound entry does to inventory cost
An inbound entry doesn't just add quantity. It recalculates the average cost of the product at that location — and it is this average cost, not the price on the last invoice, that values the outflow on the work order and in the reports.
A shed with 1,000 L of a crop protection product bought at R$ 25.00 receives an invoice for 500 L at R$ 31.00:
| Moment | Balance | Accumulated cost | Average cost |
|---|---|---|---|
| Before the invoice | 1,000 L | R$ 25,000.00 | R$ 25.00 |
| Invoice received | +500 L | +R$ 15,500.00 | (R$ 31.00 on the invoice) |
| After the invoice | 1,500 L | R$ 40,500.00 | R$ 27.00 |
From then on, each liter that goes out to a work order is worth R$ 27.00 — not R$ 31.00, nor R$ 25.00. This is the expected behavior of an inventory valued by average cost, and it explains the most common question from people checking costs: buying at a high price at the end of the season raises the cost of everything still in the shed, including what was bought cheaply before.
On outbound, the calculation is the same in reverse: balance and accumulated cost go down, and the average is recalculated with what remains.
↩️ Return: generating the invoice back
A wrong load arrived, the product came damaged, or the invoice has an item the farm didn't buy. To return the goods to the supplier you need to issue a return invoice — an outbound document that points to the original inbound invoice. The Return ▼ menu builds that outbound document for you, from the inbound entry that is selected.
Open the inbound invoice you want to return — the return acts on the open document — and, in the top bar, choose Return ▼ > Generate return. The window asks for two fields, which are what the outbound invoice needs in order to be transmitted:
| Field | Description |
|---|---|
| Series | The series of the outbound invoice that will be created. If only one is registered, it comes preselected. |
| Nature of Operation | The nature of the return operation, which is what describes the outbound document to SEFAZ (the state tax authority). |
The outbound document created does not appear on this screen — it lives in NFE TRANSMISSION - Movement, and the system takes you straight there after generating it. That's where you review and transmit it.
Three conditions must be met, and the system tells you when one is missing:
- the document must be of type Inbound with invoice — you can't generate a return for a standalone inbound entry or for an outbound one;
- it must have an access key. Without the key there is no way to reference the original invoice, and the option stays disabled. This is the case for inbound entries typed in by hand, without importing the XML;
- there must be an active series registered.
🚫 Cancel this document
The other option in the Return ▼ menu, at the top of the open document, is Cancel this document. It is for a document that is no longer valid but needs to stay on record — the rejected invoice, the entry found to be wrong after it was saved, the document the farm doesn't want to simply erase from history.
It is an internal cancellation: it doesn't talk to SEFAZ. When you confirm, the system asks for the reason — at least 15 characters, the same requirement as an NF-e cancellation — and then:
- the document's situation becomes Canceled;
- all items become Standalone: they lose storage location, field, fleet, entity and allocation. In practice, the document stops having any effect on inventory and cost, but it still exists and can be looked up;
- who canceled it, when and why is recorded — including in a line added to the document's Notes, which is what people read later during a review.
🔒 Finalization
After fully checking the movement, you need to "finalize" the document. At finalization, upCampo asks whether the movement will generate a bill in Accounts Payable/Receivable, with the payment method, the management Account, the Cost Center, the date of the first installment and the installments.
The invoice generates a single bill
Since October 8, 2026, the invoice generates a single bill, for any payment method. Before, there were several — one per management account of the items —, and the account selector only appeared for cash payment. A single bill is what matches reality: the supplier sends one payment slip, there is one payment, and reconciliation, payment batches and bank remittance all see the whole invoice.
The bill's management account is suggested in this order:
- the Account chosen in the finalization window — it overrides everything;
- the account of the entity (the supplier or the customer);
- the account of each item's product class — the inbound one on an inbound invoice, the outbound one on an outbound invoice.
The window shows the "Account suggested by the product class or by the entity" and, when the items fall into different accounts, the Planned allocation. Choosing an account in the window replaces that allocation with the chosen account.
- Supplier with an account: all items go to it, with no allocation.
- Supplier with no account and items from classes with different accounts: the bill is created with an allocation by item value, saved in the bill's Allocation tab, and each installment gets the same allocation. The bill's main account is the one with the highest value.
- No account anywhere: upCampo warns — "Bill without a management account" — and offers Go back and choose the account or Generate anyway. Without an account, the entry does not get the income tax flag in the tax cash book.
Example: invoice with items in different accounts
An invoice for R$ 10,000.00 with R$ 6,000.00 of fertilizer (Inputs class) and R$ 4,000.00 of diesel (Fuel class), from a supplier with no management account:
- Products are correctly added to inventory with traceability, or assigned to a fleet and an entity — and contracted services go straight to the cost of whoever used them
- Inbound entries are linked to the season and, if applicable, to the purchase order
- You can generate accurate accounting and inventory reports, or fleet cost reports, or entity reports
📊 Related reports
❓ Frequently asked questions
How do I return goods to the supplier?
Open the inbound invoice in Movement and, in the document's top bar, use Return ▼ > Generate return. Enter the series and the nature of operation, and upCampo creates an Outbound with invoice referencing the key of the original invoice. The outbound document appears on the NF-e Transmission screen, where you check the CFOP of the items — copied from the inbound invoice —, the values and the taxes before transmitting. The return doesn't remove inventory on its own: if the product had already been received, removing it is a separate entry.
The Generate return option is grayed out. Why?
It is only enabled for documents of type Inbound with invoice that have an access key. Standalone inbound entries, outbound documents and invoices typed in by hand without the key can't be referenced in a return — the key is what identifies, on the return document, which invoice is being returned. You also need at least one active series registered.
I entered a document by mistake. Should I delete it or cancel it?
It depends on whether you need the record. Cancel this document, in the Return menu of the open document, keeps the document in history with the Canceled situation, recording who canceled it and why, and removes its effect: the items become Standalone and no longer count toward inventory, field, fleet or allocation. That's the way to go for a rejected document or for anything that needs to stay traceable. Deleting removes the record entirely. And if the invoice has already been sent to SEFAZ, neither option works: the cancellation is done on the NF-e Transmission screen.
How do I enter a purchase invoice?
On this screen, which is the main way products enter the system. Save the header with the type "Inbound with invoice" and then add the products on the details tab. You can also use the Import NFe from access key button, which brings in the invoice directly from its access key.
I clicked Import NFe from access key and nothing came in. Why?
That import depends on the digital certificate registered in the branch's Tax settings: it is what authorizes the system to fetch the invoice from SEFAZ. Without a certificate — or with an expired one — the lookup returns nothing, and the invoice has to be entered manually.
Is the movement tied to the selected season?
No. Every document is associated with a season, but that is just an indication of which season it refers to — it doesn't prevent its use in other contexts.
I can't find a movement I entered. What should I do?
Adjust the filters: by default the list only shows the last 7 days and the next 7 days. You can also filter by situation — Finalized, Pending or All.
Can I enter a standalone outbound for a product?
Yes. Although it is mainly used for inbound entries, the screen also records standalone outbound entries, for one-off adjustments.
Can an inbound entry go to a fleet instead of inventory?
Yes. A movement lets you assign the inventory and/or the cost to a storage location, a fleet or an entity.
Where do I enter a service invoice — freight, outside maintenance, third-party application?
On this same Movement screen. The service is an item registered in Product & Service, in a class of type Service. On the details tab, instead of sending it to inventory, choose the cost destination: to a fleet, to an entity or standalone.
Why did the invoice generate a bill with an allocation?
Because the supplier has no management account in its record and the invoice items belong to product classes with different accounts. upCampo generates a single bill and splits it by item value — on an invoice with R$ 6,000.00 of fertilizer and R$ 4,000.00 of diesel, 60% Inputs and 40% Fuel. If you choose the account in the finalization window, or if the supplier has an account, everything goes to it, with no allocation.
Does the invoice still generate one bill per account?
No. Since October 8, 2026, finalization generates a single bill, for any payment method. When the items belong to different accounts, the split goes into the bill's allocation, not into separate bills.
📘 Screen: NFE Transmission - Movement
This is where the farm issues its electronic invoice (NF-e, the Brazilian electronic invoice): the soybean sale to the trading company, the cattle going to the meatpacker, the transfer between the group's CNPJs. You build the invoice, transmit it to SEFAZ (the state tax authority) and follow the response — and, if needed, cancel it or issue a correction letter.
📍 Location in the system
Menu: Inventory > NFE TRANSMISSION - Movement (Inbound & Outbound)
🧩 Main function
Issue and transmit outbound NF-e invoices, keeping in the same document what left inventory, the taxation, the shipping data and the entire history with SEFAZ.
🔀 What is different from Movement
It is the same screen as Movement (Inbound & Outbound), opened in a mode dedicated to issuing invoices. The differences you notice in practice:
- the Type is fixed as "Outbound with invoice" — no inbound entries here
- Series, Nature of Operation, the shipping fields, the Sales/Purchase Contract, the Additional Information, the Correction letter tab and the NFE Transmission button appear
- Import NFe from access key, the Return ▼ menu and the purchase order buttons and columns disappear, since they only make sense for inbound entries
🖥 The list
The filters are Start Date (from), End Date (to) and Situation (All, Pending or Finalized), with the Net Value and quantity totals next to them. At the top: New, Reload, Finalize several, View inventory, Edit several, View Costs ▼ and Reports ▼.
The grid shows Date, Type, Number, Entity, Cost Center, Products, Total V., Net V., Sales/Purchase Contract, Tax settings and Sector.
📝 Header fields
| Field | Description |
|---|---|
| Status | Read-only: the invoice's status with SEFAZ (for example Authorized). |
| Date and Season | Required. |
| Tax settings | Required. Which CNPJ/CPF is issuing — the certificate used for transmission comes from it. |
| Sector and Model | Responsible sector and the document model
(e.g., 55 - NFe - Nota de produtos). |
| Entity | Required. The invoice recipient. |
| Sales/Purchase Contract | Links the invoice to the sales contract, when the delivery is part of one. |
| Series and Number | Required. Invoice identification. |
| Nature of Operation | Required. What the invoice represents — sale, shipment, value supplement, transfer. |
| Cost Center | Where the operation is charged. |
| Carrier, Freight terms, Fleet / Improvement, Plate and State | Shipping data. The freight terms define who pays for the freight; when the vehicle belongs to the farm, this is where you enter it. |
| Payment method and Payment Amount | Payment method required by the invoice (including 90-Sem pagamento, no payment, for shipments). |
| NFE Key | Filled in by the system when the invoice is authorized. |
| Values | Total value, Total Products/Services V., Discount V., Freight V., Insurance V., Net Value, VAT V. and Other Ancillary Exp. V. |
| Notes | Keeps the transmission history: each status change with user, date and time — "Awaiting transmission", "Processing", "Authorized". |
| Additional Information - Header | The text printed on the invoice: Senar contribution, contract reference, mandatory statements, CAR number and certificate numbers. |
📦 Details tab (products)
Here the destination field is called Type - "this cost will COME FROM:" — the logic is the reverse of inbound — with the options To inventory, To a fleet, To an entity and Standalone.
Besides the usual fields (product, description, unit, storage location, lot, quantity and values), issuing brings what the invoice requires: Code, CEST, NCM and XML Product Unit. Two buttons help day to day:
- Create Prod. — registers the product on the spot, without leaving the invoice
- Apply to all lines — repeats what was filled in for all items, useful when the invoice has many products with the same setup
Besides the values, the item grid shows the tax columns CFOP, ICMS, PIS, IBS and COF — you can check the taxation line by line before transmitting.
🗂 The other tabs
| Tab | What it contains |
|---|---|
| Taxes | The taxation of each item: CFOP, ICMS, ICMS ST, PIS & COFINS, IPI, the IBS/CBS blocks, Senar and fuel. |
| Volumes | Quantity, type, brand and weights of the load. |
| General Information | The behind-the-scenes data of the invoice — see below. |
| Correction letter | The letters issued for that invoice. |
| File | Document attachments. |
General Information
This is where you find the information SEFAZ sends back and what the invoice needs to carry:
- Referenced NF-e Keys — keys of other invoices cited by this one, separated by
;. This is the case of a supplementary invoice, which refers to the original invoice - Status, XML and PDF of the authorized invoice
- Nature of operation, series, model and the recipient data (company name, CNPJ/CPF, address) as they were sent to SEFAZ
- Cancellation reason and the test-environment version
- The users who created, edited and finalized the header and details
- The IBS, IBS UF, IBS Mun, BC IBS CBS and CBS amounts
- The Animal transport permit block, for those who issue cattle invoices
📡 The NFE Transmission window
The NFE Transmission button, at the top, opens the window that talks to SEFAZ. In it you choose:
- the issuing Tax settings, when the farm has more than one CNPJ/CPF
- the Transmission mode: Production, which is the invoice for real, or Test (Homologação), a test environment with no tax validity
The window shows the Last status and the SEFAZ response as text — that's where you read, for example, "RETORNO: 100 - Autorizado o uso da NF-e", or the rejection code and reason, when the invoice doesn't go through.
| Button | What it does |
|---|---|
| Transmit | Sends the invoice. It is unavailable once the invoice is authorized. |
| Query | Asks SEFAZ for the current status of the invoice. |
| View XML and View PDF | Open the invoice file and the printed document (DANFE). |
| Open validator | Checks the XML before sending. |
| Cancel NF | Cancels the authorized invoice, requiring a reason. |
| Correction letter | Corrects information on an invoice that is already authorized, in the cases the law allows. |
🔄 The invoice's path
The invoice goes through statuses that appear in the Status field and in the Notes history:
- Awaiting transmission — built, not yet sent
- Processing — sent, waiting for the SEFAZ response
- Authorized — valid invoice; the key is filled in and the XML and PDF become available
- Rejected — SEFAZ refused it; the response states the reason, which must be fixed before transmitting again
- Canceled — canceled after being authorized, with a reason
- NF-e issuing without a separate tax system
- Product removal from inventory and invoice in the same document
- Full history of the exchange with SEFAZ, with user, date and time
- XML and DANFE stored with the document
- Cancellation and correction letter right from the web portal
❓ Frequently asked questions
How do I issue the invoice for selling my crop?
In Inventory > NFE TRANSMISSION - Movement, click New and fill in the header:
tax settings, recipient, series, number and nature of operation. Add the products on the Details
tab and, at the end, click NFE Transmission and then Transmit.
What is the difference between Production and Test (Homologação)?
Production is the real transmission: the invoice comes into existence for SEFAZ. Test (Homologação) is the test environment, with no tax validity, used to check that the document is built correctly before it counts.
How do I know the invoice was authorized?
From the document's Status field and from the transmission window, which shows the last status and the SEFAZ response — authorization shows as "100 - Autorizado o uso da NF-e". The Notes field keeps the whole history, with user, date and time for each step.
SEFAZ rejected the invoice. What now?
Read the response in the transmission window: it has the rejection code and reason. Fix what was pointed out — usually recipient data, taxation or numbering — and transmit again.
I got some data wrong on an invoice that's already authorized. Can I fix it?
It depends on what is wrong. For the cases the law allows, use the Correction letter in the transmission window. When the correction can't be made by letter, the way to go is Cancel NF, entering the reason, and issuing the correct invoice.
How do I reference another invoice, for a supplementary one?
On the General Information tab, in the "Referenced NF-e Keys" field, enter the key of the original invoice. For more than one, separate them with semicolons.
I can't transmit. What should I check first?
The digital certificate of the chosen Tax settings: it must be registered and within its validity. Also check that the selected tax setting is the one for the CNPJ that should issue that invoice.
📘 Screen: Agricultural WO Inventory Write-off
This is the warehouse keeper's screen. Instead of opening work order after work order to write off the products that went out, they see everything pending write-off here, filter by the product they handed out, check the lines and write them all off at once, stating which storage location it came from.
📍 Location in the system
Menu: Inventory > Agricultural WO Inventory Write-off
🧩 Main function
Write off, in bulk, the products entered on agricultural work orders — and record the return of whatever was left over and came back to the warehouse.
File > Company/Crop Settings.
🔎 Pending items tab
This is the list of everything that has not been written off yet — all products, from all work orders in the period. There are only a few filters at the top:
| Filter | Description |
|---|---|
| Start Date (from) and End Date (to) | Required. Period of the work orders. |
| Season | Limits to one season. |
| Order Situation | All, Pending or Finalized. |
| Inventory | All, Pending or Finalized — separates what has already been written off from what is still missing. The screen opens on Pending, which is the warehouse keeper's day-to-day view. |
| Integration | All, Pending or Finalized. Appears for those who use an external integration, along with the Integration Outbound Code column. |
The Search button refreshes the list. Right below it are the totals of what was found — Item Qty, Order Qty and Volume Qty —, and at the bottom the same numbers for what is selected, which change as you check lines.
The grid shows Order (in a colored tag, with number, date and activity type), Fields, Sectors, Product & Service, Location, Total Qty, Rate, Area, Activity type, Short ID (Subtype) — the short identification — and Season; each column with its own search field, which is how you quickly get to a specific product. The View inventory button, at the top, checks the balance before writing off.
✔️ How to write off
- Adjust the period and click Search.
- Check the lines you want to write off — multiple selection is allowed, and the box in the header checks them all.
- Click Write off, at the bottom.
The review window then opens, which is where the write-off is actually defined:
- you enter the Storage Location the product comes from and the Receiver — who is taking it
- each line shows the Original Quantity and the Delivered Quantity, which can be edited: if the warehouse keeper handed out less than the work order planned, just adjust it here, and the rest stays pending
- the Balance column flags, line by line, the product's inventory situation
- Rate, Area, Unit value and Total value are also shown, for checking
When you confirm with Yes, the write-off is saved. The system refuses it when the storage location is missing, when the lot of a product that requires one is missing and when the quantity is greater than the available balance — in that case it tells you which product and which work order are in the red.
🕓 History tab
Shows the write-offs already made in the searched period, grouped by Write-off No.: each line expands to show the items of that write-off. This is where you check what went out on a given day and find an entry to return.
Besides the number and date, the list shows the User who made the write-off, the Receiver, the work order, the product, the lot, the quantity, the storage location, the fields and sectors and, when there is an integration, the outbound codes. Each write-off has a Print button — it is the delivery receipt, useful for the operator to sign.
Lines marked as Return appear here alongside the original write-off, which makes it clear what went out and what came back.
↩️ Return
When product is left over and comes back to the warehouse, the return is entered from the write-off. There are two types:
| Type | What it does |
|---|---|
| Partial (leftover product) | Returns only the quantity left over; the rest stays written off on the work order. |
| Total (return the item as pending with the full quantity) | Undoes the write-off: the item goes back to the pending list with the full quantity. |
The Quantity to return, the reason for the return and the Returned by person are required — this is what lets you explain later why that product came back.
- Every pending write-off in a single list, with totals for items, work orders and volumes
- Bulk write-off, with balance and delivered-quantity checks before saving
- Partial deliveries handled on the spot, without losing track of the difference
- Storage location, lot and receiver recorded on the write-off
- Leftovers returned with the reason and the person responsible recorded
- History by write-off number, with a receipt to print
❓ Frequently asked questions
How does the warehouse keeper write off several work orders at once?
On the Inventory > Agricultural WO Inventory Write-off screen: adjust the period, click Search and
check the lines you want to write off — use the search field of the Product & Service column to quickly find
what was handed out. Click Write off and, in the review window, enter the storage location and the
receiver before confirming.
I handed out less than the work order asked for. How do I write off only what went out?
In the window that opens when you click Write off, the Delivered Quantity field can be edited: change it to the quantity that actually left the warehouse. The difference stays pending and can be written off later.
The product came back from the field unused. How do I return it to inventory?
Find the write-off on the History tab and enter the return. Choose "Partial" to return only the leftover or "Total" to undo the write-off so the item goes back to pending. Enter the quantity, the reason and who is returning it.
It says the total quantity is greater than the available balance. What now?
The chosen storage location doesn't have enough product to write off everything that is checked. Check whether the product's inbound entry was recorded at that location, whether the chosen lot is the right one, or write off in parts, checking fewer work orders at a time.
Why doesn't the work order show up in the pending items list?
Check the period and the season, and remember to click Search after changing them. Also look at the Inventory filter: the screen opens on "Pending", so the work order disappears from the list as soon as it is written off — and it may already have been written off on the product line itself or when the work order was finalized.
📘 Screen: MDF-E
The MDF-e (Brazilian Electronic Manifest of Tax Documents) is the document that goes with the trip: when the farm hauls its crop with its own vehicle, the manifest groups the invoices for that load, identifies the truck and the driver, and states the route. It is what the inspector asks for on the road, along with the invoices.
📍 Location in the system
Menu: Inventory > MDF-E
The screen opens with the title MDF'e.
🧩 Main function
Build the manifest for a trip, transmit it to SEFAZ (the state tax authority) and close it when the load reaches its destination.
🖥 The list
The top only has New and Reload. The filters are Start Date (from), End Date (to) and Status (All, Pending or Finalized).
The grid shows Number, Tax settings, Date, Status in a colored tag, Closing Date, Equipment, Mode, Origin, Destination, Driver and Key — each column with a search field.
The Closing Date column is the most useful day to day: a manifest that is Authorized with no closing date is a trip that ended and nobody closed.
📝 Header fields
| Field | Description |
|---|---|
| Date | Required. Date of the manifest. |
| Tax settings | Required. Which tax branch is issuing the manifest — the certificate used for transmission comes from it. |
| Series and Number | Required. Document identification. |
| Equipment | Required. The vehicle doing the hauling. |
| Driver and Driver CPF | Required. Who is driving. The CPF (Brazilian individual tax ID) must have exactly 11 digits, numbers only. |
| Start City and End City | Required. Where the trip starts and where it ends. Next to them is the End ZIP, for the destination. |
| Route | The states (UF) the load passes through, separated by commas. |
| Status | Read-only: the status of the manifest. |
| Body Type | Required. 00-Não aplicável,
01-Aberta, 02-Fechada/Baú, 03-Graneleira,
04-Porta Container or 05-Sider. |
| Wheelset Type | Required. 01-Truck,
02-Toco, 03-Cavalo Mecânico, 04-Van,
05-Utilitário or 06-Outros. |
| Load Type | Required. Dry bulk, liquid bulk,
refrigerated, containerized, 05-Carga Geral, neo-bulk and the dangerous goods
classifications. |
| Tare weight and Total capacity KG | Tare weight is required. Vehicle data. |
| NFE Key | Filled in by the system when the manifest is authorized. |
| Additional Information | Free text that goes with the document. |
| Notes | Keeps the history: each status change with user, date and time — "Processing", "Authorized". |
| Insurer, Policy and Endorsement No. | Cargo insurance data, in a block that expands and collapses. |
🗂 The tabs
Movement (Inbound & Outbound) — the trip's invoices
This is where you list the invoices being transported. Each line points to a movement or a typed-in Key, with Gross weight (required) and total value. The Import several button brings in several invoices at once, instead of one by one.
Tractor Unit — the trailers
This tab only appears when the Wheelset Type is Cavalo Mecânico (tractor unit). In it you register the trailers in the combination, each with tare, total capacity and load type.
📡 The MDF-e Transmission window
The NFE Transmission button, at the top of the document, opens the MDF-e Transmission window. In it you choose the issuing Tax settings and the Transmission mode — Production, for real, or Test (Homologação), for testing. A Generate preview button prints a draft of the manifest before sending.
Right below are the Last status and the SEFAZ response as text.
| Button | What it does |
|---|---|
| Transmit | Sends the manifest to SEFAZ. |
| Query | Asks for the current status of the manifest. |
| View XML and View PDF | Open the file and the printed document (DAMDFE). |
| Open validator | Checks the XML before sending. |
| Cancel MDFe | Cancels the manifest, within what the law allows. |
| Close MDFe | Closes the manifest when the trip ends. |
The buttons are available depending on the status: on a manifest that is already finalized, for example, Transmit, Query, Cancel and Close appear disabled.
🔒 Closing is mandatory
A manifest has two moments: authorization, when SEFAZ accepts it and the trip can start, and closing, when the load arrives. Once closed, the Status changes to Finalized and the list fills in the Closing Date.
Besides Close MDFe, the top of the document has Clone, which creates a new manifest from this one — the quick way when the same trip repeats with the same vehicle and driver.
- Manifest issued from the same system that holds the invoices
- Vehicle, driver, trailers and route on record
- Closing Date column showing, at a glance, what was left open
- History of the exchange with SEFAZ kept in the document itself
- Repeat trips handled with Clone
❓ Frequently asked questions
When does the farm need to issue an MDF-e?
When it hauls the load itself, with its own vehicle, between municipalities or states. The manifest groups the invoices for that trip into a single document, which travels with the driver along with the invoices.
How do I add the invoices to the manifest?
On the Movement tab, add each invoice — choosing the corresponding movement or typing in the NFE key. For many invoices, use the Import several button.
I transmitted the MDF-e and the load has arrived. Do I need to do anything else?
Yes: you need to close the manifest, with the "Close MDFe" button. A manifest that is transmitted and left open stays pending with SEFAZ, even after the trip is over.
How do I find manifests that were never closed?
In the list, look for those with Status Authorized and an empty Closing Date column: these are trips already authorized that nobody closed. Closed ones show as Finalized with the date filled in.
Why doesn't the trailers tab appear?
Because it is only shown when the chosen Wheelset Type is Cavalo Mecânico (tractor unit). For a straight truck, for example, there is no trailer combination to enter.
I make the same trip every week. Do I have to type everything again?
No. Open a similar earlier manifest and use the Clone button: vehicle, driver and the other data are copied, and you adjust the date and the invoices for that trip.
🛠️ Quick Guide - Operations (Work Order)
The Work Order is the record of what the crew did in the field: on which fields, with which products, with which machine and which employee. It is how cost reaches the field and how input consumption is recorded. This guide shows what needs to exist before the first work order — and how the work order is organized inside.
Before you start, the farm structure must already be in place, especially Season Planting, which gives season, crop and field context to everything entered here.
📍 Location in the system
Menu: Operations
🧩 What to set up first
1. Work Order/Activity Type
Menu: Operations > Work Order/Activity Type
This is where the farm's activities are grouped, and it is the most important record in the area. It is not just a classification: it configures how the work order behaves. In it you define:
- The nature of the activity — planting, fertilizing, crop application, harvest, collection, irrigation, seed treatment or other. This flag changes what the system calculates.
- What the work order will require and display — field, equipment, contractor, employee, hour meter, rate. This is where you decide whether a field appears in the entry or not.
- Which short identifications are available — you can restrict them, so that an activity type only offers the identifications that make sense for it.
- The associated Checklist Template and report, plus the color that identifies the type on screens.
It's worth taking time over this record: most questions like "the work order is asking for too many fields" or "the calculation came out wrong" are solved here.
Application defaults
On a crop protection application activity type, you can save the values that usually repeat, and the work order brings them in ready:
- Application parameters — spray rate, captan and treated hectare, with separate values for ground and aerial application.
- Working conditions — wind speed, humidity, temperature and spray mix pH.
On the work order, this data appears on the Crop Protection Application tab. Filling in the default here saves you from retyping the same values on every work order.
The values are saved in two sets — ground and aerial — because the work order itself, when it is an application type, has an Application type field with the options Ground and Aerial. That field determines which set applies to that entry.
2. Short Identification (Subtype)
Menu: Operations > Short Identification (Subtype)
Also called Short Identification. It is a subgroup of the activity type — it serves to detail what was done within the same type. It goes on the work order header.
You can restrict which identifications each activity type offers: in the Work Order/Activity Type record you indicate the valid identifications for it, and the work order then shows only those. This reduces typing errors and keeps a standard across crews.
3. Team
Menu: Operations > Team
Defines who is responsible for the activity. Besides the person responsible, the team defines where work orders, checklists and maintenance plans are sent, and it can be linked to an entity when it is a contracted crew.
It's worth filling in the team contact: the WhatsApp number registered here is where the system sends the notice that a new work order has been created.
4. Employee/Operator
Menu: Operations > Employee/Operator
Whoever does the work — tractor drivers, operators, helpers. This record lets you register, in the execution, who actually did the job.
📋 Inside the Work Order
Menu: Operations > Work Order/Activity
The work order has a header and a set of tabs.
The header holds three pieces of information:
- Activity type — the Work Order/Activity Type set up earlier
- Team — who is responsible for the activity
- Short Identification — the subgroup of the activity type
The tabs:
| Tab | What it records |
|---|---|
| Field | Where the work was done. |
| Product and Service | What was applied in the activity. Besides products, services go here too — that's how a contracted aerial application, for example, shows up as an item on the work order. |
| Equipment and Employees | The plan: that the activity be done with a given machine and a given employee. Completely optional. |
| Crop Protection Application | The application parameters and conditions — spray rate, captan, treated hectare, wind, humidity, temperature and spray mix pH. It comes filled in with the defaults from the Work Order/Activity Type. |
| Execution | What actually happened — which machine, which employee, which day, what time. This is the tab that turns the plan into what was done. |
➕ Optional features
Agronomic Treatment
Menu: Operations > Agronomic Treatment
Lets you create a treatment: a list of products with their rates. Then, on the work order, you apply that treatment and the predefined products are imported at once, instead of being entered one by one. Useful when the same combination repeats during the season.
Checklist Template
Menu: Operations > Checklist Template
Where checklists are set up. Some companies require the crew to answer an operation checklist — and it appears to be filled in at the moment the execution is entered. The completed checklist is linked to that work order, and completed ones are available in Completed Checklists. Optional — see how to build the form in Checklist Template.
Agronomic Prescription
Menu: Operations > Agronomic Prescription
Records the agronomist's recommendation — product, rate, crop and season — tracking the quantity recommended, the quantity already used and the balance. It is an extra feature, not required, and rarely used in practice.
Spray Nozzle
Menu: Operations > Spray Nozzle
Where nozzles are set up with standardized flow rates and pressures, used in application activities. See also the guide on work orders in perennial crops, where this record is part of the workflow.
- What was done on each field, with which products, which machine and which employee
- How much each field and each season cost, which lets you get to the cost per hectare
- Whether what was executed matched what was planned, comparing the plan with the execution record
And, day to day, less typing for whoever enters the data: products and rates that repeat come ready from the treatment, and spray rate and application conditions come pre-filled from the activity type.
The work order is the heart of up.Operações, upCampo's operations module.
❓ Frequently asked questions
What do I need to set up to enter my first work order?
The Work Order/Activity Type, the Short Identification (subgroup of the type), the responsible Team and the Employees/Operators. The farm structure, including Season Planting, must already be in place. Prescription, checklist and nozzle are optional.
The work order is asking for fields I don't use. How do I remove them?
In the Work Order/Activity Type record. It defines which fields the work order requires and displays — field, equipment, contractor, employee, hour meter, rate. When you adjust the type, the entry screen changes.
What is the difference between the Equipment and Employees tab and the Execution tab?
The Equipment and Employees tab is the plan: it defines that the activity be done with a given machine and a given employee — and it is completely optional. The Execution tab is what actually happened: which machine, which employee, which day and what time.
I always enter the same products and rates. Can I avoid typing it all again?
Yes, with the Agronomic Treatment. You register the list of products with their rates once and, on the work order, apply that treatment — the products are imported at once.
What is the Short Identification (IDERES)?
It is a subgroup of the activity type, entered on the work order header. It serves to detail what was done within the same work order type.
How do I limit the short identifications that appear for an activity type?
In the Work Order/Activity Type record, indicating which identifications are valid for it. The work order then shows only those, which avoids wrong choices and keeps a standard across crews.
Do I have to type spray rate and application conditions on every work order?
No. Save the values as defaults in the Work Order/Activity Type for crop protection application — spray rate, captan and treated hectare (ground and aerial), wind, humidity, temperature and spray mix pH. The work order brings these values in ready, on the Crop Protection Application tab.
How do I record an aerial application?
On an application-type work order there is the Application type field, with the options Ground and Aerial — it is what identifies the aerial application and defines which parameters apply.
From there, how you organize it depends on how you want to see the cost. The options are:
- Enter it as a service on the Product and Service tab, when you want to account for the value of the contracted application
- Create a specific activity type for aerial application, separating that kind of service right at the grouping level
- Create a team for aerial application, when you want to track it by who is responsible
How do I require a checklist to be filled in at execution?
Set up the checklist in Checklist Template and link it to the Work Order/Activity Type. When the user enters the work order's execution, the checklist appears to be answered, and the answer is linked to that work order. All completed checklists are in Completed Checklists.
How do I let the team know a work order was created?
Register the WhatsApp number in the Team contact. The system sends a message to that number saying the work order was created.
How do I register a contracted crew?
In the Team record, linking the corresponding entity. To track the financial side of the service provided, use the Contractor Agreement.
📘 Screen: Team
The Team screen registers the farm's work crews and defines who is responsible for each activity. E.g.: Spraying Team, Planting Crew, Harvest Team, or a contracted crew hired for the season. The team is what appears on the header of the work order and what receives the notice when a new work order is created.
📍 Location in the system
Menu: Operations > Team
🧩 Main function
Group employees and machines under one person in charge, so that field activities are assigned to a group and not to scattered individuals. The team also defines where work orders, checklists and maintenance plans are sent, and stores the contact used for notifications.
📝 Main fields
| Field | Description |
|---|---|
| Description | Team name (e.g., "APL AEREA", "COLHEITA", "PLANTIO"). |
| Code | Team identifier. |
| Sector | Internal grouping, useful when the farm separates teams by area or farm (e.g., "BOA VISTA", "PRIMAVERA"). |
| Application type | All, Ground or Aerial. Lets you separate teams by the type of application they perform. |
| Integration | The team's reference code in external systems, used in the integration mapping. |
| Active | Defines whether the team is available for use. |
👁 Show in
These are checkboxes that define in which system fields that team appears for selection — each option matches exactly the field named in it:
- Show in the Execution Team options (Work Order/Activity)
- Show in the Technical Lead Team options (Work Order/Activity)
- Show in the Checklist options
By checking only what makes sense for each team, the selection list stays short and the operator makes fewer mistakes.
📲 Person in charge
This is where you set the team contact, used for WhatsApp notices. For sending to work, the
company must be enabled in the customizations, in
File > Company/Crop Settings — without that, filling in the contact doesn't make the
message go out.
| Field | Description |
|---|---|
| 1 - Number (WhatsApp) | Number that receives the messages. |
| 2 - Responsible user | Who answers for the team within the system. |
| 3 - Contact (Ideal for groups) | Accepts only contacts of type Group or WhatsApp. By creating a contact for the team's group, everyone gets the notice at once — it is the most practical option when the crew is large. |
| 4 - Entity | Used when the team is a third party: points to the contracted entity. |
| The team's contact e-mail. |
🗂 Notification destinations
Defines where the WhatsApp notice for each type of document goes. There are three independent fields:
- Work Order/Activity WhatsApp Destination
- Checklist WhatsApp Destination
- Maintenance Plans WhatsApp Destination
This way you can, for example, send work orders to the crew's group and maintenance plans to another destination.
🗂 Additional tabs
- Fleet/Equipment: the machines that make up the team.
- Employee/Operator: the people who belong to it.
- Every field activity has a clear person in charge, instead of being assigned to scattered individuals
- The team gets a WhatsApp notice when there is a new work order
- The machines and people in each crew are on record, which makes entering the execution easier
- Work done by contracted crews is linked to the contracted entity
❓ Frequently asked questions
How do I get the whole team to receive the new work order notice on WhatsApp?
Create a contact for the team's WhatsApp group and enter it in the 3 - Contact (Ideal for groups) field. That way everyone in the group gets the notice at once. The field accepts only contacts of type Group or WhatsApp.
Before that, the company must be enabled in the customizations, in
File > Company/Crop Settings. If messages aren't going out even with the
contact filled in, that setting is the first thing to check.
Can I send work orders and maintenance plans to different destinations?
Yes. There are three independent destination fields — Work Order/Activity WhatsApp Destination, Checklist WhatsApp Destination and Maintenance Plans WhatsApp Destination — and each one can point to a different place.
How do I register a contracted crew?
Fill in the Entity field with the contracted entity. To track payments and deductions for the service provided, use the Contractor Agreement.
Do I need separate teams for ground and aerial application?
It isn't required, but it's an option. The Application type field accepts All, Ground or Aerial — separating teams is one way to organize things when the farm does both types of application.
The team doesn't appear for selection on the work order. Why?
Check two things in the record: whether the team is Active and whether, under Show in, the option matching the field you're filling in is checked — Execution Team or Technical Lead Team.
Where do I enter the team's machines and people?
On the Fleet/Equipment and Employee/Operator tabs of the team record itself.
📘 Screen: Employee/Operator
The Employee/Operator screen registers the people who do the work on the farm — tractor drivers, sprayer operators, helpers, mechanics. This record is what lets you register who did each activity and work out the labor cost per hour worked.
📍 Location in the system
Menu: Operations > Employee/Operator
🧩 Main function
Keep the list of people who appear for selection in day-to-day entries: execution of work orders, fueling, requisitions, maintenance work orders and checklists. This is also where you enter the hourly rate, used in activity costs.
📝 Record fields
| Field | Description |
|---|---|
| Name | Required. Name of the employee or operator. |
| Code | Internal identifier. |
| Role | What the person does (e.g., tractor driver, operator, mechanic). |
| Hourly Rate | Value of an hour of work, used to calculate labor cost. Rarely used in practice. |
| Currency | Currency of the value entered. |
| Cost center | Cost center the labor is charged to. |
| Sector | Internal grouping, useful when the farm separates teams by area. |
| Tax settings | Setting used on farms with more than one CNPJ/CPF. |
| E-mail and Phone | Contact details. |
| Integration | The person's reference code in external systems, used in the integration mapping. It can be set as required for the farm. |
| Active | Defines whether the employee is available for use. |
👁 Show in
These are checkboxes that define on which screens that person appears for selection. Each option matches the field named in it:
- Work Order/Activity
- Fueling
- Requisition
- Maintenance WO
- Checklist
Checking only where the person actually works keeps lists short and reduces selection errors — a mechanic, for example, usually matters on the maintenance work order, but not on the agricultural work order.
- You can record who carried out each activity, not just that it was done
- Labor cost goes into the activity's cost, based on the hourly rate
- Each screen shows only the people that make sense for it
- Crews are put together in the Team, which groups these employees
❓ Frequently asked questions
The employee doesn't appear for selection on the work order. Why?
Check two things in the record: whether they are Active and whether, under Show in, the Work Order/Activity option is checked. The same goes for Fueling, Requisition, Maintenance WO and Checklist — each screen depends on its own checkbox.
How does labor cost get into the activity?
Through the employee's Hourly Rate field, together with the currency entered. When you record the execution of the activity with that person, the hourly rate is used to calculate the cost.
I can't delete an employee. What should I do?
When the record has already been used in an entry, the system doesn't allow deleting it — that would lose the history. In that case, uncheck the Active field: the person no longer appears in the lists, but the old records stay intact.
The system is requiring the Integration field. Why?
Because filling in the Reference/Integration ID can be set as required for that farm. It is a farm setting, not the record's default behavior.
What is the difference between Employee and Team?
The employee is the person; the team is the work group, which brings employees and machines together under one person in charge. On the work order, the header takes the team, and the execution records who actually worked.
📘 Screen: Work Order/Activity Type
This is where the farm's activities are grouped — planting, fertilizing, crop protection spraying, harvest — and it is the most important setup in the operations area. It is not just a classification: it is what configures how the work order behaves, defining which fields appear, what is required, and which values come prefilled.
Most questions like "the work order is asking for too many fields" or "why doesn't this field show up" are solved here.
📍 Location in the system
Menu: Operations > Work Order/Activity Type
🧩 Main function
Define the activity types the farm performs and, for each one, the behavior of the corresponding work order: the nature of the work, the required fields, the application defaults, and the associated documents.
📝 Setup fields
| Field | Description |
|---|---|
| Description | Required. Name of the type (e.g., "Crop protection spraying", "Planting"). |
| Code | Internal identifier. |
| Category | Required. Defines the nature of the activity — see the section below. |
| Color | Color that identifies the type on screens and dashboards. |
| Display order | Sets the type's position in selection lists. |
| Default Report | Report used when printing a work order of this type. |
| Checklist Template | Checklist shown when the work order is executed. |
| Integration | Reference code in external systems. Can be configured as required for the farm. |
| Active | Defines whether the type is available for use. |
🌱 Category: the nature of the activity
The Category is chosen from a predefined system list and tells what kind of work it is. That choice changes what the system calculates and which fields the work order shows:
- Soil preparation
- Fertilizing
- Planting
- Crop protection spraying
- Harvest
- Sampling
- Irrigation
- Seed treatment — the rate becomes per 100 kg of seed and the execution becomes a slurry withdrawal (see how to record seed treatment)
- Manual
- Other
⚙️ Details, Show in, and Hide
A set of checkboxes controls, field by field, how the entry screen behaves — whether the field is only shown, hidden, or required. Among the items controlled are Field, Fleet/Equipment, Employee/Operator, Execution, Details, Quantity, Helper, Start/end time, and Short Identification. This is also where the Show on dashboard option is, which makes the type appear on the home screen dashboards.
There are also behavior locks:
- Lock date change on execution — prevents changing the date when recording the execution
- Change reference date of the Season Planting
- Separate Variety — separates the data by variety within the field
This is also where you define which Short Identifications are available for that type, limiting the list the operator sees on the work order.
💧 Spray volumes and application conditions
For application activities, the type stores the values that usually repeat, and the work order brings them ready in the Crop protection spraying tab.
These values apply only to crop protection spraying activities.
They are organized in two blocks — Spray volumes for ground application and Spray volumes for aerial application — because the work order has an Application type field that determines which one applies. Each block accepts three spray volume settings (Volume 1, 2, and 3), and each setting has:
- Spray volume
- Tank capacity
- (ha) per tank
- Spray nozzle
There are three because you can indicate, in the product setup, which of these settings it uses — different products in the same tank mix may require different spray volumes.
And the working conditions considered suitable for the application:
- Wind speed
- Humidity
- Temperature
- Spray mix pH
- Working pressure
⏱ Re-entry
The Re-entry interval (hours) field records how many hours must pass before anyone can go back into the field after the application — occupational safety information, tied to the product applied.
🔗 "Operation" tab: the mapping with the integration
This tab links the farm's activity type to the operation type used by an external system — currently, John Deere. This is what lets an application recorded by the machine in the field find the right work order in upCampo.
| Field | Description |
|---|---|
| Operation | The external operation type, set up in Operations > Operation. In John Deere there are four: Application, Seeding (planting), Harvest, and Tillage (soil preparation). |
| Equipment | Reserves a fixed fleet unit for whatever comes in through that operation. Since the imported execution brings the area of the whole operation, not the machine that did the work, the usual practice is to use a generic fleet unit — John Deere Integration — which marks in the list what came from outside and what was typed in. |
The Quick/dynamic import button creates the links all at once, instead of one by one.
📥 Import ready-made types
In the main list there is the Import activity types (default) option, which brings in setups maintained by the upCampo team. It is the fastest path during implementation: instead of creating everything from scratch, you import the common types and adjust what is specific to the farm.
You can also copy to another company, choosing the destination company and branch — useful if you have more than one farm and want to repeat the same configuration.
- Each work order shows only the fields that make sense for that activity
- Whoever enters data types less: spray volume, conditions, and checklist come already defined
- Activities are grouped consistently in reports and dashboards
- The field re-entry interval is recorded together with the activity
❓ Frequently asked questions
The work order is asking for fields I don't use. How do I remove them?
In this setup. A set of checkboxes defines, field by field, what the work order shows, hides, or requires — field, fleet, employee, execution, details, quantity, start/end time. When you adjust the type, the entry screen changes.
Do I have to create all activity types from scratch?
No. Use Import activity types (default) in the screen's list: these are setups maintained by the upCampo team, ready to use. Then just adjust what is specific to your farm.
I have more than one farm. Can I repeat the configuration?
Yes, with the Copy to another company option, where you select the records and enter the destination company and branch.
Why are there separate spray volumes for ground and aerial?
Because the application work order has an Application type field, with the options Ground and Aerial — and that is what determines which set of spray volumes applies to that entry. These fields apply only to crop protection spraying activities.
What are the three spray volume settings for?
Because different products may require different spray volumes. In the product setup you can indicate which of the three settings (Volume 1, 2, or 3) it uses.
Where do I record the field re-entry time after the application?
In the activity type's Re-entry interval (hours) field. It indicates how many hours must pass before anyone can go back into the treated area.
How do I limit the short identifications of an activity type?
In the type setup itself, by indicating which short identifications apply to it. The work order then shows only those.
I can't delete an activity type. What should I do?
When the type has already been used in a work order, the system does not allow deleting it — that would lose the history. Uncheck the Active field: it stops showing up in the lists and the old records stay intact.
📘 Screen: Irrigation Setup
The Irrigation Setup screen stores the combinations of speed and water depth used on the farm. Each setting links a speed to how many millimeters of water it applies — so, when recording irrigation, you just pick the setting instead of recalculating the depth every time.
📍 Location in the system
Menu: Operations > Irrigation Setup
🧩 Main function
Maintain the settings that will be used in irrigation work orders. They appear when the work order's Work Order/Activity Type has the Irrigation category — in activities of any other category, this setup is not used.
📝 Setup fields
| Field | Description |
|---|---|
| Description | Required. Name of the setting, preferably something that identifies the combination when choosing it. |
| Code | Internal identifier. |
| Speed | Equipment speed in this setting. |
| Millimeters | Water depth applied, in millimeters, at the given speed. |
| Active | Defines whether the setting is available for use. |
- Whoever records irrigation picks a ready-made setting, without recalculating the depth
- The same combinations apply to the whole team, which avoids different criteria
- Irrigation records are standardized and comparable across fields and seasons
❓ Frequently asked questions
The irrigation setting doesn't show up on the work order. Why?
Because it only appears when the work order's Work Order/Activity Type has the Irrigation category. Check the type's category and whether the setting is marked as Active.
Do I need to set up one setting for each speed?
Yes — that's exactly the idea. Each record links a speed to the corresponding water depth, in millimeters. Set up the combinations the farm actually uses.
I can't delete a setting. What should I do?
When it has already been used in a work order, the system does not allow deleting it — that would lose the history. Uncheck the Active field: it stops showing up in the lists and the old records stay intact.
📘 Screen: Spray Nozzle
The Spray Nozzle screen registers the nozzles used on the farm's sprayers, with their type, model, angle, and the relationship between pressure and flow rate. This setup standardizes the values used in application calculations, so each operator doesn't work with a different number.
📍 Location in the system
Menu: Operations > Spray Nozzle
🧩 Main function
Maintain the list of nozzles available for use in application activities. The nozzle is chosen in the spray volume settings of the Work Order/Activity Type, together with the spray volume, the tank capacity, and the hectares per tank.
📝 Setup fields
| Field | Description |
|---|---|
| Name/Description | Required. Nozzle identification. |
| Type | Required. Mesh, Cone, Rotary atomizer, or Hydraulic nozzle. |
| Code | Internal identifier. |
| Model | Nozzle model, according to the manufacturer. |
| Angle | Spray fan angle. |
| Active | Defines whether the nozzle is available for use. |
💧 Pressure and output
Each nozzle accepts several records linking the working pressure (PSI) to the corresponding output per minute. This is the nozzle curve: the same part delivers different flow rates depending on the pressure applied.
Entering these pairs is what lets the application calculation use the right value for the pressure at which the sprayer actually works.
- The activity type's spray volume settings point to a real nozzle, not to a loose value
- The flow rate used in the calculation matches the equipment's working pressure
- The whole farm works with the same application parameters
❓ Frequently asked questions
Where is the nozzle used after it's set up?
In the spray volume settings of the Work Order/Activity Type, which apply to crop protection spraying activities. Each spray volume setting points to a nozzle.
Which nozzle types does the system accept?
Four: Mesh, Cone, Rotary atomizer, and Hydraulic nozzle. The type is required.
Why set up more than one pressure for the same nozzle?
Because the nozzle's flow rate changes with pressure. By recording the pairs of pressure (PSI) and output per minute, the application calculation uses the value that matches the pressure at which the sprayer is working.
I can't delete a nozzle. What should I do?
When it has already been used in a setting or work order, the system does not allow deleting it. Uncheck the Active field: the nozzle stops showing up in the lists and the old records stay intact.
📘 Screen: Short Identification (Subtype)
Short ID (Ide. Res. in the Portuguese menu) is the abbreviation of Short Identification — also called IDERES. It is a subgroup of the activity type. It is used to give more detail on what was done within the same work order type — for example, within "Crop protection spraying", to tell what that application was for.
📍 Location in the system
Menu: Operations > Short Identification (Subtype)
🧩 Main function
Create a second classification level below the Work Order/Activity Type. The chosen identification goes into the header of the work order, next to the activity type and the team, and lets you analyze the data in more detail in reports and dashboards.
📝 Setup fields
| Field | Description |
|---|---|
| Description | Required. Name of the short identification. |
| Type | Classification of the identification. |
| Stage | Stage the identification corresponds to. |
| Order | Sets the position in the selection list. |
| Show on dashboard | Makes the identification appear on the home screen dashboards. |
| Reference/Integration ID | Reference code in external systems. Can be configured as required for the farm. |
| Active | Defines whether the identification is available for use. |
🔗 Link to the activity type
You can restrict which identifications each activity type offers. This link is made in the Work Order/Activity Type setup: there you indicate the valid identifications for that type, and the work order then shows only those.
It's worth doing: without the restriction, the operator sees the whole list and may choose an identification that has nothing to do with the activity.
- Activities are classified on two levels, not just by type
- Reports and dashboards allow a more detailed analysis of what was done
- By linking identifications to the right types, the list the operator sees stays short and consistent
❓ Frequently asked questions
What is the Short Identification (IDERES)?
It is a subgroup of the activity type, entered in the work order header. It is used to give more detail on what was done within the same work order type.
How do I limit the identifications that appear for an activity type?
In the Work Order/Activity Type setup, by indicating which identifications apply to it. The work order then shows only those.
The identification doesn't show up on the work order. Why?
Check that it is Active and that it is among the identifications enabled for that activity type — when the type restricts the list, only the ones indicated appear.
I can't delete an identification. What should I do?
When it has already been used in a work order, the system does not allow deleting it — that would lose the history. Uncheck the Active field: it stops showing up in the lists and the old records stay intact.
📘 Screen: Agronomic Prescription
The Agronomic Prescription screen records the agronomist's recommendations: which product to apply, at what rate, for which crop, and in what total quantity. From there the system tracks how much of that prescription has already been used and how much is left, so you can check whether the field application is within what was recommended.
📍 Location in the system
Menu: Operations > Agronomic Prescription
🧩 Main function
Store the prescription issued by the agronomist and link it to the work orders that carry it out. Each prescription has its own number, a technical lead, and a balance that goes down as the applications happen.
📝 Setup fields
| Field | Description |
|---|---|
| Number | Required. Prescription number. The system does not accept two recommendations with the same number. |
| Date | Required. Date of the recommendation. |
| Entity/Agronomist | The professional responsible for the prescription, set up as an entity of the agronomist type. |
| Product | Required. The recommended product. |
| Crop | Crop the recommendation refers to. |
| Rate | Recommended product rate. |
| Quantity | Required. Total quantity released by the prescription. |
| Quantity used | How much of the prescription has already been applied. Calculated by the system. |
| Remaining Quantity | The balance still available. Calculated by the system. |
| Check balance | Makes the system control the prescription balance, preventing you from applying more than was recommended. |
| Notes | Free field for notes. |
| Active | Defines whether the prescription is available for use. |
🔗 Link work orders
The screen lets you link work orders to the prescription. When you use the Link work orders option, the system lists the candidate work orders — with field, short identification, and quantity — and you select the ones that should go into that prescription.
This link is what feeds the quantity used and the remaining balance.
🔎 List filters
The list can be filtered by Active only, Inactive only, or All — useful when the farm builds up prescriptions from previous seasons.
- Each application is linked to the technical recommendation that authorized it
- You can know, at any time, how much of each prescription has been applied and how much is left
- With balance checking on, the system prevents applying more than recommended
- The technical lead of each recommendation is recorded
❓ Frequently asked questions
How do I link a work order to the prescription?
With the Link work orders option, inside the prescription. The system lists the candidate work orders with field, short identification, and quantity, and you select the ones to link.
How do I prevent applying more than recommended?
Check Check balance on the prescription. With that option on, the system controls the remaining quantity and does not let you exceed the recommended total.
The system says a recommendation with this number already exists. What should I do?
The prescription number is unique: you can't have two recommendations with the same number. Check whether the prescription was already entered before and, if it is a new one, use the number of the document issued by the agronomist.
Where do I see how much I can still apply from a prescription?
In the Quantity used and Remaining Quantity fields, calculated by the system from the work orders linked to the prescription.
Who shows up as the prescription's agronomist?
The entities marked as agronomist in their setup. If the professional doesn't appear in the list, check their entity type.
📘 Screen: Agronomic Treatment
The Agronomic Treatment is a list of products with their rates, put together once and reused later. On the work order, instead of entering item by item, you apply the treatment and the predefined products come in all at once.
It is especially useful when the same combination repeats throughout the season — a standard fungicide tank mix, a seed treatment, a mix used in every burndown.
📍 Location in the system
Menu: Operations > Agronomic Treatment
🧩 Main function
Standardize the product and rate combinations the farm uses, so entering the work order is faster and less prone to typing errors.
📝 Setup fields
| Field | Description |
|---|---|
| Description | Required. Name of the treatment, preferably something that identifies the combination when choosing it. |
| Crop | Required. Crop the treatment is intended for. |
| Code | Internal identifier. |
| Type | Internal, External, or Automatic. |
| Short identification | Short Identification associated with the treatment. |
| Sector | Internal grouping within the farm. |
| Notes | Free field for notes. |
| Active | Defines whether the treatment is available for use. |
🧪 Treatment products
This is the list that gives the setup its purpose. For each item you enter:
- Product & Service — the product that makes up the treatment
- Rate — the rate of that product
- Notes — a note specific to the item, when needed
The list can be filtered by product class, which helps when the product list is large. There is also the Delete all option, to clear the list at once, and View inventory, to check item availability without leaving the screen.
- Whoever enters the work order brings in the ready-made recipe, instead of typing product by product
- The same rates apply to the whole team, which avoids differences between operators
- The combinations used during the season are recorded and can be reused in the next one
❓ Frequently asked questions
I always enter the same products and rates. Can I avoid typing everything again?
Yes, that's exactly what the agronomic treatment is for. Set up the list of products with their rates once and, on the work order, apply that treatment — the products are imported all at once.
The treatment doesn't show up for selection on the work order. Why?
Check that it is Active and that the treatment's Crop is the same as the work order's — the setup is tied to a crop, which is a required field.
How do I know if I have the treatment's products in inventory?
With the View inventory option, on the same screen, which shows item availability without having to open the inventory module.
How do I clear the product list at once?
Use Delete all, which removes all items from the treatment. The system asks for confirmation first.
I can't delete a treatment. What should I do?
When it has already been used in a work order, the system does not allow deleting it — that would lose the history. Uncheck the Active field: it stops showing up in the lists and the old records stay intact.
📘 Screen: Work Order/Activity
The work order is the document that records a field operation: in which fields it was done, with which products, with which machine, and by which employee. In upCampo, it is through the work order that the input leaves inventory and that the cost reaches the field and the season — an application with no work order entered happened in the crop, but does not exist in the system.
A work order covers everything from scheduling to execution: it opens with what you plan to do and closes with the area actually executed. That final area is what recalculates how much product went out and how much it cost — and it is where the season's cost per hectare comes from.
Before entering the first work order, the area's setups need to be ready — see the Operations Quick Guide.
📍 Location in the system
Menu: Operations > Work Order/Activity
🧩 Main function
Record each activity carried out in the crop, separating what was planned from what was executed, and linking the activity to the fields, products, equipment, and people involved.
🖥 The list
The screen opens on a list with the work orders for the period. This is where you follow the progress of the season's activities.
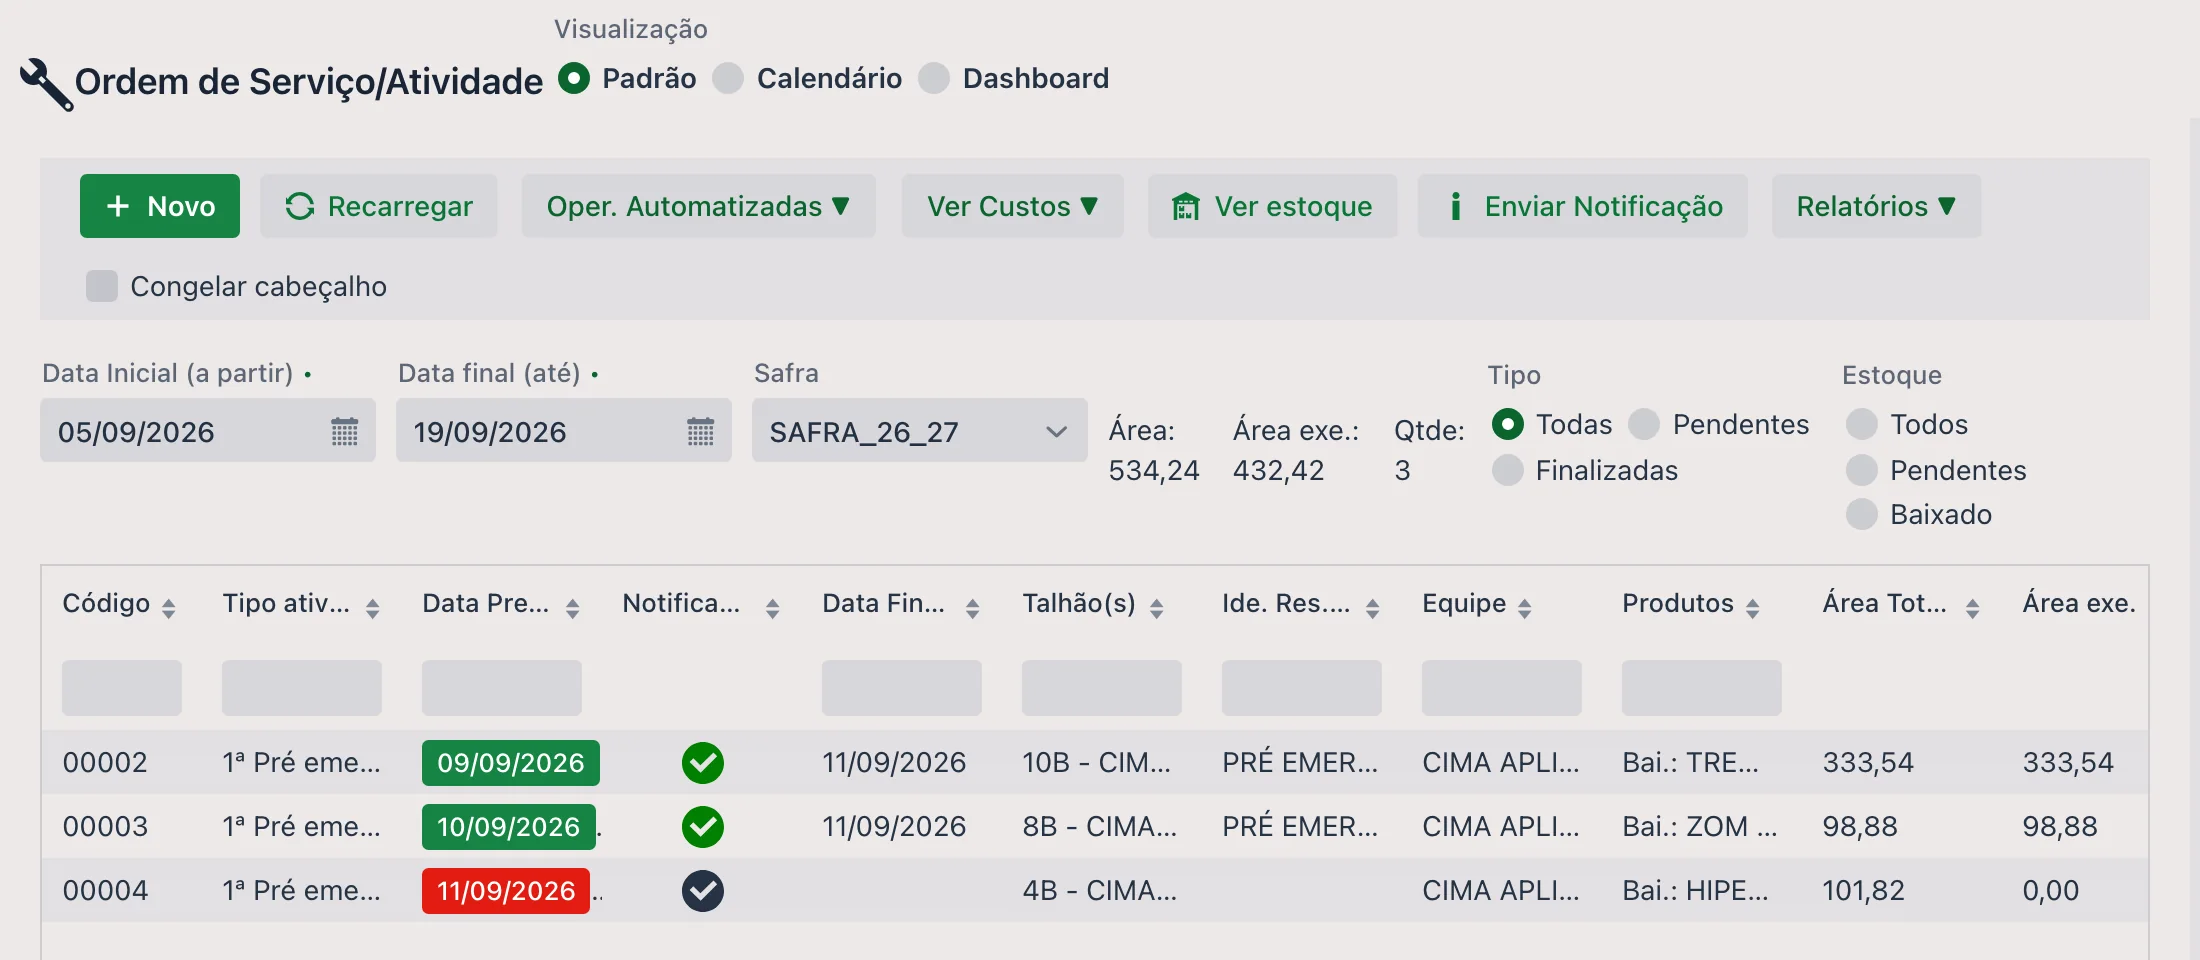
View modes
At the top there are three modes, chosen in the View field:
- Standard — the list as a grid, with all columns and filters
- Calendar — the work orders spread across the dates
- Dashboard — an indicators view
List buttons
| Button | What it does |
|---|---|
| New | Creates a work order. |
| Reload | Refreshes the list. |
| Automated Ops | Batch operations on several work orders — see below. |
| View Costs | Shows the work order's costs by field: since the product is entered for the whole work order, the amount is allocated across the fields. |
| View inventory | Shows product availability. |
| Send Notification | Sends the WhatsApp alert to the team. |
| Reports | Quick access to the area's reports. |
| Freeze header | Keeps the header fixed while scrolling the list. |
Automated operations
This is the menu that saves you from repeating the same work order by order:
- Generate several work orders (individual) — creates several work orders at once
- Add products to several work orders (batch) — adds the same products to a set of work orders
- Apply agronomic prescription to several work orders — links a prescription to several work orders
- Change several work orders at once — batch editing
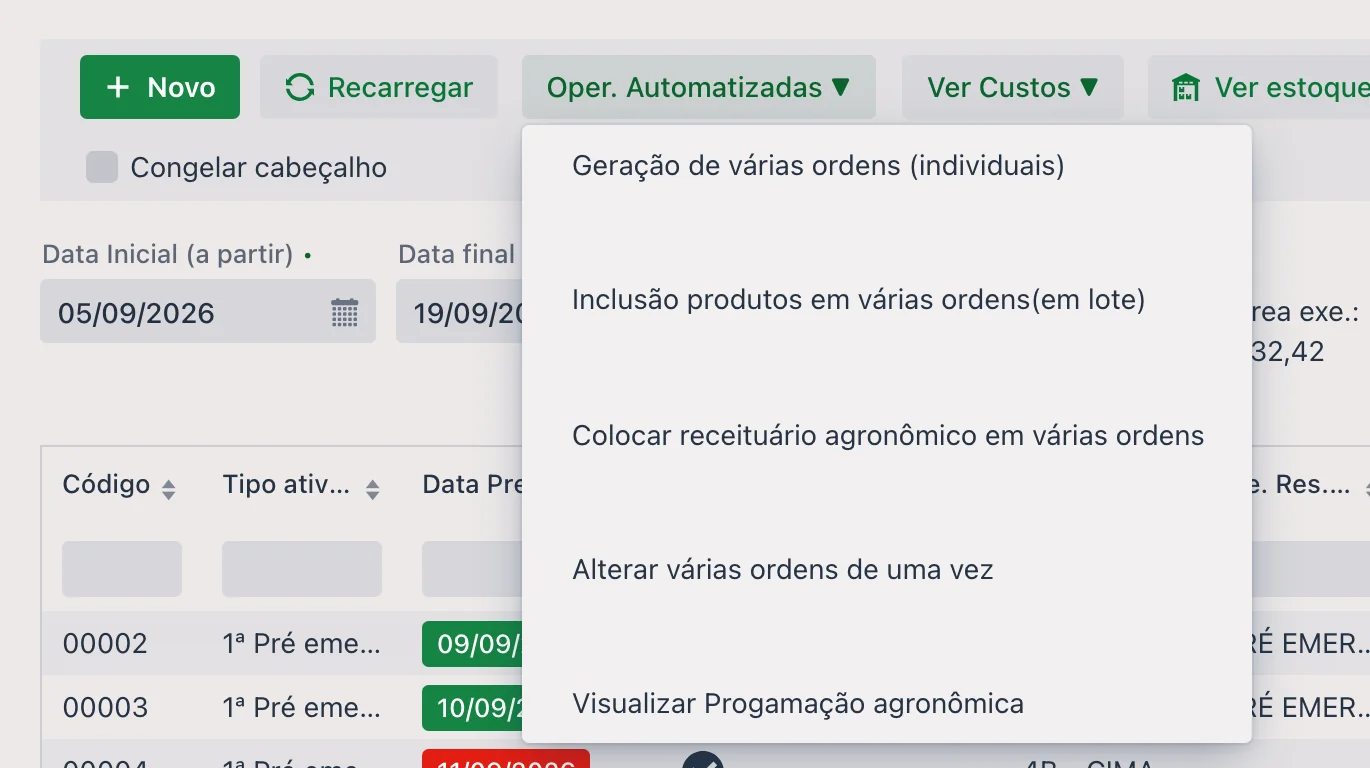
Filters
| Filter | Description |
|---|---|
| Start Date (from) and End date (to) | Period shown. By default the screen opens with 7 days before and 7 days after today's date — that's why an old or far-future work order doesn't appear until you widen the period. |
| Season | Season of the work orders listed. |
| Status | All, Pending, or Finished. |
| Inventory | All, Pending, or Posted — separates work orders whose products have already been deducted from inventory from those that haven't. |
Next to the filters are the totals for what is being shown: Area, Executed area, and the number of work orders.
Planned Date colors
The planned date appears in color, flagging each work order's situation without opening it:
| How it appears | Meaning |
|---|---|
| 05/08/2026 | Finished |
| 07/08/2026 | Late |
| 10/08/2026 | Pending and close to the deadline (within 7 days) |
Columns
The grid shows Code, Activity type, Planned Date, Notification, Completion Date, Field(s), Short ID (Subtype), Team, Products, Total Area (ha), Exec. area, and % Executed. Short ID is the short identification, and Exec. area is the area already executed.
From the grid's options menu you can add or remove columns — for example Approval, Responsible, and Equipment, which are not shown by default. Each column also has a filter field right below its title.
🧾 The work order header
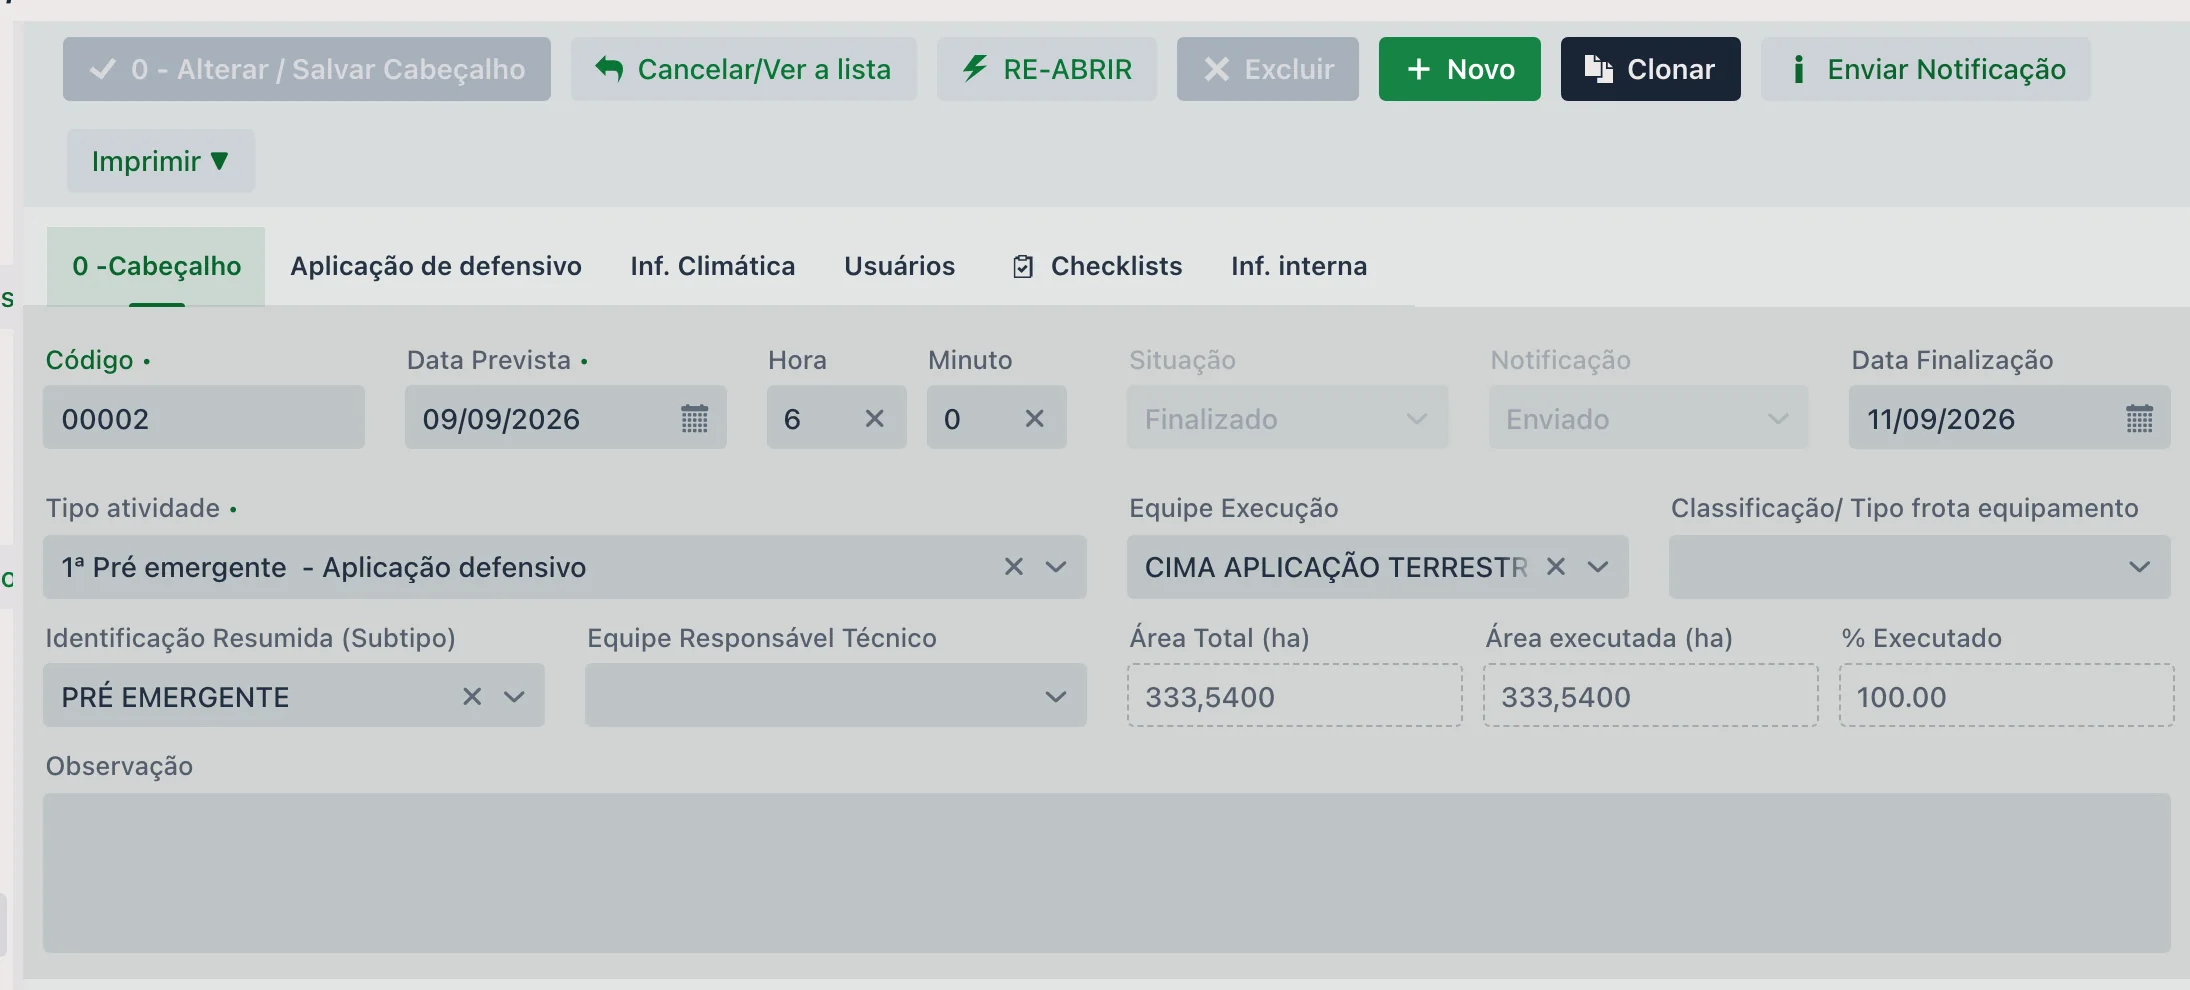
Buttons
| Button | What it does |
|---|---|
| 0 - Change / Save Header | Saves the header. |
| Cancel/View list | Goes back to the list. |
| RE-OPEN | Reopens a finished work order so it can be changed again. |
| Delete | Deletes the work order. |
| New | Creates another work order. |
| Clone | Creates a full copy of the work order — fields, products, fleet —, without bringing the inventory deduction. It is the fastest path when the same activity repeats. |
| Send Notification | Sends the WhatsApp alert to the team. |
| Opens the print reports enabled for your user. There is usually more than one template, for different situations. |
When the work order is finished, the editing buttons are disabled — you need to use RE-OPEN before editing.
Actions depend on permissions. Saving, deleting, finishing, and reopening are controlled per user. In practice, most teams allow only add and change for day-to-day operators, leaving finish and reopen to a few people — precisely because finishing locks the record. If a button appears grayed out, the most likely reason is a missing permission.
Fields
| Field | Description |
|---|---|
| Code | Work order number. |
| Planned Date, Hour, and Minute | When the activity is planned to happen. |
| Status | State of the work order: Pending, Finished, or Canceled. |
| Notification | Status of the WhatsApp alert (e.g., Not sent). |
| Completion Date | When the work order was finished. |
| Activity type | The activity type, which defines the work order's behavior: which fields appear, what is required, and which defaults come prefilled. |
| Execution Team | The team that does the work. |
| Technical Lead Team | The team technically responsible for the activity. Only appears if some team is marked to show in Tech. Lead in the Team setup. |
| Short Identification (Subtype) | The subgroup of the activity type. |
| Classification/ Fleet equipment type | Indicates which type of equipment the activity should be done with — for example, "use the drone". |
| Total Area (ha), Executed area (ha), and % Executed | The planned area, the area actually worked, and the percentage completed. |
| Notes | Free field for notes. |
Header tabs
- Crop protection spraying — application parameters and conditions, filled in with the activity type's defaults
- Weather Info — weather conditions during the application, together with the Crop protection spraying tab
- Users — users linked to the work order
- Checklists — the work order's checklists
- Internal Info — internal control information
Creating a work order, step by step
- In the list, click New. The header opens empty, and the Code is generated automatically.
- Open the Activity type field and choose the type. It defines the work order's behavior: when you choose a crop protection spraying, for example, the Crop protection spraying tab appears in the header.
- Fill in the Planned Date and choose the Execution Team.
- Click 1 - Save to save the header and continue through the detail tabs, in numbered order.
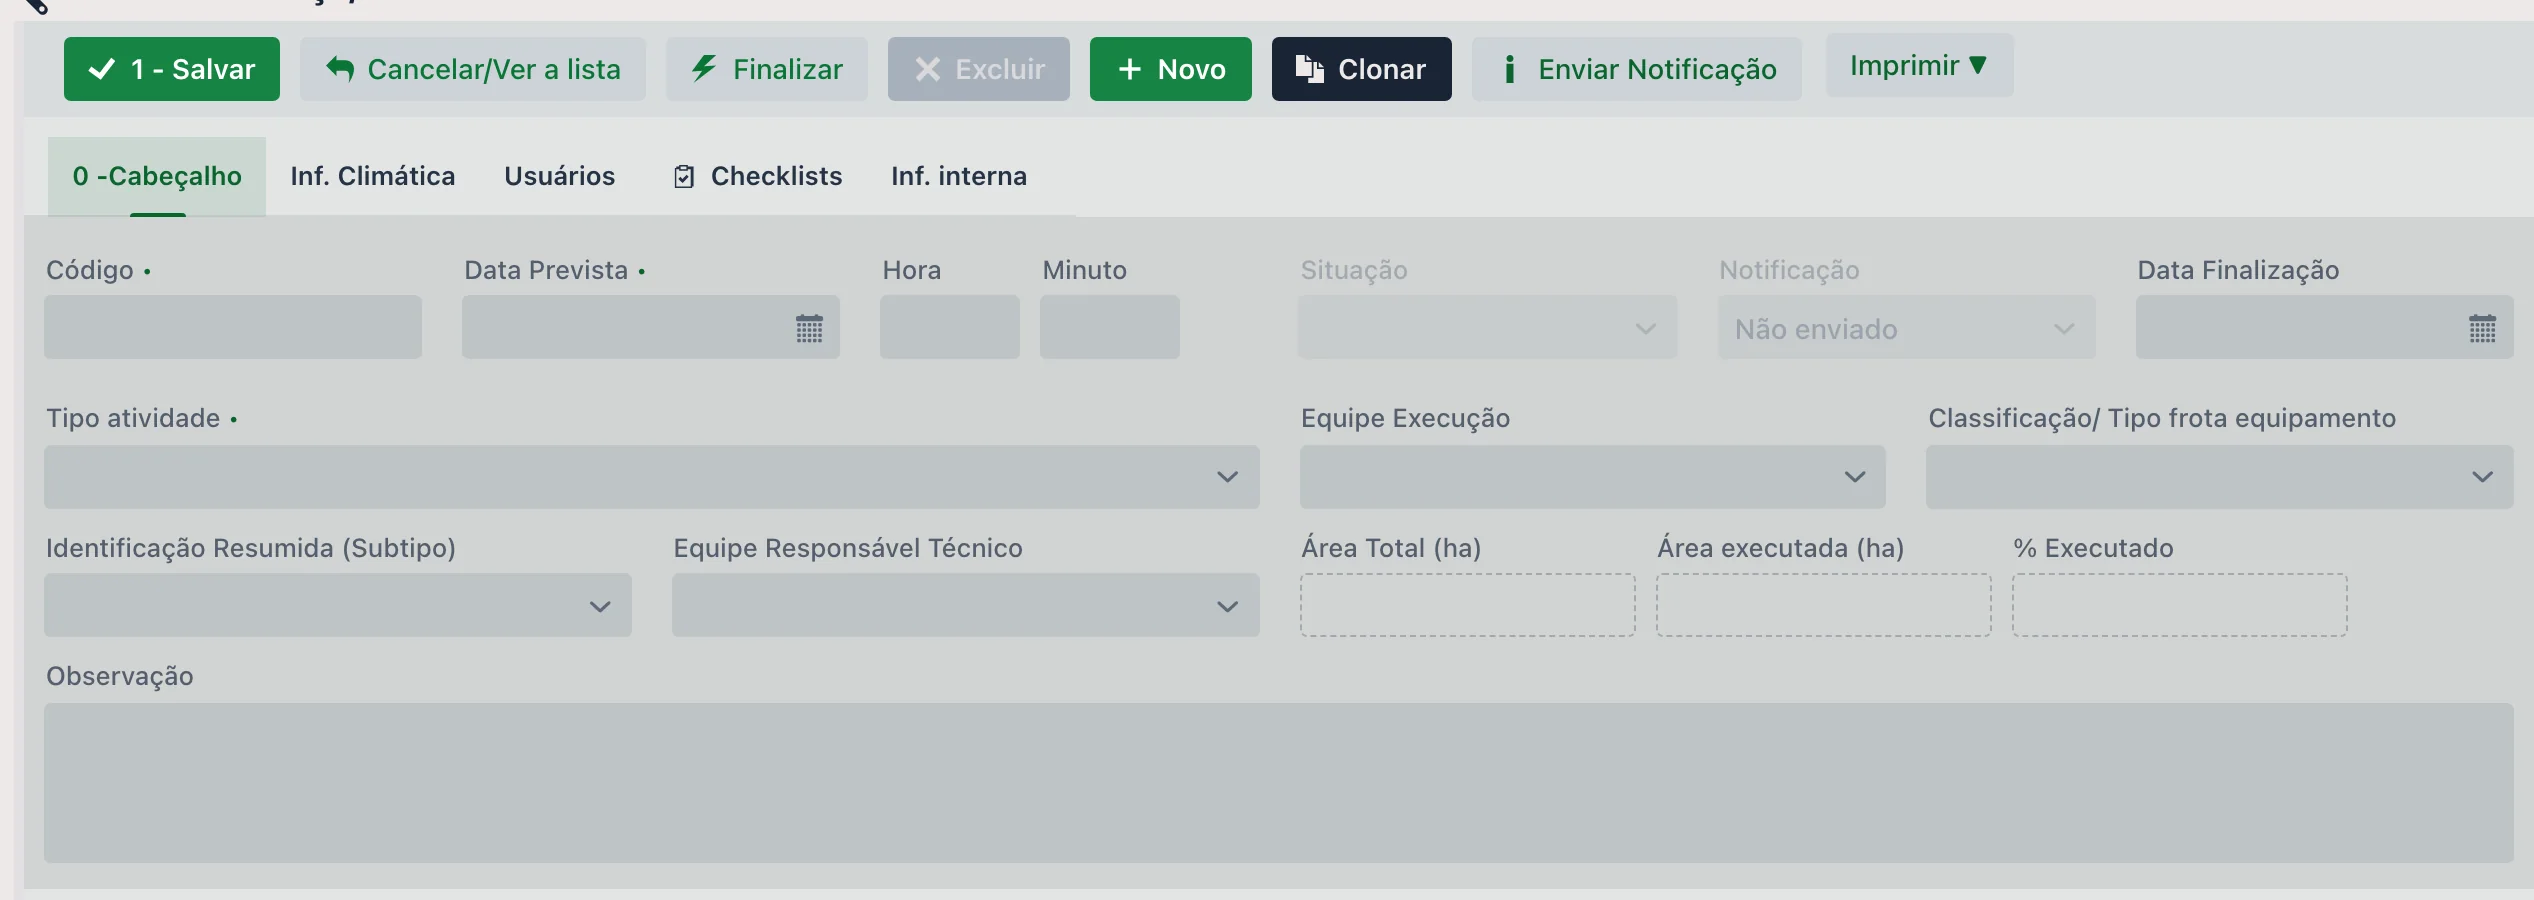
🗂 The detail tabs
Below the header there are four numbered tabs, which follow the natural order of data entry.
1 - Field
Where the work was done. You enter Sector, Field, Area, and Variety/Cultivar. The list shows Field, Sector, Crop, Variety/Cultivar, Area, Executed Area, and Season.
Which fields are available to choose: only those that meet all three conditions at the same time:
- they are in Season Planting
- they are active
- their harvest has not been finished yet
That's why a newly set-up field doesn't appear until it is linked to the planting, and why fields already harvested drop off the list.
Besides adding them one by one, the tab offers:
- Import Several — brings in several fields at once
- Import another Work Order — copies the fields from an existing work order
- Delete All — clears the list
- View Costs — shows the costs by field
2 - Product & Service
What was applied. The main fields are:
| Field | Description |
|---|---|
| Storage Location | Where the product is being taken from. |
| Filter products | Limits the list to the products in that location. With the Show only products with balance option turned on in the company settings, the list shows only products with a balance — in the chosen location or, before choosing one, in any storage location — plus services. |
| Product & Service | The product or service applied. |
| Rate Per Hectare | Rate applied per hectare. |
| Total Qty Out of Inventory | Total quantity that leaves inventory. |
| Product balance | Check | Shows the available balance and the result of the product's agronomic checks — the rate and interval limits set up in the Rate x Farm x Crop tab of the Product & Service. See below. |
There is also the Advanced product selection and the collapsible sections Volume 1 - Spray Mix and Users. The Import button is the way to bring in the items of an Agronomic Treatment.
Besides the product and the lot, the product list shows the rate, the total quantity, the storage location, the spray volume, the tank volume and capacity, the hectares per tank, and the unit and total amounts.
How upCampo calculates quantity and cost
You enter the rate per hectare; the system builds the rest from the area of the work order's fields.
A soybean burndown on 120 ha, at 2.5 L/ha of a product costing R$ 18.50 per liter:
| Step | Calculation | Result |
|---|---|---|
| Total Qty Out of Inventory | 2.5 L/ha × 120 ha | 300 L |
| Total amount | R$ 18.50 × 300 L | R$ 5,550.00 |
| Cost per hectare | R$ 5,550.00 ÷ 120 ha | R$ 46.25/ha |
How the cost is split across the work order's fields
A work order is almost never for a single field. The product is entered once, for the whole work order, and the system allocates by area: each field gets the share of the total that matches its portion of the work order's area.
Two fields, one of 300 ha and another of 150 ha, at 2.5 L/ha of a product costing R$ 18.50:
| Field | Area | Share | Quantity | Cost | Cost/ha |
|---|---|---|---|---|---|
| Field A | 300 ha | 300 ÷ 450 = 66.67% | 750.0 L | R$ 13,875.00 | R$ 46.25 |
| Field B | 150 ha | 150 ÷ 450 = 33.33% | 375.0 L | R$ 6,937.50 | R$ 46.25 |
| Work order | 450 ha | 100% | 1,125.0 L | R$ 20,812.50 | R$ 46.25 |
Notice that the cost per hectare comes out the same for both — the rate is the same, and the allocation is exactly what ensures that. What changes is how much each field carries of the total: the 300 ha field accounts for two-thirds of the bill for that application.
This allocation is what makes the cost appear by field in Season Planting and in the season's cost reports. The View cost split button, described below, shows exactly this calculation for the open work order.
Suggested rate and checks
If the product has the Rate x Farm x Crop tab filled in in its setup, the system takes it into account when you choose the product on the work order: it suggests the rate defined for that farm and crop.
Besides the rate, the limits set up there are checked and the result appears in the Check field:
- maximum number of applications
- minimum interval in days between applications
- minimum and maximum rate
This is what prevents applying above the recommendation or repeating the application before the planned interval — without relying on whoever enters the data to remember the label.
View cost split
Opens the Product split window, which shows how the cost is distributed: field, variety, field area, final area, product, cost, cost per hectare, and quantity.
What it shows depends on where you are: with no field or product selected, it shows everything; with a product or a field in focus, it shows only the item in focus.
The Force change of modification date and Edit Reference/Integration ID buttons serve farms that exchange data with other systems — they only make sense when an integration is in use.
Spray volume and spray mix type
The Volume 1 - Spray Mix section is where the system calculates the spray mix. The Spray Mix Type field defines how it is calculated, and each option asks for different data:
| Spray Mix Type | When to use it and what you enter |
|---|---|
| None | No spray mix calculation. |
| Tank by tank | When the application is planned tank by tank. You enter maximum capacity, spray volume, tank capacity, hectares per tank, number of tanks, and total product quantity per tank, plus a description and usage instructions. |
| Single mix | When you work with a single spray mix: you enter the spray volume and the total spray mix volume. |
| Volume | Usually for backpack sprayers. You enter the label volume and rate and the desired sprayer volume, and the system calculates the rate, the number of sprayer loads, and the final quantity per load. |
| Perennial Crop | For perennial crops: rate per tank and rate per treated hectare. |
How upCampo calculates tank by tank
In tank by tank, you enter the tank's Max capacity (L) and the Spray volume (liters of spray mix per hectare). The Tank capacity (L) starts equal to the maximum and can be adjusted. From there, the system does the math with the product's Total Area (ha) and the Total Qty Out of Inventory (rate × area):
Illustrative example — the same 120 ha at 2.5 L/ha (300 L of product), with a 3,000 L sprayer and a spray volume of 80 L/ha:
| Field | Calculation | Result |
|---|---|---|
| (ha) per tank | 3,000 L ÷ 80 L/ha | 37.5 ha |
| Number of tanks | 120 ha ÷ 37.5 ha | 3.2 tanks |
| Total product qty per tank | 300 L ÷ 3.2 | 93.75 L |
| Total spray mix volume | 80 L/ha × 120 ha | 9,600 L |
The Usage instructions are written automatically from these numbers, separating the full tanks from the last one, which takes only what's left: "3 tank (37.5 ha) with 93.75 of the product and 1 tank (7.5 ha) with 18.75 of the product." The 7.5 ha are the 0.2 × 37.5 ha fraction, and the 18.75 L are what's missing to reach the 300 L (300 − 3 × 93.75).
Changed the rate, the total quantity, the spray volume, or the tank capacity? The calculation is redone right away. If you type the Number of tanks by hand, the system recalculates only the product quantity per tank (total ÷ tanks). Volume 2 and Volume 3 (the + Volume button) do the same calculation, each with its own spray volume and tank, over the same area and the same total product quantity.
Rounding (in tank by tank)
In the example above the calculation gave 3.2 tanks — and nobody mixes 0.2 of a tank. The Round button adjusts the numbers to values that work in the field. The options are:
| Option | What the system does | In the example (3.2 tanks) |
|---|---|---|
| 1 — Round 'Number of tanks' DOWN, then 'Total qty' and 'Rate' | Brings the number of tanks to a whole number, splits the product evenly among them (with the quantity per tank as a whole number), and recalculates the total quantity and the rate. | 3 tanks with 100 L each; the total stays at 300 L and the rate at 2.5 L/ha |
| 2 — Round 'Number of tanks' UP, then 'Total qty' and 'Rate' | ||
| 3 — Apply 'Total qty' and 'Rate' from 'Total product qty per tank' X 'Number of tanks' | Keeps the product quantity per tank, drops the tank fraction, and recalculates the total and the rate from that. | 3 tanks × 93.75 L = 281.25 L; a rate of about 2.34 L/ha |
| 4 — Recalculate tank max capacity (when the number of tanks is less than 1) | Keeps the spray volume and splits the area into equal tanks: raises the number of tanks to the next whole number and reduces the load of each. New capacity = Max capacity (L) × (calculated tanks ÷ rounded tanks). With less than 1 tank, the capacity becomes the exact spray mix volume (spray volume × area). | 4 tanks of 2,400 L (3,000 × 3.2 ÷ 4), 30 ha and 75 L of product in each |
Single mix and Volume (backpack sprayer)
In Single mix, there is just one calculation and it doesn't change the product quantity:
In Volume, designed for backpack sprayers, the rate comes from the label — which is usually given as "so many ml per so many liters of water" — and is converted to the size of your sprayer:
Illustrative example: the label calls for 50 ml per 10 L of water, the sprayer holds 20 L, and there will be 15 loads. The Calculated Rate is 20 × 50 ÷ 10 = 100 ml per load; the Final Quantity, 100 × 15 = 1,500 ml; and, with the Inventory Output Unit set to Liters or Kilos, 1.5 L leave inventory. The work order's rate per hectare is recalculated from that total (total ÷ area). If the number of sprayer loads is not filled in, the calculation assumes one load.
The + Volume button adds another spray volume to the product.
3 - Fleet & Employee/Operator
Optional. The screen itself warns: when you specify one or more fleet units here, the execution will only offer the fleet units listed in this tab — this is how you restrict what the operator can choose later.
The fields are Fleet/Equipment, Average consumption, Implement, Employee/Operator, and Classification/Fleet equipment type. The list also shows the Fuel Cost.
To speed things up, there are Import Several - Employee/Operator and Import Several - Equipment.
4 - Execution
What actually happened. This tab turns the planned into the actual:
| Field | Description |
|---|---|
| Date | Day of the execution. |
| Employee/Operator | Who did it. |
| Started at / Finished at (hour:min) | Start and end time. |
| Field - Variety | Where it was done. The + than one Field button lets you enter the execution for several fields at once. |
| Area and Hours executed | How much was done. |
| Type | Core activity, Preparation for the activity, or Support — separates the main work from the support work. |
| Fleet | Machine used. |
| Start and End Reading / Hour meter / KM | Equipment readings at the start and the end. |
| Notes | Note about the execution. |
The list records the user who added and the user who changed each entry.
When the activity type has a Checklist Template associated with it, the Fill in Checklist button appears when entering the execution. In the grid, a column flags the status by color: green when the checklist has been answered and red when it is still missing. Answered checklists are kept in Completed Checklists.
5 - Integration - Execution
This tab only exists when the farm has the John Deere integration. While tab 4 - Execution records the area of the whole operation — with a generic integration fleet unit, not the machine that did the work —, here you see the detail: one row per machine per day.
| Column | What it shows |
|---|---|
| Date | That machine's working day. |
| Area | The hectares that machine covered that day. |
| Hours Qty | The hours of effective work, in decimal. |
| Field | The field worked. |
| Fleet | The real machine, recognized by its chassis or serial number. |
| Integration ID | The operation's code in the John Deere Operations Center. |
Above the list, a label totals the Area and the Qty of rows shown. The bar buttons: Reload, Delete, Open Operation in JD (opens the operation inside the Operations Center, to check the number at the source), Force new Integration — with or without typing the operation code — and Problem - Integration, which opens the Integration Problems screen without leaving the work order.
📦 How inventory is deducted
There are three ways to deduct the work order's products from inventory, and the farm chooses the one that fits its routine:
- At entry — by entering the storage location right in the Product & Service tab. The deduction happens immediately.
- At finishing — by entering the storage location in the finishing window, or correcting there any difference between what was planned and what actually went out.
- On its own screen — in Crop Work Order Inventory Deduction, designed for the warehouse keeper to deduct work orders without having to open each one.
Which way applies on your farm is not up to whoever enters the data: it is a setting, made
in the customizations under File > Company/Crop Settings. There you define whether the
storage location becomes required when entering the product or
when finishing the work order.
In the list, the Inventory filter (All / Pending / Posted) shows where each work order stands.
🔒 Finishing the work order
Finishing is more than closing: it is the moment the work order is checked and inventory is settled. When you click Finish, a confirmation window opens with:
| Field or action | What it's for |
|---|---|
| Completion Date | Date the work order is closed. |
| Storage location | Where the products come out of. The Apply storage location to all rows button repeats the choice for all items at once. |
| Total Area, Executed area, and Number of executions | Summary of what was planned and what was done. |
| Change quantity | Keep original quantity or Change according to executed area — this is where you decide whether the deduction follows the plan or adjusts to the area actually worked. |
| Cancel the Work Order/Activity | Instead of finishing, marks the work order as canceled. |
The window also lists, product by product, the rate and the actual rate, the quantity and the actual quantity, the lot, the storage location, the available balance, and the amounts — so you can check everything before confirming.
Once finished, the work order is locked; to change it you need to use RE-OPEN. Keep in mind that the cost does not depend on finishing: it is already counted before.
🔧 Approving and notifying
- Approve — approval step, which only exists when it is enabled in the company settings.
- Notification — sends to the WhatsApp number set up in the team the alert that the work order was created.
📱 The work order in the app
The same work orders appear in the upCampo app (in the store, "Pragueiro - upCampo"), which is where the field team checks what needs to be done and enters what they executed. Some field names are abbreviated on the phone — Activ. Type/Work Order, short identif., Exec. Area —, but they are the same fields as in the web portal.
List and open work order
The list has filters for Status, Sector, Field, Type, Short ID, Team, and Fleet and, right below, the number of work orders, the pending area, and the total area. Each card shows the code, the type, the fields, the team, the status, and the percentage executed. Tapping the card opens the work order with the header in read-only mode — the fields are locked, and the EDIT, PRINT, and FINISH buttons are at the top.
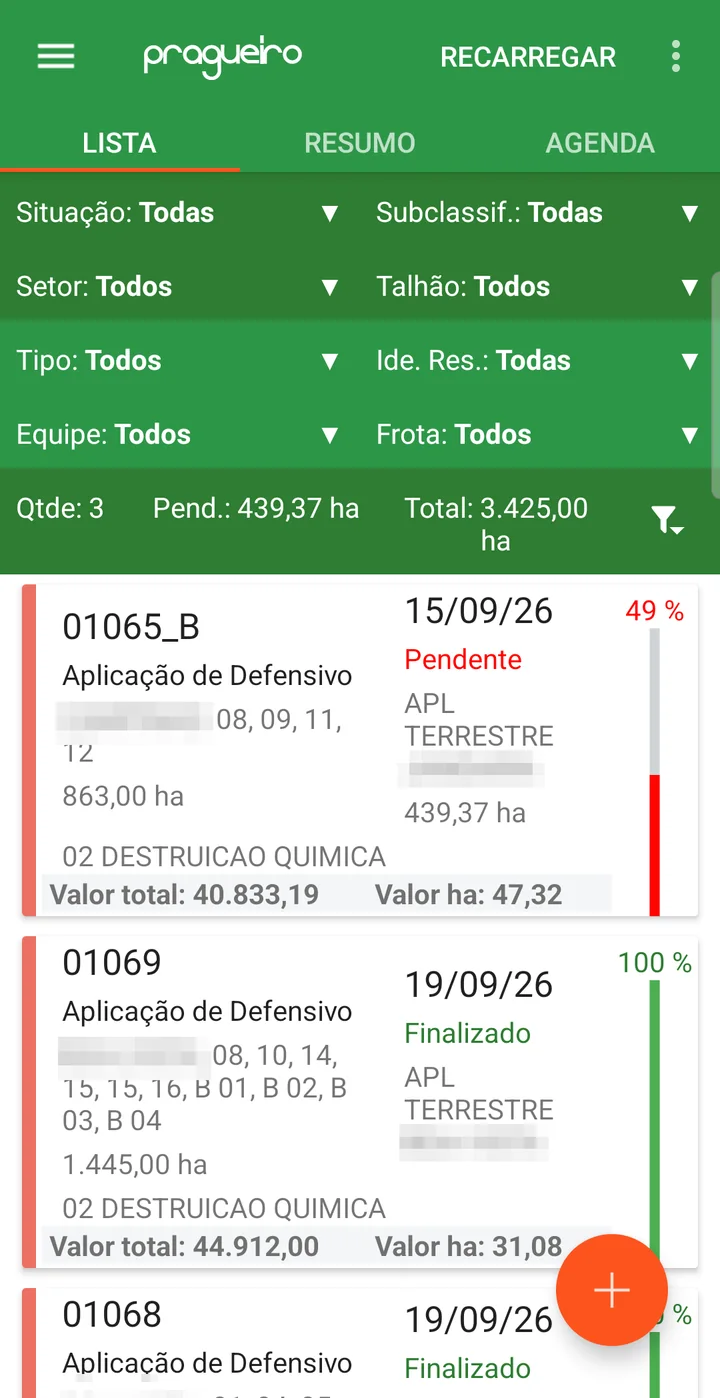
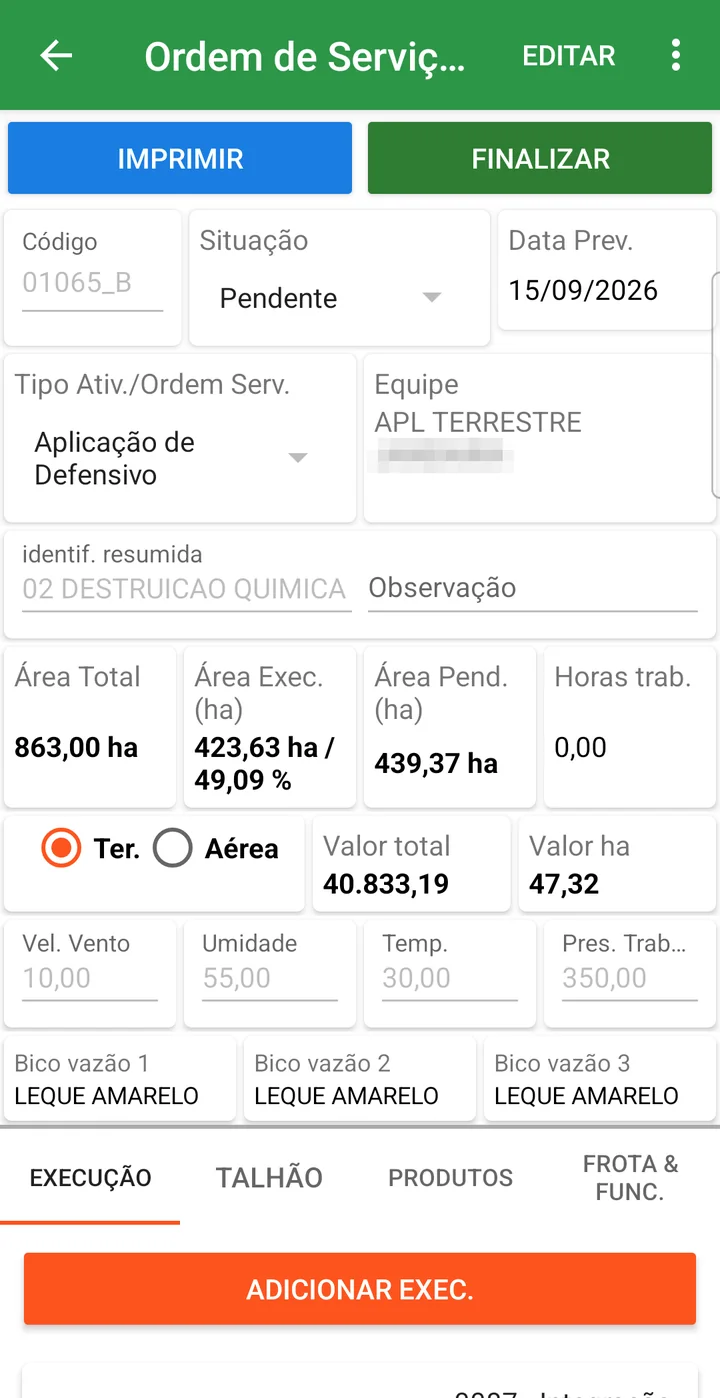
Work order tabs
Below the header there are four tabs: EXECUTION (what has already been entered, with date, field, and area, and the ADD EXEC. button), FIELD (the work order's fields and the area of each), PRODUCTS (rate, total quantity, and the per-tank calculation for each spray volume), and FLEET & EMPL. (the work order's machines and operators).
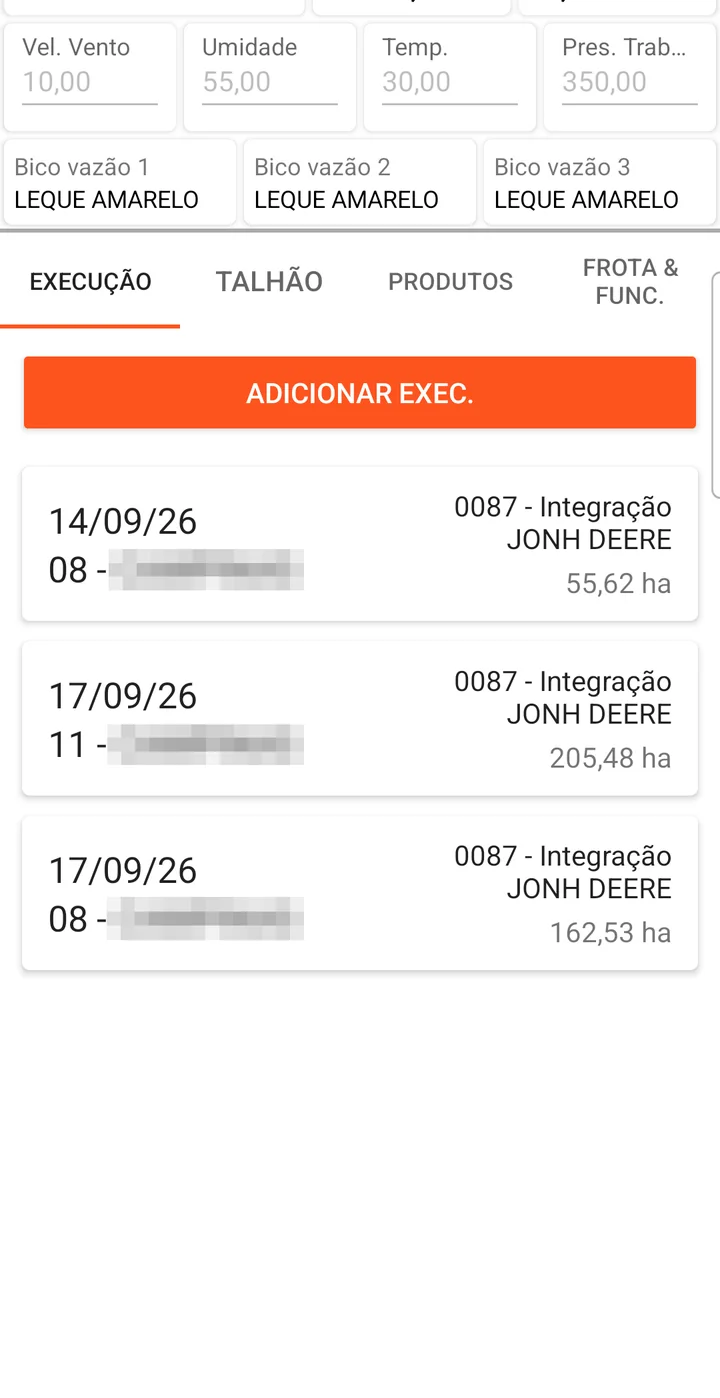
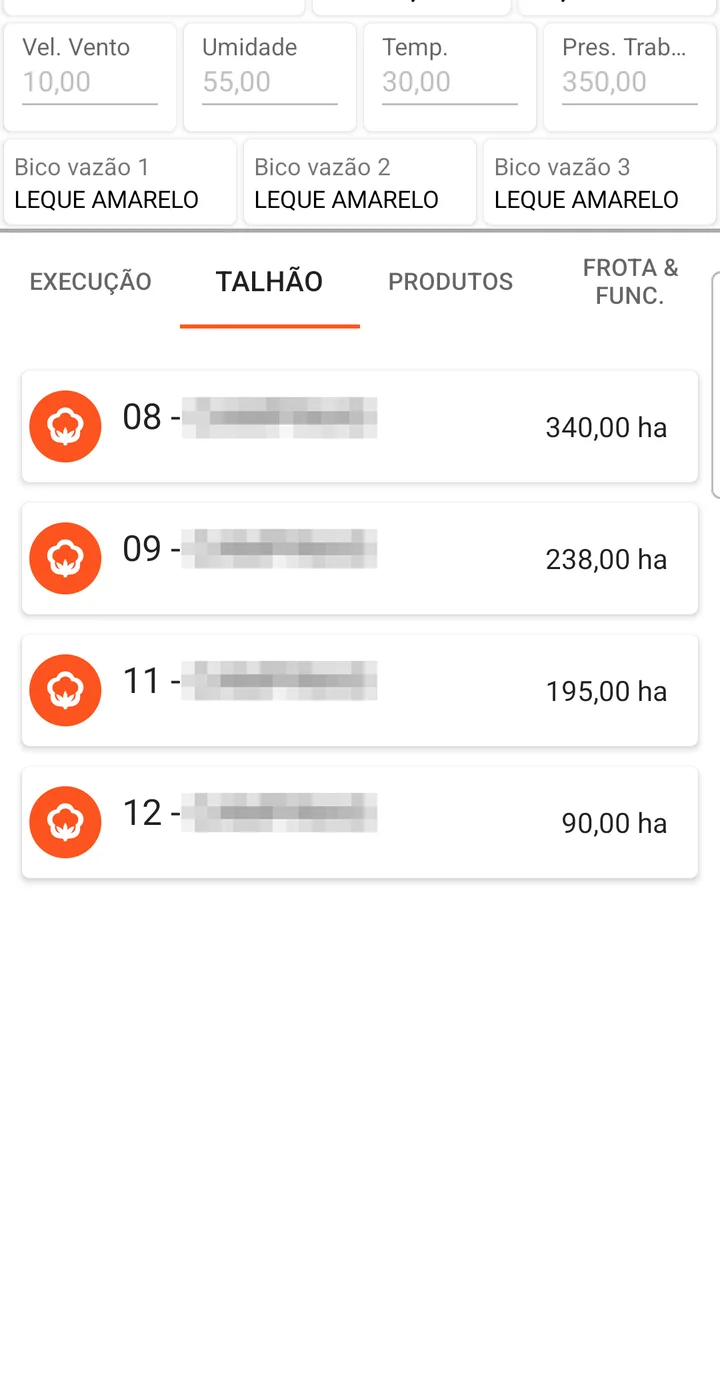
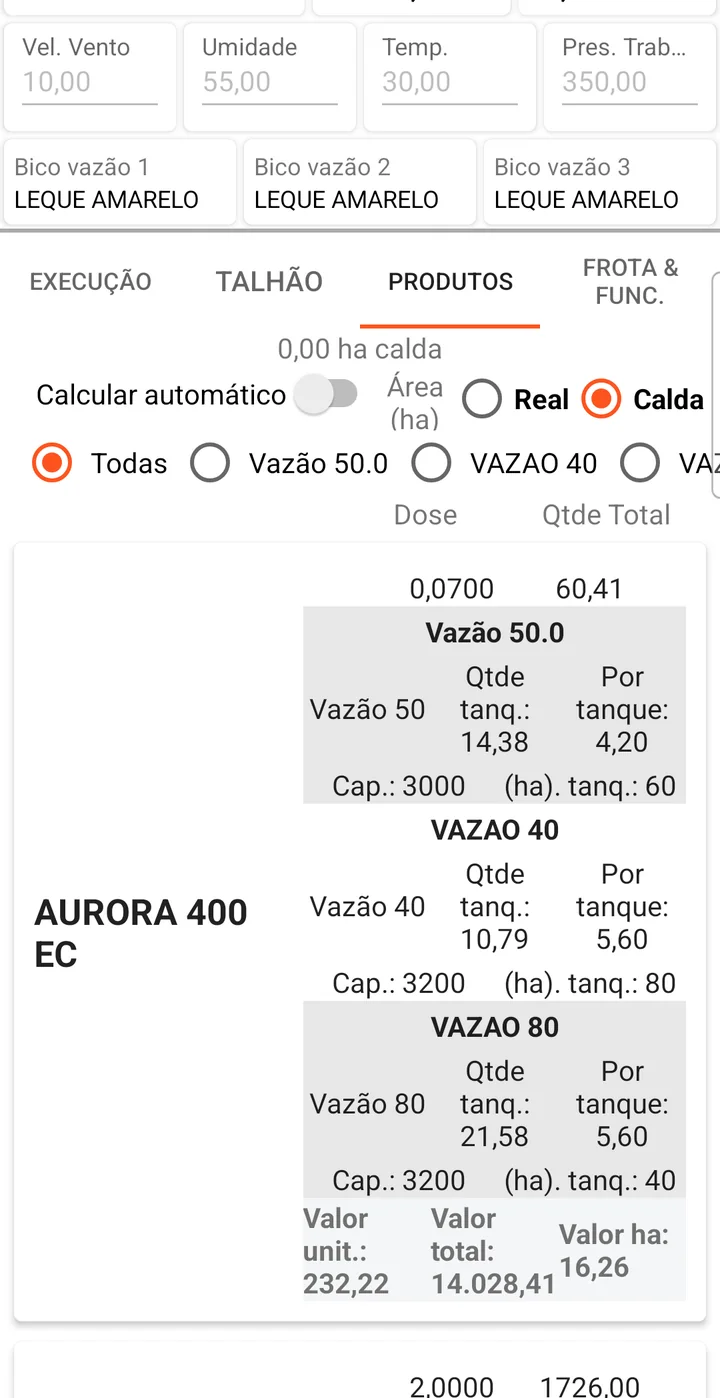
Entering an execution
- On the EXECUTION tab, tap ADD EXEC.
- Choose the Fleet/Equipment, the Implement, the Operator/Employee, and the Field — each field opens a list to choose from.
- Check the Exec. Area (ha) and enter the hours, the spray volume used, and the entry type (Core activity, Support, Preparation, or Note).
- Tap SAVE.
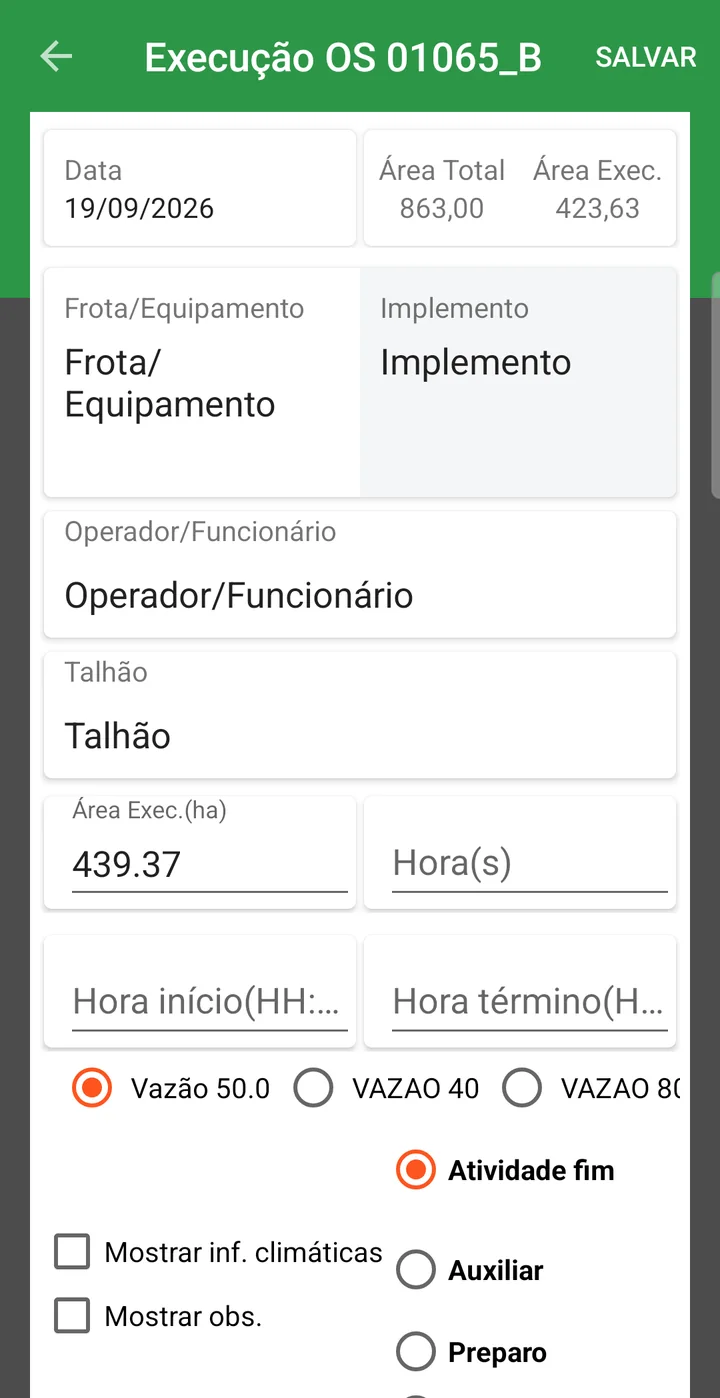
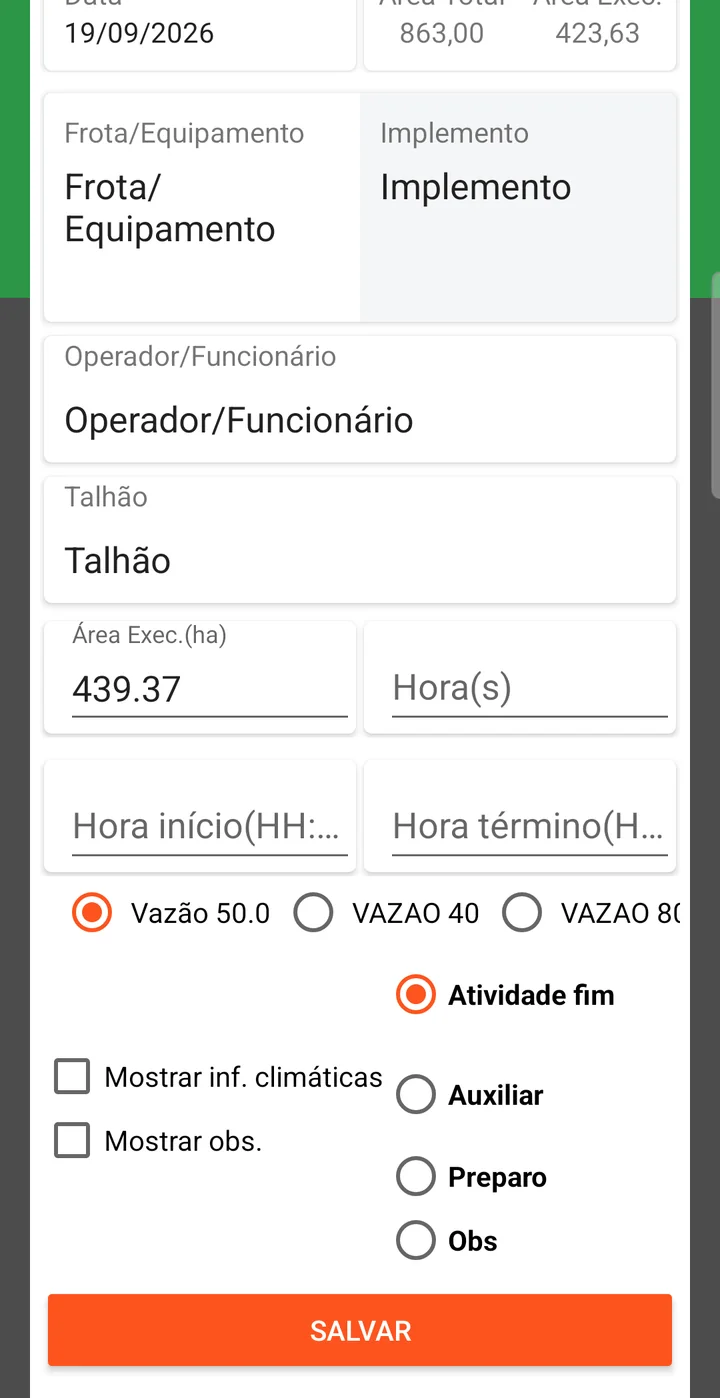
Tapping Field opens the list of the work order's fields so you can mark which one the execution was done in, with the SELECT ALL and NONE buttons, the Sector filter, the total area marked, and the CONFIRM button.
- You know what was done in each field, with which products, which machine, and which employee
- The cost reaches the field and the season, so you can work out the cost per hectare
- What was executed can be compared with what was planned
- The management history of each area is recorded for the following seasons
❓ Frequently asked questions
I can't find a work order I entered. What should I do?
It's almost always the period: the screen opens showing only 7 days before and 7 days after today's date. Widen the Start Date (from) and the End date (to). Also check the Season and Status filters.
What do the colors on the planned date mean?
Dark green: finished work order. Bright red: late work order. Light red: pending work order with a deadline coming up, within 7 days. It lets you see the status without opening each work order.
The work order is finished and I can't change it. What do I do?
Use the RE-OPEN button at the top of the work order. While it is finished, the editing buttons are disabled — finishing is meant precisely to lock the record. Reopening requires a permission that is usually given to only a few users.
The finish or delete buttons are grayed out. Why?
Most likely a missing permission. Saving, deleting, finishing, and reopening are controlled per user, and it's common for the field crew to have only add and change, with finish and reopen kept by a few people. Whoever manages the company's users can grant it.
How do I see the costs for each field in the work order?
With the View Costs button. Since the product is entered for the whole work order, the system allocates the amount across the fields and shows how much went to each.
The Technical Lead Team field doesn't appear. Why?
Because it only shows when some team is marked to appear in Tech. Lead. That setting is under Show in, in the Team setup.
How do I know whether the work order's checklist has been filled in?
By the color of the checklist column in the grid: green when it has been answered, red when it is still missing. To answer it, use the Fill in Checklist button when entering the execution.
Only one template shows up when I print the work order. Is that normal?
The Print menu shows the print reports enabled for your user — there may be more than one template, for different situations. If one is missing, it's a matter of access permission.
Do I need to finish the work order for the cost to show up?
No. The cost is already counted without finishing. Finish is used to lock the work order, record the completion date, and settle the inventory deduction.
When does the product leave inventory?
It depends on how the farm works. There are three ways: entering the
storage location right when entering the product
(immediate deduction); entering the location in the finishing window; or through the
Inventory > Crop Work Order Inventory Deduction screen, used by the warehouse keeper to deduct several work orders.
When the location becomes required is defined in the customizations, under
File > Company/Crop Settings.
The system is requiring the storage location. Can I change that?
Yes, it's a company setting, under File > Company/Crop Settings. There
you define whether the storage location is required when entering the product or
when finishing the work order — depending on the farm's routine.
I executed less area than planned. Does the inventory deduction follow?
You decide when finishing, in the Change quantity field: Keep original quantity deducts what was planned; Change according to executed area recalculates the quantity based on the area actually worked.
How do I cancel a work order?
In the window that opens when you click Finish, use Cancel the Work Order/Activity. The work order changes to the Canceled status.
All products come out of the same storage location. Do I need to enter it one by one?
No. In the finishing window, choose the location and use Apply storage location to all rows, which repeats the choice for all items.
I need to create the same work order several times. Is there a faster way?
Yes, two ways. The Clone button copies the whole work order — fields, products, and fleet — without bringing the inventory deduction, so the copy is ready to be executed. And the Automated Ops menu has Generate several work orders (individual), plus adding products and changing work orders in batch.
The field doesn't show up for selection on the work order. Why?
Only fields that are in Season Planting, that are active, and whose harvest has not been finished appear. If the field is new, it probably still needs to be linked to the planting; if it disappeared, check whether the harvest was closed or the setup was deactivated.
How do I reuse the same fields from another work order?
On tab 1 - Field, use Import another Work Order, which brings in the fields from an existing work order. To add several fields at once without copying from another work order, use Import Several.
How do I limit the machines that appear in the execution?
Enter the fleet units on tab 3 - Fleet & Employee/Operator. When you specify one or more fleet units there, the execution only offers those — if the tab is left empty, all of them are available.
How do I calculate the application tank by tank?
On tab 2 - Product & Service, in the Volume 1 - Spray Mix section, choose the Spray Mix Type Tank by tank. You enter the tank capacity, the spray volume, and the hectares per tank, and the system calculates the number of tanks and the product needed in each.
How do I do the calculation for a backpack sprayer?
Choose the Spray Mix Type Volume. Enter the label volume and rate and the desired sprayer volume — the system calculates the rate, the number of sprayer loads, and the final quantity per load.
The number of tanks came out as a fraction. How do I adjust it?
Use the Round button, in tank by tank mode. Options 1 and 2 bring the number of tanks to the nearest whole number and split the product among them; option 3 keeps the product per tank and drops the fraction; option 4 keeps the spray volume and splits the area into equal tanks, one more and a little less full (3.2 tanks of 3,000 L become 4 of 2,400 L). If you want to make sure you get one extra tank, the right option is 4.
View cost split shows only one product. Why?
Because the window follows what is in focus: with a product or a field selected, it shows only the item in focus. With nothing selected, it shows the work order's full split.
Where does the rate the system suggests come from?
From the Rate x Farm x Crop tab of the product setup. When it is filled in for that farm and crop, the default rate is suggested automatically when you choose the product on the work order.
What shows up in the Check field?
The result of checking the limits set up in the product for that farm and crop: maximum number of applications, interval in days between applications, and minimum and maximum rate. It's there to warn whoever is entering the data before the application goes wrong.
How do I know if I have product balance before entering it?
On tab 2 - Product & Service, the Product balance | Check field shows availability. There is also the View inventory button, on the same tab and in the list.
What's the difference between Core activity, Preparation, and Support in the execution?
It's the Type field of the execution entry, which separates the main work (Core activity) from what was done to make it possible (Preparation for the activity) and from support work (Support).
How do I enter the execution for several fields at once?
On tab 4 - Execution, use the + than one Field button, next to the Field - Variety field.
I always enter the same products and rates. Can I avoid typing everything again?
Yes. Set up an Agronomic Treatment with the list of products and rates and use Import on the Product & Service tab.
The work order is asking for fields I don't use. How do I remove them?
In the Work Order/Activity Type setup. It defines, field by field, what the work order shows, hides, or requires.
How do I record an aerial application?
With the Application type field, choosing Aerial. It's also common to create a specific aerial application team, or a dedicated activity type. If you want to account for the cost of the contracted application, enter it as a service on the Product & Service tab.
The checklist didn't show up to be filled in. Why?
The checklist appears when you enter the execution, and only when there is a Checklist Template associated with that work order's activity type.
The team didn't get the work order alert on WhatsApp. What should I check?
Three things: the Notification field in the work order header, whether the contact is filled in
in the team setup, and whether the company is
enabled in the customizations under File > Company/Crop Settings.
How do I add more columns to the work order list?
Through the grid's options menu, to the right of the titles. There you can check columns that are not shown by default, such as Approval, Responsible, and Equipment.
Can I see the work orders on a calendar?
Yes. In the View field, at the top of the screen, choose Calendar. There is also the Dashboard view, besides the Standard list.
📘 Screen: Work Order Correction
This screen fixes the unit price of products already entered on work orders. It is the classic situation when closing the season: the herbicide was entered at R$ 30.00 per liter on the application orders, the invoice came in at R$ 34.00, and the field cost ended up wrong. Instead of opening order by order, you fix them all at once here.
It changes only the price: it does not change the applied quantity, does not touch inventory and does not undo any write-off.
📍 Location in the system
Menu: Operations > Work Order Correction
🧩 Main function
Change in bulk the unit price of products entered on the work orders of the current season, recalculating the total value of each entry (quantity × new unit price), including on orders that are already finalized, without having to reopen them.
🗂 The two tabs
Product by product
Use it when the wrong price is on a specific product, in a specific period. You choose the product, search, check the lines you want to fix and enter the correct price.
| Field | Description |
|---|---|
| Product & Service | Required. The product whose price will be corrected — the search is always for one product at a time. |
| Stock location | Optional. Limits it to orders that consumed from that location — useful when the same product has different prices per farm. |
| Start Date (from) and End Date (to) | Period by the planned date of the order. The screen already opens with the last year, so an older order only shows up if you widen the period. |
| Unit Price (filter) | Optional. Brings only the entries that have exactly that price — it is the quick way to separate "everything that ended up at R$ 30.00". |
The Search button builds the list with Order (code, date and Ide. Res., the short identification) and the fields, Product & Service, Location, Rate, Unit Price R$, Total Qty and Total Value R$. Each of those first three columns has a search box right below its title, so you can refine without searching again.
Check the lines you want — selection is multiple, and the box in the header checks them all. As soon as the first line is checked, the Unit Price field and the Change button appear. Enter the correct price, click Change and confirm: the system shows how many records will be changed before saving. Cancel only unchecks everything.
All Products
Use it when the problem is the list price: the product record is out of date and the orders were entered with the old price.
The tab lists all products that appear on orders of the current season, with Code, Description, Brand, Class, Unit and the Total Quantity already consumed. The Unit Price column is editable right in the grid (it accepts up to four decimal places).
| Button | What it does |
|---|---|
| Save | Saves the edited prices to the product record. It does not touch the orders — from now on, that is the price suggested on new entries. |
| Apply price to season | Copies the unit price from the product record to all entries on the orders of the current season where the price is different, recalculating the totals. |
The order of use is this: edit the prices in the grid → Save → Apply price to season. Skipping Save makes Apply reproduce the old price, which is what is still in the record.
At the top of the screen, the View inventory button opens the product balance lookup, so you can check without leaving here.
- Bulk price correction, without reopening order by order
- Cost per field and per activity consistent with the invoice
- Adjustment possible even on orders that are already finalized
- Product record and season orders aligned in two clicks
❓ Frequently asked questions
The product invoice came with a different price than what was entered — how do I fix it without redoing the orders?
On the Work Order Correction screen, Product by product tab: choose the product, adjust the period, click Search, check the wrong entries, type the correct price and click Change. The system recalculates the total value of each entry and the field cost adjusts on its own.
Does fixing the price affect inventory or the applied quantity?
No. The correction changes only the unit price and the total value of the entry. The applied quantity, the inventory write-off and the product balance stay exactly as they were.
What is the difference between "Save" and "Apply price to season"?
"Save" stores the new price in the product record and does not change any order already entered. "Apply price to season" takes the price that is in the record to all orders of the current season. For the expected result, use both in that order.
Can I fix the price on a work order that is already finalized?
Yes. Unlike the Work Order screen, where a finalized order has to be reopened to accept changes, the price correction works on both pending and finalized orders of the current season.
I searched and the entry I wanted to fix did not show up. Why?
It is almost always the period: the screen opens filtering the last year by the planned date of the order — widen the Start Date. Also check that the season selected at the top of the portal is the order's season, and that the "Unit Price" filter was not left filled in from a previous search.
📘 Screen: Checklist Template
This is where you build the form the operator will fill out: the tractor's pre-departure checklist, the sprayer inspection before application, the team's PPE check, and so on. You write the questions, set the answer type for each one (Yes/No, number, photo, employee choice…) and say which ones are required — the finished template is available to fill out on a phone or through a QR code stuck on the machine itself or per order.
📍 Location in the system
Menu: Operations > Checklist Template
The same screen also appears under Fleet > Checklist Template — it is a single record,
reachable from both menus.
🧩 Main function
Create and maintain the farm's checklist templates: the questions, the order they appear in, the format of each answer, what triggers an email alert and what the checklist generates when it is finalized (fueling, maintenance work order or work order).
🔗 How the checklist reaches the order
The template created here is not linked to the work order on its own. The path is this:
- You build the template on this screen.
- In the Work Order/Activity Type, the Checklist Template field points to it.
- Every work order of that type starts showing the Fill Out Checklist button when entering the execution — and the grid column turns green when it has been answered and red when it is still missing.
- The answer stays tied to that execution and shows up in Completed Checklists.
Without the link in the activity type, the template still exists — it just is not required on the order, and filling it out is left to the phone or the QR code.
📝 Header fields
| Field | Description |
|---|---|
| Code | The template number. The system suggests the next number when you click New. |
| Description | Required. The name the operator sees when choosing the checklist — e.g., "Daily tractor checklist" or "Sprayer inspection". |
| Active | Uncheck it to take an old template out of circulation without deleting the checklists already filled out with it. |
| Send email copy to | Addresses that receive every checklist filled out with this template. For more than one, separate them with commas. |
| Send 'Alerts' email to | Addresses that are notified only when an answer counts as a nonconformity — the mechanic and the manager, for example. |
| Generate Fueling | The finalized checklist creates a fueling record. |
| Generate Maintenance Work Order | The finalized checklist opens a maintenance work order — it is the "operator flagged the problem, the shop gets the request" path. |
| Generate Work Order | The checklist becomes a service request, which goes through acceptance before becoming an order — see Completed Checklists. |
| Notes | Free note about the template, for internal use. |
📱 QR code and share link
Every saved template gets a QR code, shown next to the header. Pointing the phone camera at it opens the checklist with the right template already selected — that is what lets you stick the QR in the tractor cab, on the shed door or on the fuel pump and let the operator record it right there.
- Save QR — downloads the code image to print and laminate
- Open QR — opens the checklist on screen, so you can check how it looks
- Share link — the same address as a link, to send via WhatsApp
The QR code and the link serve people filling it out on their own, outside an order. When the checklist is part of the activity, the path is the link with the activity type, described above.
🗂 Details/Topics tab — the questions
This is the tab where the checklist takes shape. Each row in the grid is a question; you fill in the form above it and click Save to add it.
| Field | Description |
|---|---|
| Order | Position of the question in the form. |
| Title | Required. The question itself — "Is the engine oil level normal?". |
| Subtitle | Supporting line, for instructions: "check with the engine cold". |
| Data type | Required. The answer format — see the list below. |
| Required | The operator cannot finalize the checklist leaving this question blank. |
| Identifier | Marks the question whose answer identifies the checklist in the list — usually the one that gives the machine or the license plate. |
| Active | Removes the question from the form without deleting the history of those who already answered. |
| Decimal places | Number type only: how many decimal places the answer accepts. |
| Hour meter/KM | Number type only: indicates that the value is the machine's hour meter or odometer reading. |
| Block typing | Prevents the operator from typing the value by hand, leaving only the choice of options. |
| Get current | Date and Hour/Minute only: fills in the answer with the date or time at the moment of filling out. |
| Content | The answer options, separated by commas. It shows up for the choice types. |
| Nonconformity value (triggers email alert) | Which answers count as
a problem. If the question is "Are the brakes OK?" with options Yes, No, the nonconformity value is
Não — if the answer is No, the alert email goes out. |
| Filter / Choose filters | Limits the options offered. In Fleet, Implement, Team and Employee questions, the Choose filters button opens the selection of what can appear — for example, only the tractors, not the whole fleet. |
| Default value | Answer already suggested when the checklist opens. |
| Parameter | Name used to receive the value from outside, when the checklist is opened by a link that already carries the information filled in. |
| Requester and Recipient | In Employee and Team questions shown as a drop-down list, they mark which answer indicates who is asking and who should receive the service. |
Conditional questions
In the Conditional block you make a question appear only depending on the answer to another: choose the source question in Show based on question and, in Conditional answer, which of its answers unlocks the current question. That is how you ask "What is the problem with the brakes?" only of those who answered "No" to the previous question — the form stays short for the operator and complete for the shop.
The Row group field groups questions on the same row of the form, making the screen more compact on a phone.
Available data types
| Group | Types |
|---|---|
| Structure and typing | Group (a title that separates blocks of questions), Date, Hour/Minute, Text, Number |
| Choice | Drop-down list, Multiple choice, Multiple choice (Yes or No), Option box |
| System records | Employee, Team, Fleet, Implement, Crop, Storage location and Fields — each in three formats: Drop-down list, Option box - Small and Option box - Large |
| Attachments | Image (the photo taken on the spot) and File |
The Multiple choice (Yes or No) type already comes with the options Sim, Não and
with the nonconformity set to Não — it is the shortcut for most inspection questions.
Tab buttons
| Button | What it does |
|---|---|
| Save / Cancel / Delete | Save, clear or delete the question being edited. |
| Delete all | Clears all the template's questions at once. |
| Import | Brings in the questions from another finished template, instead of typing everything again. |
| Organize | Opens the window to move questions up and down until the order is the way you want it. Requires the header to be saved already. |
🏢 Copy to another company
In the list, the Copy to another company button duplicates the selected template, choosing the Target Company and Target Branch. It is used to standardize the inspection across the group's farms without rebuilding the form in each one.
- Standardized form, the same for every operator
- Filled out on a phone or by QR code on the machine itself
- Email notice as soon as a nonconformity shows up
- A problem flagged in the field becomes a maintenance work order or work order without rework
❓ Frequently asked questions
How do I create a checklist for the operator to fill out on the phone before leaving with the machine?
In Checklist Template, click New, give the template a name and save it. Then, in the Details/Topics tab, enter one question per inspection item — the "Multiple choice (Yes or No)" type covers most of them. Once the template is saved, it is already available to fill out in the app and through the QR code generated on the screen itself.
I created the template, but it does not show up on the work order. What is missing?
The template needs to be linked to the activity type. Open the Work Order/Activity Type used on those orders and fill in the Checklist Template field. From then on, every order of that type shows the Fill Out Checklist button when entering the execution.
Does the operator need a user account in the system to fill out the checklist?
Not necessarily: each template generates a QR code and a share link that open the form directly. Just print the QR and stick it on the machine, or send the link via WhatsApp — whoever fills it out does not need to navigate the portal.
How do I get an email when the operator reports that something is faulty?
In the question, fill in the "Nonconformity value" field with the answers that represent a problem
(for example Não). In the template header, enter the addresses in "Send 'Alerts' email
to". Whenever an answer matches the nonconformity, the alert is sent to those
emails.
Can a question show up only when the previous answer is "No"?
Yes, that is the question's Conditional block. In "Show based on question" choose the source question and, in "Conditional answer", the answer that unlocks it. The conditional question stays hidden until the source question is answered that way.
I already have a finished template — how do I use the same one on another farm?
Use the "Copy to another company" button in the list, choosing the target company and branch. If you just want to reuse the questions inside a new template, the way is the "Import" button, in the Details/Topics tab.
Why can't I delete a checklist template?
Templates that have already been used in a completed checklist cannot be deleted — deleting them would destroy the inspection history. In that case, uncheck the Active field: the template disappears from the choice list and the old checklists can still be looked up.
📘 Screen: Completed Checklists
This is where the inspections that have already been answered are kept: the checklist the tractor driver filled out on the phone before heading out, the check read through the QR code stuck on the machine, the round of the shed. It is the screen where the manager reviews what was answered, sees the photo the operator attached and decides what to do about the problem reported.
📍 Location in the system
Menu: Operations > Completed Checklists
The same screen also appears under Fleet > Completed Checklists.
🧩 Main function
Look up, review and finalize the checklists answered from a Checklist Template — and, when the template calls for it, accept or reject the service request that comes out of the inspection.
🖥 The list
| Filter | Description |
|---|---|
| Start Date (from) and End Date (to) | Period shown. The screen opens with 7 days before and 7 days after today — that is why a checklist from last month only shows up after you widen the period. |
| Status | All, Pending, Finalized or Work Order Generated. |
The grid shows Code, Date, the template used, the Identifier (the answer that identifies the checklist — usually the machine or the license plate), the linked Work Order and the Service Req. column, which shows the status of the request as a colored tag. Each column has a search box below its title.
The New and Reload buttons are at the top, next to the Reports ▼ menu — the list of reports varies according to what is enabled for your user. The New button lets you enter a checklist through the portal itself, which is useful when the inspection was done on paper and needs to be typed in later.
📝 Record fields
| Field | Description |
|---|---|
| Code and Date | Number and day it was filled out. |
| Identifier | Text that identifies the inspection in the list. |
| Checklist Template | Which form was answered. Setting the template is what brings the questions into the details tab. |
| Equipment | The machine inspected, when the checklist is a fleet checklist. |
| Work Order | The order generated from this checklist, if any. |
| Notes | Free note from whoever reviewed it. |
🗂 Details/Topics tab — the answers
Lists question by question what was answered: Order, the template question, Title, Subtitle and the Answer. When the question was of the Image type, the Image button downloads the photo attached by the operator — it is the record that settles arguments about the condition the machine left or came back in.
You can also correct an answer here, while the checklist is still pending.
✔️ Finalizing the checklist
The Finalize button closes the review and asks for the outcome:
- Finalized — the inspection was reviewed and did not generate any service
- Work Order Generated — the inspection led to an order
Once finalized, the save buttons are locked. To correct something, click Finalize again: the checklist goes back to Pending and accepts changes.
🔧 Service request: accept or reject
When the template is set to generate a work order, the completed checklist arrives as a request — the operator reported the problem, but whoever schedules the maintenance decides.
The Accept/Reject button opens the window where you choose between the two options. When accepting, you enter the Planned Date (the system suggests the next day) and a note; the request moves to Scheduled. The record's Work Order block keeps, for reference only, the status, the date and the user who decided, the planned date, the completion date and the note from whoever approved it.
- History of every inspection by machine, with date and person responsible
- Field photos stored alongside the answer
- A problem reported by the operator becomes a work order with a scheduled date
- Clear separation between what has been reviewed and what is still pending
❓ Frequently asked questions
Where do I see the checklist the operator filled out this morning?
On the Completed Checklists screen. It opens showing the last 7 days and the next 7, so the day's checklist already shows up in the list. Click the row to see, in the Details/Topics tab, each question with the answer given.
How do I see the photo the operator attached to the inspection?
Open the checklist, go to the Details/Topics tab and select the Image-type question. The Image button downloads the file sent from the operator's phone.
What does the "Work Order Generated" status mean on the checklist?
It means that inspection was closed by generating an order — usually because the operator reported a problem that needs fixing. The other statuses are Pending, for what has not been reviewed yet, and Finalized, for what was reviewed without generating any service.
The operator reported a defect on the machine. How does that become a work order?
If the checklist template is set to generate a work order, the completed checklist arrives as a request. Open the checklist and use the Accept/Reject button: when accepting, enter the planned date and the request moves to Scheduled. If you reject it, the record keeps the justification for later reference.
I finalized the wrong checklist. Can I reopen it?
Yes. Select the checklist and click Finalize again: the system asks whether you want to reopen the document and the status goes back to Pending, unlocking changes.
The inspection was done on paper. Can I enter it in the system later?
Yes. Click New, choose the matching checklist template and answer the questions in the Details/Topics tab. The record ends up the same as one filled out on the phone.
🧩 Extra: Perennial crop - Work order
This guide was put together to explain the steps needed to create a crop work order for a perennial crop correctly, avoiding calculation errors.
In a perennial crop, especially oranges, the way the calculation works changes, so we created some specific settings.
📘 1. Crop
Location in the system: Crops > Crop
Main function: Records the crops the farm works with, such as soybeans, corn, cotton, and perennial crops such as citrus, coffee, cocoa, among others.
Important: Check Perennial correctly so that the fields this crop needs are shown in the season planting.
✅ After entering or changing the crop, move on to Season Planting.
📘 2. Season Planting
Location in the system: Crops > Season Planting
Main function: Links field + crop + variety(ies) + season + area.
- Row spacing
- Plant spacing
✅ After entering or changing the season planting, move on to Nozzle.
📘 3. Spray Nozzle
Location in the system: Operations > Spray Nozzle
Main function: Records nozzles, their flow rates and pressures, standardizing the values.
✅ After entering the nozzle or adding flow rate and pressure to an existing one, move on to Work Order/Activity Type.
📘 4. Work Order/Activity Type
Location in the system: Operations > Work Order/Activity Type
Main function: Records the activity types used to open work orders.
Important: Set the crop type to Perennial to unlock the work order functions for that crop.
✅ With the Work Order/Activity Type entered, go on to the crop work order.
📘 5. Work Order/Activity
Location in the system: Operations > Work Order/Activity
Main function: Enter and execute the work orders carried out in day-to-day field work.
- Create the header, choosing an activity type that is of the PERENNIAL type.
- Include only one field, which must be of the perennial type.
- Go to the Pesticide Application tab, in the header, and fill in the nozzle, speed and the other fields.
- Save the header.
- In the products, choose the "Perennial" spray mix option.
- In the Dose per tank field, enter it: with that, the total quantity is calculated from the header data.
Always check that this information is correct so the rate calculation is accurate.
❓ Frequently asked questions
Why does the work order calculation change for a perennial crop?
Because in perennials, especially oranges, the basis of the calculation is the number of plants, not just the area. That is why there are specific settings, starting with marking the crop as Perennial.
How does the system calculate the number of plants?
From the Planting Details field, shown in Season Planting when the crop is perennial. There you enter the row spacing and the plant spacing — the system uses those two values to count the plants used in the crop work order calculation.
What do I need to set up before creating the application order?
In this order: the Crop marked as Perennial, the Season Planting with the spacing details, and the Spray Nozzle (under Operations > Spray Nozzle), with its standardized flow rates and pressures.
☣️ Screen: Organophosphate exposure
Organophosphates are a class of pesticide that requires controlling who handles them: repeated exposure is cumulative, and Brazilian labor rules call for rotating the crew. In upCampo this becomes a simple rule — no one can apply organophosphates on more than 6 days within 30 days. The seventh day would require putting the person in quarantine, so the system blocks it beforehand. This screen shows who applied what, on which day, and how many days each person has already built up in the window — one row per employee per day, which is the unit the rule works with.
📍 Location in the system
Menu: Operations > Organophosphate exposure
🧩 Main function
Look up the exposure of all the farm's employees over a period, and see right away who is at the limit or above it. It is a read-only screen: the data is created automatically, when the work order is executed — there is nothing to type here.
🔗 How the data gets here
There are three steps, and the first is the only one that depends on someone checking something:
- In the product record
(
Inventory > Product), check Organophosphate. That checkbox turns on everything else. - When that product goes into the product list of a work order, the order starts requiring control — the Organophosphate control tag shows up in the order header, right after the % Executed field.
- With each execution entered on that order, that employee's day goes into the count and starts showing up on this screen.

📝 Main fields
| Field | Description |
|---|---|
| Start date / End date | The period looked up. It opens with the last 30 days; the end date cannot be earlier than the start date. |
| Search | Runs the lookup again with the chosen period. |
| Export | Generates an Excel spreadsheet with the rows in the period. Filters typed at the top of the columns are not applied to the spreadsheet: it comes out with everything the period returned. |
| Summary line | Right below the filters: how many employees appear in the period, how many days of exposure they add up to and how many employees are above the limit. |
| Date | The day of exposure — the day the work order was executed. The screen shows one row per employee per day: if the person had several executions on the same day, they appear together on a single row. |
| Employee/Operator | Who did the work. It comes from the field of the same name on the execution. There is a search box at the top of the column. |
| Role | The employee's registered role, for whoever checks the work schedule. |
| Work Order/Activity | The codes of the work orders on which the employee was exposed that day, without repeats — for example, 04010, 04012. There is a search box at the top of the column. |
| Type | The execution types for that day: Main activity, Activity preparation and/or Auxiliary, without repeats — for example, Activity preparation, Main activity. All three count — whoever handles the product is exposed — but whoever checks the schedule needs to tell them apart. |
| Activity | The activity types of that day's orders — application, spraying and so on — without repeats. |
| Products | Which organophosphate products were on that day's orders, without repeats. It answers "exposed to what", which the occupational health record asks for. There is a search box at the top of the column. |
| Days/30 | How many days of exposure that employee had built up in the 30 days ending on that date. At 6 it shows as At the limit; above that, as Above the limit, and the row is highlighted. Above 6 is a situation the portal no longer allows, but it can come from an entry made in the app. |
🔢 How the count works
Three details that avoid surprises:
- It counts days, not entries. An order with six fields applied on the same day generates six executions and counts as one day of exposure. The same goes across types and across orders: preparation and main activity on the same day, or executions on different orders on the same day, are a single exposure.
- The window moves with the date. It is 30 consecutive days back from the day entered, not the calendar month. Someone who applied on the 1st and the 15th is free again on the 31st.
- Correcting an entry is not blocked. If the day has already been counted, editing that execution adds no exposure and the system lets you save.
Executions entered: 3 · Days of exposure: 1
On screen, a single row: Date 10 · Work order 04010, 04012 · Type Activity preparation, Main activity.
🚫 The block, in practice
The control happens in the 4 - Execution tab of the work order, not here. When the order has an organophosphate product:
- The Employee/Operator becomes required on Main activity and Activity preparation executions, even if the activity type did not require it: whoever prepares the spray mix is exposed too, and without knowing who operated there is no control at all. Only on Auxiliary executions does the field remain optional — but, if it is filled in, the day counts and the block applies.
- While no one has been chosen, a notice right below the Date and Employee/Operator fields reminds you that the order has an organophosphate product. When you choose the employee, their Last application (date and products) and how many days they have in the window appear. The color sums it up: green with room to spare, yellow from the fifth day on, red when a new day would already be blocked. Changing the execution date redoes the count, because the window is counted from it.
- The Organophosphate exposure history button, in the execution's button bar, opens the list of the last 12 months for all of the farm's employees — you do not need to choose anyone first. That is where you build the work schedule, because those already at the limit show up alongside. The same window opens from the Automated Ops. menu of the work order list, without opening any order.
- When you try to save the seventh day, the system refuses and asks you to switch the employee.
- To finalize the order, it must have at least one Activity preparation execution and one Main activity execution. An execution entered without a type counts as main activity; the preparation must be entered with its type. This applies to all three ways of finalizing in the portal: Finalize (the window with the products), Finalize/Reopen and Change several orders at once, from the Automated Ops. menu, with the Finalize type. In the last one, if any selected order does not have both executions, none is finalized, and the message says which ones are missing: "An order with organophosphate control can only be finalized with one Activity preparation execution and one Main activity execution. Missing in: 04010, 04012".
📊 Reports and dashboards
Printing works as usual, as described in the reports quick guide.
- Exposure is recorded automatically, from the entries the farm was already making
- Whoever builds the schedule sees who is at the limit before assigning them
- The seventh day does not get through: the system refuses it
- The order only closes with the preparation and the main activity recorded
- The per-employee record comes out ready for inspection
❓ Frequently asked questions
I checked the product as organophosphate. Why is the screen still empty?
The count only sees work orders that received the product after the checkbox was set. Older orders are not recalculated. The screen starts filling up with the next applications.
The employee is blocked and I need to enter it anyway. How do I release them?
There is no release. The block is the reason the control exists, and it applies to everyone. From the seventh day in 30 on, the person would have to go into quarantine; the way forward is to switch the employee on the execution, which is exactly the rotation the rule is meant to force.
The execution has several employees. Does it count for all of them?
Yes. In a grouped execution, each employee on the list gets the day of exposure, and any one of them at the limit blocks saving.
I can't finalize the order — what is missing?
In upCampo, a work order with organophosphate control can only be finalized in the portal if it has at least one Activity preparation execution and one Main activity execution, in the 4 - Execution tab. Enter the missing one and finalize again. The error message says which orders are missing it — when finalizing several orders at once, none is finalized until all of them have both.
Who can see this screen?
Only users granted the Organophosphate exposure permission in
File > Users. It is named occupational health data — the usual practice is to enable it for
whoever handles workplace safety, not for everyone.
What happens if I remove the product from the work order?
The order immediately stops requiring the control, and the tag disappears from the header. That order's executions also drop off this screen and out of the day count, because only flagged orders are included. If the product comes back, the requirement and the count come back with it.
🚜 Quick Guide - Fleet (Maintenance and Fueling)
The Fleet module answers three questions every farm asks: how much each machine has cost, what has already been repaired on it and when the next service is due. This guide shows the order in which the records should be set up and how the day-to-day work of the shop and the fuel station fits into them.
The module's logic is simple: the machine is registered once, fueling brings in the hour meter every day, the hour meter makes the maintenance plan come due, the plan becomes a maintenance work order, and the order consumes parts and labor. That chain is what turns fuel station invoices and shop tickets into cost per machine.
📍 Location in the system
Menu: Fleet
🧩 What to set up first
1. Fleet Classification
The machine types — tractor, combine, sprayer, truck, implement, facility. Besides organizing the list, the classification defines which work order activities each group shows up in and which ones go into the hectare, consumption and cost dashboards. There is a button that imports a standard list of classifications — the shortcut for getting started.
2. Fleet / Facility
Every machine, implement and structure on the farm. It is the module's central record — see Fleet / Facility. Three settings deserve attention right from the start:
- Counter type: hour meter for tractors and combines, odometer for trucks
- Tank capacity and hour meter limit: these are what make the system flag typing errors in fueling
- Show in: sets which screens the machine appears on — fueling, work order, maintenance work order, requisition, checklist, load tickets
3. Department, Maintenance Group & Symptom
Three records on one screen: who does the work (shop, tire shop), what it is about (engine, hydraulics, electrical) and what the machine showed ("won't start", "overheating"). See Department, Maintenance Group & Symptom. This is also where employees are linked to the department — without that, the mechanic does not show up when logging hours.
4. Employee/Operator
Operators and mechanics come from the Employee/Operator record, shared with the Operations module.
⛽ The fuel station
Before the first fueling, you need the fuel registered as a product, the station as a storage location with a pump, and the opening balance entered. That walkthrough is detailed in Fueling (Initial Setup).
With that in place, the day-to-day is the Fueling screen, which handles four situations: internal fueling at the farm pump, external fueling at a roadside station, pump calibration and transfer between locations. Every entry takes the fuel out of inventory and — what matters most for the rest of the module — records the machine's hour meter.
🔧 Preventive maintenance
1. Maintenance plans
A plan is the recipe for the service: the items to check, in order, with the product and quantity each one uses. Written once, it serves all similar machines.
2. Fleet x Maintenance Plans
This is where the plan gets an interval on each machine: recurrence (every 250 hours, every 10,000 km, monthly, yearly), last occurrence and how far ahead to give notice. The Fleet x Maintenance Plans screen is the module's dashboard — it shows what is left until each service, has a filter to find machines without a plan, clones the setup from one fleet unit to another and sends an email or WhatsApp alert for each plan generated.
3. Maintenance Work Order
When the plan comes due — or when the machine breaks down — the maintenance work order comes in, with activities, labor in hours, parts through requisitions and cost. A preventive order comes from the plan; a corrective one comes from the problem. In the list, the status color shows what is pending, overdue, in progress, paused or finalized, and a click on the status marks that the shop has started or stopped the job. In the Dashboard view, the Maintenance overview sums up spending, open orders and overdue plans, and Workshop now shows what is in the shop right now.
📋 Day-to-day in the shop
| Situation | Where to record it |
|---|---|
| The machine was fueled | Fueling, with the hour meter at that moment |
| The machine broke down | Maintenance Work Order, corrective type |
| A service came due | Maintenance Work Order, preventive type, pointing to the plan |
| A part is needed | Requisition, from the order's products tab |
| The part is not in inventory | Quotation and Purchase Order |
| The machine ran for the day | Fleet Operation Log, with hours, field and operator |
| Check before operating | Completed Checklists, based on a Checklist Template |
| A tool changed hands | Mobile Item Movement |
| The shop started or stopped the job | Click the order status in the Maintenance Work Order list — or the mechanic's hour clock in the app |
| The job was put on hold | The order's hour log, with the downtime reason |
🔗 Screens the Fleet menu shares with other modules
Some items in the Fleet menu are the same as in Inventory and Operations — same screen, two paths:
- Requisition, Quotation and Purchase Order, from the Inventory module
- Checklist Template and Completed Checklists, from Operations
- Employee/Operator, also from Operations
- Fuel consumption measured per machine, with the station balance matching
- Services triggered by the actual hour meter, not by memory
- Complete maintenance history — what broke, when and how much it cost
- Parts leaving inventory through requisitions, traceable back to the purchase order
- Machine and mechanic hours logged, the basis for cost per hectare
This module is upCampo's farm fleet and maintenance management — the website page explains what it solves before you set it up screen by screen.
❓ Frequently asked questions
Where do I start setting up the fleet module?
With Fleet Classification (you can import a standard list) and by registering the machines in Fleet / Facility. With that you can already enter fueling and open maintenance work orders; the preventive plans can come next, machine by machine.
Do I need the maintenance plans to start using it?
No. Fueling and corrective orders work from day one. The plans are the next step, when the farm wants to stop reacting to breakdowns and start scheduling downtime.
Why is there so much emphasis on the hour meter when fueling?
Because it is the only reading that goes into the system every day. It is what gives you consumption per hour, the calculation of what is left until the next service and the machine's usage history. A wrong hour meter reading throws everything else off.
How does the machine cost get to the field?
In two ways: fueling can be spread across the period's crop work orders, in proportion to area; and the fleet operation log records how many hours the machine ran in each field.
Do third-party machines also go into the module?
Yes: register the fleet unit checking Third party and entering the contractor's entity. The fleet list has an Owned / Third-party / All filter, which lets you separate what belongs to the farm from what is contracted.
📘 Screen: Fleet Classification
It is the family each machine belongs to: tractor, combine, sprayer, truck, trailer, planter, disc harrow, generator, light vehicle. Every fleet unit registered belongs to a classification, and that is what organizes the whole equipment yard — when filtering the list, looking at a consumption dashboard by machine type or deciding which equipment shows up for each work order activity type.
Without classification, the fleet becomes a loose list of names. With it, you can answer questions the grower asks every season: how much diesel the tractors used, how much it cost to maintain the combines, how many hectares the planters covered.
📍 Location in the system
Menu: Fleet > Fleet Classification
🧩 Main function
Group machines, implements and facilities by type, defining which Work Order activities each group shows up in and which ones go into the hectare, consumption and cost dashboards.
📝 Main fields
| Field | Description |
|---|---|
| Code | Short identifier for the classification. |
| Description | Required. The group name — "Tractor", "Combine", "Self-propelled sprayer", "Truck". |
| Abbreviation | Short version, used where space is limited. |
| Active | Uncheck it to remove the classification from the lists without deleting its history. |
| Application Tank Capacity | Reference tank size for the group — it makes sense for sprayers and anything that carries spray mix. |
| Flow Rate | Reference flow rate for the group, on the same row as the previous field. |
🗂 Show in (Work Order/Activity Header)
This block is what keeps the operator from scrolling through a list of a hundred machines to find the planter. Check which activities the classification should appear in:
Tillage · Fertilization · Planting · Pesticide application · Harvest · Collections · Irrigation · Manual · Other
A combine checked only for Harvest will not clutter the list on a spraying order. What defines the type of each activity is the Work Order/Activity Type.
📊 Show in - Dashboard
| Option | Effect |
|---|---|
| Show in hectares worked dashboard | The group is included in the comparison of area worked. |
| Show in consumption dashboard | The group is included in the fuel consumption comparison. |
| Show in cost dashboard | The group is included in the cost comparison. |
All three are checked by default. Unchecking is useful for groups that skew the chart — facilities and idle equipment, for example, which neither cover hectares nor burn diesel.
⚡ Import fleet types (standard)
In the list, the Import fleet types (standard) button opens a window with a ready-made list of classifications. Select the ones you want and confirm — it is the fastest way to start registering the fleet on the first day of setup, without typing group by group.
- The machine list can be filtered by type, instead of being one big pile
- Each activity type shows only the machines that make sense for it
- The hectare, consumption and cost dashboards compare group against group
- Fleet reports come out grouped in a way the manager understands
❓ Frequently asked questions
Do I need to create a classification for each machine?
No. The classification is the type, not the machine: a single "Tractor" group covers all of the farm's
tractors. Each tractor is a record in Fleet > Fleet / Facility, pointing to that
classification.
Why doesn't my combine show up on the work order?
It is almost always because its classification is not checked for that activity type. Open
Fleet > Fleet Classification, choose the machine's group and check the matching
activity in the "Show in (Work Order/Activity Header)" block.
How do I keep facilities and idle equipment out of the consumption charts?
Uncheck "Show in consumption dashboard" (and, if it makes sense, hectares and cost) in those items' classification. They stay registered and keep their history, but stop skewing the comparison between the machines that actually run.
I'm just getting started. Is there a ready-made list of classifications?
Yes. Use the "Import fleet types (standard)" button in the screen's list, select the groups the farm uses and confirm. Then just adjust the descriptions and checkboxes to match how the operation actually works.
Can I delete a classification I no longer use?
Only if no fleet unit is using it — the system blocks deleting a record that is already in use. The right way in that case is to uncheck the Active field: the classification disappears from the choice lists and the history stays intact.
📘 Screen: Fleet / Facility
This is the record for every machine, implement and structure on the farm: the John Deere tractor in field 12, the combine, the self-propelled sprayer, the grain cart, the truck that hauls the cotton, the pivot generator, the shed. Everything that will be fueled, maintained, entered on a work order or have its cost tracked starts here.
It is the module's most central record: fueling points to a fleet unit, the maintenance work order points to a fleet unit, the maintenance plan is tied to a fleet unit, and the work order's cost per hectare goes through it.
📍 Location in the system
Menu: Fleet > Fleet / Facility
🧩 Main function
Register machines, implements and facilities with their manufacturer data, documentation and counter (hour meter or odometer) — and define which screens of the system each one appears on.
🖥 The list
The top has New, Reload, View Costs, Change several and the Reports ▼ menu, with an Owned / Third-party / All filter. The grid lists Code, Description, Model, Type, Plate, Classification, Third party, Cost Center, Active, Allows Implement, Is an implement, Brand, Year, Mfr. ID and Reference/Integration ID, each column with its own search. The Mfr. ID column is clickable: it opens the machine in the John Deere Operations Center.
Change several takes care of the repetitive work of setup: it changes the cost center, the classification, the tank capacity, the hour meter limit, the brand, the model or the average consumption of several fleet units at once. The system itself asks you to make the selection unit by unit, not "all at once".
🔀 Type: what is being registered
| Type | What it is |
|---|---|
| Fleet | A machine that moves: tractor, combine, sprayer, truck. |
| Equipment | Equipment that is not a vehicle — pump, engine, generator. |
| Facility | A farm structure: shed, headquarters, silo, fence, corral. |
| Other | Whatever does not fit the categories above. |
📝 Header fields
| Field | Description |
|---|---|
| Description | Required. The name the machine goes by on the farm — "Tractor 7215 – 04", "Combine S780". |
| Classification/Fleet equipment type | Required. The machine's group, coming from Fleet Classification. |
| Code | Internal number, usually the number painted on the machine. |
| Active | Uncheck it when the machine leaves the fleet; its history remains. |
| Is an implement | Marks the planter, the disc harrow, the pull-type sprayer — what is pulled, not what pulls. |
| Allows Implement | Marks what pulls: tractor, self-propelled machine. It is what unlocks choosing the implement on the work order. |
| Cost Center | Where the machine's cost goes. |
| Reference/Integration ID | The fleet unit's code in the external system, when there is a telematics integration. |
| Notes | Anything else that needs to be recorded about the asset. |
🏭 Manufacturer Data
| Field | Description |
|---|---|
| Brand and Model | The machine's manufacturer and model. |
| Year | Year of manufacture. |
| Chassis | Chassis/serial number. |
| Power (HP) | Engine power. |
| Swath width (m or ft) | Working width — sprayer boom, combine header, planter width. |
| Height (m) | Flight height, for aerial application. |
| Manufacturer ID | The machine's ID in the manufacturer's system. It is what the John Deere integration uses to tie the Operations Center machine to the upCampo fleet unit. |
📄 Documentation data
Plate, State, RNTRC and RENAVAM — what an on-road machine needs to have (Brazilian vehicle registrations). This block feeds the transport documents, such as the MDF-e.
The driver is also set here: chosen from a record in Registered driver or typed directly in Driver (name only), for an occasional trucker.
⛽ Fueling
The block starts with a single checkbox — Show in Fueling. The other fields only appear once it is checked, because they only make sense for a machine that gets fueled.
| Field | Description |
|---|---|
| Show in Fueling | Makes the machine appear on the Fueling screen. Without it, the fuel attendant cannot find the fleet unit. |
| Has hour meter | Check it when the machine has a counter. It is what unlocks choosing the counter type. |
| Counter type | Hour meter (hours) for tractors and combines, Odometer (KM) for trucks and light vehicles. |
| Tank capacity | Tank size in liters. The system warns when a fueling entry exceeds this capacity. |
| Average consumption | The machine's reference consumption. |
| Hour meter limit | Maximum acceptable hour meter difference between two fuelings. Beyond that, the system warns you — it is what catches typing errors. |
| Show add. reading on WO | Shows the additional reading on the work order. |
👥 Owner / Third party
Check Third party when the machine does not belong to the farm and enter the Third-party Entity (the contractor, coming from Entity). This checkbox is what feeds the Owned / Third-party / All filter in the list.
👁 Show in
This block controls which screens the fleet unit appears on — it is what keeps each list short and prevents picking the wrong one:
| Option | Where the fleet unit starts appearing |
|---|---|
| Show in Work Order | On the Work Order. |
| Show in Maintenance WO | On the Maintenance Work Order. |
| Show in Requisition | On the Requisition. |
| Show in Checklist | On the Checklists. |
| Show in Harvest Ticket / Outbound Ticket / Standalone Ticket | On the matching load tickets. |
| Show in collection | On the bale collection. |
The same block holds the three dashboard checkboxes — Show in hectares worked dashboard, consumption and cost — which decide whether that machine is included in the comparison charts.
🗂 Additional tabs
Right below the notes, the screen shows the machine's Last Hour Meter — the most recent reading that came in through fueling. Then come the tabs:
| Tab | What it is for |
|---|---|
| Components | The machine's parts and measurements — Type, Description/Code and Quantity. It is the "parts sheet": "FILTRO DE OLEO MOTOR" (engine oil filter) with each manufacturer's equivalent codes, "OLEO DO MOTOR — 15W40 — 9,0" (engine oil), tire size, belt. Whoever does the buying no longer needs to open the manual. The Import button copies the whole list from another identical fleet unit. |
| Maintenance plans | This fleet unit's preventive plans, with Type, Last occurrence (the reading at the last execution), Recurrence, Anticipate, Next will be at, Last Hour Meter and the Remaining indicator. You can add a plan right here, with the New button; the screen itself recommends using Fleet x Maintenance Plans for advanced use. The plans themselves come from Maintenance plans. |
| Maintenance Work Order | The machine's order history: Date, Code, Type, Description, Hour meter/KM, Generator hrs/KM and Status as a colored tag. |
| Fueling | The fuelings in the chosen period — Number, Date, Storage location/station, Consumption, Hour meter/KM, Liters and amounts. |
| Product & Service | What the machine consumed in a period: Date, Product & Service, Type, Number/Description/Entity, Hour meter, Quantity and amounts. |
| QR code | Generates the machine's QR code, with the Save QR (to print and stick in the cab) and Open QR buttons. Scanned with a phone, it opens the maintenance work order for that fleet unit directly — the operator records the problem on the spot, without looking for the machine in a list. |
| File | The asset's attachments: invoice, manual, photo, document. |
The Fueling and Product & Service tabs have Start Date and End Date filters with an Update button — by default they show the last few months, not the whole history.
🔗 John Deere integration
When the farm uses the integration, the Manufacturer Data block has the button to open the Operations Center and to import the machine by Manufacturer ID/chassis — the same machine can be reached from the Mfr. ID column in the list. That pairing is what brings the hour meter and the operation in from outside without retyping.
- Each machine has its counter, tank and limit defined — and fueling starts flagging typing errors
- Each screen shows only the machines that make sense on it
- Cost, consumption and hectares are tracked per machine and per group
- Preventive maintenance has something to build on
- The parts sheet stays with the machine: filter, oil and sizes when it is time to buy
- The QR stuck on the machine opens its maintenance work order
❓ Frequently asked questions
I registered the tractor and it does not show up in fueling. Why?
Show in Fueling needs to be checked on the machine record, in
Fleet > Fleet / Facility, in the Fueling block. That checkbox is what puts the fleet unit
on the list in the fueling screen.
How do I register the planter, which has no engine?
Register it normally with the "Fleet" type and check Is an implement. Machines that pull implements (tractors, self-propelled machines) need Allows Implement checked so the planter can be chosen together with them on the work order.
The truck tracks mileage, not hours. How do I record it?
Check "Has hour meter" and choose the Odometer (KM) counter type. From then on the system treats the machine's readings in kilometers, both in fueling and in the maintenance plans.
How do I register a rented or third-party machine?
In the Owner/Third party block, check Third party and enter the contractor's entity. The fleet list has an Owned / Third-party / All filter, which lets you separate what belongs to the farm from what is contracted.
I need to change the cost center of thirty machines. Can I do it all at once?
Yes: use the Change several button in the list. It changes cost center, classification, tank capacity, hour meter limit, brand, model or average consumption for the selected fleet units. Select machine by machine, as the system itself instructs.
What is the machine's QR code for?
The QR code points to opening a maintenance work order for that fleet unit. Printed and stuck on the machine, it lets whoever is in the field point their phone and record the problem on the right order, without looking for the machine in a list.
The system complained that the hour meter is far above the previous one. What do I do?
That warning comes from the Hour meter limit field on the fleet record: it sets the maximum acceptable difference between two fuelings. Check whether the reading was typed correctly; if the machine really ran all those hours, adjust the limit on the record.
Where do I write down the filter and oil codes for each machine?
In the Components tab of the fleet record. Each row has a type ("FILTRO DE OLEO MOTOR"), a description/code — where each manufacturer's equivalents fit — and a quantity, such as the 9 liters of 15W40 engine oil. On a new machine, the Import button copies the whole sheet from another identical fleet unit.
Where does the "Last Hour Meter" shown on the screen come from?
From the most recent reading recorded for the machine, usually the one from the last fueling. It is the same number the Fleet x Maintenance Plans screen uses to calculate how much is left until the next service.
📘 Screen: Fleet Operation Log
It is the log of machine use: which tractor, with which implement, in which field, with which operator, on which shift, how many hours and how many hectares. One record per machine, per work day — the digital version of the time sheet the shift leader used to fill out by hand at the end of the day.
This information is what closes the books on machine hours: without it, the system knows how much diesel the fleet used, but not how long it ran or over what area — and cost per hectare becomes an estimate.
📍 Location in the system
Menu: Fleet > Fleet Operation Log
🧩 Main function
Record the hours worked by each fleet unit per field, operation and shift, with the counter's start and end readings, to track machine and operator productivity.
📝 Main fields
| Field | Description |
|---|---|
| Code | The record number. |
| Date | Required. Day of the work. |
| Shift | The shift the machine ran on. |
| Activity type | The operation type, coming from Work Order/Activity Type — planting, spraying, harvest. |
| Fleet/Equipment | Required. The machine that worked. |
| Implement | The attached implement. It is only available when the chosen machine allows an implement. |
| Employee/Operator | Who operated it, coming from Employee/Operator. |
| Team | The team responsible. |
| Field | Where the machine worked, coming from the season planting. |
| Operation | The operation performed. |
| Area | Hectares worked in the period logged. |
| Start Reading and End Reading | The machine's counter at the start and at the end. The end reading must be greater than the start reading — the system does not accept the opposite. |
| Hour meter/KM | The machine's counter reading. |
| Started at / Finished at (hour:min) | Start and end time of the work. |
| Time | Calculated from the two times, in decimal hours — 7h30 becomes 7.50. |
🖥 The list
The grid shows Date, Equipment, Implement, Employee, Shift, Operation, Start Reading, End Reading and the start and end times, with a period filter (Start date from and End date to). To enter several logs in a row, use the Save + New button: it saves and opens the next one blank.
- Machine hours measured per field, operation and shift
- Productivity comparable between operators and between machines
- A basis for cost per hectare that does not depend on estimates
- Counter readings tracked day by day, which supports preventive maintenance
❓ Frequently asked questions
What is the difference between this log and the work order?
The work order is the crop work: what was applied, in which field, with which recipe. The fleet operation log is the machine's time record: how many hours it ran, with which operator, on which shift. One looks at the crop, the other at the machinery.
The system won't let me save and says the end reading is lower than the start reading.
That check is intentional: a machine counter does not run backwards. Make sure the readings were not swapped and that no digit is missing from the end reading.
The Implement field is locked. How do I unlock it?
The implement only becomes available after you choose a machine that has Allows
Implement checked on its record, in Fleet > Fleet / Facility. And the
implement itself must be registered with Is an implement.
Do I have to fill in the time by hand?
No. Enter the start and end times and the system calculates the time in decimal hours — from 7:00 to 11:30 comes out to 4.50.
📘 Screen: Maintenance plans
It is the recipe for preventive maintenance: "250-hour service", "Engine oil change", "Combine service before the season". Each plan brings together the items that need to be checked or replaced — air filter, engine oil, belt, brake clearance — and, when it makes sense, the product and quantity each item uses.
The plan is written once and used on as many similar machines as there are. What says how often (or every how many hours) it repeats on each fleet unit is the Fleet x Maintenance Plans screen.
📍 Location in the system
Menu: Fleet > Maintenance plans
🧩 Main function
Register the preventive maintenance plans and the list of items for each one, with the product and quantity that will be consumed when it is carried out.
📝 Main fields
| Field | Description |
|---|---|
| Code | The plan's identifier. |
| Name/Description | Required. The plan name — "500 h service", "Season prep – combine". |
| Active | Uncheck it to retire the plan without losing the history of orders that already used it. |
| Notes | Context for the plan: which machine line it was designed for, what the manufacturer's manual recommends. |
🗂 Details (items to check)
The Details (items to check) tab holds the core of the plan — the screen itself explains: "here you specify the details of this plan, the items that must be checked, for example: check filter, change oil, etc.".
| Field | Description |
|---|---|
| Description | What needs to be done: "Change engine oil", "Check brake clearance". |
| Order | The sequence in which the items appear — so the mechanic can work from top to bottom. |
| Product & Service | The inventory item consumed, coming from Product & Service: the oil, the filter, the belt. |
| Qty | How much of the product the job uses — 12 liters of oil, 1 filter. |
| Active | Lets you deactivate an item without deleting it from the plan. |
| Notes | Item detail: torque, specification, precautions. |
Entering the product and quantity is what lets the maintenance work order generated from the plan already know what will come out of inventory.
- Preventive maintenance no longer depends on the mechanic's memory
- Every service goes out with the same list of items, in the same order
- Oil, filter and parts usage is predictable
- The plan serves several identical machines, written only once
Planning preventive work is what upCampo's farm fleet and maintenance management does from end to end — the website page explains the module before you set it up screen by screen.
❓ Frequently asked questions
Where do I say the service is every 250 hours?
Not here. The plan holds the what (the items to check); the interval is set per
machine in Fleet > Fleet x Maintenance Plans, or in the Maintenance plan tab of the
fleet record, in the Recurrence and Last occurrence fields — the reading at the last execution.
Do I need a plan for each tractor?
No. A "250 h service" plan covers every tractor that follows that service; the link to each machine is made separately. Create different plans only when the item list is truly different.
How do I make the oil come out of inventory when the service is done?
Enter the product and quantity on each plan item. That way, when the maintenance work order is generated from it, the products are already listed for the write-off, without anyone having to remember to type them.
Can I change the order of the items later?
Yes: each item's Order field sets the display sequence. Change the number and save — the list rearranges itself.
📘 Screen: Fleet x Maintenance Plans
This is the preventive maintenance dashboard: on a single screen, every machine on the farm with the plans each one follows, how much is left until the next service and what is already overdue. Instead of opening machine after machine, the manager takes a quick look and sees that tractor 04 is 12 hours from its 250-hour service and that the combine is past due.
This is also where you set the frequency of each plan for each fleet item: the plan says what to do, this screen says how often.
📍 Location in the system
Menu: Fleet > Fleet x Maintenance Plans
🧩 Main function
Link maintenance plans to fleet items, set the recurrence and last occurrence, and track in a single list what is about to come due and what is overdue.
A single machine can also be linked through the Maintenance Plans tab of the Fleet / Facility record. This screen is the route for advanced use: it shows the whole fleet at once, clones configurations and sends alerts.
🖥 The list
Each row of the grid shows one fleet item and one plan:
| Column | What it shows |
|---|---|
| Fleet and Classification | The machine and its group. |
| Maintenance Plan | The linked plan, or No plan when the machine doesn't have one yet. |
| Type | How the plan repeats (see the table below). |
| Last occurrence (km or hr.) | Last occurrence, in kilometers or hour meter (the hr. in the label): the reading at the last service, shown as a tag. When it is zero, the tag turns red: the plan has never been done or was left without a reading, and without it the next-service calculation doesn't work. |
| Recurrence | How often the plan repeats. |
| Anticipate (km or hr.) | Lead margin for the alert. |
| Next will be at | When the next service falls. |
| Last Hour Meter | The machine's most recent reading, usually coming from fueling. |
| Remaining | How much is left until the next service, as a colored tag. It's the column you look at first: green means there's room, and anything at the limit or overdue changes color. |
| Also execute | Another plan that should be done together with this one. |
| Department | Who is responsible for the service. |
| Active | Whether the link is in effect. |
The filter at the top is With plan / No plan / All: the quick way to find out which machines were left out of preventive maintenance. Next to it are New, Reload, View Costs, Clone and Reports ▼. The screen refreshes itself from time to time, and the Pause button stops that refresh while you're working on it.
🔁 Recurrence types
| Type | When to use |
|---|---|
| By KM or Hour Meter | The most common case: service every 250 tractor hours, every 10,000 km for a truck. |
| Weekly | A check that repeats every week. |
| Monthly | Monthly repetition, regardless of use. |
| Yearly | Once a year: the typical case of getting ready for the season. |
| Specific date | One set date, no repetition. |
📝 Link fields
| Field | Description |
|---|---|
| Fleet, Implement and Facilities | Required. The machine that gets the plan. |
| Maintenance Plans | Required. The plan to follow. |
| Description (Optional) | A name of its own for this link, when it helps to tell it apart. |
| Type | The recurrence type from the table above. It decides which fields appear. |
| Recurrence (km or hr.) | Must be greater than zero. The interval between services. |
| Last occurrence (km or hr.) | Required. The reading at the last service: the next-service calculation comes from it. |
| Anticipate (km or hr.) | Required. How far ahead the plan should start alerting. For a 250 h service with an anticipation of 20, the alert shows up from 230 h. Zero means no lead time. |
| Second-to-last occurrence | Read-only: the service before the last one, useful for checking the actual interval. |
| Next will be at | Read-only, calculated by the system: when the next service falls. |
| Department | The responsible department, coming from Department, Maintenance Group & Symptom. |
| Maintenance Plans (Multiple - Also execute) | Ties one plan to another: when doing the 500 h service, also do the 250 h one. |
| Notes and Active | Additional details of the link. |
The fields change according to the Type: in By KM or Hour Meter you get Last occurrence, Anticipate and Second-to-last occurrence as numbers; in the period-based types (weekly, monthly, yearly, specific date) those three go away and Last Occurrence Date and Second-to-last Occurrence Date appear.
🗂 Link tabs
| Tab | What goes in it |
|---|---|
| Components | The parts this machine uses in this plan: Product & Service (Optional), Description, Quantity and Type. It's for when the machine differs from the plan's standard: a different filter, a different oil, a larger quantity. |
| Maintenance Work Order | The work orders already generated by this plan for this fleet item: the service history. |
📋 Clone plans from one fleet item to another
The Clone button copies all plans from one fleet item to another. With five identical tractors, you set up the first one carefully and replicate it to the others; then you just adjust the last occurrence of each one.
📊 View: Standard, Dashboard and Settings
| Mode | What it shows |
|---|---|
| Standard | The fleet × plans list described above. |
| Dashboard | The preventive maintenance charts. |
| Settings | The alert settings for when a plan is generated: Email (recipients), Email (BCC), Email Subject, Email Body and WhatsApp Number. Every time a plan is generated, the alert goes out on its own to purchasing and to whoever runs the shop, without depending on someone opening the screen. |
- A single screen shows what is coming due and what is already overdue, across the whole fleet
- The "No plan" filter reveals the forgotten machine before it breaks down
- Services are triggered by the actual hour meter, not by memory
- Identical machines get the same configuration in one click
- The generated-plan alert reaches whoever needs to buy the part by email or WhatsApp
❓ Frequently asked questions
How do I know which machines have no scheduled maintenance?
In Fleet > Fleet x Maintenance Plans, change the status filter to
No plan. The list then shows only the fleet items that don't have any plan
linked yet.
Where does the hour meter reading the system uses to calculate the service come from?
From the last reading recorded for the machine, usually the one from fueling, which is when the hour meter is written down every day. That's why it pays to require the correct reading at fueling time: it's what makes preventive maintenance work.
What is the Anticipate field for?
So the alert comes before the exact moment. With a 250-hour recurrence and an anticipation of 20, the service starts being flagged from 230 hours: enough time to set aside the part and schedule the downtime.
I bought another identical tractor. Do I need to set everything up again?
No. Use the Clone button to copy the plans from an already configured fleet item to the new one, then adjust only the last occurrence based on the machine's current hour meter.
Can the shop be notified automatically when a plan is generated?
Yes. In the Settings view mode, enter the destination emails, the BCC, the subject, the message body and the WhatsApp number. From then on, every generated plan triggers the alert on its own: that's what gets purchasing buying the part before the machine stops.
One service has to be done together with another. How do I record that?
Use the Maintenance Plans (Multiple - Also execute) field. It ties one plan to another: when the 500-hour service comes up, the system indicates that the 250-hour one should be done with it.
The last occurrence is zero and shown in red. What does that mean?
That the plan has never been done on this machine, or that the reading at the last service wasn't entered. As long as it stays that way, the "Next will be at" calculation starts from zero and the service shows up as if it were long overdue. Enter the last occurrence with the hour meter or KM from the last time the service was done.
This machine uses a different filter from the one in the plan. How do I record that?
In the link's Components tab, enter the Product & Service, the description, the quantity and the type. It applies only to that fleet item in that plan: the plan itself keeps serving the other machines unchanged.
📘 Screen: Downtime Reason
This is the list of reasons a maintenance job sits idle: "waiting for parts", "waiting for quote", "no mechanic available", "machine in use in the field", "waiting for outside shop". It's a simple record with three fields, but it's what explains why a work order that should have taken four hours took three days.
The reasons show up in the time entries of the maintenance work order, including in the field app, where the mechanic records time worked and downtime.
📍 Location in the system
Menu: Fleet > Downtime Reason
🧩 Main function
Standardize the downtime reasons used in maintenance time entries, so lost time can be totaled by cause instead of staying buried in each work order's free-text description.
📝 Main fields
| Field | Description |
|---|---|
| Code | Short identifier for the reason. |
| Description | Required. The reason as the mechanic would recognize it: "Waiting for parts", "Waiting for quote", "No mechanic available". |
| Active | Uncheck it to remove the reason from the lists without erasing the history of work orders that already used it. |
- You can total how many hours the shop lost waiting for parts during the season
- Downtime no longer gets mixed up with time worked
- Every time entry uses the same vocabulary, which makes the report comparable
❓ Frequently asked questions
How many downtime reasons is it worth setting up?
A few, clearly distinct ones: somewhere between five and ten is usually enough. Too many reasons and the mechanic picks any of them; too few and everything ends up as "other". Start with the causes that actually keep happening in the shop.
Where is the downtime reason chosen?
In the time entries of the maintenance work order, together with the employee, the activity and the period worked, including from the field app, when the mechanic records the job straight from their phone.
I no longer use a reason. Should I delete or deactivate it?
Deactivate it. A record already used in work orders can't be deleted, and unchecking the Active field removes the reason from the selection lists without touching what has already been recorded.
📘 Screen: Department, Maintenance Group & Symptom
One screen, three records. This is where you register the department responsible for the job (mechanics, tire shop, electrical, welding, lubrication, outside), the maintenance group that groups the jobs (combine servicing, hydraulic system, undercarriage) and the symptom the operator reports when the machine has a problem ("hard starting", "burnt-out light", "leaking oil").
All three feed the maintenance work order: the department says who fixes it, the group says what it's about and the symptom says what the machine is showing. That's what lets you find out, at the end of the season, that half the breakdowns were electrical problems.
📍 Location in the system
Menu: Fleet > Department, Maintenance Group & Symptom
🧩 Main function
Register departments, maintenance groups and symptoms, define which employees belong to each department and who the purchase order emails should go to.
🔀 The Type field decides what is being registered
| Type | What it is | Examples |
|---|---|---|
| Department | The area responsible for the job. It's the most used type, and some farms also create departments by area or by person in charge, such as "Agriculture – Inputs" or "Livestock". | Mechanics, Tire shop, Electrical, Welding, Lubrication, Outside, Safety. |
| Maintenance Group | How the job is grouped, by machine system or by fleet family. | Combine servicing, hydraulics, undercarriage, air conditioning. |
| Symptom | What the machine shows, in the words of whoever operates it. | Hard starting, burnt-out light, leaking oil, losing power. |
The type is required: without it the system won't save. The list shows Code, Description, Type and Active, and the filter at the top (Department / Symptom / Maintenance Group / All, which is the default) keeps the three worlds apart.
📝 Main fields
| Field | Description |
|---|---|
| Code | Short identifier. |
| Description | Required. The name of the department, group or symptom. |
| Type | Required. Department, Symptom or Maintenance Group. |
| Emails for Purchase Order | Who receives the purchase order originating from this department. |
| Emails for Purchase Order Second approver | The second approval level, when the farm works with two signatures. |
| Active | Uncheck it to remove it from the lists without losing the history. |
| Notes | Anything else that needs to be recorded. |
🗂 Employee/Operator tab
The Employee/Operator tab defines who belongs to the department: the mechanic, the tire technician, the electrician. Pick the person, add a note if needed and save; the list below shows the department's team. That's the list that appears when recording labor on the maintenance work order. Employees come from the Employee/Operator record.
- Every maintenance work order has an owner: the responsible department
- Breakdowns are classified by nature, so you can see where the machine fails most
- The symptom reported by the operator comes in standardized, not as free text
- The department's purchase order reaches the approver by email
❓ Frequently asked questions
What's the difference between department, maintenance group and symptom?
The department is who does the work (mechanics, tire shop, welding). The maintenance group is how the job is grouped (combine servicing, hydraulics). The symptom is what the machine showed before the repair ("hard starting", "burnt-out light"). All three are registered on the same screen by changing the Type field.
How do I get the mechanic to show up when recording hours on the work order?
Link the employee to the department in this screen's Employee/Operator tab. Before that, they
need to be registered in Operations > Employee/Operator.
I tried to delete a department and the system wouldn't let me. Why?
Because there are records using it: maintenance work orders, activities on those orders or requisitions. If there are employees linked, they need to be removed first. In practice, the best route is to uncheck the Active field: the department disappears from the lists and the history stays intact.
What are the two email fields for?
To route the purchase order generated by that department: the first field is the regular recipient and the second is the second approver, for farms that require two approvals before buying.
📘 Screen: Fueling
Fueling is the record of each tank of fuel that goes from the farm's pump into a machine: which fleet item, which pump, how many liters, at what hour meter or odometer reading and by whom. In upCampo, it's the simplest and most frequent entry in the fleet module, and the one that supports everything else in it: consumption per machine, the fuel station balance and the reading that triggers preventive maintenance.
Fueling deducts the fuel from inventory: the storage location set up as the fuel station uses the same balance control as any other product. Before the first entry, you need the product, storage location, pump and fleet set up; that walkthrough is in Fueling (Initial Setup).
📍 Location in the system
Menu: Fleet > Fueling
🧩 Main function
Record internal and external fueling, pump calibrations and fuel transfers, updating the fuel station balance, the machine's hour meter and consumption per fleet item.
🔀 The four types
The type, at the top of the header, is the first choice, and it changes which fields appear:
| Type | When to use | What changes on the screen |
|---|---|---|
| Internal (storage location) | The normal case: the machine was fueled at the farm's pump. | Asks for the storage location, pump and the pump readings. The product comes from the location itself and the unit price comes from inventory. |
| External (one-off) | Fueled at a roadside gas station, off the farm. | Asks for the station description, the product and the unit price; there's no pump and no reading. |
| Calibration | Pump measurement adjustment, when the counter and the tank don't match. | No fleet item and no hour meter: the entry is about the fuel, not a machine. |
| Transfer | Fuel moving from one location to another, for example the fuel truck filling up at the main tank. | Asks for the source location and the destination storage location. Source and destination can't be the same. |
📝 Main fields
| Field | Description |
|---|---|
| Date | Required. Can't be later than today. |
| Number | Comes in sequence and must be unique: the system rejects a repeated number. |
| Ticket | Receipt number from the pump or the gas station. Shown depending on the company settings. |
| Employee/Operator | Who did the fueling. |
| Description/Station | For external fueling, where the machine was fueled. |
| Storage Location | Required for internal and transfer. It's the farm's fuel station, registered in Storage Location. |
| Pump | Required for internal. When the location has only one, it comes preselected. |
| Storage Location DESTINATION | Transfer only: where the fuel goes. |
| Equipment | Required for fueling: the machine that received the fuel. Only fleet items with "Show in Fueling" checked appear. |
| Cost Center | Where the fuel cost goes. |
| Product | The fuel. For internal it comes from the storage location itself; for external it is chosen. |
| Pump start reading | Comes filled in and locked: it's the end reading of the previous fueling at that pump. Only a user with that permission can change it. |
| Pump end reading | Required for internal: in practice, it's the number the fuel attendant reads on the pump and the only one of the two they type in. Must be greater than the start reading. |
| Gallon | Appears when the pump works in gallons (US pump). Once the gallons are entered, the system converts them to liters. |
| Liters | Amount fueled, greater than zero. In start/end reading mode the system calculates it on its own and the field is locked; for locations set up to type in liters, this is where you type them. |
| Hour meter/KM | Required when the fleet item has a counter. It's the reading that feeds preventive maintenance. |
| Notes | Anything that needs to be recorded about the entry. |
| Unit price and Total value | Fuel price. For internal, it comes from inventory; for external, it's typed in. |
| Balance | How much was left in the storage location after the entry. |
| Prev. hour meter/KM and Prev. hour meter diff. | Previous hour meter/KM and Difference from previous hour meter: the reading from that machine's previous fueling and how much it ran or worked since then. This pair is what exposes typing errors: a difference that is too large or negative is almost always a wrong reading, not a machine that ran a lot. |
| Consumption | Calculated from the liters and the hour meter difference. |
| Created by and Changed by | Who entered it and who last changed it, with date and time. |
The fields at the bottom (Unit price, Total value, Balance, Prev. hour meter/KM, Prev. hour meter diff. and Consumption) are calculated: they're a check at entry time. That's where you see the balance left at the fuel station and whether that machine's consumption was out of the ordinary.
To enter several fuelings in a row, use Save + new: it saves and opens the next one blank, which is how the fuel attendant works.
🚜 Link fueling to the work order
Below the hour meter, the Field W.O. Date field lists that machine's work orders, with 7 days before/after the fueling or All. When you check the work orders, the fuel is split among them in proportion to the area worked. That's how diesel reaches the field's cost instead of sitting in a generic cost center.
⛽ How upCampo calculates consumption
Consumption isn't typed in: it comes from comparing with the previous fueling of that same fleet item. When you pick the fleet item and enter the reading, the system looks up its last fueling with an earlier date, brings that entry's reading into the Prev. hour meter/KM field (previous hour meter or mileage) and calculates the Prev. hour meter diff., the hour meter difference from the previous fueling, that is, how much the machine worked or ran between one tank and the next.
From there, the calculation depends on the Counter type in the fleet record, and the result comes out in different units:
| Machine | Previous reading | Current reading | Difference | Liters | Consumption |
|---|---|---|---|---|---|
| Tractor (Hour meter) | 1,240 h | 1,268 h | 28 h | 420 L | 15.00 L/h |
| Truck (Odometer) | 84,300 km | 84,910 km | 610 km | 210 L | 2.90 km/L |
Two practical consequences: skipping a fueling distorts the next one (the difference piles up the hours of both, with the liters of only one), and so does entering out of chronological order, because the comparison is always with the most recent entry with an earlier date. Both show up as odd consumption in the list before they show up in the monthly report.
🛡 The checks the system runs
These are warnings meant to catch typing errors on the spot, not three months later in the report:
- Liters above the fleet item's tank capacity
- Hour meter difference above the limit set on the fleet item
- Hour meter entered lower than or equal to the previous fueling's
- There's already an entry for the same pump and location with a later date
- End reading lower than or equal to the start reading; zero liters; negative total value
Who can or can't change the start reading is set in the user preferences; by default, the operator can't.
🖥 The list
The grid shows Number, Ticket, Date, Storage location/station, Fleet/Equipment, Consumption, Start read., End read., Hour meter/KM, Liters, Unit price, Total value and Cost Center, with search on each column. The Ticket, Employee and Reference/Integration ID columns appear depending on the company settings.
The filter is by period (Start Date (from) and End Date (to)) and, next to it, the system shows the total of what's on screen: summed Liters and the Qty of entries. It's the quick check of the day or week against what came out of the pump. The top also has View fleet cost, View inventory and the Reports ▼ menu.
📱 Fueling in the app
In the field, the entry is made in the upCampo app, in the Fueling menu. The list shows the period's fuelings (it starts at Last 7 days) with filters for storage location, dates and fleet item, and the + button opens a new entry.
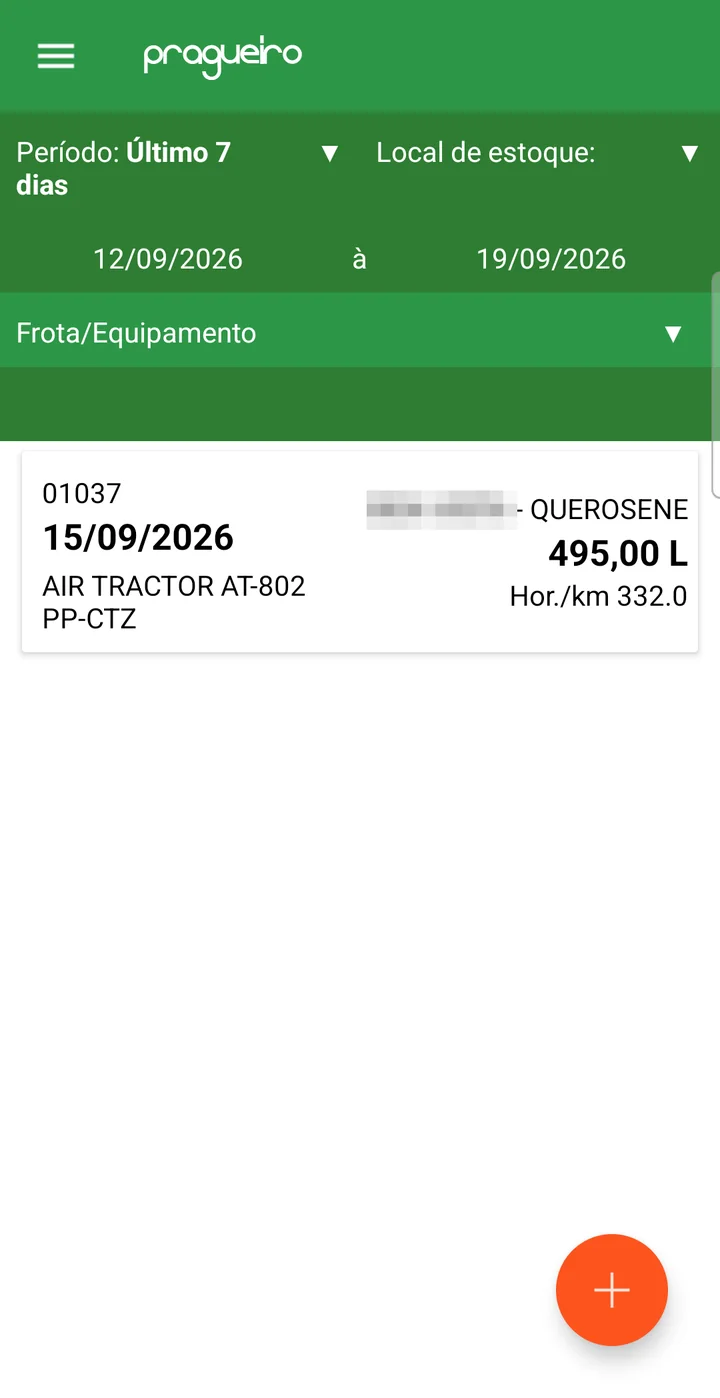
The four types in the app
The Type is at the top of the form and changes the fields as described in the four-types table above:
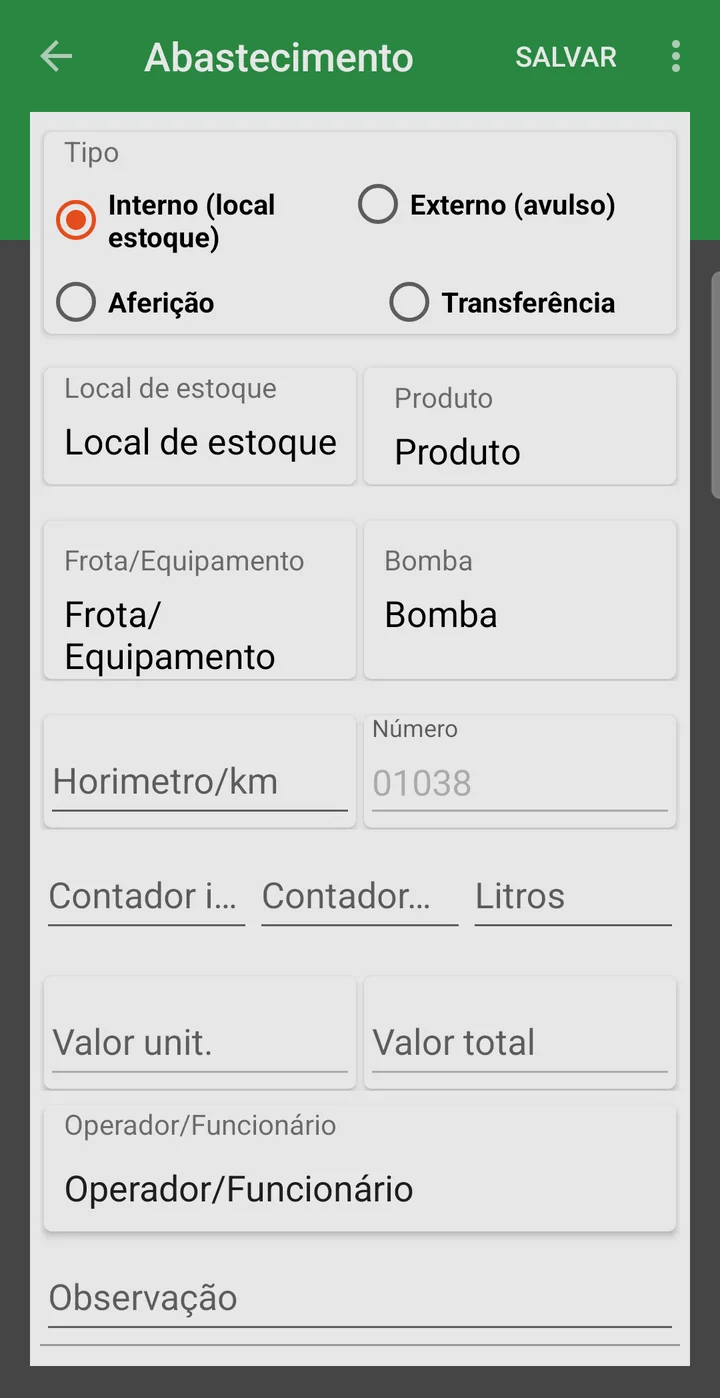
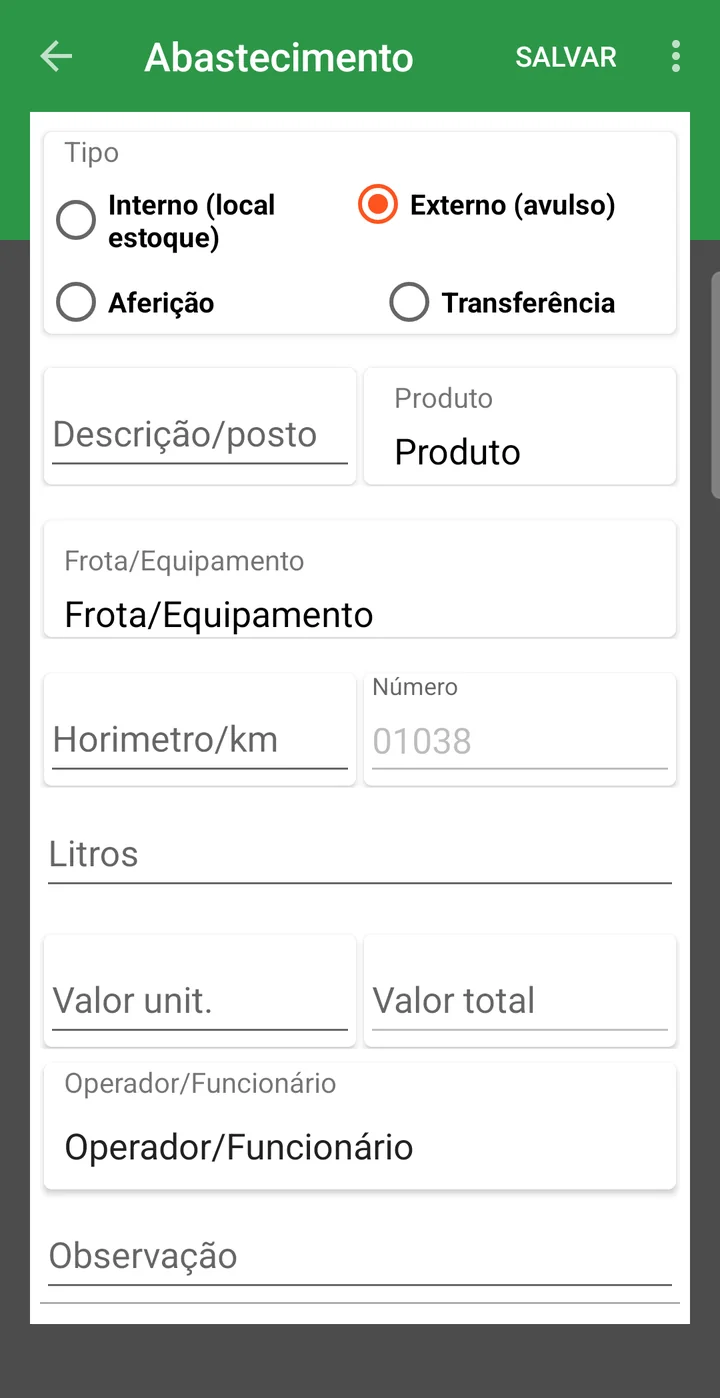
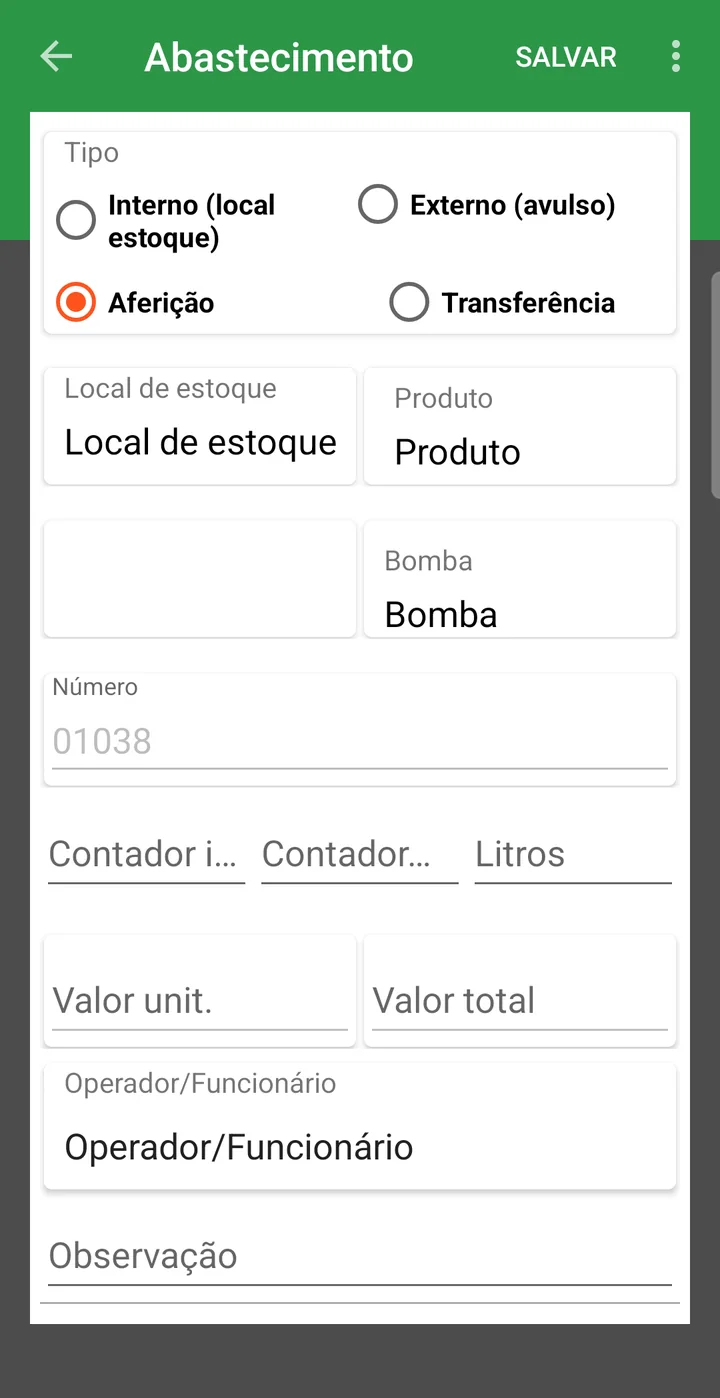
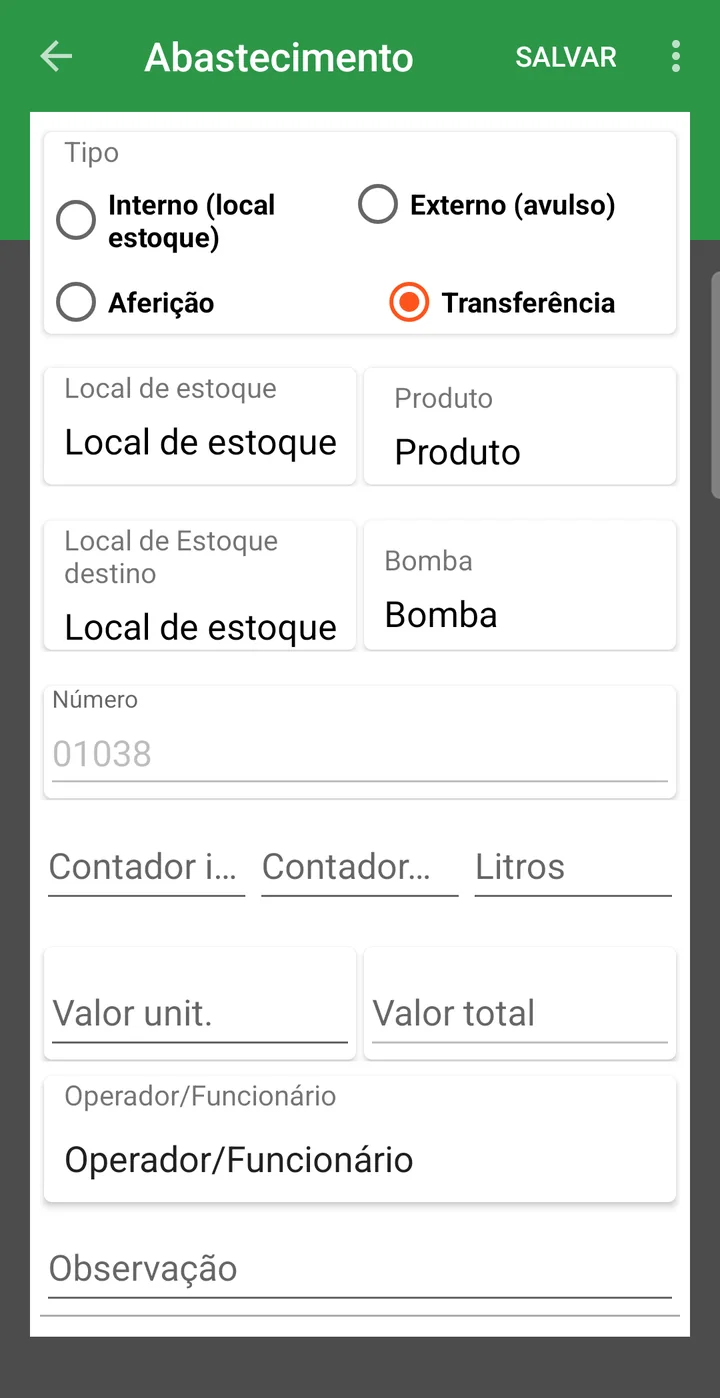
Enter an internal fueling
- Tap + and leave the type as Internal (storage location).
- Choose the Fleet/Equipment and the Storage location: each field opens a list to choose from.
- Enter the Hour meter/km and the Liters, and choose the Operator/Employee.
- Tap SAVE.
When you pick the location, the app fills in the Product (with the balance in liters), the Pump, the Start counter and the Unit price on its own; once the liters are typed in, it calculates the End counter and the Total value.
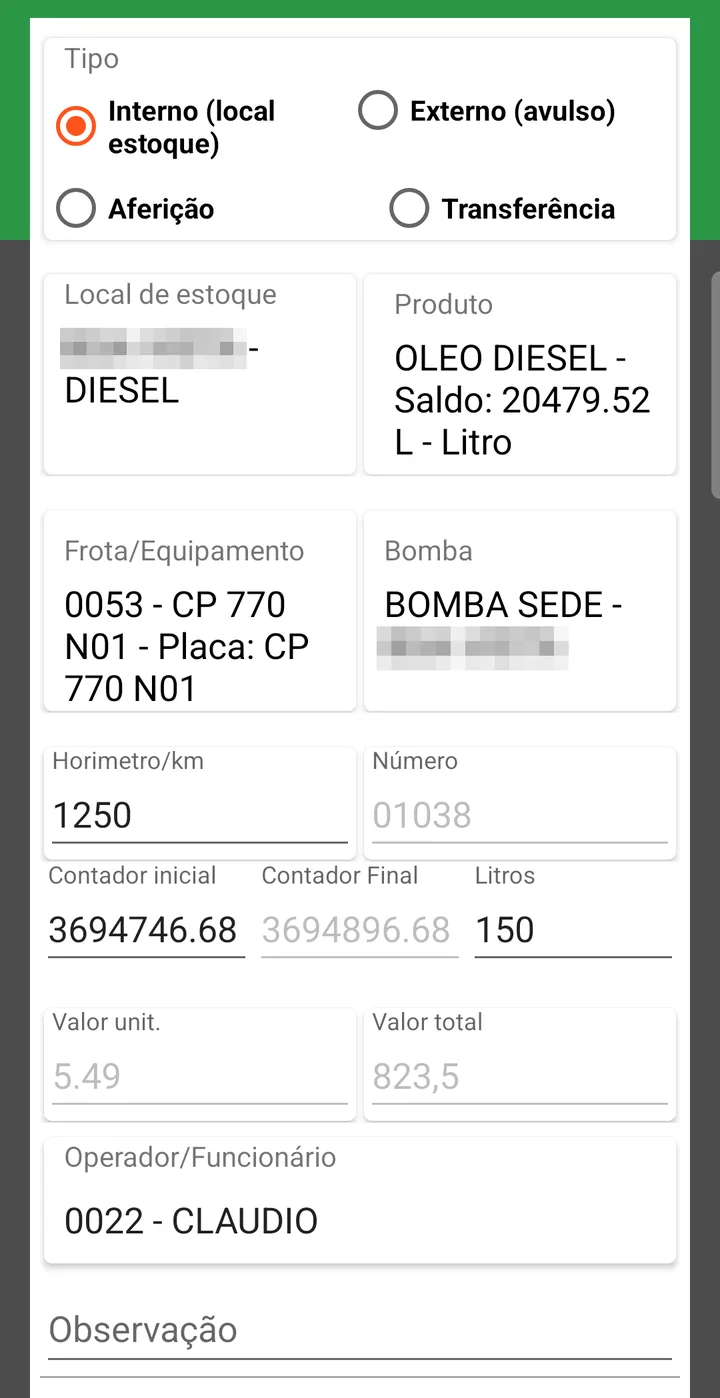
- Fuel station balance always matching the tank
- Consumption per machine measured, not estimated: you can spot the machine that started burning too much
- Hour meter updated every day, which makes preventive maintenance work
- Diesel charged to the field through the work order
- Typing errors caught at entry time
❓ Frequently asked questions
How do I enter fueling done at a gas station in town?
Choose the External (one-off) type. In this mode you enter the station description, the product, the liters and the unit price; there's no pump or counter reading, because the fuel didn't come out of the farm's inventory.
The pump reads differently from what's in the tank. How do I fix it?
Use an entry of type Calibration. It adjusts the measurement without involving a machine or hour meter, because what's being corrected is the fuel, not a fleet item's fueling.
The fuel truck filled up at the main tank. Is that a fueling?
It's a Transfer: enter the source location and the destination storage location. The fuel leaves one balance and goes into the other; source and destination can't be the same location.
The system warned that the liters exceed the tank capacity. Is that wrong?
Probably yes: check the pump reading and the liters typed in. The limit comes from the
Tank capacity field in the fleet record; if it's the registered capacity that's out of date, fix it
in Fleet > Fleet / Facility.
The fleet item doesn't show up in the fueling list.
Show in Fueling needs to be checked in its record. Only machines with that setting make it into the fueling screen's list.
Why does the system insist on the hour meter?
Because the fueling reading is what keeps the machine's counter up to date, and it's what the calculation of how much is left until the next service in Fleet x Maintenance Plans comes from. Without the hour meter, preventive maintenance stops working.
How do I get the diesel into the field's cost?
In the Field W.O. Date field, check the machine's work orders for the period. The fuel is split among them according to the area worked, and the cost reaches the field.
The pump start reading is locked. How do I correct it?
It's locked on purpose: it comes from the end reading of that pump's previous fueling, and that's what makes sure one entry picks up where the other left off with no gaps. Changing it requires a permission in the user preferences. If the number is wrong, the problem is almost always the previous entry: correct that one.
How do I check what came out of the pump today against what was entered?
In the list, enter the period in Start Date and End Date: next to the fields the system shows the summed Liters and the Qty of entries for that range. It's the direct check against the pump's physical reading.
📘 Screen: Maintenance Work Order
The maintenance work order is the shop's work order, not the field's. It covers the repair of the tractor that broke down in the middle of planting, the combine's 500-hour service, the trailer's tire change, the fix on the pivot's generator. In upCampo, it's the document that keeps what happened to the machine, who fixed it, how many hours it took, which parts came out of inventory and how much it cost, and the sum of these work orders makes up each piece of equipment's maintenance cost.
There are two worlds on one screen: corrective, which starts from a breakdown, and preventive, which starts from a plan coming due. The difference between a farm that is always putting out fires and one that schedules downtime lies in the ratio between the two.
📍 Location in the system
Menu: Fleet > Maintenance Work Order
🧩 Main function
Record and track corrective and preventive maintenance on the fleet, with activities, labor, requisitioned parts and cost, from opening to finishing.
🖥 The list
The grid lists Name, UP Number, Date, Status, Fleet / Facility, Type, Trigger Hr/KM, Finishing Hour meter/KM, W.O. No., Description, Department, Maintenance Group and Service. The filters at the top are the period (start and end date, required), the Status (All / Pending / In progress / Paused / Finished) and the Type (All / Corrective Maintenance / Preventive Maintenance). Next to them, Qty shows how many work orders the list is bringing: these are work orders, not rows; a "3 items" group counts as three.
An open work order always shows up, whatever its date. Pending, In progress, Working and Paused come into the list even when the work order's date is outside the chosen period; the period only limits finished ones. That way, the work order paused for months waiting for a part doesn't vanish from the list just because its date fell behind.
Each column has a search box in its header. In the Status column, typing "over" brings up only the overdue work orders (see below).
The Status column is clickable. One click on the status changes the work order's progress right away, without opening the form:
| Current status | One click takes it to |
|---|---|
| Pending (or Overdue) | In progress |
| Paused | In progress |
| In progress or Working | Paused |
| Finished | doesn't change: the status isn't clickable |
Hovering over the status shows "Click to change to …" with the next status; with the keyboard, the Enter key does the same. The change saves only the status and who changed it; no date on the work order or the maintenance plan changes, and it reaches the app through normal sync. Pausing from the web portal doesn't ask for the downtime reason: that's still done in the app. In rows that group several work orders ("3 items"), the group's status is informational only; the click works on each work order, inside the group.
The view switches between Standard (the list) and Dashboard (the dashboards; see The dashboards, further down). Switching between them doesn't reload anything: the list comes back as it was.
🎨 The colored date and the grouped rows
Two things in the list save time and aren't obvious the first time:
The date and the status come in a colored tag, and the color is the work order's status:
| Color | Status |
|---|---|
| Solid red | Overdue: pending with its date already past |
| Light red | Pending, still on time |
| Green | In progress or Working |
| Gray | Paused |
| Blue | Finished |
On a crowded screen, the color shows what nobody has touched yet and, among those, what is already past due.
Preventive work orders generated together show up grouped. When a plan comes due and the system generates several work orders for the same machine on the same date (air filter change, fuel filter, engine oil), the first column shows "3 items" and the arrow opens the work orders one by one, each with its own UP Number and description. The group's status is the most urgent in the set: one pending is enough for the group to show as pending, and one overdue is enough for it to show as Overdue. Corrective work orders aren't grouped: each breakdown is its own case.
🔁 The five work order statuses
A maintenance work order goes through five situations. Four of them can be set in the web portal (through the header's Status field or with one click on the list's Status column); one, Working, only appears when it comes from the mechanic's time entry in the app, which also sets Paused and Finished. Knowing who writes each one avoids the shop's most common question: "why did this work order change status if nobody touched it in the portal?".
| Status | What it means | Who sets it |
|---|---|---|
| Pending | The work order exists and nobody has started. | Web portal, when the work order is created |
| In progress | The work order has started: there's already been a time, activity or part requisition entry, or someone marked the start. | The system, on its own, at the first entry; or the portal, by clicking the Status column or through the Status field |
| Working | The mechanic has the clock running right now. | App, when starting the time entry |
| Paused | The mechanic stopped the job; the downtime reason is recorded when the pause is done in the app. | App, when pausing the time entry; or the portal, by clicking the Status column or through the Status field |
| Finished | Job done and cost closed. | Web portal or app, when finishing |
The change to In progress is automatic. As soon as the work order gets its first entry (time, activity or requisition), it stops being Pending. It lets you answer at a glance what has gotten off the ground and what is still sitting and waiting. A work order that is already Working, Paused or Finished isn't changed: the mechanic's clock is more specific and stays in charge.
"Overdue" isn't a sixth status. It's how the list shows a Pending work order whose date has already passed: it appears in the Status column (in solid red), in that column's search and on the group row that has any overdue work order. In the database the work order is still Pending, a click takes it to In progress like any pending one, and the Status filter at the top has no Overdue option: to find them, type "over" in the Status column search.
In the list filter, "In progress" also brings work orders that are Working. They're the same state under different names (one written by the portal, the other by the app), and that's why they appear together. Paused has its own filter, because there the question is usually a different one: what stopped halfway and why.
🔀 Corrective or preventive
| Type | When it applies | What changes |
|---|---|---|
| Corrective Maintenance | It broke, leaked, stopped. | The Trigger Hr/KM is typed in: it's the machine's reading at the moment of the problem. |
| Preventive Maintenance | The machine's plan came due. | The Maintenance Plan, Second-to-last occurrence, Recurrence and Anticipate appear, all locked, because they come from the link between the fleet item and the plan. The Trigger Hr/KM is also locked. |
The Service location says whether the repair is Internal (the farm's shop) or External (a third-party shop).
📝 Header fields
| Field | Description |
|---|---|
| Status | To choose from: Pending, In progress, Paused or Finished. Working isn't among the options: it only appears when it comes from the time entry in the app. See The five work order statuses, below. |
| Code | Required. The work order's number in the system. |
| Work Order No. | The shop's own numbering, when there is one. |
| Date | Required. When the work order was opened. |
| Maintenance Group | The nature of the job: engine, hydraulic, electrical. |
| Responsible department | Who does the work, coming from Department, Maintenance Group & Symptom. |
| Fleet, Equipment and Facilities | Required. The machine or structure to be repaired. |
| Trigger Hr/KM | Required when the fleet item has a counter: the reading that originated the work order. |
| Maintenance Plan | For preventive work orders, the plan being carried out. The Show only fleet item's plans checkbox narrows the list to that machine's plans. |
| Description | Required. What needs to be done. |
| Finishing Hour meter/KM and Finishing Date | Filled in when the work order is closed. |
| Cost Center | Where the job's cost goes. |
| Notes | Details that help whoever will do the work. |
| Financial | Collapsed block with the Total value $. Who fills it in (you or the system) depends on the Maintenance W.O. cost type setting; see below. |
| Final repair summary | Filled in at finishing: what was done, in a few lines, to become the machine's history. |
🗂 Tabs
| Tab | What goes in it |
|---|---|
| Products & Service - Requisition | The work order's parts and services, through
Requisition. The
+ New - Requisition button opens a requisition already tied to the work order. The grid shows
Sequence, Code (with the status as a tag), Date, Requester, Product & Service,
Quantity (with how much is still to be fulfilled), Storage Location, Unit, Qty fulfilled, Qty
Quote, Qty
Order, Unit price and Total
Value. At the top of the tab there's a Requisition / Trail selector: under Requisition you get the grid described above; under Trail the same information becomes a linked tree (requisition → item → quote → order → invoice), with the part handed out by the parts room showing as Inventory issue. It's where you find out where the part got stuck, without opening one screen after another. The work order doesn't appear as a node because it's already the open screen. The trail is explained in full in the Requisition article, and follows the same cost allocation rules described further down. |
| Activities | The work order's tasks: Description, Activity start date, Expected activity end, Responsible, Department (required), the reported Symptom (in an expandable block) and the Type: Internal or External. Each activity has its own Finish button, and that's what the work order requires at closing. |
| Labor (hours) | Who worked and how much: Employee/Operator, the Activity the hours belong to, Start date, Start time, End date and End time, with a More details block for the rest. The grid totals the Total hours per entry, next to employee, group and type. The system rejects negative hours and entries over 24 hours. |
| Internal info | Traceability: the user who opened, changed and finished it and, when applicable, the fueling or checklist that generated the work order. |
💰 How the maintenance cost is built
The header's Financial block has a single field, the Total value $. What changes
is who fills it in, and that's decided once, for the whole farm, in the
Maintenance W.O. cost type setting, under
File > Company/Crop
Settings:
| Maintenance W.O. cost type | Who fills in the Total value | Who it's for |
|---|---|---|
| Manual | You type it in, when finishing the work order. | Farms that don't enter parts and hours inside the work order, or that work with an outside shop at a fixed price. |
| Calculated automatically | The system adds it up on its own, with each entry. | Farms that record hours and requisition parts through the work order: the value is built from what was entered. |
How the value is added up in automatic mode
In Calculated automatically, the Total value adds three sources and updates with every entry; there's no need to trigger a recalculation:
A combine's 500-hour service:
| Source | Item | Calculation | Value |
|---|---|---|---|
| Labor | Mechanic | 6 h × R$ 45.00 | R$ 270.00 |
| Helper | 6 h × R$ 28.00 | R$ 168.00 | |
| Material | Engine oil | 40 L × R$ 28.00 | R$ 1,120.00 |
| Oil and air filters | 3 units × R$ 145.00 | R$ 435.00 | |
| Purchase | Seal bought for this work order | inbound invoice | R$ 320.00 |
| Total value | R$ 2,313.00 | ||
The three sources, one by one
Labor: each entry in the Labor (hours) tab has its own Hourly rate. Hours recorded without an hourly rate count as zero: they show up in the work order's time, but not in the cost.
Material: the requisition items that come out of the farm's inventory. It's the part that was already in the parts room: the requisition deducts the balance and the value goes into the work order.
Purchase: the part that wasn't in stock and was bought for this work order. Here the value isn't the requisition's, but the invoice that arrived: the system follows the path requisition → quote → purchase order → inventory transaction and brings in the actual amount paid. Until the invoice arrives, that portion isn't in the cost yet.
What lets external and internal maintenance live side by side is each activity's Type field: Internal or External. And the header's Cost Center is what decides where that expense will show up in financials.
💸 Generate financial: turn the work order into an account payable
Knowing how much the maintenance cost is one thing; having the account payable recorded is another. That's what the Generate financial button, in the work order's Financial section, solves: it creates the bill in Accounts Payable from the work order itself, without retyping anything. The typical case is the outside shop: the machine was repaired, the work order is closed with its value, and now there's an invoice to pay.
The button opens the Generate Financial window, with what the bill needs:
| Field | Description |
|---|---|
| Entity | Who will be paid: the shop, the dealership, the parts supplier. Required. |
| Management Account/Category | The expense classification. Required. |
| Cost Center | Where the expense will weigh. Optional: without it, the bill has no cost center. |
| Entry Date | The bill's date. Defaults to today. |
| First installment | The due date of the first one. Defaults to today plus 30 days. |
| No. of Installments | How many installments the invoice was negotiated in. Starts at 1. |
| Days | Every how many days each installment comes due. Starts at 30. |
| Total value | The work order's value, already filled in and not editable: it's what will be split among the installments. |
Below the form, the window shows the Installments that will be created, with Installment, Due Date and Value. The list is rebuilt with each change to the first installment, the quantity or the days, and the last installment takes the remainder of the division so the total matches the work order's value. Once confirmed with Generate, the accounts payable bill is created, already linked to the work order.
The bill is created as Accounts PAYABLE, with the description Maintenance work order followed by the work order's code, which makes it clear where it came from when someone finds it in the financial list.
⏩ Advance, generate and finish plan execution
Two buttons on the list handle preventive maintenance in batch, without opening work order by work order:
| Button | What it does |
|---|---|
| Advance/generate plan exec. | Pick the fleet item and the plans you want to move up, enter hour meter/KM and date, and generate the execution: useful when the machine is going to stop anyway and it's worth taking the chance to do the service early. |
| Finish plan exec. | Select the fleet item and the plans carried out and finish the execution all at once. |
✔️ Finish and reopen
The Finish button opens the Finish W.O. window, which warns in plain words: "finish the W.O. only when all activities have been completed". In it you enter:
| Field | Description |
|---|---|
| Finishing Date | Defaults to today. |
| Hour meter/KM | The machine's reading at closing. Required in the situations in the table just below. |
| Work Order No. | The shop's numbering, if it hasn't been entered yet. |
| Final repair summary | What was done, in a few lines: it becomes the machine's quick history. |
| Total value | How much the job cost. |
Confirm with Yes, or with Finish + New, which closes it and opens the next work order right away, for anyone closing several at once.
Rules worth knowing:
- The work order must be saved before finishing
- It only finishes when all activities are completed: if there's a pending activity, the system refuses
- A finished work order can't be changed. To correct it, use Reopen, which uses the same window
When the Hour meter/KM is required. It only applies to fleet items marked with an hour meter in the
Fleet / Facility record; for the others, it's
never required. For those machines, it depends on the work order type and on the
Require hour meter to finish maint. W.O. option, under
File > Company/Crop
Settings (Fleet block):
| Work order type | Option unchecked (default) | Option checked |
|---|---|---|
| Preventive Maintenance | Required | Required |
| Corrective Maintenance | Not required | Required |
If the reading is missing, finishing is blocked with the message "Fleet item has an hour meter, it is required!". Finish plan exec., which closes preventive maintenance in batch, has always asked for hour meter/KM, with or without the option. The option applies per farm and takes effect after switching farms or logging into the portal again.
📊 The dashboards: Maintenance overview and Workshop now
In the Dashboard view, the first two options are the screen's own dashboards, built from the data of the farm in use: Maintenance overview, which opens by default, and Workshop now. After them come the dashboards registered in Report and enabled for the user, as before.
These two dashboards don't use the Filters button or the auto-refresh countdown of the other dashboards; their bar disappears. Each has its own Refresh button and shows, at the top, the farm and the time of the last load ("Farm · updated at 14:32"). The dashboard reloads itself when you switch farms, when the load is more than 10 minutes old or when a work order's status was changed by clicking the Status column. Saving or finishing a work order from the form doesn't reload the dashboard: in that case, use Refresh.
Every grid in both dashboards has search on every column.
Maintenance overview
The manager's view: how much maintenance cost, what's open and which services are coming due. Everything from the last 12 months.
At the top, Equipment types sets which types count. It's for taking out what isn't a machine (headquarters, inputs, administrative allocations), which tends to inflate spending and hide the real fleet. The choice applies to the whole screen until you leave the portal.
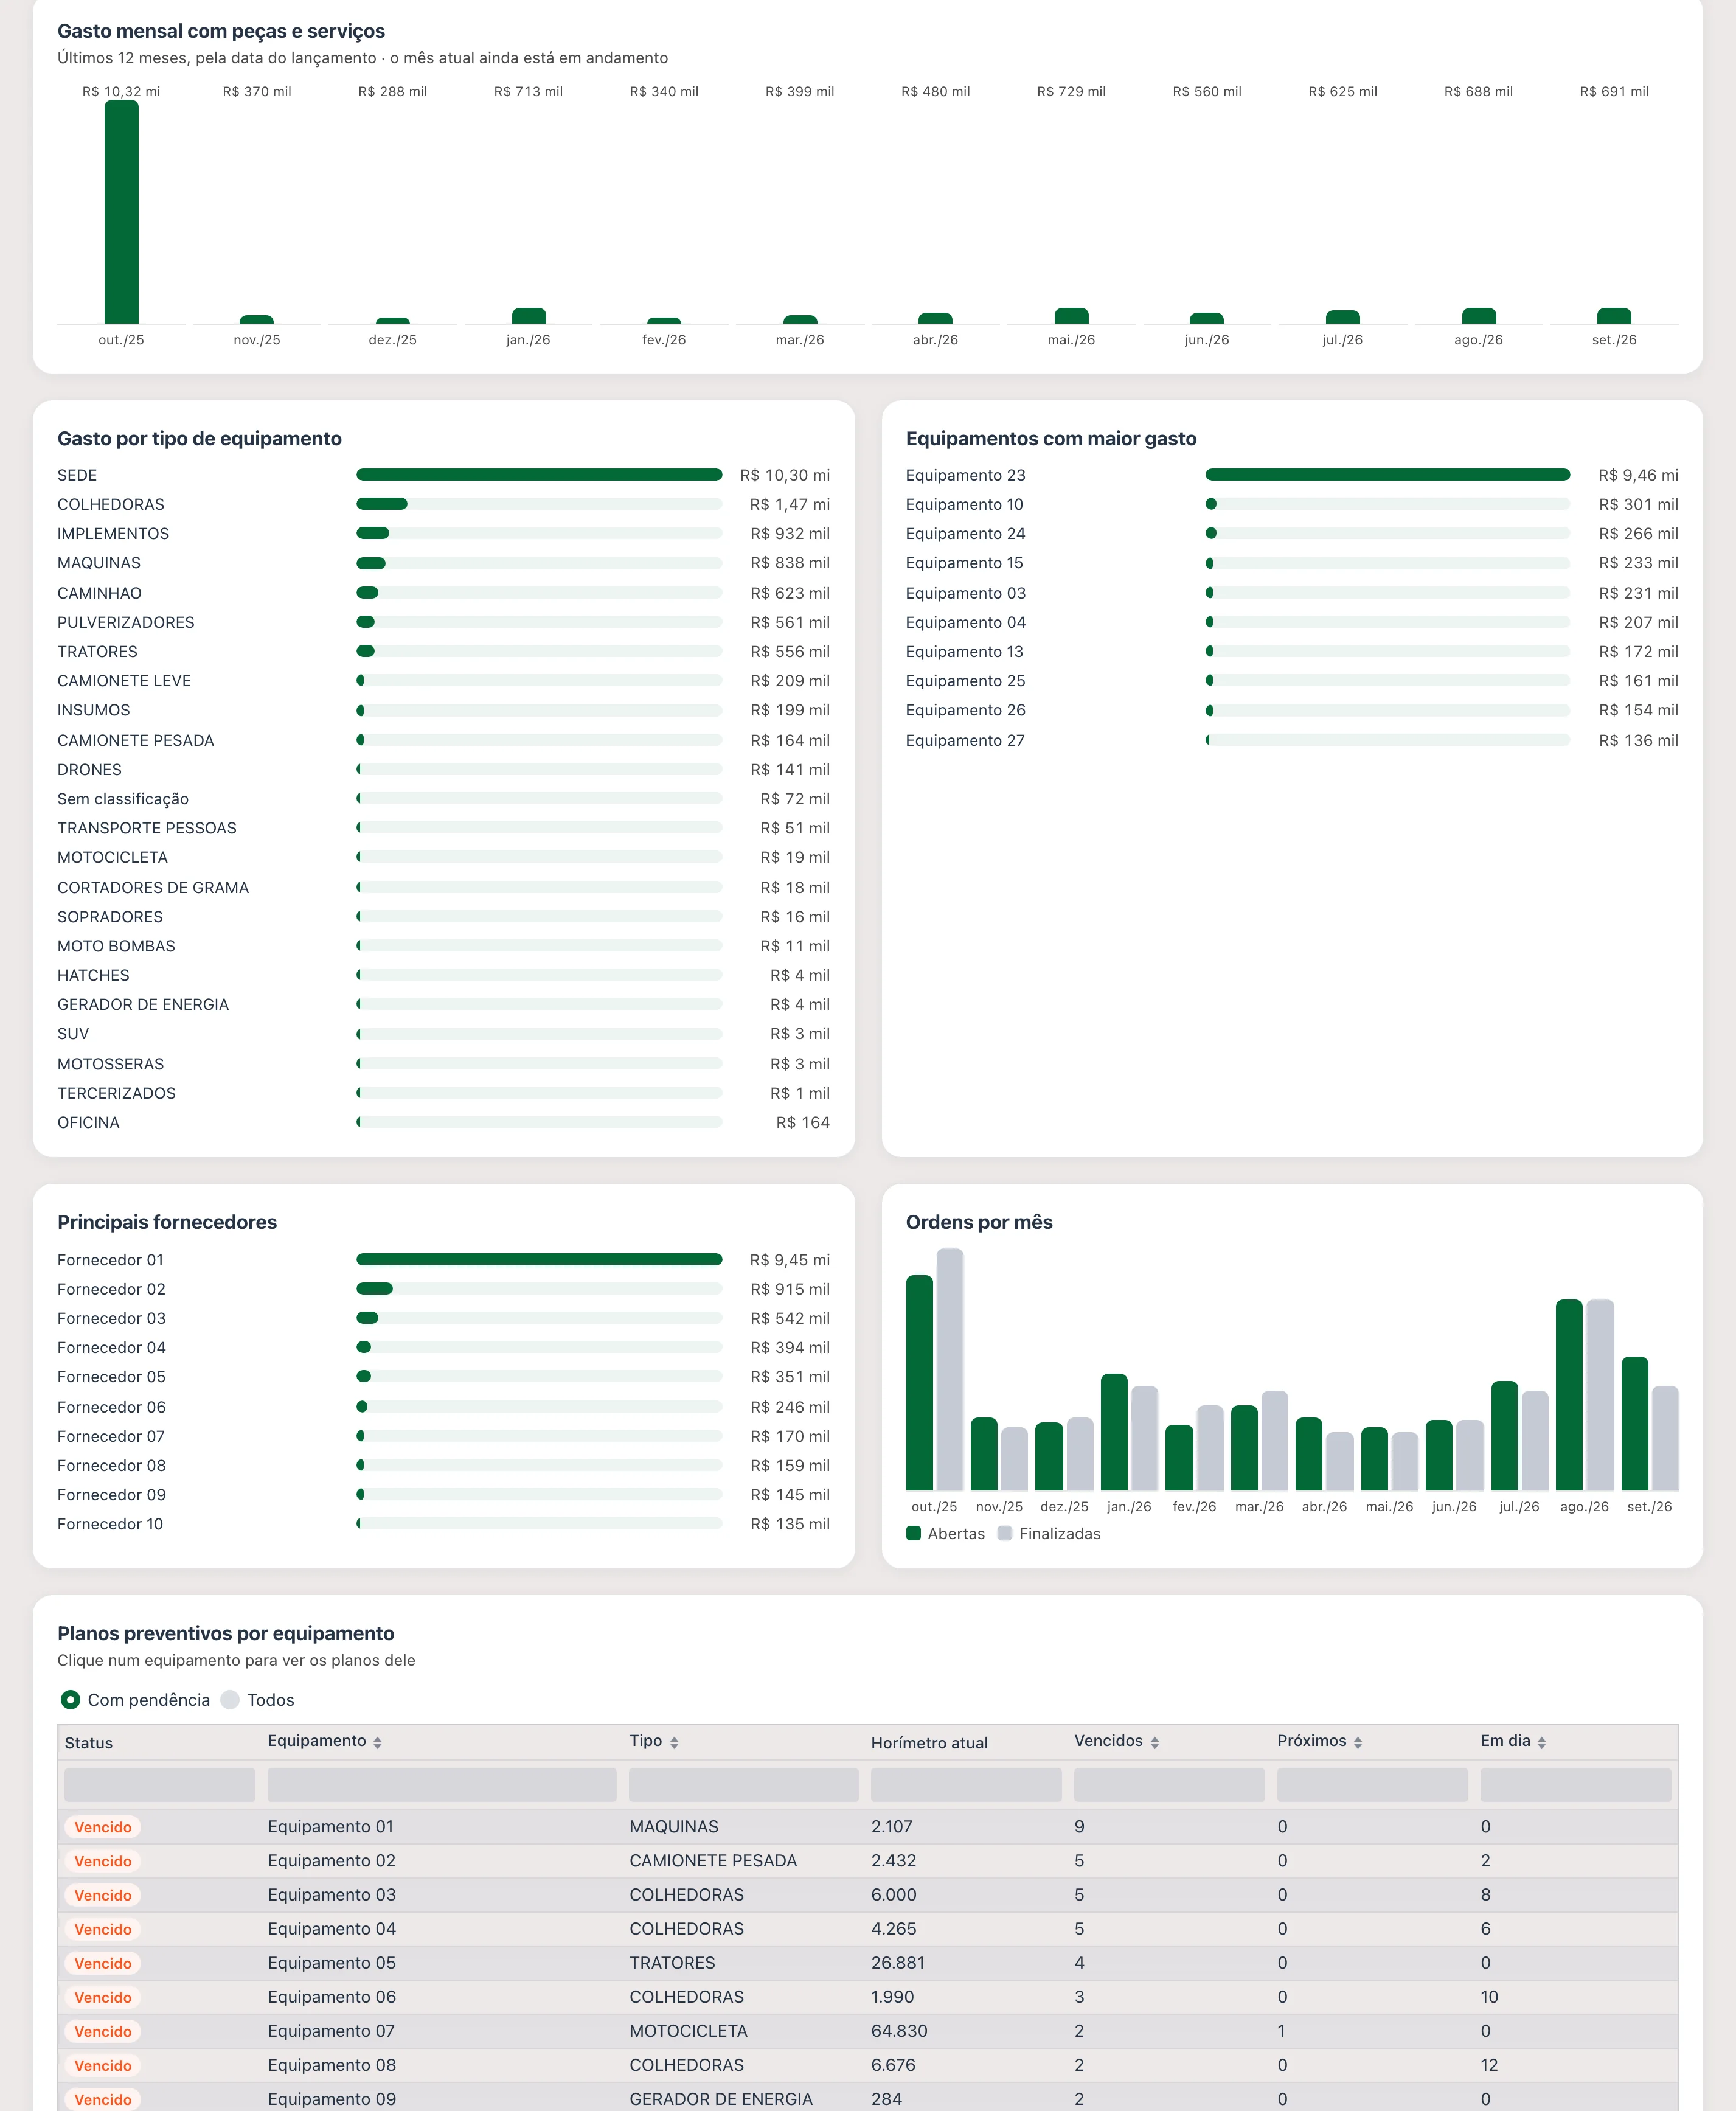
| Card | What it shows |
|---|---|
| Open work orders | How many are pending, in progress and paused, highlighting those open for more than 30 days. |
| Overdue plans | How many preventive plans are overdue and on how many pieces of equipment, highlighting those that don't have a W.O. open yet. |
| Coming due | Plans that will come due soon. |
| Parts and services (12 months) | Spending for the period, with the average ticket per entry. |
| Finished work orders (12 months) | How many were closed, with the average days to finish. |
| Type with highest spending | The equipment type that consumed the most, with its share of the total. |
Below the cards come the blocks Monthly spending on parts and services, Spending by equipment type, Equipment with highest spending (top 10), Top suppliers (top 10), Work orders per month (opened × finished), Preventive plans by equipment and Longest-open work orders (the 15 oldest, flagged Overdue when applicable). In Preventive plans by equipment, the filter switches between With pending items and All, and clicking a piece of equipment opens its plans with the last one, the next one, how much is left and whether there's an open W.O.
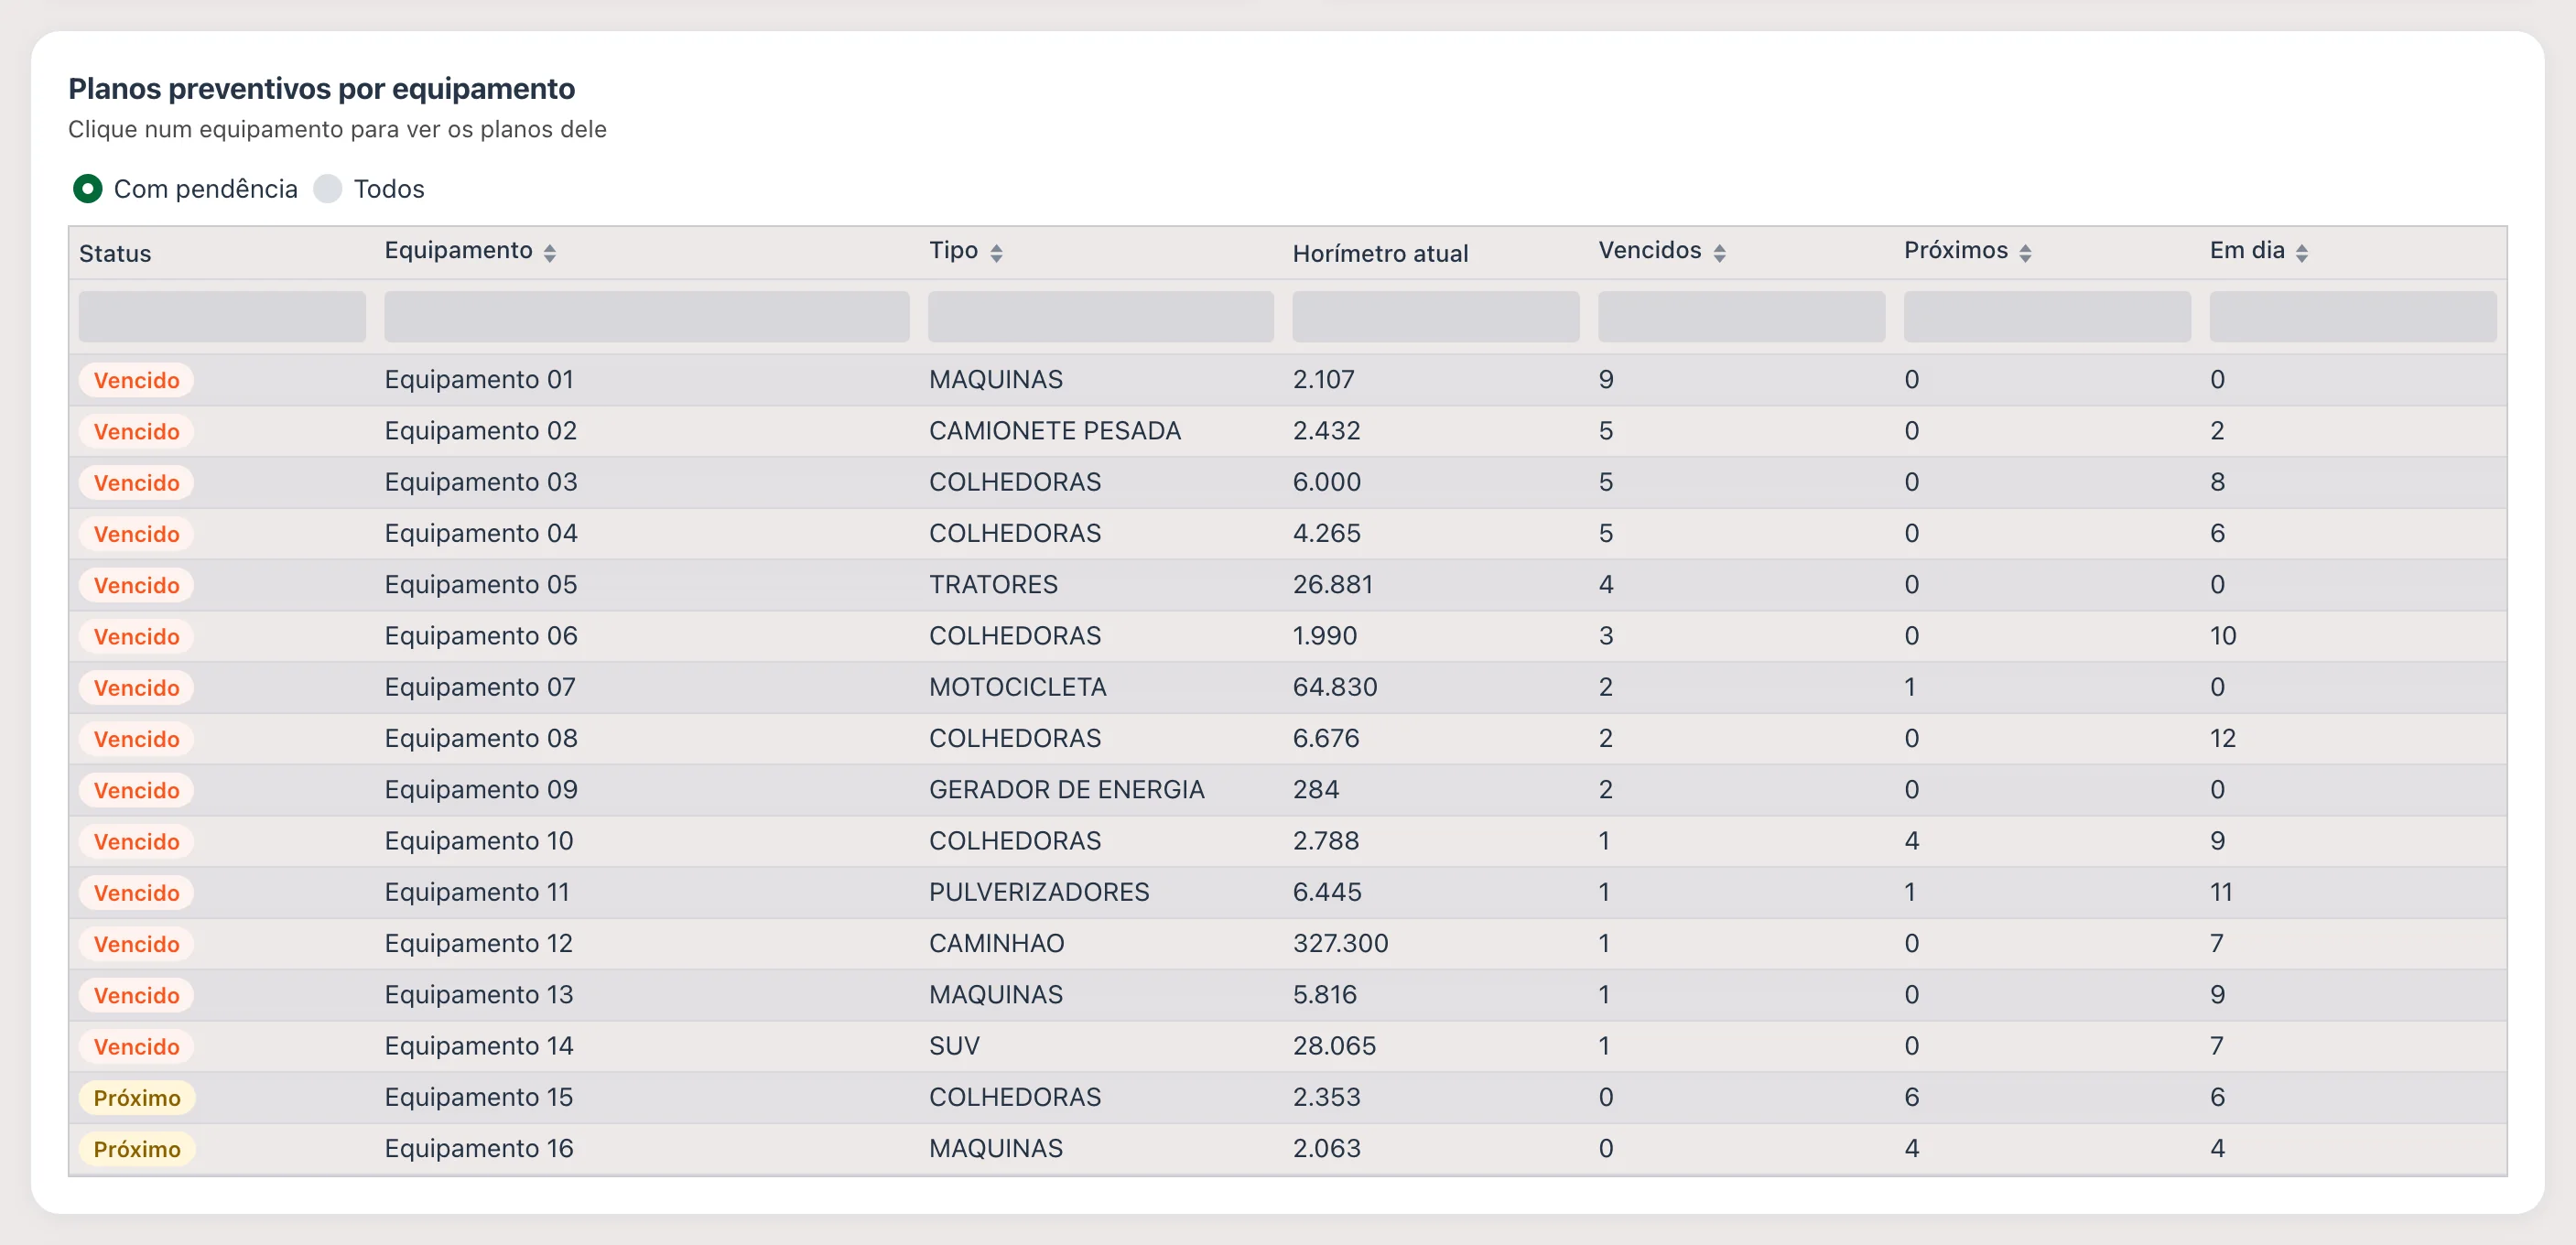
How the dashboard counts:
- Spending is what was entered for parts and services on owned equipment, by entry date. Fueling isn't included, and entries with a future date are left out.
- Overdue plan is one that has passed its next hour meter/km reading or next date. Coming due is one within 10% of the recurrence or 7 days of coming due. It's the same rule UPí uses to answer questions about plans.
Workshop now
The shop foreman's view: what's sitting in there right now and who's working on what. Work orders In progress, Working or Paused count as in the shop; the hours come from the mechanics' time entries.
At the top, Hours period picks 7, 30 or 90 days for the hours blocks; at 90 days, the chart switches to weekly.
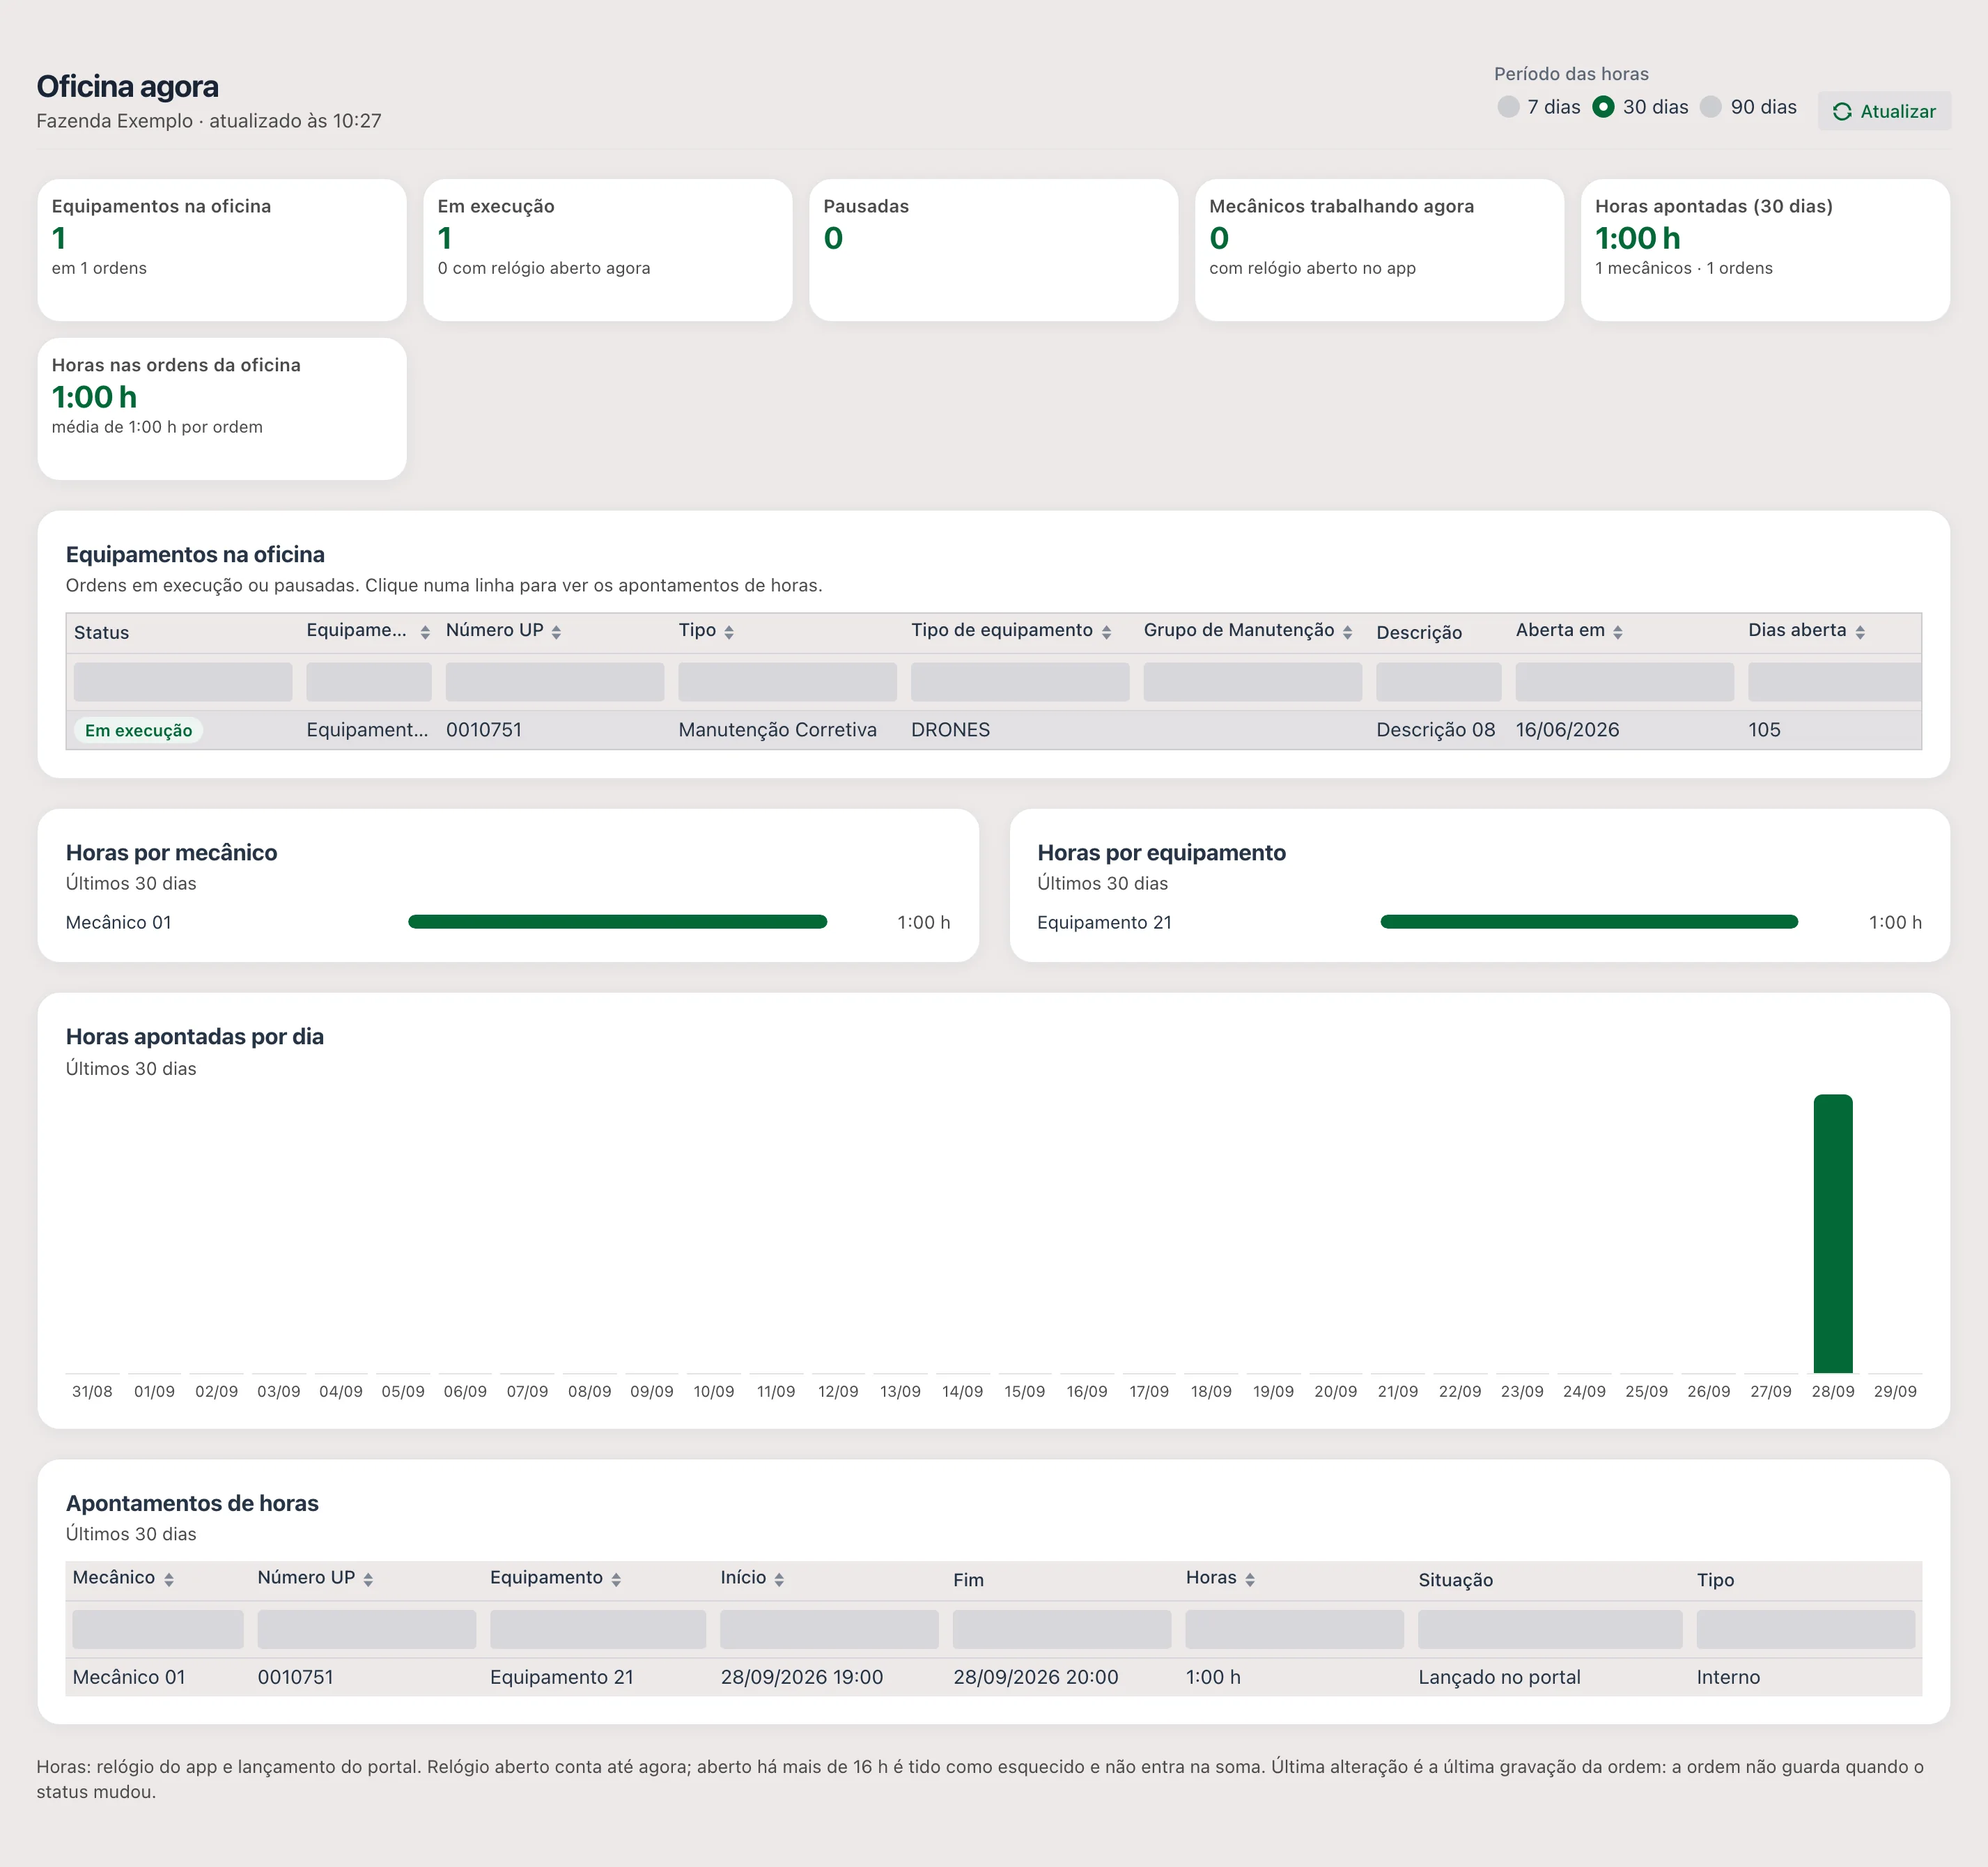
| Card | What it shows |
|---|---|
| Equipment in the shop | How many machines are in the shop, and on how many work orders. |
| In progress | How many work orders are in progress, and how many with a clock running right now. |
| Paused | How many are paused, the most common downtime reason and how many have been stopped for more than 7 days. |
| Mechanics working now | Who has a clock running in the app, highlighting forgotten clocks. |
| Hours recorded (N days) | Hours for the chosen period, with how many mechanics and how many work orders. |
| Hours on shop work orders | Hours already recorded on the work orders currently in the shop, with the average per work order. |
The blocks are Equipment in the shop (clicking a row opens that work order's time entries), Hours by mechanic, Hours by equipment, Hours recorded per day and Time entries.
How the dashboard counts:
- Hours from the app's clock and hours entered in the portal are added together.
- An open clock counts up to now. A clock open for more than 16 hours is considered forgotten: it's left out of the total and shows as "Clock left open".
- The Last change column is the last time the work order was saved; the work order doesn't store the moment its status changed. It works as an approximation of "stopped since".
📱 The two QR codes
| Where it is | What it opens |
|---|---|
| QR code button, on this screen's list | Opens the branch's Maintenance Work Order. It's the QR to hang on the shop wall or the notice board. |
| QR code tab of the Fleet / Facility record | Opens the work order for that machine. Stuck in the cab, it lets the operator record the problem the moment it happens. |
In both cases the Save QR button downloads the image for printing.
- Complete history of each machine: what broke, when and how much it cost
- Parts leaving inventory through the requisition, not on a scrap of paper
- Labor measured in hours, by mechanic and by activity
- Preventive and corrective kept apart, which shows whether the plan is working
- Maintenance cost per machine and per cost center
The maintenance work order is the day-to-day of upCampo's fleet and farm maintenance management; the website page shows everything the module covers.
❓ Frequently asked questions
What's the difference between this screen and the field work order?
The Work Order records farm work (planting, spraying, harvest) with field and applied products. The maintenance work order records shop work on the machine: repair, service, part replacement.
The tractor broke down in the middle of the field. How do I open the work order?
In Fleet > Maintenance Work Order, click New, keep the Corrective Maintenance type,
pick the machine, enter the hour meter at the time of the breakdown and describe the problem. Then add the
activities, record the mechanic's hours and requisition the parts through the products tab.
How do I request a part from the parts room from the work order?
In the "Products & Service - Requisition" tab, use the + New - Requisition button. The requisition is created tied to the work order, and the tab then shows how much has been fulfilled, how much is in quoting and how much became a purchase order. To follow the part's path document by document, switch the tab's selector to Trail: it shows, as a tree, the quotes, orders and invoices each item generated.
The system won't let me finish the work order. What's missing?
Usually there's an open activity: the work order only finishes when all activities are completed. Open the Activities tab and use each one's Finish button. Also check that the work order was saved before finishing.
If the message is "Fleet item has an hour meter, it is required!", the Hour meter/KM is missing in the finishing window. It's required when the machine has an hour meter in its record and the work order is preventive or, if the farm checked Require hour meter to finish maint. W.O. in Company/Crop Settings, for corrective ones too. Enter the machine's reading at closing and confirm again.
I finished the wrong work order. Can I fix it?
Yes: use the Reopen button. A finished work order doesn't accept changes, so the fix goes through reopening, adjusting and finishing again.
The machine is going to be down this week. Can I move up the service that would come due later?
Yes. Use Advance/generate plan exec. on the list, select the fleet item and the plans, enter the hour meter/KM and the date, and generate the execution. The plan then counts from this new occurrence.
How do I know how long the shop sat idle waiting for parts?
Through the time entries, using the downtime reasons. They separate time worked from time lost and let you total hours by cause.
Why does the list show "3 items" instead of the work order number?
Because they're several preventive work orders for the same machine, generated on the same date; the system groups them so the list isn't repetitive. Click the arrow next to it to open the group: each work order appears with its own UP Number and description (air filter change, fuel filter, engine oil).
What does a red date in the list mean?
The date's color is the work order's status. Solid red is an Overdue work order: pending with its date already past; light red is Pending still on time. Green is In progress or Working, gray is Paused and blue is Finished. The Status column uses the same colors. For a group of work orders, the group takes the most urgent status of its children.
How do I mark that the shop started or stopped a work order without opening the form?
Click the work order's status in the Status column of the list in
Fleet > Maintenance Work Order. Pending or Paused goes to In progress; In
progress or Working goes to Paused. The change saves only the status (no date on the
work order or plan changes) and reaches the app through normal sync. A finished work order doesn't change with
that click.
What does "Overdue" mean in the Status column?
It's a Pending work order whose date has already passed. It's just how the Maintenance Work Order list shows that work order: in the system it's still Pending, and that's why there's no "Overdue" in the Status filter at the top. To see only overdue ones, type "over" in the Status column search.
Does a work order paused months ago disappear from the list?
No. In the Maintenance Work Order list, every open work order (Pending, In progress, Working or Paused) shows up whatever its date. The period chosen at the top only limits finished work orders.
I finished a work order and the maintenance dashboard didn't change. Why?
The Maintenance overview and Workshop now dashboards don't reload when a work order is saved or finished from the form. Use the dashboard's Refresh button. They reload on their own when you switch farms, when the load is more than 10 minutes old or when a work order's status is changed by clicking the Status column.
How do I record the mechanic's hours on a specific activity?
In the Labor (hours) tab, choose the Employee/Operator and, in the Activities field, the matching activity; enter start and end date and time. The system calculates the total hours. Recording hours by activity is what later tells you where the shop's time went. Also enter the entry's Hourly rate: that's what puts that time into the work order's cost; without it, the hours show up in the time but add zero.
The work order's Total value isn't filling in on its own. Why?
Because the farm is set to Maintenance W.O. cost type = Manual. In this mode you
enter the value when finishing the work order, and the system adds nothing up, even if there are hours
recorded and parts requisitioned. For automatic filling, the option is
Calculated automatically, in File > Company/Crop Settings. The
choice applies to the whole company, not per work order.
I bought the part for the work order and the value didn't show up. Why?
In Calculated automatically mode, a purchased part comes in at the value of the invoice (nota fiscal), not the requisition's: until the inbound inventory transaction is entered, that portion isn't in the cost yet. Also check the item type in the requisition: anything requested "for inventory" becomes parts-room balance and doesn't go into any work order; it only shows up on a work order when it's requisitioned from it.
The shop sent the invoice. How do I enter the maintenance account payable?
With the Generate financial button, in the maintenance work order's Financial section. It opens the Generate Financial window, where you enter the entity, the management account, the cost center, the date, how many installments and every how many days. The window shows the installments before saving and, on confirming, creates the bill in Accounts Payable from the work order's own value.
The Generate financial button disappeared from the work order. Why?
Because this work order has already generated its bill. In place of the button, the Financial section shows Bill generated, with its number and date. One work order generates one bill and only one: that's what keeps the same maintenance from becoming two accounts payable. If the bill came out wrong, correct it in Accounts Payable/Receivable.
📘 Screen: Mobile Item Transfer
A mobile item is something that doesn't leave the farm's assets, but changes hands: the two-way radio, the fire extinguisher, the hydraulic jack, the toolbox, the sensor, the backpack sprayer, the gas cylinder. It isn't consumed like an input: it just moves from the parts room to the tractor, from the tractor to the mechanic, from the mechanic to the outside shop.
This screen records each of those moves: what left, from where and to where. That way, when someone asks "where's the radio from combine 03?", the answer is in the system, not in the memory of whoever handed it over.
📍 Location in the system
Menu: Fleet > Mobile Item Transfer
Once open, the screen is titled just Mobile Item; it's the same screen.
🧩 Main function
Record the change of custody of mobile items between storage locations, fleet items, employees, teams, departments and third parties, keeping the current location of each trackable item.
🖥 The list
The grid shows Code, Date, Product, Lot, Source Type, Source, Destination Type and Destination, with search on each column. At the top, besides New and Reload, there are View current location and View inventory.
📝 Main fields
| Field | Description |
|---|---|
| Date | Day of the hand-over or return. |
| Code | The transfer's number, which comes in sequence. |
| Product | Required. The item being moved around. Only products marked as Mobile Item in the Product & Service record show up here. |
| Lot | Only appears when the chosen product has a lot registered: it's what tells radio 1 apart from radio 2. The list itself has a + NEW option, to register the lot on the spot without leaving the screen. |
| Source Type and Source | Where the item is coming from (see the table below). The source field is required. |
| Destination Type and Destination | Where the item is going, also required. |
| Notes | The item's condition at hand-over, return deadline, whatever was agreed. |
| Created by and Changed by | Who recorded it and who changed it. |
🔀 Source and destination types
The form reads top to bottom: Source Type and its field, and below it Destination Type and its field. Both use the same list of six options, and the screen shows only the field for the chosen type:
| Type | What appears |
|---|---|
| Storage Location | The parts room or warehouse. It's the option that comes preselected. |
| Fleet | The machine that kept the item: the radio that lives in the combine. |
| Entity | A third party: the outside shop that took the tool in for repair. |
| Department | The responsible department, coming from Department, Maintenance Group & Symptom. |
| Employee/Operator | The person responsible for the item. |
| Team | The team that kept the item. |
Nothing stops source and destination from being different types; in fact, that's the most common case: it leaves the storage location and goes to an employee, or it leaves the fleet item and returns to the parts room.
📍 View current location
The View current location button opens a window with two tabs: Mobile Item, which shows where each lot is now (lot, product and location), and Mobile Item Transfer, with the full history: date, product, lot, user, source type, source, destination type and destination. It's the quick answer to "who has this?". There's also the View inventory button, to check balances.
- Every tool, radio or fire extinguisher has a person responsible and a current location
- The history shows where the item has been and who received it last
- An item lent to an outside shop doesn't get lost along the way
- Asset checks no longer depend on memory
❓ Frequently asked questions
The product doesn't show up in the transfer list. Why?
Because it isn't marked as a Mobile Item in the Product & Service record. Check that option and the item starts showing up here.
How do I know who has a particular tool?
Use the View current location button. The Mobile Item tab lists each lot with its current location, and the transfer tab shows the whole path it has taken.
What's the difference between this and product loans?
A loan deals with inputs that leave the farm and come back, changing the inventory balance. Mobile item transfer deals with assets that still belong to the farm and only change who's responsible for them: what changes is the location, not the quantity.
I have five identical radios. How do I tell them apart?
By lot: register one lot per unit (with a serial or asset number) and always transfer by pointing to the lot. The Lot field appears as soon as the chosen product has a lot, and the list itself has the "+ NEW" option to create one without leaving the screen.
⚖️ Quick Guide - Storage (Load Tickets and Contracts)
The Storage module handles what happens at the scale: what comes in after harvest, what goes out sold, and everything that gets weighed along the way. It answers the end-of-season questions: how much each field yielded, how much is in the warehouse and how much is still left to ship on each contract.
The chain is short and worth understanding before you start: the discount table defines how much the grading deducts; the season and the contract say which discounts apply in each case; the inbound load ticket brings the load from the field into inventory; the contract holds the deal and the tax data; and the outbound load ticket ships the load, deducts it from the contract and generates the invoice.
📍 Location in the system
Menu: Storage
🧩 What needs to be ready first
Storage is an end-of-line module: it uses records set up in other menus. Check these four before harvest starts:
- Product & Service — the grain, the lint, the cottonseed. It is what will be moved.
- Storage Location — the silo, the warehouse, the cotton gin. It is where the load goes in and where it comes out.
- Entity — buyers, third-party growers and carriers. To issue invoices, the municipality IBGE code must be filled in.
- Season Planting — without a planted field, there is nowhere for the harvest to come from.
⚙️ Setup in three steps
1. Register the scales
In Scale, add one line for each scale on the farm. For electronic scales, fill in IP and Port: that is what lets the capture buttons read the weight straight from the indicator, with no typing. With no scale registered, load tickets still work — the weights are just typed in.
2. Build the discount tables
In Standard Discount Table, create one table for each combination of type and product: "Moisture Soybean", "Impurity Soybean", "Moisture Corn". Each table is a list of ranges — measured grade and percentage deducted. The system always applies the highest range that is less than or equal to the value typed on the load ticket. If you already have the table in a spreadsheet, upload it all with Import from Excel.
3. Link the tables to the season
The tables only come into play when someone selects them. For harvest, this is done in the harvest parameters tab of the Season, by crop: which discounts exist, which table to use for each one and which will be typed in by hand. Without that parameter, the harvest load ticket will not save — it is the most common error when a season is getting started.
🌾 Harvest coming in
With the combine in the field, the day-to-day screen is the Inbound Load Ticket (Harvest/Purchase): you pick the field, weigh the truck full and empty, type in the grading and the system does the rest. Each saved load ticket:
- posts the final net weight into the storage location;
- adds to the total harvested for the field and the variety, building the season's yield;
- is deducted from the contract, when the load comes in under one.
Two safeguards help the operator: the load ticket number and the authorization number (the source ticket) cannot repeat within the same season, and the list shows in red the date of load tickets that still have only one weight.
🤝 The closed deal
Once the sale is agreed, it becomes a Sales/Purchase Contract: quantity, price, shipping window and which discounts the buyer accepts. If invoices will be issued, this is also where the tax data lives — it is worth spending time on it, because it saves you from retyping tax, series and carrier for every truck. An internal sale, with no invoice, skips this part.
The contract always shows how much has shipped and how much is left, but note: it does not move inventory. Signing a contract does not take anything out of the balance — the outbound load ticket does. That is why a contract can be closed even before the crop comes in.
🚛 Shipping
Each truck that hauls product out is an Outbound Load Ticket (Sale). Once the contract is selected, the product and the storage location come from it; you weigh the truck, and the final net weight is taken out of inventory and deducted from the remaining quantity. Then the Generate NF button builds the outbound invoice in awaiting transmission status, with everything that was on the contract.
One precaution that saves rework: a load ticket with a generated invoice can no longer be edited. To fix a weight, you have to deal with the invoice first — by deleting the movement, if it has not been transmitted yet, or by canceling the invoice, if it has.
🔁 What is not harvest
Fuel coming in, lime, transfers between warehouses, technical shrinkage: all of that goes on the Standalone Load Ticket, which has five types and does not depend on a field or a contract. Watch one detail: on inbound loads, the net weight is the 2nd weight minus the 1st — the order in which the truck went onto the scale, not whether it was loaded or empty.
📊 Where to check the numbers
- View inventory, a button on all three load ticket screens and on the contract: current balance by location and product, without leaving the screen.
- View Contracts, on the inbound and outbound load tickets: every contract in the season with quantity, shipped, remaining and totals at the bottom.
- List totals: kilos, bags and count for the filtered period — your end-of-day close without exporting anything.
- Reports ▼ on each screen, and Print on the form, which prints the load ticket template defined in the company settings.
- Each field's yield builds itself, load by load
- Grading discounts follow a single rule, written once
- Each contract's balance tracks shipments in real time
- When invoices are issued, they come straight from the load ticket, with no retyping
- Everything that crosses the scale is recorded — including what is not harvest
❓ Frequently asked questions
Where do I start setting up storage?
With the discount tables and the season's harvest parameters — in that order. The scale can come later, because load tickets work with typed-in weights. Without the season's harvest parameter, however, the first harvest load ticket will not save.
What is the difference between the Inbound Load Ticket and the Standalone Load Ticket?
The inbound ticket asks for the field, so it feeds the total harvested and the season's yield. The standalone ticket has no link to the crop: it is used for fuel, inputs, transfers between warehouses and technical shrinkage. Both move inventory.
Do I need a contract to sell?
To use the Outbound Load Ticket, yes — the contract supplies the product, storage location, price and the invoice tax data, and the quantity is deducted from it. An outbound load without a contract can be recorded on the Standalone Load Ticket, with the Outbound type, but then no invoice is generated from the load ticket and there is no control of the contracted balance.
The harvest belongs to a third-party grower. Does anything change?
Only the start of the entry: fill in Third-Party Entity on the inbound load ticket and the field list will show only that grower's fields. The rest of the flow — weighing, grading and posting to inventory — is the same.
📘 Screen: Scale
This is where you register the scales on the farm or at the warehouse — the truck scale at the gate, the second scale in the cotton gin yard, the scale at another site. Each one becomes an option when a truck is weighed: whoever fills in a load ticket picks which scale the vehicle went onto.
There are two types. On a manual scale, the operator reads the display and types in the weight. On an electronic/digital scale, the system talks to the scale indicator over the network and brings in the weight by itself — that is what the IP and Port fields are for.
📍 Location in the system
Menu: Storage > Scale
🧩 Main function
Record which scales exist and, for electronic ones, the network address of the indicator, so that the Capture Gross Weight and Capture Tare Weight buttons on the load tickets read the weight straight from the scale, with no typing.
📝 Main fields
| Field | Description |
|---|---|
| Code | Suggested automatically when you click New, always one higher than the highest code already registered (0001, 0002…). It can be changed. |
| Description | Required. This is the name shown to whoever fills in the load ticket — use something the operator can recognize at a glance: "Scale 1 - Gate", "Scale 2 - Cotton Gin". |
| IP | Network address of the scale indicator. Only relevant for electronic scales. |
| Port | Communication port of the indicator. It goes together with the IP: both must be filled in for capture to work. |
| Brand | Equipment brand, for reference only. |
| Model | Equipment model, for reference only. |
| Type | Required. Manual (the weight is typed in) or Electronic/Digital (the weight is captured over the network). |
| Sector | Sector where the scale is located. The list comes from the sectors used on fields — it is the same vocabulary as the Sector screen in the Basic menu. |
| Active | Only active scales can be selected on load tickets. Uncheck it instead of deleting when a scale goes out of use. |
⚖️ How the scale appears on load tickets
On all three load ticket screens — Inbound, Outbound and Standalone — active scales appear as a row of options right above the weights, next to the capture buttons. Good to know:
- If no active scale is registered, the row of options and the two capture buttons disappear from the screen, and weights can only be typed in.
- If you click capture without choosing a scale, the system warns you to select one.
- If the chosen scale has no IP or no Port, the message tells you to fill in those fields here, on the Scale screen.
- The load ticket records which scale took each weight — the gross and the tare can even have been taken on different scales.
- The weight goes onto the load ticket exactly as the scale read it, with no typing errors
- It is recorded which scale each weighing was done on
- If you have more than one scale, you can keep grain weighing separate from cotton weighing
❓ Frequently asked questions
Do I need to register the scale to use load tickets?
No. With no scale registered, load tickets keep working: the scale selection and the capture buttons disappear, and weights are typed in by hand. Registering is only required if you want to pull the weight straight from the indicator.
The capture weight button brings nothing back. What should I check?
Check three things: whether the scale was selected on the load ticket screen, whether it has IP and Port filled in on its record, and whether the indicator is on and reachable on the same network as the computer. Without IP or Port the system warns you right away; if the address is wrong, the reading simply never comes back.
What is the difference between a Manual and an Electronic/Digital scale?
It is how the weight gets onto the load ticket. With manual, the operator reads the display and types it in. With electronic/digital, the system fetches the weight from the indicator's network address. The physical scale can be digital and still be registered as manual, if you are not going to connect it to the system.
Can I delete a scale I no longer use?
It is better to uncheck the Active field. Old load tickets record which scale did each weighing; by deactivating it, the scale disappears from the selection lists without touching that history.
📘 Screen: Standard Discount Table/Grain Harvest
This is the table that turns the grading result into a weight discount. The grader pulls the sample at the scale and measures 15.2% moisture — how much does that deduct? The answer is here: one line for each grade, with the matching discount percentage. The screen title is "Standard Discount Table for Harvest Load Tickets".
Each table applies to one discount type and one product. That is why a typical setup has several: "Moisture Soybean", "Impurity Soybean", "Damaged Soybean", "Moisture Corn", and so on. Once they are ready, they are selected in the harvest parameters tab of the Season and on the Sales/Purchase Contract — and that is where the load ticket picks them up.
📍 Location in the system
Menu: Storage > Standard Discount Table/Grain Harvest
🧩 Main function
Standardize discounts by grade, so that every load of the same product is discounted by the same rule — no matter who is at the scale.
📝 Header fields
| Field | Description |
|---|---|
| Type | What the table discounts: Moisture, Impurity, Damaged, Heat-damaged, Broken, Receipt, Other and Storage. The type is what makes the table show up in the right field on the Season and the contract. |
| Description | Required. This is the name shown when picking the table — include the product: "Moisture Soybean", "Moisture Corn". |
| Active | Uncheck it to remove the table from the selection lists without erasing the history of the load tickets that already used it. |
| Created by / Changed by | Who created it and who last changed it, with date and time. Filled in by the system. |
🗂 Details tab — the ranges
This is where the table takes shape. Each line has two fields:
| Field | Description |
|---|---|
| Classification | The measured value, with two decimals. E.g.: 14.00,
14.10, 14.20. The same value cannot repeat within the same table — the
system warns you. |
| Discount % | The percentage deducted when the load falls into that grade. E.g.:
1.10. |
The tab's toolbar also has Import from Excel, to upload the whole table at once, and Delete all, which clears every range from the selected table.
🎯 How the system picks the range
On the load ticket, when you type in the grade, the system looks in the table for the highest range that is less than or equal to the value entered, and applies its discount. In a table with ranges from 8.1 to 9.1, a load graded at 8.55 gets the discount of the 8.5 range — the value is not rounded up or interpolated.
If the value entered is lower than the lowest range registered, there is no discount: the system sets the percentage to zero. That is why it pays to build the table starting from the point where the discount begins and going far enough to cover the real variation in your loads.
📥 Import from Excel
The import adds ranges: nothing that already exists is replaced. The file
must be .xls or .xlsx and have, in the first row, two
columns with the exact names classificacao and desconto — with no accents or
special characters, or the system will not find the column. Column order does not matter, and both must
be numeric. Before saving, the window shows what will be imported and a list of the problems found.
🏢 Copy to another company
With a table selected, the Copy to another company button duplicates the table and all its ranges into another company, asking only for the target company and the description of the copy. It is the quick route if you have more than one company and use the same discount rule in both.
- The discount comes out the same for everyone, regardless of who is weighing
- The load ticket calculates the discount in kg by itself, from the grade typed in
- A change of rule is made in one place and applies to the next loads
❓ Frequently asked questions
Do I need a table for each product?
Yes, when the discount rule changes from one product to another — which is normally the case between soybean and corn. Each table is selected separately in the season's harvest parameters, by crop, and on the contract. That is why the description should make the product clear: "Moisture Soybean", "Moisture Corn".
Can I have more than one table for the same product?
Yes, and it is common: one is the farm's internal table, used when the harvest comes in, and the other is the one the buyer applies — each buyer may have its own rule. Register as many as you need, with descriptions that tell them apart ("Moisture Soybean - Internal", "Moisture Soybean - Co-op"), and choose on the contract which one applies to that deal.
I graded the load with a value that is not in the table. What happens?
The system uses the range immediately below. If the table has 8.5 and 8.6, a load at 8.55 gets the 8.5 discount. If the value is lower than the lowest range registered, the discount is zero.
How do I let the operator type the discount directly, without a table?
That is decided elsewhere: the Season's harvest parameters tab and the contract have the manual discount options. When checked, the discount field on the load ticket is open for typing instead of being filled in from the table.
I changed the table in the middle of the season. Do old load tickets change too?
No. The load ticket stores the discount as a percentage and in kilos at the moment it is saved, and also records which range was applied. Changing the table applies from the next loads onward.
📘 Screen: Inbound Load Ticket (Harvest/Purchase)
The inbound load ticket is the document that records the weighing and grading of each load that comes in from the field. In upCampo, it is the entry that brings the crop into the storage location and builds the total harvested for each field, in Season Planting — the sum of a season's load tickets is that crop's yield.
Every harvested load goes through it: the truck goes onto the scale full and comes off empty, the grader pulls the sample and measures moisture and impurity right there, and the system turns those measurements into a weight discount. What is left is the FINAL Net Weight — the number that goes into inventory and up to Season Planting. That is why the rule cuts both ways: a load entered wrong here means wrong inventory and wrong yield over there.
📍 Location in the system
Menu: Storage > Inbound Load Ticket (Harvest/Purchase)
🧩 Main function
Bring the crop in: record the weighing and grading of each load, calculate the final net weight and post that quantity to inventory, linking it to the harvested field.
🔀 The Harvest type is the everyday one
The Type, at the top of the form, already comes set to Harvest — and that is how it stays for the whole season. It is the type for loads that came from the field, the only one that asks for Field/Variety and, therefore, the only one that adds to the crop's total harvested. If you do not have a clear reason to change it, leave it.
The other two are exceptions and rarely used:
- Sales/Purchase Contract — for loads that arrive under a contract. It enables the Contract field and clears the Field; the storage location comes from the contract itself.
- Standalone — to just record the weighing, without touching the balance. It shows the Destination and Product fields: if you fill in the Destination and leave the Storage Location blank, the load is recorded in the system, but it does not move inventory.
📝 Header fields
| Field | Description |
|---|---|
| Entity Third Party | The grower who owns the load, when it is not the farm's own. Selected first, it filters that third party's fields — and, if there is only one, it comes filled in. |
| Number | Load ticket number. It cannot repeat within the same season and branch. |
| Auth. No. | Number of the source document — the ticket or load ticket from whoever weighed it before. It cannot repeat either within the same season and branch: this is the safeguard that prevents entering the same load twice. |
| Date | Date of the load. It comes filled in with today's date. |
| Storage Location | Required. Where the load is stored — the inventory entry goes to this location. |
| Field/Variety | Required. Where the load came from. It brings in the season, the crop and the discount parameters. Only active fields from the branch whose harvest is not yet finished are shown. |
| Team | The team that did the harvest. |
| Fleet | The truck. When you select it, the plate comes from its record. |
| Plate | Filled in from the fleet, or typed in when the truck belongs to a third party. Fleet or plate: one of the two is required. |
| Driver | Who was driving. It is also saved on the fleet record as the last driver. |
| Notes | Free-text field, printed on the load ticket. |
⚖️ Weighing
Right below the truck details are the scales registered in Scale and the two weights:
- Gross weight — the loaded truck.
- Tare weight — the empty truck.
- INITIAL Net Weight — calculated: gross minus tare. The discounts are applied to it.
The Capture Gross Weight and Capture Tare Weight buttons read the weight straight from the selected scale. If no scale is registered, the selection row and the buttons disappear and the weights are typed in. The system will not save with a tare greater than the gross, or with either of them at zero.
🧪 Grading and discounts
The grading block has three columns: Classification (what was measured in the sample), Discount % (how much that deducts) and Discount Kg (the discount converted into weight). The system offers eight types: Moisture, Impurity, Damaged, Broken, Heat-damaged, Storage, Receipt and Other.
Not all of them always appear, and none of this is set up here. Which lines are
visible, which table each one looks up and whether the discount is calculated or typed in by hand comes
from the
Season > Harvest parameters tab
— one record per crop and product. The load ticket only reads what is
defined there.
On that tab, each discount type has two settings:
- the table it looks up — Standard Moisture Discount, Standard Impurity Discount, Standard Broken Discount, Standard Heat-damaged Discount, Standard Damaged Discount, Standard Storage Discount, Standard Receipt Discount Table and Standard Other Discount Table (the last two use this longer label; they are the same thing as the others). Each one points to a standard discount table;
- the manual checkbox — Moisture manual, Impurity manual, Broken manual, Heat-damaged manual, Damaged manual, Storage manual, Receipt manual and Other manual. When checked, the Discount % field for that type is open for typing on the load ticket, instead of being looked up in the table.
Once the grade is typed in, the system looks up the range in the standard discount table, fills in the percentage and converts it into kilos. Where the parameter is marked as manual, the discount field is open for typing.
How upCampo calculates the final weight
There are five calculations, and one breaks the pattern: storage is the only discount that is not calculated on the initial net weight.
Of the eight types, seven are calculated on the initial net weight. Only storage comes off the Pre-Net Total: in upCampo it is charged on what was actually stored, not on the weight that went onto the scale. In practice, between two loads with the same storage percentage, the one with the worse grade pays fewer kilos.
Worked example
A truckload of soybeans. The example turns on all eight types to show the full
calculation — your farm will probably have fewer lines, depending on what is enabled in the season's
Harvest parameters.
The percentages are illustrative: your
farm's come from the standard discount tables
linked to that crop, and those are what the system looks up when you type in the grade.
| Step | Measured | Table range | Calculation base | Result |
|---|---|---|---|---|
| Gross weight | — | — | — | 42,000 kg |
| Tare weight | — | — | — | 15,000 kg |
| Initial Net Weight | — | — | — | 27,000.0 kg |
| Moisture | 16.0% | 3.0% | 27,000.0 kg | −810.0 kg |
| Impurity | 1.5% | 2.0% | 27,000.0 kg | −540.0 kg |
| Broken | 2.0% | 0.5% | 27,000.0 kg | −135.0 kg |
| Heat-damaged | 1.0% | 1.0% | 27,000.0 kg | −270.0 kg |
| Damaged | 4.0% | below the 1st range | — | 0 kg |
| Receipt | — | 0.5% | 27,000.0 kg | −135.0 kg |
| Other | — | no entry | — | 0 kg |
| Pre-Net Total | — | — | — | 25,110.0 kg |
| Storage | — | 1.2% | 25,110.0 kg | −301.3 kg |
| Total discount | — | — | — | 2,191.3 kg |
| FINAL Net Weight | — | — | — | 24,808.7 kg |
24,808.7 kg is 413.5 bags — a bag is always 60 kg. That is the weight that went into the storage location and was added to the field's total harvested.
Three lines deserve attention:
- Damaged came out to zero, even with 4.0% measured. It is not an error: the table for that type only starts discounting from a minimum grade, and the measured value fell below the first range.
- Other was left blank. It shows on the screen because the parameter is configured — it is the line used for an agreed discount that does not fit the others. With no entry, it does not deduct anything.
- Storage: 1.2% on 25,110 gives 301.3 kg. If it were applied to the initial 27,000, it would give 324.0 kg. That is 22.7 kg on a single load — small here, but significant over a whole season.
🗂 Internal information tab
It keeps the load ticket's audit trail, all filled in by the system: season and product, who created it (with hour and minute), who took the tare weight and who took the gross weight — each with its time — and the discount ranges that were applied (moisture, impurity, broken, heat-damaged and storage). This is where you check why the discount came out to that value. There is also Print on save, which prints the load ticket automatically every time it is saved and is remembered by the browser.
📋 The list and its buttons
- Start date / End date — the list opens with a window around today; adjust it to see other periods.
- Season — changes the season in the filter and, with it, the fields offered on the form.
- Kilos and Bags — totals for what is filtered on the screen.
- The date on each line is color-coded: green when the load ticket already has a final net weight, red when it is still pending (only the first weight, for example).
- View inventory and View Contracts — open, without leaving the screen, the current balance and the status of the season's contracts (quantity, shipped and remaining, with totals).
- Import from Excel — uploads a spreadsheet of load tickets in one go.
- Reports ▼ — the reports enabled for this screen; and Print, on the form, prints the load ticket template defined in the company settings.
- Save + new — saves and immediately opens another load ticket, for back-to-back weighing.
📥 Import from Excel
The spreadsheet must have the column names in the first row; the system recognizes common variations — "Romaneio"/"Número", "Rom. Orig."/"Ticket" for the authorization number, "Talhão"/"Quadra"/"Campo", "Setor", "Variedade"/"Cultivar", "Data", "Motorista", "Placa", "Peso bruto", "Peso tara". Before saving, the window shows what will be imported and the problems found. Rows whose field the system cannot identify are not imported — it is the most common reason an import gets stuck, so check beforehand that the field names in the spreadsheet match the ones in the system.
🔗 What the load ticket moves
- Inventory: posts the final net weight into the selected storage location.
- Season Planting: adds to the total harvested for the field and the variety, and recalculates the average yield.
Deleting a load ticket reverses those totals. That is why the system blocks deletion when there is already a later entry that depends on it.
📱 The inbound load ticket in the app
In the app, the menu is Romaneio de colheita/entrada. The ROMANEIOS DE ENTRADA tab filters by status, fleet/truck, crop, field, period and contract, and totals the count, the pending ones and the net weight; each load ticket shows fleet, driver, field, date, gross, tare, net, discount and final net. The RESUMO tab shows the totals, the area, the average per hectare and the breakdown by field.
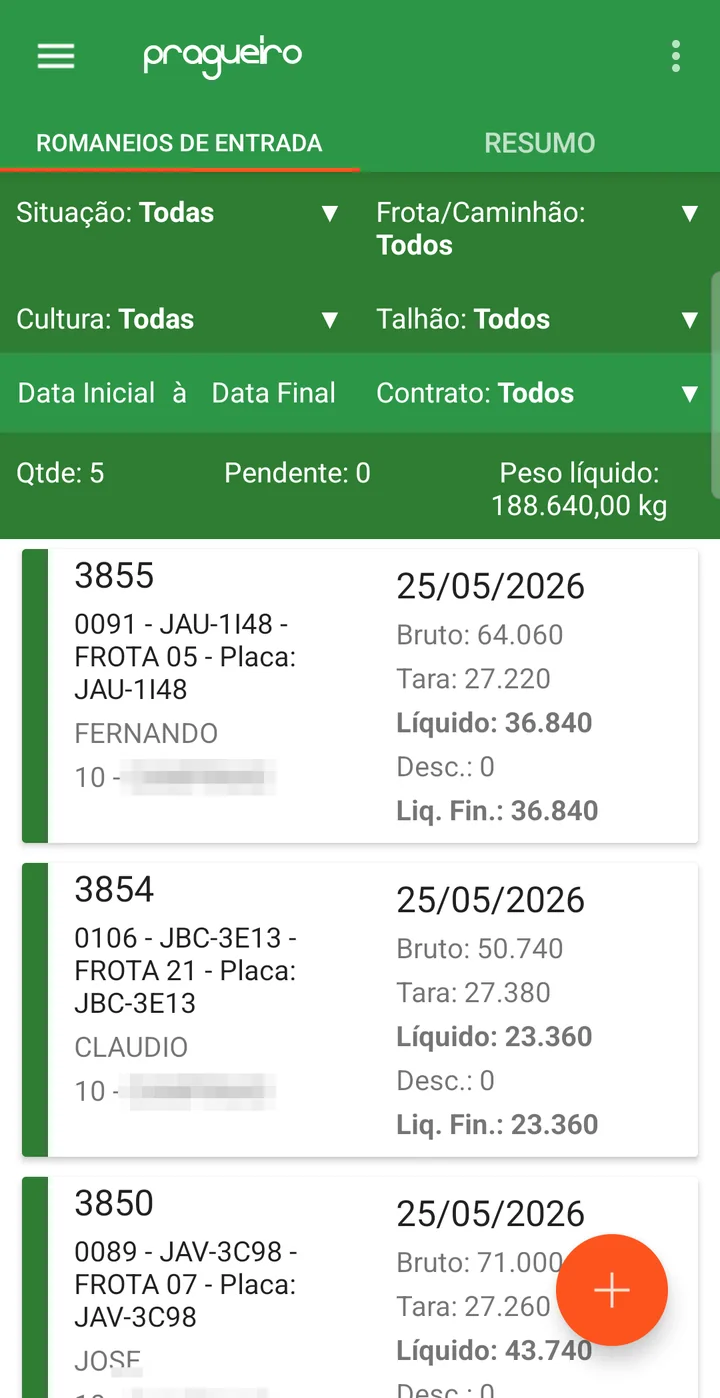
The load ticket form in the app has the Type with two options — Colheita (harvest) and Contrato de compra (purchase contract) —, the number, the fleet, the driver, the storage location, the field, the team and the contract; then the gross, tare and net weights and, for each discount type (moisture, impurity, broken, damaged, heat-damaged), the measured percentage, the discount percentage and the kilos; at the end, the total discounts, the final net weight, the notes and the dates of the first and second weights.
- The weight that goes into the warehouse is the same one that left the field, with no side spreadsheet
- The grading discount follows the registered rule, the same for every load
- Each field's yield builds itself, load by load
- A duplicate ticket is blocked when you save
❓ Frequently asked questions
Why does the system say it could not find the season's harvest parameter?
Because the season does not yet have parameters registered for that crop. They live in the harvest parameters tab of the Season screen and define which discounts appear on the load ticket and which standard discount tables to use. Without them, the harvest load ticket will not save.
The truck has been weighed full but has not come back empty yet. Can I save?
The load ticket only saves with both weights filled in and greater than zero, and with the tare never greater than the gross. Until the load is closed, it shows on the list with the date in red — that is how you see what is still pending in the yard.
Why does storage deduct less than the others?
Because it is applied to a smaller weight. Moisture, impurity, damaged and the rest are deducted from the initial net weight; storage is applied to the Pre-Net Total, that is, to what was left after those discounts.
I typed in the moisture and the discount came out to zero. Is that wrong?
Not necessarily. The discount comes from the standard discount table, which only starts discounting from a minimum grade. If the measured value is lower than the table's first range, the discount really is zero. Check the ranges of the table linked to that crop.
I entered the same load twice and the system would not let me. Why?
The load ticket number and the Auth. No. cannot repeat within the same season and branch. The warning shows which load ticket already has that number — look it up in the list before entering it again.
I need to reweigh a load that was already entered. Can I edit the load ticket?
Yes, as long as the load ticket is not tied to later entries. When you save, the system recalculates inventory, total harvested and contract. If there is an inventory movement with a later date that depends on that entry, the change is blocked.
📘 Screen: Sales/Purchase Contract
The sales/purchase contract is the record of the deal closed with the trading company, the co-op or the processor: so much product, at so much per bag, to ship between such and such dates. In upCampo, it is what gives the crop a destination — each outbound load ticket is deducted from the contract, and the screen shows, at any moment, how much has shipped and how much is still left.
The contract on its own does not take anything out of inventory. It is the agreement: it records what was settled and serves as a reference. What reduces the balance is the outbound load ticket, truck by truck. A 2,000-ton contract can be closed with the warehouse still empty — that is the case of a forward sale, agreed before the crop comes in.
The contract is also where the sale's tax parameters are kept, when an invoice will be issued: nature of operation, series, CFOP, CST, carrier and additional information.
📍 Location in the system
Menu: Storage > Sales/Purchase Contract
🧩 Main function
Track the balance of each contract — quantity contracted, shipped and remaining — and bring together in one place the agreed price, the grading discounts the buyer accepts and the invoice tax data.
🔀 Sale or Purchase
The Type is chosen when the contract is created and does not change after it is saved. It swaps the roles of the entity fields:
- Sale — the main field is Buyer (Entity), whoever is taking the product; the third-party field is Seller (third party).
- Purchase — the main field becomes Seller (Entity) and the third-party one, Buyer (third party).
📝 Header fields
| Field | Description |
|---|---|
| Status | Open, Started, Finished, Canceled and Forward sale. A finished or canceled contract no longer appears for selection on load tickets. |
| Tax Settings | Which branch CNPJ issues the invoice for this contract. |
| Season Origin / Year | The season of the product being traded. |
| Currency | Contract currency. It decides which block of values is active. |
| Date | Date the deal was closed. |
| Number (ours) | Required. The farm's own numbering. |
| Number (supplier) | The number the buyer uses for the same contract — it is how the trading company will refer to the deal. |
| Buyer (Entity) | Required. Who the contract was closed with. It fills in the Address, which is read-only. |
| Storage Location | Required. Where the product leaves from (or where it comes into, on a purchase). |
| Crop | Required. Besides classifying the contract, its Unit field defines whether the quantity is converted into bags or into arrobas. |
| Product | Required. What is being traded — lint cotton, cottonseed, shelled corn. |
| Shipping Start / End Date | The agreed shipping window. |
| Quantity KG | Required and greater than zero. The total contracted, in kilos. The contract always tracks the balance in KG — the other units are just a reading of the same number. |
| Quantity SC or Quantity @ | The same total, in the unit that product is traded in — and the field label changes with it: Quantity SC for grain (60 kg bags) and Quantity @ for cotton (15 kg arrobas). The Unit field of the Crop decides. Typing on one side fills in the other. |
| Shipped Quantity KG | Added up from the load tickets. Not typed in. |
| Remaining Quantity KG | What is left to ship. It drops with each load ticket and decides whether the contract still appears when entering a new one. It is not a hard stop: the system does not prevent shipments from going over the contracted amount. |
| Quantity field | Which load ticket value goes onto the invoice: Final Net (the default), Initial Net or Quantity. If you choose Quantity, the outbound load ticket shows a Quantity field for typing. |
| Responsible for tax | Us or Them — who bears the tax on the operation. It defines which contract total accumulates the tax from the load tickets. |
| Who sold / Who bought (broker) | The broker or dealer who intermediated — free-text field. |
| Notes | Free-text field. |
How upCampo tracks the contract balance
The contract holds the quantity in three units at once, but only one is in charge: the balance is tracked in kilos. The others are readings of the same number, converted.
The divisor is decided by the Unit field of the crop: with SC - Bags the calculation is by 60; with any other, by 15. Neither 60 nor 15 is configurable — that is what a bag and an arroba weigh.
| Point in time | Kilos | In bags |
|---|---|---|
| Contracted | 1,200,000 kg | 20,000 sc |
| Already shipped (outbound load tickets) | 780,000 kg | 13,000 sc |
| Remaining Quantity KG | 420,000 kg | 7,000 sc |
💵 Values
The values block has Unit Price (KG), the unit price in the product's unit (SC or @, with the label changing accordingly), Total value, Total Freight, Net Value and Total Taxes. Filling in the per-kilo price updates the per-bag price and the total, and vice versa. Net Value is required to save.
There are three blocks of values, one per currency, and the foreign currency blocks also include the Exchange rate. Changing the exchange rate recalculates the converted values.
🧪 % Grading/Discount
This block says how the buyer agrees to discount the load. For each type — moisture, impurity, broken, heat-damaged, damaged and storage — you choose the standard discount table that applies to this contract. The manual checkboxes next to them (moisture, impurity, heat-damaged, damaged and storage) open the discount field for typing instead of looking it up in the table.
A type with no table selected simply does not appear on the load ticket linked to this contract — that is how you slim down the screen for someone who only discounts moisture and impurity, for example.
🗂 Tabs
Amendments
Records quantity changes agreed after the deal was closed. Each amendment has a Type (Adding or Removing), Date, Number, Quantity KG, the quantity in the product's unit, unit prices and Net Value. The amendment changes the contract's remaining quantity: adding increases the balance to ship, removing decreases it.
NF-E - Parameters for Electronic Invoice Issuance
Not every contract issues an invoice. An internal sale — corn going to the farm's own feedlot, for example — is recorded on a contract just to track the quantity. In that case, simply leave this tab and the details tab blank: the contract works normally and the outbound load ticket still takes product out of inventory; what will not exist is Generate NF.
When an invoice is issued, this is where the data the invoice will use lives: Payment method, Freight mode, Carrier (if fixed), Cost center, Series, Nature of operation, Kind and the Additional information — the legal text printed at the bottom of the invoice, which can include automatic fields (the button above the field lists the ones available, such as the driver and the vehicle's CPF). The Copy Parameters from another contract button brings all of this over from a contract that is already set up.
NF-E - Details (products)
The items that go onto the invoice, with Product, NCM, Unit, Quantity, Unit price and the Taxes block — CFOP, CST for ICMS, PIS, COFINS and IPI, with the rates and the base reduction. When you choose the CST, the registered default rate comes with it. This is the tab the load ticket reads when generating the invoice: with no items here, the invoice will not be issued.
File
Contract attachments — the signed PDF, the scanned amendment. Each attachment has Title, Description, file name and Notes, and the list has a view button that opens the document.
💰 Finish and Generate Financials
- Finish closes the contract; on a contract that is already finished, the same button asks whether you want to reopen it.
- Generate Financials opens the window that turns the contract's net value into receivable installments in the financial module. The field next to the button shows the title already generated.
📋 The list
The list filters by Season and by Type (Sale, Purchase or All), and shows the Status as a colored label, along with quantity, net value, shipped and remaining quantity — you can read the progress of every contract in the season on one screen. The View inventory button opens the current balance without leaving here, and Reports ▼ lists the reports enabled for this screen.
- You know, at any moment, how much is left to ship on each contract
- At shipping time, whoever enters the load ticket finds the right contract, with the balance in view
- When invoices are issued, they come out of the load ticket with the agreed tax parameters
❓ Frequently asked questions
The contract does not show up to pick on the load ticket. Why?
Three reasons cover almost every case: the contract is finished or canceled, the remaining quantity has reached zero, or it belongs to a season/branch other than the one selected in the load ticket list filter. Check the status and the remaining quantity in the contract list.
I agreed on more quantity with the buyer. Do I create another contract?
No need: use the Amendments tab, with the Adding type. The contract's remaining quantity goes up and a record of what was agreed later is kept. To reduce it, the type is Removing.
The load ticket will not generate the invoice. What is missing on the contract?
It is almost always incomplete tax data: nature of operation and series on the parameters tab, or an item without a CST for ICMS, PIS, COFINS and IPI, or a product without NCM and unit on the details tab. The municipality IBGE code is also required on the contract's entity and on the carrier. The on-screen warning tells you which item is missing.
I sell within my own farm, without an invoice. Can I use a contract?
Yes, and it is a common use — corn going to the feedlot, for example. Register the contract as usual and leave the NF-E tabs blank: you still track the quantity contracted, shipped and remaining, and the outbound load ticket still takes product out of inventory. There just will not be an invoice to issue.
I closed a contract before harvest. Does the system allow it?
Yes. The contract records the agreement, not the inventory — what reduces the balance is the outbound load ticket. A forward sale, closed before the crop comes in, is entered normally, and the Forward sale status exists precisely to make that clear on the list.
What is the "Quantity field" for?
It says which load ticket weight counts as the invoice quantity. The usual one is Final Net — the weight after discounts. If you choose Quantity, the outbound load ticket gets its own quantity field, used when what you are billing is not the scale weight.
The quantity converted to arrobas and I expected bags. Why?
A bag is always 60 kg and an arroba, 15 kg — that is not configured anywhere. What the system needs to know is which of the two that product is traded in, and that comes from the Unit field of the Crop: with SC - Bags the field is called Quantity SC and divides the kilos by 60; with @ - Arroba, it becomes Quantity @ and divides by 15. If it converted to the wrong unit, the fix is on the crop record. Either way, the contract balance is still tracked in kilos.
I finished a contract by mistake. Can I undo it?
Yes. Select the contract and click Finish again: on a contract that is already finished, the button asks whether you want to reopen it, and it goes back to Open status.
📘 Screen: Outbound Load Ticket (Sale)
The Outbound Load Ticket records the removal of the crop from the farm, from weighing the truck to writing off the load. You enter the tare and the gross weight, and the difference between the two is the net weight hauled — that is what comes out of inventory and is deducted from the corresponding sales contract. When an invoice is issued, the load ticket is what it is generated from.
📍 Location in the system
Menu: Storage > Outbound Load Ticket (Sale)
🧩 Main function
Weigh the truck, calculate the net weight and post the outflow from inventory, deducting the quantity from the contract. When an invoice is issued, the load ticket is what it is generated from.
📝 Header fields
| Field | Description |
|---|---|
| Number | Load ticket number. |
| Date | Shipping date. It comes filled in with today. |
| Entity (Third Party) | When filled in, it filters that third party's contracts — useful if you ship product belonging to more than one owner. |
| Sales/Purchase Contract | The contract being shipped. The list only shows contracts with remaining quantity that are neither finished nor canceled, and each item shows how much is still left. |
| Product | Comes from the contract and is not typed in. |
| Storage Location | Required. Comes from the contract — it is where the quantity is taken out of. |
| Carrier | The carrier for the trip. If it is not entered, the one fixed on the contract applies. |
| Fleet | The truck, when it belongs to the farm. |
| Plate | Typed in when the truck belongs to a third party. Fleet or plate: one of the two is required. |
| Driver / Driver CPF | They go onto the invoice, when the contract's additional information uses those fields. |
| Quantity | Only appears when the contract has Quantity field = Quantity. In that case it is this, not the weight, that counts for the invoice. |
| Notes | Free-text field, printed on the load ticket. |
⚖️ Weighing and discounts
As on the inbound ticket, you choose the scale and capture the two weights:
- Tare weight — the empty truck.
- Gross weight — the loaded truck.
- INITIAL Net Weight = gross minus tare.
Which grades appear — moisture, impurity, broken, damaged, heat-damaged and storage — comes from the contract: only types that have a discount table selected there show on the screen, and the field is editable when the contract marked that discount as manual. Unlike the inbound load ticket, here every discount is applied to the initial net weight — including storage — and there is no Pre-Net Total.
FINAL Net Weight = initial net minus the total discount. When the contract does not define any grading, the Total discount field is open for direct typing: you enter the agreed discount in kilos and the final net adjusts. When there is grading, the total is calculated and locked.
How upCampo calculates the outbound final weight
A truckload with 27,000 kg initial net, illustrative percentages:
| Step | Range | Calculation base | Result |
|---|---|---|---|
| Initial Net Weight | — | — | 27,000.0 kg |
| Moisture | 3.0% | 27,000.0 kg | −810.0 kg |
| Impurity | 2.0% | 27,000.0 kg | −540.0 kg |
| Storage | 1.2% | 27,000.0 kg | −324.0 kg |
| Total discount | — | — | 1,674.0 kg |
| FINAL Net Weight | — | — | 25,326.0 kg |
Another difference: the outbound ticket works with six discount types — moisture, impurity, broken, damaged, heat-damaged and storage. Receipt and other, which exist on the inbound ticket, do not appear here.
🧾 Generate NF
This only applies to contracts that issue invoices: an internal sale, with no invoice, is entered with the contract's NF-E tabs blank, and then this button has nothing to generate.
With the load ticket saved, the Generate NF button creates an outbound movement with an invoice, which stays awaiting transmission — the invoice has not been sent to SEFAZ yet, and transmission is done on the Movement screen. The movement is created with everything agreed on the contract: nature of operation, series, tax settings, cost center, payment method, freight mode, carrier, kind and the additional information. The products come from the NF-E - Details (products) tab, which only appears when a contract is selected and is fed by its items — Volume, Unit, Quantity, Unit price and the taxed amounts.
Before generating, the system checks whether the tax data is complete — and, if anything is missing, the invoice is not created: a warning tells you what is missing. Where to fix it depends on what is missing: nature of operation, series and CST are on the contract; NCM and unit, on the product record; and the municipality IBGE code, on the entity record — for both the buyer and the carrier.
A load ticket with a generated invoice can no longer be edited. To fix a weight, deal with the invoice first: delete the movement, if the invoice has not been transmitted yet, or cancel the invoice, if it has. Once the load ticket is free, change what you need and generate it again.
The Remove Movement button is for a different situation: late cancellation, when the deadline for canceling the invoice has already passed. It undoes the link between the load ticket and the movement, freeing the load ticket without touching the invoice — which is why it is not the normal way to make corrections.
📋 The list and its buttons
- Start date / End date / Season — what is shown.
- Kilos, Bags and Qty — totals for the filtered period: you can close out the day without exporting anything.
- The Invoice column shows, as a label, the number and date of the generated invoice — a row with no label is a load ticket that does not have an invoice yet.
- View inventory and View Contracts — current balance and status of the season's contracts, without leaving the screen.
- Reports ▼ — the reports enabled for this screen; Print prints the load ticket template defined in the company settings.
🔗 What the load ticket moves
- Inventory: takes the product out of the contract's storage location, by the final net weight (or by the Quantity, when the contract uses that field).
- Contract: adds to the shipped quantity and reduces the remaining quantity — when it reaches zero, the contract no longer appears for new load tickets.
- The contract balance tracks shipments in real time
- When invoices are issued, they come straight from the load ticket, without retyping product, tax and carrier
- Warehouse inventory goes down by the actual weight loaded onto the truck
- The day's total shipped can be read right at the top of the list
❓ Frequently asked questions
I need to fix the weight on a load ticket that already has an invoice. How do I do it?
Deal with the invoice first: delete the movement, if it has not been transmitted yet, or cancel the invoice, if it has. Only then will the load ticket accept changes again — fix it and generate the invoice again. The Remove Movement button is not for this: it exists for late cancellation, when the invoice cancellation deadline has already passed.
The contract disappeared from the list in the middle of shipping. What happened?
Most likely the remaining quantity reached zero — the list only shows contracts that still have a balance to ship. If there is still product to load, adjust the quantity through the contract's Amendments tab, or check that it was not finished by mistake.
Why is there no moisture or impurity field?
Because the selected contract has no discount table defined for those types. In that case the screen shows only the Total discount, open for typing. To make the grades appear, choose the tables in the contract's % Grading/Discount block.
The invoice will not go through and the system mentions an IBGE code. What is that?
It is the municipality code on the contract's Entity — and, when there is a fixed carrier, on the carrier's record too. Without that code, the electronic invoice cannot be built. Complete the entity record and try generating it again.
Can I weigh several trucks in a row without going back to the list?
Yes: use Save + new. It saves the current load ticket and immediately opens a blank one, keeping you on the form — the workflow for whoever is at the scale house during shipping.
📘 Screen: Standalone Load Ticket
This is the load ticket for everything that crosses the scale and is neither harvest nor a contract sale: the diesel tanker coming in from the fuel station, the load of lime, a grain transfer between two warehouses, the technical shrinkage that needs to be recognized in inventory.
It exists so the scale can serve the whole farm — not just the harvest — while keeping the same routine: weigh, calculate, and the net weight moves the storage location.
📍 Location in the system
Menu: Storage > Standalone Load Ticket
🧩 Main function
Weigh and record inflows, outflows, transfers and shrinkage that do not go through a contract, moving inventory by the weight measured on the scale.
🔀 The types and what each one changes
| Type | What it is for | What changes on the screen |
|---|---|---|
| Inbound | Loads coming in — fuel, fertilizer, lime, grain bought without a contract. | Full flow: storage location, product, two weights and discounts. The net is the 2nd weight minus the 1st (see below). |
| Outbound | Loads going out without a sales contract. | Same as inbound, but the net is the 1st weight minus the 2nd. |
| Transfer | Moving product from one storage location to another. | The Destination Storage Location appears: the origin gets an outflow and the destination receives the inflow. |
| Technical shrinkage | Recognize the natural loss of stored product. | Truck, weights and discounts disappear. What is left is the FINAL Net Weight, which here is the only editable field — it is the loss you are recording. |
| Trip | Record only the vehicle's movement, with no load. | Storage location, product, weights and discounts disappear. |
⚖️ Watch the order of the weights
Here the labels are Gross weight (1st weight) and Tare weight (2nd weight) — the order in which the truck went onto the scale, not whether it was loaded or empty:
- On Inbound, the truck arrives loaded, but the 1st weight is taken when it enters the yard and the 2nd when it leaves. That is why the calculation is 2nd weight minus 1st weight. In the diesel example: 1st weight 27,300, 2nd weight 47,900, initial net 20,600.
- On Outbound and Transfer, it is the opposite: 1st weight minus 2nd weight.
The Capture Gross Weight and Capture Tare Weight buttons read the value straight from the selected scale, when a scale is registered.
📝 Main fields
| Field | Description |
|---|---|
| Number | Load ticket number. |
| Date | Date of the weighing. |
| Entity | Who the load came from or went to — the fuel station, the supplier, the customer. |
| Description | What the load is, in one line: "DIESEL", "LIME", "TRANSFER SILO 2". |
| Product | The product that will be moved in inventory. |
| Origin Storage Location | Where the product comes in (on inbound) or goes out from (on outbound and transfer). |
| Destination Storage Location | Transfer only: where the product goes. |
| Movement (Invoice) | Links the load ticket to an invoice already entered in Movement, for the same product. When you choose the invoice, the storage location is cleared — the movement now defines where the product goes — and the description is suggested. |
| Fleet / Implement | The truck and the implement used. |
| Plate / Driver | Filled in from the fleet or typed in, when the vehicle belongs to a third party. |
| Classification (%) and Discount Kg | Moisture, impurity, broken, damaged, heat-damaged and storage. Here the percentage is typed in directly — the standalone load ticket does not use a standard discount table — and the system converts it into kilos on the initial net weight. |
| Total discount | Sum of the discounts in kilos. |
| FINAL Net Weight | Initial net minus the discounts. It is the value that moves inventory. It is only typed in for technical shrinkage. |
| Notes | Free-text field. |
🗂 Internal information tab
Shows the season and product of the entry, who created the load ticket and who took each weighing, with hour and minute, plus Print on save, which prints the load ticket every time it is saved.
📋 The list
Filter by Start date and End date, with columns for date, number, type, description, entity, storage location, product, fleet, both weights, initial net, total discount and final net. The Reports ▼ and View inventory buttons are on the top bar; Print and Save + new, on the form.
- Every load that crosses the scale is recorded, not only the harvest
- Fuel and input deliveries go into inventory at the actual weight received
- A transfer between warehouses leaves one location and enters the other in a single entry
- Technical shrinkage is recognized with date, product and person responsible
❓ Frequently asked questions
Why did the net weight come out negative on an inbound load?
Because the weights were swapped. On inbound, the calculation is 2nd weight minus 1st weight: the 1st is the truck as it arrived at the scale and the 2nd is the second weighing. Check which value went into each field — on outbound the order is reversed.
How do I record a storage loss in inventory?
Use the Technical shrinkage type. It hides the truck and weights and enables the FINAL Net Weight field, where you enter the quantity lost. Choose the product and the storage location the loss will be taken out of.
What is the difference between a transfer here and the Transfer Between Storage Locations screen?
The difference is the scale. Here the quantity transferred comes from weighing the truck, with grading discounts and a printed load ticket. The Transfer Between Storage Locations screen is a direct entry, with no weighing, for when the product just changes place on the books.
Can I use the standalone load ticket for harvested grain?
You can, but you lose the link to the crop: the standalone ticket does not ask for a field, so it does not add to the total harvested or to the season's yield. For harvest, use the Inbound Load Ticket.
📘 Screen: Production Classification
This is the record that says what type of production each lot is: "Screened seed", "Cotton processing", "Feed". Every lot created in Lot Production picks one of these classifications.
It is a three-field screen — the kind you fill in once, at the start, and hardly ever open again.
📍 Location in the system
Menu: Industry > Production Classification
🧩 Main function
Separate lots by the nature of the process. This classification is what lets you filter the production list and keeps lots of different types — seed processing and feed production, for example — from getting mixed up when you read it.
📝 Record fields
| Field | Description |
|---|---|
| Code | Sequential number of the classification (0001). |
| Description | The name of the production type, the way the farm calls it. |
| Active | A classification no longer in use leaves the list without erasing the history of old lots. |
The list shows Code, Description and Active, with search on each column. The buttons are the usual ones — New, Reload, Save, Cancel/View list and Delete.
🧭 Where the classification appears
In the header of Lot Production, in the Production Classification field — which is required: without a registered classification, there is no way to open a lot. When you pick it, the system suggests the lot description based on it, which saves typing for repetitive production.
The classification also becomes a column in the lot list, and it is what separates processing from, for example, feed production.
- Every production lot starts with its process type identified.
- The lot list can be filtered by type of production.
❓ Frequently asked questions
What should I enter as a classification?
The type of process the farm runs: seed processing, grain cleaning, feed production, cotton ginning. If the farm only does one, a single classification is enough.
Can I delete a classification I no longer use?
The safest option is to uncheck Active: it disappears from the lists and old lots keep showing which classification they were produced under.
Why can't I create a production lot?
Check that there is a registered, active classification: the lot's Production Classification field is required. With none on the list, the lot will not save.
📘 Screen: Lot Production
This is the transformation screen: inputs go in from inventory and a finished product comes out — processed seed, feed, cotton lint. The lot records where the raw material came from, who was responsible, what was consumed and what was produced, with manufacturing and expiration dates.
In practice, it is what lets you pick up a finished bag of seed and say which fields it came from.
📍 Location in the system
Menu: Industry > Lot Production
🧩 Main function
Record an industrial production run on the farm and, with it, move inventory: the input entered goes out of the storage location given and the finished product comes in. It is a transformation, not a transfer.
The list toolbar has New, Reload, View inventory — to check the balance without leaving the screen — and Reports ▼.
📝 Header fields
| Field | Description |
|---|---|
| Code | Sequential lot number (0001). It is the number that goes into the QR Code. |
| Status | Not editable: Pending, Approved or Finished. The toolbar button changes it. |
| Production Classification | The type of process. Required. |
| Description | The lot name. Required — when you choose the classification, it comes suggested. |
| Product | The lot's main product. |
| Responsible | Who is accountable for the production. |
| Manufacturing Date · Expiration Date | Shelf life of what was produced — it is what supports the lot's traceability. |
| Notes | Free-text field. |
🗂 The three tabs
📍 Fields
Where the raw material came from: Field, Variety/Cultivar and Area, the first two required. The list shows Field and Hectares. This tab links the finished product to the crop it came from.
📋 Inputs
What was consumed: Product, Storage Location, Quantity, Unit price, Balance, Total value and Date. The Import product button brings in items from the farm's inventory, and View inventory shows the balance before you enter them.
📦 Finished product
What came out: Finished product, Storage Location, Quantity, Unit price, Total value, Date, and the manufacturing and expiration dates of the item produced.
This is also where the QR Code button lives, which generates the lot's code and lets you save it as an image to stick on the packaging.
🔄 The lot cycle
The button on the right of the toolbar changes name depending on the stage, and each step asks for confirmation:
- Pending — the lot being put together. Everything is editable.
- Approve → Approved — the production has been checked.
- Finish → Finished — the lot is closed and the screen is locked: header and inputs become read-only.
- Reopen — sends the lot back to Pending, when something needs fixing.
🔗 The lot QR Code
The QR Code generated on the Finished product tab opens a public traceability page — you do not need access to the system to view it. It shows the farm, the map, the products applied to the source crop (with class and rate), the history of the fields and the company's presentation.
It is what gets printed on the packaging so the end customer can check where their purchase came from.
- Raw material consumption and the finished product's entry are in inventory, with cost.
- Every lot produced can be traced back to the field.
- The QR Code delivers that traceability to the customer, with no manual work.
When the finished product is seed, the lot is the tip of work that starts long before — see how upCampo supports seed research and development.
❓ Frequently asked questions
Do I need to enter a movement to write off the inputs?
No. The input entered on the Inputs tab already leaves the storage location given, and the finished product comes in. The lot production is itself the document for the transformation.
I finished the lot and now I can't edit it.
That is the expected behavior: a finished lot is locked. Use the status button to reopen it — it goes back to Pending and editing is unlocked.
What is the lot QR Code for?
To stick on the packaging. Whoever scans it opens a public page with the farm, the map, the source fields and the products applied — the traceability of what they are buying, with no login needed.
How do I know if I have enough balance before entering the input?
With the View inventory button, which is on the list toolbar and next to the inputs. The line's Balance field also shows how much of that product there is in the chosen location.
💸 Quick Guide - Financial
This guide presents the first steps to set up your farm's financial module in the upCampo system. With it, you ensure proper control of inflows, outflows, balances and financial results.
🧱 Initial steps
Before recording financial transactions, it is important to set up the system's foundations:
✅ Cost Center
A grouping that lets you organize expenses and revenues by sectors, farms, crops or activities.
📍 Menu: Financial > Cost Center
✅ Management Account
A chart of accounts that classifies the types of financial entries (Revenue, Expense, Totalizer).
📍 Menu: Financial > Management Account
✅ Bank Account
Where balances are controlled and payments and receipts are made.
📍 Menu: Financial > Bank Account
✅ Entity
Registry of suppliers, customers, carriers, agronomists, etc.
📍 Menu: Financial > Entity — it is the same screen as in the Inventory menu, which is why its article is under Inventory.
📦 Transactions (Inbound and Outbound)
This is the screen used to record incoming products and services — usually through invoices — or standalone outbound entries. It works both for the fertilizer invoice that goes into inventory and for the invoice for freight or outside repair work, which goes straight to the cost of the fleet or the entity.
After you finalize the transaction, the system offers the option to automatically generate the matching financial entry in Accounts Payable.
📍 Menu: Inventory > Transactions (Inbound and Outbound)
This topic is extensive. There is another guide for this step: Quick Guide - Receiving products into inventory.
💸 Accounts Payable/Receivable
With the foundation set up, financial control is done on the Accounts Payable/Receivable screen:
- You can record standalone bills or bills integrated with other modules (e.g., transactions, contracts, payroll).
- You can generate installments, record payments, set the bank account, track due dates, and apply discounts, penalties and interest.
- You can pay or receive several installments at once.
- The Allocation tab splits the whole bill across management accounts and cost centers, and every installment follows that split. A finalized invoice generates a single bill, with an allocation when the items fall into different accounts.
- All transactions are linked to the season and the cost center.
📍 Menu: Financial > Accounts Payable/Receivable
🧭 The rest of the Financial menu
The four registries above are the minimum to get started. The menu also has these screens, which come in as the farm needs them:
🥧 Cost split template
The percentage split the farm repeats every month, saved under a name — "Headquarters 30% / Crops 70%" — so it can be applied to an installment with one click. It splits across management account and cost center, applies to the whole company and can only be active if the total adds up to 100%. Do not confuse it with Allocation Setup in the Inventory menu, which splits costs across fields.
📄 Payment Terms
The terms negotiated with the supplier (cash, 30 days, 30/60/90). They appear on the Quotation and the Purchase Order. Once the terms' installments are set up — number, days and percentage —, choosing the terms in Generate Installments on Accounts Payable/Receivable fills in the due dates and amounts in one go.
📚 Chart of Accounts
Groups the management accounts, with their own order and names, for the management reports and the DRE (income statement).
💱 Currency and Currency Rates
Only for those who operate in a foreign currency. Currency enables the exchange fields in the rest of the system (up to three per farm); Currency Rates keeps the history of exchange rates.
🔁 Transfer Between Accounts
Money that leaves one account and goes into another — from the bank to the headquarters cash box, for example. It is neither an expense nor revenue: it only changes the balances.
🗓️ Planned Entry
A schedule of planned commitments that have not yet become bills. It does not generate installments or change balances.
✍️ Approval rules
The company's payment policy written into the system: value ranges and, in each range, the sequence of steps with the approvers for each one. At each step one approver's signature is enough, and whoever builds the batch does not approve it. This is the registry that makes payment batch approval exist — with no active range, no batch is sent.
📋 Payment batch
The installments that will be paid together, on the way between "I decided to pay" and "the money went out": you build the batch from open installments, it goes through the approval rules, generates the remittance file (Banco Inter CNAB 240, with PIX and TED) that you upload to Internet Banking and, with the bank's return file or the statement, settles what was paid. In File > Company/Crop Settings you can require that no settlement happen outside an approved batch.
🔒 Period closing
Locks the past: once closed up to a date, nothing dated earlier can be added, changed or deleted — bill, installment or transfer. It is what makes the report for a closed month show the same number six months from now. As long as no period is closed, nothing changes. The button that would change an entry in a closed period already comes disabled, with the reason in the tooltip when you hover over it.
📒 Tax cash book
The monthly review of the cash of each individual grower, in the format required by the Brazilian tax authority. It builds the book from the settlements in Accounts Payable/Receivable, with the 12 months of the year in cards, shows what each entry is missing for the tax authority and closes the month. In the LCDPR generation view, the reviewed year becomes the LCDPR file (Brazil's Digital Rural Producer Cash Book) — one per CPF per year, with version history (see LCDPR generation). It is by CPF and by month, and does not replace Period closing. What decides what counts as rural activity is the Consider for Income Tax flag on the management account.
📊 Monitoring
🔎 View Balances
A button on the main Accounts Payable/Receivable screen to check balances by bank account.
📄 Reports
- FIN.01.01 (formerly 15.07) – Accounts payable/receivable by Entity – Installments
- FIN.01.02 (formerly 15.06) – Accounts payable/receivable by Entity – General
- FIN.01.03 (formerly 15.09) – Accounts payable/receivable by Contract – Loading
- FIN.02.01 (formerly 15.01) – Financial statement
- FIN.02.02 (formerly 15.05) – Future financial statement
- FIN.03.01 (formerly 15.02) – Financial flow
- FIN.03.02 (formerly 15.03) – Periodic cash flow
- FIN.04.01 (formerly 15.10) – Planned vs. Actual
- FIN.04.02 (formerly 15.04) – DRE
FIN.04.01 (formerly 15.10) – Planned vs. Actual is the newest one on the list: it compares, month by month and by management account, what was planned with what actually came into or went out of cash.
📅 Which date each report uses
Cash flow shows the money; the DRE shows the result. The two don't match — and they shouldn't.
Planned is the full installment amount, in the month it was due. Actual is the amount that left the bank, on the day it left. The difference between the two is the delay, the interest or the discount.
A paid installment appears in both columns of Planned vs. Actual. It is not an error or a duplicate: it is the same installment seen from two angles.
| Report | Which date rules | Which amount |
|---|---|---|
| FIN.02.01 (formerly 15.01) Financial statement, FIN.03.01 (formerly 15.02) Financial flow, FIN.03.02 (formerly 15.03) Periodic cash flow and FIN.02.02 (formerly 15.05) Future financial statement | the payment day | the amount paid, with interest and discount |
| FIN.04.02 (formerly 15.04) DRE, in the Payment view (default) | the payment day | the amount paid, with interest and discount; paid installments only |
| FIN.04.02 (formerly 15.04) DRE, in the Accrual date view | the bill's accrual date — if blank, its date | the full installment amount, paid or not; no interest and no discount |
| FIN.01.01 to FIN.01.03 (formerly 15.06, 15.07 and 15.09) (accounts payable/receivable) | the due date | full while open, paid amount once settled |
| FIN.04.01 (formerly 15.10) Planned vs. Actual | planned by due date, actual by payment day | planned full, actual paid |
View is a filter on the FIN.04.02 (formerly 15.04) – DRE screen, with two options:
Payment, the default, which shows the result on a cash basis, and Accrual date, which places
each installment in the month the event happened — paid or not. The Accrual date view does not include interest, penalties or
discounts: they did not exist when the event happened, and they come in on the payment date, as financial
result.
FIN.02.01 (formerly 15.01), FIN.03.01 (formerly 15.02),
FIN.03.02 (formerly 15.03), FIN.04.02 (formerly 15.04) in the Payment view, FIN.02.02 (formerly 15.05) and the
actual figures in FIN.04.01 (formerly 15.10). No change in FIN.04.02 (formerly 15.04) in the
Accrual date view or in FIN.01.01 to FIN.01.03 (formerly 15.06, 15.07 and 15.09), which are placed by due date or by
accrual date. Where the farm records settlements on the same day it pays, nothing changes. Where there is a lag
between paying and recording, the amount moved to the month the money moved: the year's total
stays the same, only the monthly distribution changes — with one exception, the turn from December to
January, when payment and recording fall in different years and the year's total changes at both ends.
❓ Frequently asked questions
What do I need to set up before recording bills for the farm?
Four registries, in this order: Cost Center, Management Account, Bank Account and Entity. Without them, entries are left unclassified and the reports don't add up.
Does the invoice I enter in inventory create the payable automatically?
Yes. After you finalize the inbound Transaction, the system offers the option to automatically generate the matching entry in Accounts Payable.
How do I check the balance of the farm's accounts?
With the View Balances button, on the main Accounts Payable/Receivable screen, which shows balances by bank account. For a broader view, use FIN.03.01 (formerly 15.02) – Financial flow, FIN.03.02 (formerly 15.03) – Periodic cash flow and FIN.02.01 (formerly 15.01) – Financial statement.
Can I track the season's financial result?
Yes. All transactions are linked to the season and the cost center. FIN.04.02 (formerly 15.04) – DRE shows the result, and FIN.04.01 (formerly 15.10) – Planned vs. Actual compares, month by month or by season, what was planned with what actually came into or went out of cash. For what is still open, reports FIN.01.02 (formerly 15.06) to FIN.01.03 (formerly 15.09) list installments by due date.
Is moving money from the bank to the cash box an expense?
No. Use the Transfer Between Accounts screen: it takes the balance out of one account and adds it to the other, without creating an expense or revenue — the money still belongs to the farm.
The farm buys in dollars. Do I need to set anything up?
Yes: register the currency in Financial > Currency (at most three per farm). Only after that do the currency and exchange rate fields appear on the bank account, bills and contracts.
📘 Screen: Bank Account
The Bank Account screen is used to register and manage the bank accounts and cash boxes the farm uses. It is an essential registry for every financial transaction, such as payments, receipts, transfers and reconciliations.
📍 Location in the system
Menu: Financial > Bank Account
🧩 Main function
It represents the accounts that money moves through in the financial module. Every operation involving money coming in or going out (such as accounts payable and receivable) depends on an account registered here.
The Balance field is not typed in: it results from payments, receipts and transfers between accounts. What you enter is the Opening balance — how much the account had on the day the farm started tracking it in upCampo. To check the current balance and the history of each account — date, user, source of the transaction, previous balance and new balance —, use the View Balances button, available on Accounts Payable/Receivable and on Transfer Between Accounts.
📝 Registry fields
| Field | Description |
|---|---|
| Code | Unique identifier of the account (generated or defined). |
| Description | Name that represents the account in the system (e.g., "Headquarters Cash Box"). |
| Bank code | The three-digit Brazilian bank clearing code: 077 for Inter, 001 for Banco do Brasil, 341 for Itaú. The LCDPR requires it. |
| Bank | Name of the bank. |
| Branch | Bank branch number. |
| Account No. | Bank account number. |
| Pix key type | Defines whether the Pix key is a CPF, CNPJ, phone, e-mail or random key. |
| Pix | The account's Pix key (Brazil's instant payment system), to make transfers and receipts easier. |
| Balance | Informational; shows the account balance based on the transactions made. It cannot be typed in. |
| Opening balance | The account's starting point: how much it had before the first entry made in upCampo. When you save, the account balance becomes this amount. |
| Opening balance date | The day this balance refers to — usually the day the farm started using the system, or the first day of the fiscal year. It is the date shown on the Opening balance line of the statement. |
| Active | Defines whether the account is active for use in the system. |
| Do not allow negative balance | Prevents entries that would leave the account with a negative balance — including transfers that would come out of this account. |
| Currency | Currency in which the account balance is tracked. It only appears if a currency is registered; with none, the field is hidden and the account is handled in reais. |
| Type for the cash book (LCDPR) | How the account goes into the LCDPR: Bank account, Cash on hand or Funds in transit. See the section right below. |
| Notes | Free field for additional notes. |
📒 Type for the cash book (LCDPR)
The LCDPR (Brazil's Digital Rural Producer Cash Book) separates money that went through the grower's bank account from money that didn't, because the Brazilian Federal Revenue Service cross-checks bank account entries against what banks report to it (the e-Financeira), by date and amount. The Type for the cash book (LCDPR) field says which of the three cases the account falls into:
| Type | When to use it | In the file |
|---|---|---|
| Bank account | An account at the grower's bank. This is the default. | Goes with bank, branch and account, and entries are reported under its code. |
| Cash on hand | The farm's cash box: money paid or received in cash. | Account 000. |
| Funds in transit | What did not go through the grower's bank: lease paid in grain, inputs paid with product, money that went through a partner's or co-owner's account. | Account 999. |
With the Bank account type, the screen checks the registry and warns about what is missing: "For the LCDPR, this bank account is missing: bank code (3 digits), branch…". You can save it like that, but the account will be incomplete in the file and LCDPR generation will not let you generate it until it is complete. The branch goes without the check digit (up to 4) and the account with the check digit (up to 16).
🏁 Opening balance: the account's starting point
In real life a bank account doesn't start at zero — it already had money before the farm started using upCampo. The Opening balance is where you enter that amount, together with the Opening balance date, which is the day it refers to.
When you save, two things happen: the account's Balance becomes the amount entered, and the statement — the View Balances window — gets an Opening balance line with the date you typed. From then on, every payment, receipt and transfer adds to or subtracts from that starting point, and the statement reconciles from end to end.
An account flagged with Do not allow negative balance does not accept a negative opening balance: upCampo responds "The account is set to not allow a negative balance." The option applies from the very first amount, not only to later entries.
The opening balance line appears in View Balances, on the History tab, with Opening balance in the Origin column. Correcting the opening balance before the first transaction writes a second line, with the difference — the statement doesn't erase anything, it accumulates.
🗑 Deleting or deactivating an account
An account that has already been used cannot be deleted. If it has a balance, statement, payment or transfer, the system refuses, with the message "This record has already been used! Delete the dependencies or deactivate it." (that is the exact message shown on the screen).
The right path in that case is to deactivate it: uncheck Active and save. The account disappears from the selection lists on the other screens, and everything already recorded in it stays in place — the statement, payments and history remain intact. Deleting only makes sense for an account registered by mistake, which never had any transactions.
- You can use them in accounts payable, receivable, transfers and cash flow.
- Balances are updated automatically with every financial transaction.
- The statement starts at the account's real balance, not at zero — so you can check it against the bank statement.
- Validations such as "do not allow negative balance" help keep financial control tight.
📊 Related reports
- FIN.02.01 (formerly 15.01) – Financial statement
- FIN.03.01 (formerly 15.02) – Financial flow
- FIN.03.02 (formerly 15.03) – Periodic cash flow
- FIN.02.02 (formerly 15.05) – Future financial statement
❓ Frequently asked questions
Do I need to register the farm's cash box, or only bank accounts?
Both. This screen registers both bank accounts and cash boxes — for example, "Headquarters Cash Box". Every operation with money coming in or going out depends on an account registered here. For the tax cash book, mark the cash box as Cash on hand in the Type for the cash book (LCDPR) field: its entries go out with code 000.
How do I keep an account from going negative?
Check the Do not allow negative balance option in the account registry. With it on, the system blocks entries that would make the account negative.
Can I store the account's Pix key?
Yes. The registry has the Pix field for the key and the Pix key type field, where you indicate whether it is a CPF, CNPJ, phone, e-mail or random key.
Is the account balance updated automatically?
Yes. The Balance field is informational and reflects the transactions made — it updates automatically with every financial operation. The only amount you type in is the Opening balance, the account's starting point.
My account already had money before I started using the system. How do I enter it?
With the Opening balance and Opening balance date fields, in the upCampo bank account registry. When you save, the account balance becomes that amount and the statement — the View Balances window — gets an Opening balance line with the date entered. From then on, entries add and subtract from that point.
I typed the wrong opening balance. Can I fix it?
Only while the account has no transactions at all. After the first entry the field locks and upCampo responds "The account already has transactions; the opening balance can no longer be changed." — changing the starting point later would shift the whole statement built on top of it. In that case, the adjustment is made with an entry in Accounts Payable/Receivable or with a transfer, which are recorded in the statement.
The system won't let me delete a bank account. What should I do?
An account with a balance, statement, payment or transfer cannot be deleted — upCampo responds "This record has already been used! Delete the dependencies or deactivate it.". Instead of deleting, uncheck the Active field: the account disappears from the selection lists and everything already recorded in it stays on record.
How do I see an account's balance and statement?
With the View Balances button, which is on Accounts Payable/Receivable and on Transfer Between Accounts. It opens the "Current balances" window, with each account's balance and a history tab with every transaction.
I have an account in dollars. How do I track its balance?
Register the currency in Financial > Currency. Once that's done, the Currency field starts appearing in the account registry and its balance is tracked in that currency.
What is "Funds in transit" on a bank account?
It is the account type for money that did not go through the grower's bank — lease paid in grain, inputs paid with product, money that went through a partner's account. In the LCDPR, its entries go out with code 999. Choose it in Type for the cash book (LCDPR), in the account registry.
📘 Screen: Cost Center
The Cost Center screen is used to structure and organize the farm's costs in hierarchical levels. It is essential for financial analysis, letting you correctly distribute amounts across areas, departments, crops or projects.
📍 Location in the system
Menu: Financial > Cost Center
🧩 Main function
It lets you build a cost center structure that is used in several features of the system: budgeting, expense entries, contracts, work orders and financial reports.
You can create cost centers as a tree (levels), allowing both grouped and detailed analysis.
📝 Registry fields
| Field | Description |
|---|---|
| Code | Identifying code of the cost center. |
| Description | Name of the cost center (e.g., "Soybeans 2024" or "Infrastructure"). |
| Order | Field to manually sort how cost centers are displayed. |
| Parent Cost Center | Lets you build a hierarchy, grouping this item under a higher-level cost center. |
| Allow direct amounts | Defines whether amounts can be posted directly to this cost center (usually turned on only at the lowest levels). |
| Active | Defines whether the center is available for use. |
- Financial entries can be distributed correctly.
- Reports and dashboards can show costs by cost center or grouped.
- You will have a clearer view of where expenses are being generated and can make decisions based on that.
📊 Related reports
- FIN.03.02 (formerly 15.03) – Periodic cash flow
- FIN.01.01 (formerly 15.07) – Accounts payable/receivable by Entity – Installments
- Other reports in the financial module use this structure for filters and grouping.
❓ Frequently asked questions
What is a cost center for on the farm?
To know where the money is being spent. It organizes costs by area, department, crop or project — for example "Soybeans 2024" or "Infrastructure" — and that classification shows up in reports and dashboards.
Can I group cost centers into levels?
Yes. The Parent Cost Center field builds a tree hierarchy, which lets you see amounts grouped by the higher level or detailed at the lowest level.
Why can't I post an amount to a cost center?
Probably because the Allow direct amounts option is unchecked. It is usually on only at the lowest levels of the tree; the higher levels are only for grouping.
Where is the cost center used besides finance?
In budgeting, expense entries, contracts, work orders and financial reports — it is a structure that runs across the whole system.
📘 Screen: Cost split template
A cost split template is a percentage split saved under a name, so it can be applied to an installment in Accounts Payable/Receivable with one click. It records the split the farm repeats every month: the power bill that is 30% headquarters and 70% crops, the manager's salary split between two cost centers, the lease that is spread across three crops.
Without a template, each installment is split by hand, line by line. With a template, the split is registered once and picked from a list.
📍 Location in the system
Menu: Financial > Cost split template
It is in the registry block of the Financial menu, right after Cost Center — which is precisely one of the two destinations it splits across.
🧩 Main function
To register reusable percentage splits. The template does not move any money: it is a split recipe, which only has an effect when someone applies it to an installment. Applying it copies the template's lines into the installment — from then on the installment has its own split, independent of the template.
📝 Main fields
| Field | Description |
|---|---|
| Code | Generated by the system and not editable. The field's help explains the rule: "Generated by the system: the company's highest financial template code plus one." It has four digits — 0001, 0002 — and numbering is per company. When adding, the screen shows the number as a preview; the final one is recorded when you save. |
| Description | Required, up to 100 characters. It is the name that will show up when applying, and the field's help suggests writing it with the percentages already in it: "The name shown when applying it. E.g.: Headquarters 30% / Field 70%". It is worth following the suggestion — whoever applies the template to an installment picks it by this text. |
| Active | Controls whether the template appears in the list for applying. The help states the rule in one sentence: "Only an active template adding up to 100% can be applied to an installment." |
The template list, above the form, shows Code, Description, Destinations, Total and Active, with search on each column. The Destinations column is a ready summary of the split — something like "Crops 70.00% > Headquarters 30.00%" —, and Total shows the sum of the percentages, which tells you whether the template is complete.
🗂 Tab: lines
This is where the split is built, one line per destination:
| Field | Description |
|---|---|
| Management account/Category | The account that portion goes to. |
| Cost Center | The structure that receives that portion. |
| Percentage | This line's portion. The field's help states the rule: "This line percentage. All lines together must add up to 100%." It must be greater than zero — zero is rejected with "The line percentage must be greater than zero." |
At least one of the two destinations is required: management account only, cost center only, or both. With neither, the screen responds "Enter the account or the cost center for the split."
The tab's buttons are Save, Cancel, Delete and Divide equally. Divide equally redistributes the lines already entered in equal parts — it does not create lines: first you register the destinations, then you divide. With three lines, it builds 33.33% / 33.33% / 33.34%: the leftover cents go on the last one, so the total adds up exactly.
Below the grid, the screen shows the math at all times — "Split total: 100.00% / 100.00%" —, green when it adds up and red when it doesn't. A template with no lines also shows in red.
💯 The rule: it can only be active if it adds up to 100%
An Active template must add up to exactly 100%. Trying to save an active template that doesn't add up is rejected: "To be active, the template must add up to 100%.", with the current total right after. Rounding differences below half a hundredth pass — that's rounding, not an error —, but 80% and 130% don't.
An inactive template can be left half-done on purpose: it is the draft. And that is the key to the registration path, because the Active field starts checked and a new template starts with a total of zero.
The order that works
- Click New and uncheck Active. Otherwise the first Save is rejected — the header has no lines yet, and the total is zero.
- Write the Description with the percentages already in the name and save the header.
- On the lines tab, enter each destination with its percentage, until the total turns green at 100%. If the split is equal among the destinations, enter the lines with any percentage and use Divide equally.
- Go back to the header, check Active and save. The template now appears in the list for applying.
🪄 Applying the template to an installment
The template is used on the other side: in the installment's Split window, in Accounts Payable/Receivable. At the top of the window there is the Cost split template field and the Apply template button; the list offers only active templates that add up to 100%.
When you apply it, upCampo calculates each line's amount on that installment's amount — the leftover cents go on the last line, so the split adds up to the exact amount — and records the lines inside the installment. If the installment already has a split, the screen warns before doing anything that applying the template deletes the current lines and records the template's lines, and asks for confirmation.
📊 Reports and dashboards
The template has no report of its own: its effect shows in the reports that read the installment's
split. FIN.03.01 (formerly 15.02) – Financial flow, FIN.03.02 (formerly 15.03) – Periodic cash flow and
FIN.04.02 (formerly 15.04) – DRE divide the split installment across the lines' accounts and cost centers, instead
of putting the whole amount in the installment's account. That is why adding up to 100% matters so much — see the
Chart of Accounts to understand how those
accounts are grouped in the DRE.
- The split the farm repeats every month no longer has to be typed in every month.
- The same expense always falls in the same proportion — headquarters power isn't 30% one month and 25% the next because of a typing mistake.
- A template registered once serves every farm in the company.
- Since only a template adding up to 100% can be active, applying a template never distorts the installment amount in the reports.
❓ Frequently asked questions
I saved the template and it doesn't show up to apply to the installment. Why?
For a template to appear in the list for applying, it must be Active and add up to exactly 100%. Check the Total column in the template list: if it isn't at 100.00%, a line is missing or there is one too many. And check that the Active field stayed checked — the template must be saved as active after the lines are complete.
upCampo won't let me save the new template and says it must add up to 100%. What do I do?
It's the order of registration. The Active field starts checked, and a new template doesn't have any lines yet — so the total is zero and the 100% lock rejects it. Uncheck Active, save the header, enter the lines on the lines tab until the total reaches 100%, and only then go back and check Active.
I fixed the template's percentage. Do the old installments fix themselves?
No. Applying a template copies the lines into the installment, and from then on the installment has its own split. The correction in the template applies to future applications. To fix older installments, you have to open Split on each one and apply the template again — which deletes the current lines and records the corrected ones.
Do I need to register the same template on each farm?
No. The cost split template applies to the whole company: registered on one farm, it can be applied on any other. There is no farm field in the registry.
What is the difference between this split and Allocation Setup in the Inventory menu?
They are different subjects with a similar name. Allocation Setup, in the Inventory menu, splits a transaction's cost across field, variety and fleet — it is a crop split, used for cost per area. The Cost split template, in the Financial menu, splits an installment's amount across management account and cost center — it is a financial classification, used for the DRE and cash flow. Templates from one don't appear in the other.
Can I delete a template I have already used on several installments?
Yes, and nothing is lost. Since applying copies the lines into the installment, installments already split stay exactly as they are — the deleted template simply no longer appears in the list for applying. If you only want to take it out of circulation for a while, prefer to uncheck Active: that way it leaves the list and the registry stays there.
How do I split an expense equally among three cost centers?
Enter the three lines with the destinations (any percentage will do) and click Divide equally: upCampo builds 33.33% / 33.33% / 33.34%, putting the leftover cents on the last line so the total adds up to exactly 100%. The same button exists in an installment's Split window, for when the split applies only to that installment.
📘 Screen: Payment Terms
The Payment Terms screen registers the terms the farm negotiates with suppliers: cash, 30 days, 30/60/90, down payment plus 30 days. It is a short registry, set up once, that then appears as an option on the Quotation and the Purchase Order.
Each payment term can also have its own installments — how many there are, how many days apart and what percentage of the amount each one takes. Once they are set up, "30/60/90" is no longer just a name: choosing the payment term in Accounts Payable/Receivable fills in the due dates and amounts of all three installments in one go.
📍 Location in the system
Menu: Financial > Payment Terms
🧩 Main function
To standardize the term agreed with the supplier. Instead of each buyer writing the term their own way in the notes, everyone picks from the same list — which makes comparing quotations fair, because price can only be compared with the term alongside it.
📝 Registry fields
| Field | Description |
|---|---|
| Active | Defines whether the payment term appears in the list on other screens. An unchecked term disappears from the drop-downs, but stays on older documents. |
| Code | Sequential code of the payment term (e.g., 0001). |
| Description | The term, written the way the farm says it: "CASH", "30 DAYS", "30/60/90", "DOWN PAYMENT / 30 DAYS". It is the only required field. |
| Notes | Free space to detail the rule — for example, from which date the term counts. |
The registry applies to the whole company: a payment term created here appears on every farm.
🗂 Tab: Payment term installments
This is where the payment term gets its content. Each line is an installment, with three pieces of information:
| Field | Description |
|---|---|
| Installment | The installment's order: 1, 2, 3. It is what will show on the bill as the installment number. |
| Days | How many days after the starting date this installment is due. In a 30/60/90 term, the three lines get 30, 60 and 90. A down payment installment gets 0. |
| Percentage | How much of the bill's amount goes to this installment. With three equal installments, 33.33 · 33.33 · 33.34. |
The screen itself sums up the rule in the help for the Days field: "Each installment has its term in days and its share of the total. The percentages must add up to 100."
Below the list is the Sum of percentages total — for example
Sum of percentages: 100.00%. It turns green when it adds up to 100 and
red when it doesn't, and it is the most important check on the tab. upCampo warns you,
but does not stop you from saving: if you leave with the total at 90%, the payment term is incomplete and the bill amount
would not be fully distributed.
The Generate equal installments button
For the most common case — installments of the same size, at regular intervals — you don't need to type line by line. The Generate equal installments button opens a window with two fields: Number of installments and Every how many days. It is pre-filled with 3 installments every 30 days, which is the everyday 30/60/90.
Since 100 rarely divides into a round number, the last installment takes the remainder, so the total adds up to exactly 100. For three installments every 30 days, the result is:
After generating, you can adjust any line by hand — that's how you build a payment term with a down payment,
for example: generate three, and change the first one to 0 days.
🧭 Where the payment term appears
- Accounts Payable/Receivable, in Generate Installments — the Payment Terms drop-down is the first line of the window. Once the term is chosen, the installments' due dates and amounts are filled in at once, from the days and percentages registered here.
- Quotation — together with the supplier and price, to compare offers.
- Purchase Order — it is saved on the order and appears as a column in the order list.
- Quotations become comparable: price and term side by side.
- The purchase order goes out with the agreed term recorded, not written by hand.
- The payable bill is created already split into installments the way it was negotiated, without typing due date after due date.
- Conversations with the supplier always use the same vocabulary.
❓ Frequently asked questions
Does registering 30/60/90 already create the three installments in finance?
It depends on whether the payment term has installments set up. On the Payment term installments tab, enter the three lines — 30, 60 and 90 days, adding up to 100% — or use the Generate equal installments button. Once that's done, choosing that term in Generate Installments on Accounts Payable/Receivable fills in the three due dates and three amounts at once. Without installments set up, the payment term is just the name of the term.
I chose the payment term and it said it has no installments set up. What now?
That's the warning "This payment term has no installments set up yet.": the term exists, but nobody has built its installments. Open Financial > Payment Terms in upCampo, select the term, go to the Payment term installments tab and enter the number, days and percentage of each installment — or use Generate equal installments. Payment terms registered before this feature all start out like this.
The percentages don't add up to 100. Is that a problem?
Yes: the percentage is the share of the bill amount that goes to each installment, so a total other than 100 would distribute more or less than the bill is worth. In upCampo the Sum of percentages total, below the list, turns green when it adds up to 100 and red when it doesn't — and the screen warns you, but lets you save anyway. If you used Generate equal installments, the last installment already takes the remainder of the division and the total adds up on its own.
How do I register a payment term with a down payment plus installments?
The down payment is simply an installment with 0 in Days: it is due on the base date itself. In a "down payment + 30 + 60" term, there are three lines with 0, 30 and 60 days, and the percentages adding up to 100. The quickest way is to generate three equal installments and then change the first one's days to zero.
Where do I choose the payment term?
On the Quotation and the Purchase Order. Only payment terms marked as Active appear in the list.
Can I delete a payment term I no longer use?
You can, but the safest option is to just uncheck Active: it disappears from the lists and older orders keep showing the term they were closed with.
Do I need to repeat the registry on each farm?
No. The registry belongs to the company: a payment term created on one farm appears on all of them.
📘 Screen: Management Account/Category
The Management Account screen lets you structure the farm's chart of accounts, classifying revenues, expenses and grouping accounts. It is used for financial analysis, DREs (income statements), dashboards and cash flow control, making financial management clearer and more efficient.
It may also be called Financial Category, or Financial Type.
📍 Location in the system
Menu: Financial > Management Account
🧩 Main function
The Management Account/Category organizes financial entries based on a customized chart of accounts. You can build a structure of revenues and expenses with levels and groupings, making consolidated or detailed analysis easier.
The list bar has two features worth knowing before you start:
- Chart of Accounts / DRE — the selector switches the set being shown and sets the set for any account created next. They are two independent views: the day-to-day management one and the Income Statement one.
- Import 'default' company — opens a window with the accounts of upCampo's default company; check the ones that fit and import them. It is the fastest way for anyone building their finances from scratch.
This account will be linked in financial entries (accounts payable/receivable), work orders, inventory transactions and contracts, among others.
📝 Registry fields
| Field | Description |
|---|---|
| Classification |
|
| Code | Account identifier. |
| Name | Name of the management account. |
| Order | Number used to organize the display. |
| Parent Account | Lets you build a hierarchy (upper and lower levels). |
| Allow direct amounts | Defines whether amounts can be posted directly to this account (usually turned on only for lowest-level accounts). |
| Consider for Income Tax | Says whether the account belongs to the farming activity. When checked, whatever is posted to it goes into the Tax cash book as farm revenue or expense; when unchecked, it stays as Outside the farming activity and does not go into the LCDPR. It applies to every bill that uses the account — whether it comes from an invoice, contract, payroll, maintenance work order or manual entry. See the section right below. |
| Interest and charges go into the cash book | For a loan or crop-financing account, which has Consider for Income Tax unchecked: the principal stays out of the book, but the interest paid on each payable installment goes in as a farm expense, on its own line. See Interest and charges, below. |
| Split Later (Allocation) | Allows amounts posted to this account to be split later. |
| Active | Defines whether the account is available for use. |
| Type | It is not a form field: it comes from the Chart of Accounts / DRE selector on the list bar, and it is what separates the two sets of accounts. |
| Show on Dashboard | If checked, this account will appear in the charts and summaries of the financial dashboard. |
- Every financial transaction will be classified correctly.
- Financial reports and dashboards (such as the DRE and cash flow) will show the data in a clear, structured way.
- You will be able to analyze profitability, spot bottlenecks and meet accounting obligations more accurately.
📒 The account decides what counts as farming activity in the cash book
In the tax cash book, each entry is classified as part of the farming activity or Outside the farming activity. What decides it is the installment's Consider for Income Tax flag — and the installment copies that flag from the management account when it is created. In practice, then, checking the account or not means deciding whether everything posted to it goes into the LCDPR.
- Check the activity accounts: inputs, fuel, labor, maintenance, sale of production, lease paid.
- Leave unchecked the ones that aren't: loans (the principal), financial investments, owner withdrawals, personal expenses.
Interest and charges go into the cash book
With loans and crop financing, the money coming in and the repayment of principal are not activity revenue or expenses — but the interest and charges paid are. The Interest and charges go into the cash book flag handles this without splitting the bill in two:
The interest must be in the Interest & Penalties amt. field of the settlement, in Accounts Payable/Receivable. The flag is read when the book is updated: it applies to open months as soon as they are updated, and a closed month does not change. With Consider for Income Tax checked, the whole installment already goes into the book, and the interest flag just separates it onto its own line.
🔗 Management account and chart of accounts
The management account is what you choose on each entry. To group those accounts — with their own order, code and name for the report —, use the Chart of Accounts screen, which works on this same registry.
📊 Related reports
- FIN.03.01 (formerly 15.02) – Financial flow
- FIN.03.02 (formerly 15.03) – Periodic cash flow
- FIN.04.02 (formerly 15.04) – DRE
- FIN.01.02 (formerly 15.06) – Accounts payable/receivable by Entity – General
- FIN.04.01 (formerly 15.10) – Planned vs. Actual
- Home screen dashboards: Financial – Result and Financial – Flow
FIN.04.01 (formerly 15.10) – Planned vs. Actual is the one that depends most on this registry: it opens one line per management account and compares, month by month, what was planned with what was paid or received. A poorly registered management account shows up there as a stray line.
❓ Frequently asked questions
Are Management Account, Financial Category and Financial Type the same thing?
Yes. They are different names for the same registry: the chart of accounts that classifies the farm's financial entries.
What is the difference between the account classifications?
There are four: (+) Revenue, (-) Expense, (+/-) Both and (=) Totalizer. The totalizer is only for grouping — it does not accept amounts posted directly.
How do I make an account show up on the financial dashboard?
Check the Show on Dashboard option in the management account registry. Only checked accounts go into the charts and summaries.
Can I split an amount after it has been posted?
Yes, as long as the account has the Split Later (Allocation) option enabled. It allows amounts posted to that account to be split afterwards.
How do I mark what goes into Income Tax?
With the Consider for Income Tax option, in the management account registry. When checked, the account is treated as part of the farming activity, and every bill that uses it — from an invoice, contract, payroll, maintenance work order or typed in by hand — goes into the Tax cash book. When unchecked, its entries stay as Outside the farming activity and do not go into the LCDPR. The installment copies the account's flag when it is created.
Does loan interest go into the cash book?
Yes, if the loan account has the Interest and charges go into the cash book flag. It is meant for an account with Consider for Income Tax unchecked: the principal stays outside the activity, and the interest entered in Interest & Penalties amt. on the settlement becomes a farm expense line, on the same bank account and the same date.
What is the Chart of Accounts / DRE selector for?
It separates two sets of accounts: the management chart used day to day and the Income Statement one. The account is saved in the set that was selected when you created it, and the selector also filters what the list shows.
Do I have to type in every account one by one?
No. The Import 'default' company button brings in the structure of upCampo's default company: you check the accounts that fit your farm and adjust whatever you need afterwards.
📘 Screen: Chart of Accounts
The Chart of Accounts screen groups management accounts into an ordered structure, with its own names and codes. It is the step after registering the accounts: the accounts say what each expense and each revenue is; the chart says in what order and under which headings they appear in the management reports and the DRE (income statement).
The screen builds two sets, chosen in the selector on the bar: Chart of Accounts and DRE. Each chart created belongs to the set that was selected at the time it was saved.
📍 Location in the system
Menu: Financial > Chart of Accounts
🧩 Main function
To bring several management accounts together under one grouping — "Crop Expenses", "Grain Revenue", "Administrative" — and set the order in which they appear. The same management account can go into a chart with a code and name different from those in its registry, which lets you adapt the report's naming without touching the original registry.
🧱 How the screen is organized
As in the rest of the web portal, the list is on the left and the registry on the right. The list bar has:
- New and Reload.
- Import 'default' company — opens a window with the charts of upCampo's default company; you check the ones you want and click Import selected. It is the shortcut for anyone starting from scratch.
- Chart of Accounts / DRE — switches the set being shown and the one that will be saved on new charts.
📝 Header fields
| Field | Description |
|---|---|
| Code | Code of the chart, used to sort and identify the grouping. |
| Name/Description | Name of the grouping, the way it should appear in the report (e.g., "LIVESTOCK EXPENSES"). |
| Active | Defines whether the chart is still in use. |
🗂 Account tab
This is where management accounts go into the chart. Save the header first — until it is saved, the import and organize buttons warn that the header needs to be saved.
| Field | Description |
|---|---|
| Account | The management account that goes into the chart. Required. |
| Name/Description | Name under which this account appears in this chart. If blank, the name from the account registry is used. |
| Code | Code of the account within this chart. |
| Order | Position of the account in the chart listing. |
The tab's list shows Account, Classification, Type, Code, Name/Description and Order — Classification and Type come from the management account registry, and they are how you check whether revenue went in where an expense should have.
Tab buttons
- Save, Cancel and Delete — for one account at a time.
- Import — opens the "Import accounts" window, which lists the management accounts not yet used in this chart, with filters by code, description and classification. Check several and import them at once.
- Organize — opens the reordering window, with the Move up and Move down buttons. It is the practical way to fix the order without typing number after number.
- Delete all — clears the chart's accounts. It does not touch the management account registry, only the makeup of this chart.
- Accounts appear grouped and in the order the farm uses to analyze the result.
- You can keep two views — the day-to-day management one and the DRE one — on the same account registry.
- Anyone starting out imports the default company's structure and adjusts it, instead of building everything from scratch.
❓ Frequently asked questions
What is the difference between a management account and the chart of accounts?
The management account is the classification you choose on each entry — "Crop Expenses", for example. The chart of accounts is the grouping of those accounts, with its own order and names, used to organize how the result is read.
What is the DRE option for?
To build a second view of the same accounts, with the Income Statement structure. The selector on the bar switches between the two sets, and each chart is saved in the set it was created in.
I can't import accounts — the screen asks for the header.
Save the chart header first (code, name and active). Only then do the Import and Organize buttons on the Account tab work, because they need to know which chart to link the accounts to.
How do I change the order of the accounts within the chart?
With the Organize button, which opens a window with Move up and Move down. You can also type the number in each account's Order field, but the organizer is faster when the chart has many lines.
Does deleting an account from the chart erase its registry?
No. Deleting on the Account tab — or using Delete all — removes the account from this chart only. The management account registry and the entries made to it stay intact.
📘 Screen: Currency
The Currency screen registers the currencies in which the farm tracks money besides the Brazilian real — the dollar and the guaraní are the common cases for those who buy inputs or sell production in a foreign currency. Each bank account is tied to a currency, and that link is what makes the account balance be tracked in the right currency.
The registry is per farm and accepts at most three currencies. When you reach the third one, the New button is disabled and the screen warns that only three records are allowed.
📍 Location in the system
Menu: Financial > Currency
🧩 Main function
To enable foreign currency tracking in the rest of the system. As long as no currency is registered, the currency fields stay hidden on the other screens and everything is handled in reais.
Once a currency is registered, the field starts appearing on the Bank Account registry, on Employee/Operator, on Storage Location, on the Sales/Purchase Contract and on Accounts Payable/Receivable, which accepts amounts and exchange rates in up to three currencies. On Transactions the field only appears when there is more than one currency registered.
📝 Registry fields
| Field | Description |
|---|---|
| Active | Defines whether the currency is available for use. |
| Order | 1, 2 or 3. It is the currency's position on screens that work with more than one — the one with order 1 appears first and is suggested as the default. |
| Code | Short symbol, the way you want to see it in amount fields (e.g., US$). |
| Description | Name of the currency (e.g., "Dollar"). It is the only required field. |
- Each bank account has its balance tracked in its own currency.
- Financial entries accept amounts and exchange rates in foreign currency.
- The View Balances screen shows the balance separated by currency.
❓ Frequently asked questions
Do I need to register the real as a currency?
No. With no currency registered the system already works in reais, and the currency fields don't even appear on the screens. Register here only the foreign currencies the farm uses.
Why can't I register a fourth currency?
Because the limit is three per farm. When you reach the third, the New button is disabled and the screen shows the warning. To replace one of them, uncheck Active or delete the one that is no longer used.
I registered the currency and it doesn't show up on Transactions. Why?
On the Transactions screen the currency field is only shown when the farm has more than one currency registered. On the other screens, a single one is enough for the field to appear.
Where do I enter today's dollar exchange rate?
The exchange rate that applies to the entry is typed into the document itself — on Accounts Payable/Receivable, on Transfer Between Accounts or on the contract. The Currency Rates screen is for keeping the history of exchange rates.
📘 Screen: Currency Rates
The Currency Rates screen keeps the history of foreign currency exchange rates: for each date, what the buying rate was and what the selling rate was. It is a rate logbook — useful for checking later at what exchange rate a deal was closed.
📍 Location in the system
Menu: Financial > Currency Rates
🧩 Main function
To record the day's exchange rate. The entry is simple: choose the currency, confirm the date and enter the two amounts.
📝 Registry fields
| Field | Description |
|---|---|
| Currency | A fixed list on the screen, with Dollar and Euro. Required. Note: this list belongs to this screen and does not come from the Currency registry. |
| Date | Day of the rate. It comes filled in with today's date and is required. |
| Buying rate | How much you pay in reais for one unit of the currency. Required. |
| Selling rate | How much you receive in reais for one unit of the currency. Required. |
The list, on the left, shows Date, Buying rate, Selling rate and Currency, with a filter on each column. The registry applies to the whole company — it is not per farm.
- You can check at what exchange rate each period was closed, without relying on a spreadsheet.
- It becomes easier to check the amount typed into an older contract or bill.
❓ Frequently asked questions
If I record today's rate, do entries come out converted automatically?
No. Each document's conversion uses the amount typed in its Exchange rate field. This screen keeps the history of rates for reference.
Why does the currency list here only have Dollar and Euro?
Because that list is fixed on the screen and does not come from the Currency registry. If the farm operates in another currency, it is tracked through the Currency registry and the documents' Exchange rate field.
What is the difference between the buying rate and the selling rate?
The buying rate is how much you pay in reais to buy the foreign currency; the selling rate is how much you receive when you sell it. Record both as they were that day — the difference between them is what explains the exchange result.
Do I need to enter the rate every day?
Only on the days that matter: usually the day you close a purchase, a sale or a payment in foreign currency. The screen does not require one rate per day and does not block entries for lack of one.
📘 Screen: Approval rules
Approval rules are the company's payment policy written into the system: up to what amount a payment can go out with a single person's signature, and from what amount it needs to go through more people. Each rule is a value range — "up to R$ 10k", "from R$ 10k to R$ 100k", "above R$ 100k" — and each range has a sequence of steps, with the approvers for each step.
What uses this rule is the payment batch. When someone sends a batch for approval, upCampo adds up the batch, looks for the active range that covers that total and copies its steps to the batch: from then on, each approver signs in turn, in order. With no range set up, no batch is sent — the approval rules screen is the setup that makes approval exist.
Approval rules apply only to accounts payable: they authorize money going out. With the option Require approval to settle turned on in File > Company/Crop Settings, every payable follows the path add to batch → send for approval → approve → pay, and Accounts Payable/Receivable itself offers the Add to batch button in the payment window. Receivables are received normally, whether the option is on or not.
📍 Location in the system
Menu: Financial > Approval rules
It closes the setup block of the Financial menu, after Currency Rates — it is setup, not a day-to-day operation. Like every screen in the web portal, it only appears for those who have permission, granted in File > Users.
🧩 Main function
To set up the value ranges and, within each one, the approval steps with their approvers. Two characteristics change how you use it:
- The setup is per company, not per farm. The same range applies to all of the company's farms — unlike the financial close, which is per farm.
- In each step, one approver signing is enough. Putting three people in a step does not require three signatures: it is the list of who can sign that step, and the first one to approve moves the batch forward. That way payment does not stop when someone is traveling.
📝 Main fields
The form at the top is the value range:
| Field | Description |
|---|---|
| Description | The name of the range, required. The field's help text suggests the format: "E.g.: Up to R$ 10k". This text is what appears in the batch, next to the approval, and in system messages — it is worth writing it so it makes sense outside the screen. |
| Value from | The floor of the range, required. It can be zero, and in the lowest range that is normal. |
| Value up to | The ceiling. Blank means "no limit" — the field's help text says so, and the list shows No limit in the column. The last range is usually the one with no limit; otherwise a very large batch has no rule to cover it. |
| Active | Checked by default. Only an active range is used when sending the batch, and only an active range is included in the overlap check. Unchecking it is how you retire a rule without erasing the history. |
| Notes | Free space to record the decision: "approved at the partners' meeting on 09/10/2026". |
The list, above the form, shows Description, Value from, Value up to, Steps — the whole sequence on one line, in the format "Finance manager > Director" — and Active. Ranges are listed in order of value.
To avoid gaps between ranges, use the next cent as the floor of the following one: 0.00 to 10,000.00; 10,000.01 to 100,000.00; 100,000.01 with no limit. A batch that falls into a gap — R$ 10,000.005 does not exist, but R$ 10,000.00 set up in two ranges does — is not sent.
🗂 Tab: Steps
The range alone approves nothing: its steps do the approving. After saving the range, the Steps tab unlocks the setup of each one.
| Field | Description |
|---|---|
| Order | The position of the step in the sequence: 1, 2, 3. Required, minimum 1, and it comes pre-filled with the next free position. Two steps cannot have the same order — upCampo responds "There is already a step with this order.", because with two steps in the same position the batch would not know which one is the current step. |
| Step | The name of the role that signs, required. The help text suggests "E.g.: Finance manager". It is what the approver reads in the batch ("step 2 of 3 - Director"), so name it after the role, not the person: changing managers should not force you to rewrite the rule. |
| Approvers | Who can sign this step. It accepts several, and the field's help text states both rules: "Any one of them can approve. Each person approves only one step of the same batch." At least one is required — with no approver, "Choose at least one approver for the step.". The list shows the company's users. |
The tab's buttons are Save, Cancel and Delete, and they act on the step selected in the grid — which shows Order, Step and Approvers. Changing a step requires edit permission on the screen; deleting the whole range requires delete permission.
🔒 Who cannot approve
Being on a step's approver list is not enough. At signing time, upCampo checks three things, and each refusal has its own message:
| Lock | What upCampo responds |
|---|---|
| Only an approver of the current step — the pending one with the lowest order — can sign | "You are not an approver of this batch's current step." |
| Whoever created the batch and whoever sent it for approval cannot approve it | "Whoever created or sent the batch cannot approve it." |
| Whoever has already signed one step cannot sign another in the same submission | "You have already approved another step of this batch. Each person approves only one." |
Together, the three guarantee what approval rules promise: a three-step batch was seen by three different people, and none of them is the one who built the batch. The same person can, however, be an approver of several steps in the setup — they simply sign the first one they reach.
Returning is different from approving. Any approver of the current step can return the batch to draft, with a reason — including someone who could not sign because they already signed another step. Refusing is always possible; it is releasing that is locked.
🧮 How the range is chosen
On the batch's Send for approval, upCampo:
- Adds up the batch — the amount to pay of each installment, excluding the ones that were rejected.
- Looks for the company's active range whose "value from" is less than or equal to that total and whose "value up to" is greater than or equal to it (or is blank, no limit).
- Copies that range's steps to the batch, renumbered 1, 2, 3 in the order set up, and puts the batch in Awaiting approval.
When something is missing, the batch stays in draft and the message says what to set up:
- no range covers the amount — "No active approval range covers this batch's amount (R$ 128,400.00). Set it up in Financial > Approval rules.";
- the range exists but has no steps — "The range 'Above R$ 100k' has no steps. Set them up in Financial > Approval rules.";
- a step's only approver is whoever created or is sending the batch — the message quoted above.
What changes in a batch already sent
It is worth knowing what the batch takes with it and what it keeps reading from the setup:
- Steps are copied when sending. How many there are, in what order and with what name — that is frozen in that batch. Creating a new step in the range does not add a step to a batch that is already in approval.
- Who can sign is read at that moment. Each step's approver list comes from the setup at the moment of the click: removing someone from the step removes their right to sign batches that are waiting, and adding someone grants that right right away — which is exactly the way to unlock a batch held up by someone's absence.
- A deleted step leaves the batch with no one to sign it. Deleting a step also erases its approvers, and the batch that was right at that step no longer has anyone to release it. The way out is Back to draft and resend, under the new rule.
✅ How to build the farm's approval rules
- Decide the ranges before setting them up. Two or three cover almost any farm: everyday payments, mid-sized ones and large ones.
- In
Financial > Approval rules, click New, describe the range, enter Value from and Value up to (empty in the last one) and save. - In the Steps tab, set up step 1 with the role and the approvers. Repeat for the others.
- Repeat for the other ranges, always starting the floor at the cent after the previous ceiling.
- Test with a real batch, a small one: build it, send it and watch the sequence appear in the batch's Approvals tab.
- A payment above the agreed amount does not go out without the signature of whoever the company has designated.
- Whoever builds the batch is not whoever releases it, and that becomes guaranteed by the system — not by each person's memory.
- Each signature is recorded with name, date and step, in the batch's Approvals tab.
- Vacations and trips do not stop the finance team: with several approvers in the step, one signature is enough.
- The payment policy stops being a verbal agreement and becomes setup, reviewable and auditable.
❓ Frequently asked questions
How do I require two partners to approve a large payment?
In upCampo's Financial > Approval rules, set up a range starting at the amount from which this applies and, within it, two steps: each step is one signature. Make one partner the approver of step 1 and the other of step 2 — or both on both steps, since upCampo prevents the same person from signing both. The batch is only approved after the last step.
The batch won't send and says no range covers the amount. What is missing?
An approval range for that total is missing. Open Financial > Approval rules and check three things: whether there is an active range whose interval contains the batch amount, whether the last range has Value up to blank (no limit) and whether there is no gap between one range's ceiling and the next one's floor. Until some range covers the amount, the batch stays in draft.
I set up three approvers in the step. Do all three need to approve?
No. Several approvers in a step are the people who can sign it, and one of them approving is enough for the batch to move on to the next step. When the goal is to require two signatures, the way to do it is to create two steps, not to put two people in the same step.
Why can't I approve a batch I built myself?
Because whoever creates or sends the batch does not approve it — upCampo responds "Whoever created or sent the batch cannot approve it.". That is the point of approval rules: the check has to be done by someone else. If your company has no other person for that step, add an approver to the step, or ask someone else to build the batch.
Does approval also apply to accounts receivable?
No. Since October 5, 2026, mandatory approval applies only to accounts payable, which is money leaving the company. Receivables are received directly in Accounts Payable/Receivable, even with the option Require approval to settle turned on.
Do approval rules apply to all of the company's farms?
Yes. Approval rules are set up per company: the same ranges apply to all of its farms. That is different from the financial close, which is per farm. Batches, on the other hand, belong to the farm where they were created.
I changed the approvers and have batches awaiting approval. Do they follow the old rule?
The batch's steps were copied at the moment of sending and do not change. But who can sign each step is read from the setup at the moment of the click: adding an approver immediately releases the batches held at that step, and removing someone removes their right to sign. That is how you unlock a batch whose approver has left the company.
Can I deactivate a range instead of deleting it?
Yes, and it is usually the best way: uncheck Active. The deactivated range is no longer used in new submissions and drops out of the overlap check, but it stays in the list, with its steps and history. Deleting erases the range and its steps at once — and a batch that was right at one of those steps is left with no one to sign it.
The system says the range overlaps another one. Why is that blocked?
Because a batch falls into a single range, based on its total amount. If two active ranges covered R$ 8k, sending would have no way of choosing which sequence of steps to follow — and approval would no longer be predictable. Adjust the values so the ranges meet without crossing (up to 10,000.00; from 10,000.01) or deactivate one of them.
📘 Screen: Transfer between accounts
The Transfer between accounts screen records money that leaves one of the farm's bank accounts and goes into another — from the bank to the headquarters cash box, from one account to another in the same group, from the account in reais to the dollar account. It is neither an expense nor income: the money still belongs to the farm, it just changed places.
That is why this movement does not go through Accounts Payable/Receivable: recording a transfer as an expense in one account and income in the other would distort the result. Here it is recorded as a transfer and only affects the balances.
📍 Location in the system
Menu: Financial > Transfer between accounts
🧩 Main function
To reduce the balance of the source account and add the same amount to the destination account, keeping a record of who did it, when and why. Each side of the movement appears in the account's history, inside View Balances.
📝 Record fields
| Field | Description |
|---|---|
| Number | Sequential number suggested by the system (0001, 0002…). It can be changed. |
| Date | Date of the movement. It comes with today's date and is required. |
| Status | Open or Finalized. It cannot be typed — the Finalize button is what changes it. |
| Description | The reason for the transfer ("Topping up the headquarters cash box"). Required. |
| Source Account | Where the money comes out of. Required. |
| Destination Account | Where the money goes. Required, and it must be different from the source. |
| Cost Center Source and Destination | Optional. They identify from which structure and to which one the funds were reallocated. |
| Source Amount R$ | Amount that leaves the source account. Required. |
| Exchange Rate | Only appears when source and destination are in different currencies. Required in that case. |
| Destination Amount | Same: it only appears between accounts in different currencies, and is required when it appears. This is the amount that goes into the destination account. |
| Notes | Free space to describe the movement in detail. |
🧰 Buttons
- Add — saves the transfer and moves the balances right away. On a selected document, the button is renamed Update.
- Cancel/View list — goes back to the list without saving.
- Delete — deletes the transfer and reverses both balances.
- Finalize — closes the document; after that it no longer accepts changes. On a transfer that is already finalized, the button just warns "The transfer is already finalized!" and opens no confirmation.
- View Balances — opens the "Current balances" window, with the balance of each account and the History tab, where both ends of the transfer appear (inflow and outflow), with previous balance and new balance.
📒 What appears in the account history
A transfer writes two lines to the history, one in each account: the outflow in the source account and the inflow in the destination account. That's all — finalizing writes no line at all, because it does not move money.
When the transfer is undone or corrected, two more are added, reversing the first ones. This happens when you delete the document and also when you change the account, the amount or the date — the system undoes the previous movement and posts the new one. Changing only the description, the notes or the cost center does not touch the balance and does not create a line.
🚫 When the system refuses the transfer
- Source account the same as the destination.
- Description, source account, destination account or amount left blank.
- Source account marked Do not allow negative balance with insufficient balance — the message states how far negative it would go.
- Document already finalized — including when clicking Finalize again, which responds "The transfer is already finalized!".
- Account balances stay correct without inventing expenses and income that never happened.
- Each account's history shows where each reallocation came from and where it went.
- The headquarters cash box can be topped up and checked at any time.
❓ Frequently asked questions
How do I transfer money from the bank to the farm's cash box?
Through this screen: click New, write the description, choose the bank account in Source Account, the cash box in Destination Account, enter the amount and click Add. Both balances change at that moment.
Is a transfer between accounts an expense?
No. The money still belongs to the farm, it just changed accounts. That is why it does not become a bill in Accounts Payable/Receivable and does not affect the result — it only changes the balances of the two accounts.
I entered the wrong transfer amount. How do I fix it?
If it is still Open, select the document, adjust it and click Update. If it is already finalized, the way is to delete it — which reverses both balances — and enter it again.
The system won't let me transfer and mentions a negative balance. What should I do?
The source account has the option Do not allow negative balance checked in its Bank Account record and does not have enough balance for the amount. Either reduce the amount, enter the missing inflows first, or review that option in the account record.
What is the Finalize button for?
To close the document: it saves the date and the user who finalized it and starts blocking changes. The balance had already been moved when the transfer was added, so finalizing changes no amount and writes no line in the account history. On a transfer that is already finalized, the button just warns "The transfer is already finalized!".
Can I check an account's history?
Yes, with the View Balances button. The History tab shows date, user, movement origin, type (E for inflow, S for outflow), amount, previous balance and new balance for each entry in the account. Each transfer writes two lines — the outflow in the source account and the inflow in the destination.
Why does the statement have more lines than transfers entered?
Because every correction stays visible. A transfer writes two lines when added (the outflow and the inflow) and two more when undone — which happens both when you delete the document and when you change the account, the amount or the date. Changing only the description, the notes or the cost center does not touch the balance and does not create a line.
I transferred from an account in reais to one in dollars. What amount goes into the destination account?
The Destination Amount you entered. Between accounts in different currencies, upCampo takes the Source Amount R$ out of the source account and puts the Destination Amount into the destination account — each side in its own currency. The Exchange Rate is saved in the document as a record of the rate used.
📘 Screen: Planned entry
The Planned entry screen keeps the commitments the farm already knows will exist but that have not yet become bills: next year's land lease, the machinery installment, the sale already agreed and not yet invoiced. It is a forecast agenda, separate from Accounts Payable/Receivable.
📍 Location in the system
Menu: Financial > Planned entry
🧩 Main function
To record forecast amounts, classified by management account and cost center, for lookup and projection. The selector in the list bar separates the two sides: Accounts PAYABLE and Accounts RECEIVABLE — it filters the list and sets the type of the record you create.
📝 Record fields
| Field | Description |
|---|---|
| Number | Sequential number suggested by the system (0001, 0002…). Required. |
| Date | Expected date of the entry. It comes with today's date. |
| Description | What the commitment is ("Lease area 3 — July installment"). Required. |
| Total amount | Forecast amount, in reais. Required. |
| Mgmt. account | The management account that classifies the forecast. Required. |
| Amount in Dollars | Forecast amount in dollars, when the commitment is in a foreign currency. |
| Dollar unit value $ | Exchange rate used in the forecast. |
| Entity | Supplier, customer or lessor of the commitment. Active entities only. |
| Cost center | Structure that will receive the cost, once it is confirmed. |
| Consider for Income Tax | Marks the forecast as relevant for income tax. |
The list, on the left, shows Number, Description, Date, Total Amount, Account, Amount in Dollars and Dollar Value.
- Future commitments are noted in the system, not in a spreadsheet or notebook.
- The forecast is already classified by management account and cost center from the start.
- What is a forecast stays separate from what is a real bill, without cluttering collections.
❓ Frequently asked questions
Does what I enter here become an account payable?
No. A planned entry is a note of a future commitment: it does not create an installment, does not go into collections and does not touch any balance. When the commitment is confirmed, enter the bill in Accounts Payable/Receivable.
What is the difference between a planned entry and an account payable?
An account payable is a firm commitment, with installments and due dates, that will be paid off and changes the bank account balance. A planned entry is the expectation: it helps you not forget what is coming.
How do I record an expected receipt?
Select Accounts RECEIVABLE in the list bar selector before clicking New — that is what sets the record type. Remember that the Mgmt. account field only lists expense accounts.
The management account I want does not appear to choose
The Mgmt. account field in the planned entry only lists expense accounts that are active and have Allows direct amount checked. Open the Management account record and check those settings.
📘 Screen: Accounts Payable/Receivable
This is the main screen of the financial module, used to control the farm's obligations and receipts. Through it, you view, record, edit and pay off financial commitments, keeping cash inflows and outflows organized. It is a "header" + installments. In other words, the header is a summary of the document, and the installments are where the amounts are.
It is the installments that get "paid off".
📍 Location in the system
Menu: Financial > Accounts Payable / Receivable
🧩 Main function
To record all accounts payable (expenses) and accounts receivable (income), both standalone and integrated with other modules (e.g.: inventory movements, contracts, salaries, etc.).
It gives full control of due dates, amounts paid, bank accounts involved and accounting classification (cost center and management account).
🧰 Top action bar
At the top of the screen, you will find the following buttons:
- New: create a new bill manually.
- Reload: refreshes the list.
- Pay/Receive Multiple: selects multiple installments for payment/receipt in a batch.
- Import Movement: automatically brings in amounts from inventory movements (invoice entries).
- View Balances: shows the grouped balance of the installments.
- Change Multiple: bulk-edits fields such as season, entity, cost center and management account.
- Generate Salary: a specific tool to generate salary entries based on employee data.
- Reports: quick access to the financial reports.
📅 Filters and view
- Period filter: by default it shows 7 days before and 7 days after the current date.
- Accounts PAYABLE / Accounts RECEIVABLE: the screen shows one side at a time — there is no "both" option.
- Status filter: All, Pending or Finalized.
- Next to the filters are the totals of what is being displayed: Qty, Total amount and Pending amount.
- Below is the list of entries, organized by document, showing status, date, number, account, cost center, description, entity, total amount, amount paid, remaining, tax configuration, integration type and season.
At the top of the screen there is also the View: Standard / Dashboard selector. In Dashboard, the list gives way to the financial dashboards set up for this screen, with automatic timed refresh — it is the view for monitoring, not for entering data.
📝 Document header fields
| Field | Description |
|---|---|
| Integration Type |
|
| Management Account | Financial classification. |
| Cost Center | Control by sector or unit. |
| Entity | Supplier, customer, employee, etc. |
| Entry Date | The document date — when it entered the system. |
| Accrual date | The month in which the event happened, next to the Entry Date. The field's own help text says: "Month when the fact occurred; if blank, the entry date is used". |
| Number | Internal number of the bill. |
| Document type · Document number | Only on a standalone bill, one that did not come from an invoice: the document that supports the entry — Invoice (nota fiscal), Bill, Receipt, Contract, Payroll or Other — and its number. See Document type and number, just below. |
| Season | Required link to the corresponding crop cycle. |
| Description | Identification of the document ("NF 751", "July lease"). |
| Tax Configuration | Which tax configuration (CPF or CNPJ) is responsible for the document. It is what determines which grower the bill belongs to in the tax cash book. |
| Movement (Invoice) | Filled in by the system when the bill comes from a Movement: it shows the number and date of the source invoice. |
| Consider for Income Tax | Says whether the bill belongs to the rural activity, for the tax cash book. It is copied from the management account, and each installment has its own. |
| Notes | Free-text field for the document. |
The header amount fields — Total Installments Amount, Discount Amount, Interest & Penalties, Open Amount, Amount Paid and Movement Amount — are calculated from the installments and the source movement. They are not typed in: they are for checking whether the sum of the installments matches the invoice amount.
📆 Accrual date: the month in which the event happened
A financial bill carries three different dates, and on a farm they rarely coincide:
- Entry Date — when the bill was recorded in the system.
- Due Date (on the installment) — when it must be paid.
- Accrual date — when the event that generated the bill actually happened.
Fertilizer applied in October, bought on credit, with the bank slip entered in December and paid in January: the accrual date is October. That is the month the farm used that fertilizer, regardless of when the money left the cash box. The same goes for the month's land lease, for maintenance done in August and invoiced in September, for one month's salary paid in the next.
The field is in the header, next to the Entry Date, and is optional. If blank, upCampo takes the accrual date to be the entry date — which is the most common case, a bill entered in the same month as the event.
🧾 Document type and number
The LCDPR (Brazilian rural producer's digital cash book) requires, for every entry, the type of document that supports it. On a bill that came from an invoice, the document is the invoice itself, and the two fields don't even appear. On a standalone bill — land lease, a day laborer's receipt, an electricity bill —, the header shows:
- Document type: Invoice (nota fiscal), Bill, Receipt, Contract, Payroll or Other. The field's help text says what it is for: "The document of this entry in the rural cash book (LCDPR)."
- Document number: the number of the receipt, bill or contract. If blank, the bill number is used.
A salary bill already comes out as Payroll, and a contract bill as Contract, with nothing to fill in. With no type at all, the entry shows the issue Entry without document type or number in the tax cash book and blocks LCDPR generation.
Other document buttons
- Cancel/View list — goes back to the list without saving.
- Delete — deletes the bill and its installments.
- View Balances — opens the "Current balances" window, with the balance of each bank account and the movement history.
- Clone — creates a new bill from the one that is open, for recurring commitments.
- Repeat entry — next to Clone, creates several copies of the bill at once, with the frequency and quantity you choose (see below).
- Reports ▼ — the reports set up for this screen in File > Report.
🔁 Repeat entry
Clone takes care of one copy. Repeat entry takes care of the whole year: it creates several copies of the bill at once, spaced out over time. It is the way to handle what always repeats the same — land lease, rent on a house or shed, a machinery financing installment, a software subscription, an insurance policy paid in installments.
In the window you enter:
| Field | Description |
|---|---|
| Frequency | How often the entry repeats: Monthly (the default), Every two months, Quarterly, Every six months or Annual. |
| Repetitions | How many copies to create, from 1 to 60. Sixty months is five years of land lease. |
| Entry Date | The starting date, which comes pre-filled with the bill's date. The field's help text explains: "The first copy comes one period after this date" — in a monthly repetition starting 09/17, the first copy is dated 10/17. |
Before confirming, the window shows a preview of the dates, in a line such as "11 will be created: 10/17/2026, 11/17/2026, 12/17/2026, 01/17/2027 … 08/17/2027". Check it there: it is cheaper to fix the frequency than to delete twelve bills afterwards.
The copies are created open, with no payment. They are future commitments, not settled bills: each one will be paid in its turn, through the normal payment window. The bill must have installments to be repeated — it is the installment that is copied.
📄 Tab: Installments
This is where the amounts to be paid or received are. Each document can have one or more installments.
Installment fields
- Installment cost center — lets you split a single bill across different structures
- Due Date (required)
- Days to pay
- Invoice Date (nota fiscal)
- Installment number
- Management account/Category — individual per installment
- Amount R$ (required), Discount Amount R$, Interest & Penalties R$ and Open Amount
- Consider for Income Tax
- Notes
Below the form is the list of installments, with installment, due date, amount, discount, interest, net amount, whether it was paid/received, payment date, payment method, account and management account.
📌 Installment actions
- Save, Cancel and Delete — one installment at a time.
- Pay/Receive: opens the settlement window (see below).
- View Balances: checks the account balances without leaving the screen.
- Generate installments: used for bills created manually. You enter the date of the first installment, the quantity (in months or days), the days to payment and how to split the amount — Equal amounts or Whole amounts with the remainder in the last, which avoids leftover cents. You can also choose a payment term already set up, and then the due dates and amounts come ready — a "30/60/90" builds all three installments at once. The window shows the installments before saving, and you can adjust the due date and amount of each one.
- Remove Payment: appears only on an installment already paid and is the way to reverse the settlement, returning the amount to the account balance. It requires edit permission on this screen.
- Split: divides the installment across management account and cost center, in percentages (see its own section, below).
💵 The Payment & Receipt window
This is where the installment is actually settled — what the web portal calls settlement. The window reads from top to bottom, in the order the payment is made:
- The selected installments, in a list with due date, amount, bill, entity and source movement.
- How it was paid: the Bank Account (required — the money comes out of it, or goes into it) and the Payment date, side by side; just below, the Payment method (Cash, Transfer, Credit card, Boleto (bank slip), PIX or Check); and the exchange rate fields, when the bill is in another currency.
- The Notes.
- The collapsible block Interest, discount and partial payment, closed until you open it — it is where you record what was not paid at exactly the installment amount (see its own section, further below).
The footer stays fixed, always visible even with many installments in the list: the total on the left and, on the right, Cancel and Make payment/receipt, which completes the operation and updates the account balance.
📅 The two settlement dates: payment and recording
Every settlement keeps two dates, and they answer different questions:
| Field on screen | What it is |
|---|---|
| Payment date | The day the money left or entered the account. It is entered by whoever records the settlement — and, when the settlement comes from bank reconciliation, it is the date of the bank statement line. |
| Recorded on / user | When the settlement was typed in, and by whom. It is not editable: upCampo fills it in on its own, at the moment the installment is settled. |
In most settlements the two fall on the same day. They split apart when the farm pays on a Friday and enters it the following Tuesday, when a whole month's statement is reconciled at once, or when checking falls behind — and then the gap between them can cross the turn of the month.
Which reports changed figures and which did not, and which date each one uses, is in the Quick Guide - Financial, in the section Which date each report uses.
🥧 Tab: Allocation (of the bill)
The Allocation tab is always visible on the bill, next to Installments. It is where you split the whole bill across management accounts and cost centers — the invoice for diesel and fertilizer, the land lease that is half one season and half another. The tab's help text sums up the rule: "The bill allocation applies to all installments: when you save, each installment gets the same lines, and a new installment is created with it. Use the installment's Split only for exceptions."
Each line has Management account/Category, Cost Center and %, built with the buttons Add line, Change line, New line and Delete line. The footer shows the Allocation total. The Divide equally and Apply template buttons work as in the installment split (see below). Nothing takes effect until you click Save allocation — until then, the tab warns "Unsaved changes: click Save allocation."
- The total must come to 100%. The same account with the same cost center cannot be repeated on two lines.
- When you save, all installments get the allocation, and an installment created later already starts with it.
- An installment in a closed financial period keeps its previous allocation, and the screen says how many were left that way.
- The bill's management account becomes the one on the line with the highest percentage. That is the one shown in the list and in the filters.
- The bill must be saved; if it is not yet, the screen offers to save the header and then the allocation.
🥧 Splitting the installment
The Split button, in the installment action row, opens the Split - Installment N window, where the installment amount is divided in percentages across management account and cost center. It is for an expense that belongs to more than one place: electricity that is 30% headquarters and 70% crop, a salary divided between two cost centers.
Since October 8, 2026, the rule is the bill allocation, in the tab above: it applies to all installments. The installment's Split still applies for the exception — the installment that, on its own, is divided differently. Keep in mind that saving the bill allocation again replaces that exception, after asking for confirmation.
The split is classification, not money. It does not change the bill amount, the balance of the bank account or the statement: what it changes is which accounts and cost centers that amount appears under in the reports.
The installment must be saved first — the split is stored inside it. With the installment not yet saved, the screen offers to save it and open the split in the same action.
The split lines
Each line has four fields: Management account/Category, Cost Center, Percentage and Amount R$. Percentage and amount go together — typing one calculates the other on the installment amount. At least one of the two destinations is required; with neither, the response is "Enter the account or the cost center for the split."
The footer of the window shows the math: "Split total: 100.00% / 1,000.00 (installment amount 1,000.00)", green when it adds up and red when it does not.
FIN.04.02 (formerly 15.04) – DRE and in the cash flow reports, and an 80% split shrank it — with no sign of it in the
bill amount, the balance or the statement. Today the window blocks at two points: when saving
a line that would push the total over 100% ("The split percentages cannot add up to more than
100%. Available: 30.00%") and when closing the window with an incomplete total ("The split must add up to
exactly 100% of the installment amount. Complete the rows or delete the ones already entered."). An installment
with no lines at all is still valid: in that case the installment's own management account and cost center
apply.
Divide equally and apply template
- Divide equally — redistributes equally the lines already entered. It does not create lines: first you set up the destinations, then you divide. With three lines, it makes 33.33% / 33.33% / 33.34%, putting the leftover cents on the last one so the total adds up.
- Apply template — brings in a split already set up in Financial > Cost split template, chosen in the Cost split template field at the top of the window. The list offers only active templates that add up to 100%. If the installment already has a split, upCampo warns that applying the template deletes the current lines and saves the template's, and asks for confirmation.
Splitting requires edit permission on this screen.
💰 Interest, discount and partial payment
A bill is almost never paid at exactly the installment amount. The bank slip was late and came with a penalty; the supplier gave an early-payment discount; the customer paid part and promised to send the rest. Below the notes field, the Payment & Receipt window has a block for exactly that — and it lets you settle the installment for an amount different from the one entered, without inventing another bill and without "adjusting" the installment amount on the side.
The block's fields
| Field | Description |
|---|---|
| Interest & Penalties | What was added for late payment — interest, penalty, adjustment. It comes pre-filled with whatever is entered on the installment. |
| Discount Amount | What was deducted — early-payment discount, agreed rounding. It also comes pre-filled with the installment's. |
| Withheld by the buyer (Funrural/Senar/Fethab) | Only on accounts receivable. What the buyer of the production deducted when paying, to pay it over on your behalf — Funrural, Senar, Fethab. See When the buyer withholds taxes, just below. |
| Amount Paid | How much actually left (or entered) the bank account. It starts with the installment amount. |
Next to the fields, the window shows Amount due: X, and it is recalculated as you type. It is the installment amount plus interest, minus discount — that is, how much should be paid under those conditions. With Amount Paid equal to the amount due, the installment is settled and that's it.
When the buyer withholds taxes
When production is sold, the buyer usually deducts Funrural, Senar or Fethab from the payment, because the buyer pays those amounts over on the grower's behalf. The invoice was for R$ 100,000.00, but the bank receives R$ 98,500.00. That difference is not a discount: the grower sold at the full amount, and part of it was paid in taxes. That is why, on accounts receivable, the block has the field Withheld by the buyer (Funrural/Senar/Fethab).
- When the bill came from an invoice with Senar, the withheld amount is already suggested, proportional to the installment, and Amount Paid already comes as the amount due minus the withheld amount. Check it against the buyer's statement and correct it if needed.
- The withheld amount does not create a new installment, as happens with a partial payment: with the equation above adding up, the bill has a zero balance and is Finalized.
- The bank account statement records only what entered the bank — the R$ 98,500.00 in the example.
- In the tax cash book, three lines come out: R$ 98,500.00 of income in the bank account (same as the statement), R$ 1,500.00 of income in Cash in transit (999) — "Part withheld by the buyer – NF no." — and R$ 1,500.00 of expense, also in 999 — "Funrural/Senar withholding – NF no.". Total income is R$ 100,000.00, the same as the invoice, and the bank account matches the statement.
- Remove Payment undoes the withheld amount too, along with the payment.
The withheld amount goes on each installment, as on the buyer's statement
Enter on each installment what was withheld in that payment, according to the buyer's settlement statement. Do not pile it all onto the last installment.
If the buyer withheld everything on the first payment, enter it all on that installment. The rule is to follow the settlement statement for each payment — that is what matches the bank, date by date. The invoice's Senar is only a suggestion.
When the amount paid is less than the amount due
Then it is a partial payment, and upCampo needs to know what to do with the difference. The Remainder choice appears, with two options:
| Option | What happens |
|---|---|
| Create a new installment with the remainder (the default option) | The installment is settled for the amount actually paid, and another open installment is created with the difference. It has the same number and the same due date as the original, and already comes with the note "Remainder of installment N, partially paid (amount) on mm/dd/yyyy". The bill keeps the same total as before. |
| Grant the remainder as a discount | The difference becomes a discount: the installment is settled in full, and what was missing is recorded as a granted rebate. Nothing is left open. |
When you finish with the first option, upCampo confirms what it did: "The remainder was entered as a new open installment."
Example: the customer paid only part
An installment receivable of R$ 1,000.00, due today. The customer deposited
R$ 600.00 and promised to send the rest next week. On payment, enter
600.00 in Amount Paid and leave Remainder on Create a new installment
with the remainder:
The bank account receives the R$ 600.00 that actually came in, and the R$ 400.00 keeps showing as pending for that customer, on the same due date — which is how collections needs to see it.
Messages the screen may show
| Message | What to do |
|---|---|
| "The amount paid is greater than the amount due. Enter the difference as interest." | You paid more, usually because of a penalty or adjustment that was not entered. Enter that addition in Interest & Penalties — the Amount due goes up and matches what you paid. |
| "Say what to do with the remainder: new installment or discount." | The amount paid was below the amount due and the Remainder choice has no answer. Select one of the two options. |
| "The installment is already paid. Remove the payment before changing the amounts." | A settled installment does not accept amount changes. Use Remove Payment, correct it and pay again. |
| "The discount cannot be greater than or equal to the installment amount with interest." | The discount would zero out (or flip) the amount due. If the intention is to cancel the charge, the way is to delete the installment, not discount it in full. |
| "The amount paid plus the amount withheld by the buyer is greater than the amount due." | The total exceeded what the installment is worth. Check the withheld amount against the buyer's statement and the amount that entered the bank. |
| "The amount withheld by the buyer cannot be negative." | Leave the field blank or at zero when there was no withholding. |
| "The amount paid is less than the interest minus the discount. Adjust the interest or pay the remainder in another installment." | What was paid does not even cover the addition entered. Review the interest amount, or record the payment without it and charge the difference separately. |
🔗 Tab: Integration
Shows the inventory movements linked to the bill and the net amount of each. It is how you check which invoices the bill came from — useful when a single payment covers more than one invoice from the supplier.
- All financial entries are centralized and traceable.
- You can track cash flow accurately.
- The farm's accounting becomes more transparent and organized.
- Settling bills correctly avoids late or forgotten payments.
- Interest, discount and partial payment are recorded on the bill itself, with no amount workarounds.
- What repeats every month — land lease, rent, machinery installment — is entered only once.
- Information is integrated with the financial module's reports and dashboards.
📊 Related reports
- FIN.01.01 (formerly 15.07) – Accounts payable/receivable by Entity – Installments
- FIN.01.02 (formerly 15.06) – Accounts payable/receivable by Entity – General
- FIN.01.03 (formerly 15.09) – Accounts payable/receivable by Contract – Loading
- FIN.02.01 (formerly 15.01) – Financial statement
- FIN.02.02 (formerly 15.05) – Future financial statement
- FIN.03.01 (formerly 15.02) – Financial flow
- FIN.03.02 (formerly 15.03) – Periodic cash flow
- FIN.04.01 (formerly 15.10) – Planned x Actual
- FIN.04.02 (formerly 15.04) – DRE (income statement)
The FIN.04.01 (formerly 15.10) – Planned x Actual compares, month by month and by management account, the planned amount of the installments with what was actually paid or received.
❓ Frequently asked questions
What is the difference between the bill and the installment?
The bill is the header, with the summary of the document; the installments are where the amounts are. It is the installments that get paid off, not the bill.
Can I pay several bills at once?
Yes. Use the Pay/Receive Multiple button, on the top bar, to select multiple installments and settle them in a batch.
I entered an invoice in inventory. How do I bring it into finance?
With the Import Movement button, which automatically brings in the amounts of the invoice entries recorded in Movement.
I can't see a bill I entered. Why?
It is probably the period filter: by default the screen shows 7 days before and 7 days after the current date. Adjust the period, or the type filters (payable/receivable) and status filters (pending/finalized).
How do I split a bill into several installments?
Use the Generate installments action, available for bills created manually in upCampo. You enter the date of the first installment, the quantity and the interval, and the system divides the amount. If the farm already has the payment term set up with its installments, just choose the term: the due dates and amounts come ready.
The customer paid only part of the installment. How do I record it?
Select the installment, click Pay/Receive and, in the block below the notes, enter in Amount Paid how much actually came in. Since the amount is less than the amount due, upCampo asks what to do with the remainder: Create a new installment with the remainder (the default) creates a second open installment, with the same number and the same due date; Grant the remainder as a discount forgives the difference and closes the installment. On an installment of R$ 1,000.00 with R$ 600.00 paid, the first option leaves one of R$ 600.00 paid and another of R$ 400.00 open.
The buyer deducted Funrural from the payment. How do I record it?
When settling the receivable, open the Interest, discount and partial payment block and enter the amount in Withheld by the buyer (Funrural/Senar/Fethab), with what entered the bank in Amount Paid. When the bill came from an invoice with Senar, the withheld amount is already suggested. Do not enter it as a discount: in the tax cash book the income must add up to the invoice amount. Enter on each installment what was withheld in that payment, according to the buyer's settlement statement.
Why doesn't the pay button appear on an account payable?
Because the company requires approval to pay. With that option on, the payment window for an account payable replaces Make payment/receipt with Add to batch: the installments go into a payment batch, which is sent for approval and paid after it is approved. Accounts receivable are still received directly.
The bank slip came with interest and a penalty. Where do I enter it?
In upCampo's Payment & Receipt window itself, in the Interest & Penalties field. The Amount due shown beside it goes up immediately, and that is the amount the installment is settled for. An early-payment discount goes in the Discount Amount field, in the same block. This block only appears with one installment selected — with Pay/Receive Multiple it does not exist.
I entered the wrong amount on an installment already paid. How do I fix it?
A paid installment cannot be changed or deleted — upCampo responds "The installment is already paid. Remove the payment before changing the amounts.". Use the Remove Payment button, which reverses the settlement and returns the amount to the bank account balance, correct the installment and pay again. Remove Payment requires edit permission on this screen.
I have a land lease every month. Do I need to enter them one by one?
No. Enter the first bill and use the Repeat entry button, next to Clone: choose the frequency (Monthly, Every two months, Quarterly, Every six months or Annual), how many repetitions you want — from 1 to 60 — and the base date. upCampo shows the date preview before confirming, and the copies are created open, with no payment. It works the same way for rent and for machinery installments.
The system won't let me repeat a bill. Why?
Because it was generated by another document. A bill that came from an invoice or a sales contract belongs to that source document, and upCampo refuses with "A bill generated by an invoice or contract cannot be repeated: it belongs to the source document.". Repeat entry applies to bills entered on this screen itself — Standalone, Advance and Outsourced Contract —, and the bill must already have installments.
What is the Accrual date field for?
To record which month the event happened in, which is not always the month the bill was entered or paid. Fertilizer applied in October, with the bank slip paid in January, has an accrual date in October. The field is in the bill header, next to the Entry Date, and is optional: if blank, upCampo takes the accrual date to be the entry date itself. A bill generated by an invoice, contract or salary is created without an accrual date, precisely for that reason.
How do I correct the season or cost center of several bills?
With the Change Multiple button, which bulk-edits fields such as season, entity, cost center and management account.
I paid the wrong installment. How do I reverse it?
Select the installment and use the Remove Payment button, which only appears on an installment already paid. It undoes the settlement and returns the amount to the balance of the bank account used.
How do I record that I paid by PIX or in cash?
In the Payment & Receipt window, in the Payment method field: Cash, Transfer, Credit card, Boleto (bank slip), PIX or Check. Then choose the bank account and confirm with Make payment/receipt.
What is the Dashboard view for?
For monitoring, not for entering data. The selector at the top of the screen swaps the list for the financial dashboards set up for this screen, which refresh on their own every few minutes.
What is the difference between "Payment date" and "Recorded on / user"?
The Payment date is the day the money left or entered the account — you enter it, or it comes from the statement line when the settlement comes from bank reconciliation. Recorded on / user is when the settlement was typed in, and by whom; upCampo fills it in on its own and it cannot be edited. In financial reports the payment date is what governs; the recording date is for auditing.
The report for a past month changed its figures. Why?
If the change showed up from October 4, 2026 onward, it is the correction of the two settlement dates. Before, several financial reports placed the amount by the day the settlement had been typed in; now they use the payment date. Where the farm pays in one month and enters it in the next, the amount moved to another month — and the right place is now the month the money moved. The year's total is the same, except at the turn from December to January. The table of which date each report uses is in the Quick Guide - Financial.
How do I divide a bill between two cost centers?
With the Split button, in the installment action row. In the window that opens, enter one line per destination with the management account, the cost center and the percentage of each; the total must come to exactly 100%. If it is a split that repeats every month, set it up in Financial > Cost split template and use Apply template.
upCampo won't let me close the split window. What is missing?
The total has to come to exactly 100% of the installment amount — that has been the rule since October 3, 2026, because a split that did not add up changed the installment amount in the DRE and in the cash flow. Look at the Split total line at the bottom of the window: if it is red, complete the lines or delete the ones you already entered. An installment with no split lines at all is also valid: in that case the installment's own management account and cost center apply.
Does the bill allocation apply to all installments?
Yes. When you click Save allocation, in the bill's Allocation tab, all installments get the same lines, and an installment created later already starts with them. The exceptions are an installment in a closed financial period, which keeps its previous allocation, and one you split afterwards with its own Split button.
Where do I say whether the document is a receipt, bill or contract?
In the header of the standalone bill, in the Document type and Document number fields. The LCDPR requires the type on every entry; without it, the tax cash book flags an issue and the file is not generated. On a bill that came from an invoice, the fields do not appear: the document is the invoice itself.
The buyer withheld all the Funrural on the first payment. How do I enter it?
Enter it all on the installment for that payment, in the Withheld by the buyer field, and nothing on the others. The rule is to follow the settlement statement for each payment: what was withheld in each one goes on its installment.
📘 Screen: Payment batch
A payment batch is the set of installments someone decided to pay together. It covers the gap between "I decided to pay" and "the money went out" — the stretch that used to have no place in the system, where an installment was either open or already settled, with nothing in between.
In practice it is the weekly payment routine: on Thursday someone picks out the installments coming due, sends the batch for approval by whoever the company has designated, generates the file that is uploaded to the bank's online banking and, with the bank's response in hand, settles what was actually paid. Each of these steps has a batch status, and that is what the screen shows.
📍 Location in the system
Menu: Financial > Payment batch
It closes the day-to-day block of the Financial menu, after Transfer between accounts. Like every screen in the web portal, it only appears for those who have permission, granted in File > Users.
Two screens work alongside it: Approval rules, which says who approves each value range, and Accounts Payable/Receivable, where the installments come from and where the settlement actually happens.
🧩 Main function
To group installments payable, run them through the company's approval, send the payments to the bank in a file and settle them from the bank's response. The batch does not create documents or installments: it points to installments that already exist in Accounts Payable/Receivable, and the installment remains the source of truth for what is owed.
The batch cycle
| Status | What it means | What you can do |
|---|---|---|
| Draft | The batch is being put together. It is the only status in which you can change the header and add installments. | Change, add and remove installments, delete the batch, send for approval. |
| Awaiting approval | The batch is on the signer's desk. The current step appears next to the status ("Current step: 2 of 3 - Director — approves: ..."). | Approve or return (only an approver of the current step); go back to draft; delete. |
| Approved | Every step has signed. This is what authorizes sending money to the bank. | Export the payment file, settle, reconcile against the statement, reject an item, remove an installment, go back to draft. |
| Payment file generated | The CNAB 240 file has been generated. The file went out; the money has not yet — which is why the badge is blue, not green. | Re-export the payment file, import the return file, reconcile against the statement, reject an item. |
| Sent | Reserved for when there is automatic sending to the bank (VAN or API). Today the person uploads the file in online banking, so the batch stays at "Payment file generated". | Import the return file, reconcile against the statement, reject an item. |
| Paid | No installment is left pending: every line was paid or rejected. The batch is history and is no longer changed. | View. Importing the return file still works, for anything left to record. |
| Rejected | An old status that the system no longer produces. Today, a batch that is not needed is deleted, and a refusal at a step returns the batch to draft with the reason. | View. |
Who can do what
The screen permission (File > Users) splits the actions like this:
- Add — create the batch, add installments and send for approval.
- Edit — change the header, remove an installment, reject an item, go back to draft, export the payment file, import the return file, reconcile and settle.
- Delete — delete the batch (a paid batch cannot be deleted).
📝 Main fields
| Field | Description |
|---|---|
| Number | Generated by the system and not editable. The field's help text states the rule: "Generated by the system: the highest number in the branch plus one". |
| Date | The batch date, required. It starts as today. It is not the payment date — that is chosen at settlement. |
| Description | How the batch is recognized in the list: "Suppliers week 40", "September payroll". Up to 100 characters. |
| Bank Account | Required. The help text is direct: "Account the money comes out of". The payment file takes the payer's details from it, and it is the one pre-filled at settlement. |
| Notes | Free space, up to 1,000 characters. |
Above the fields is the status badge, and next to it a line that changes depending on
where the batch is: the current step and who approves, while it is in approval; "Approved by
John Doe - 10/03/2026 (rule: Above R$ 100k)", once approved; "Payment file 12 -
CI240_001_000012.REM - generated by John Doe on 10/04/2026", when the file went out; and "Returned by
John Doe - 10/03/2026: freight invoice missing", when it went back to draft. Once the bank's return file is read,
the name of the .RET file is added after that, without erasing the payment file's — the normal check is to
compare the two.
The list, on the left, shows Number, Date, Description, Bank account, Status, Current step, Installments, Total amount, Management account, Cost center, Origin, Notes and an Actions column. The three middle columns show (several) when the batch's installments do not converge on a single value — that is how you can see, without opening the batch, that it mixes expenses of different kinds. The filter above the list switches between All and Awaiting my approval.
🗂 Tab: Installments
This is the list of what the batch will pay. Each line is an installment from Accounts Payable/Receivable, with Document, Entity, Installment, Due date, Amount (the installment's), Amount to pay (what you intend to pay through this batch), Status, How it will be paid, Your number, Occurrence and the line's actions. At the bottom, the total of what is in effect and the number of installments.
The status is per item, on purpose: the bank rejects one line and accepts the others in the same file. Pending, Paid and Rejected — and a rejected one, in red, stays in the list but does not count toward the total.
Add installments
The Add installments button opens the selection. Only installments that can be added appear, and the dialog's help text says which: "Only open accounts payable installments that are not already in another batch appear" — from the farm you are in, with a due date in the chosen period (which starts one year back through one month ahead).
The grid shows Document, Entity, Installment, Due date, Amount, Account and Term, which flags what is Overdue and what is Short term (due within seven days). At the bottom, two summaries: Total open, for what the filter found, and Selected, which follows your selections item by item — you can see the batch amount before confirming.
Removing an installment from the batch
Here a rule applies that seems odd and is deliberate: removing is allowed, adding is not.
- Add installments only in draft. In approval, changing the list under a signature in progress is exactly what step-by-step approval exists to prevent; once approved, adding would raise the authorized amount.
- Removing an installment works in draft and in an approved batch, before settlement. Removing only reduces what was authorized, and whoever signed a R$ 100k batch has no objection to paying R$ 80k of it. Previously, removing a line from an approved batch forced the whole approval to be redone — and, in practice, it was redone in a hurry, without anyone reviewing anything.
- An installment that has already been paid never leaves the batch. It is the settlement's history: "This installment has already been paid and can no longer leave the batch."
Reject an item
The Reject button, on the installment's line, serves a single case: the bank refused that line — wrong PIX key, invalid account, payee details that don't match. The dialog's help text states the effect: "The installment stays open and can go into another batch again; nothing is settled or reversed."
The reason is required, and it goes into the Occurrence column. It is the only record of why that payment did not happen — without it, months later, the rejected line is a mystery, and someone puts it back into a batch without knowing the problem was the supplier's record.
Rejecting only exists from an approved batch on (approved, payment file generated, sent or paid), which is when there is already a bank response to record. In draft and in approval nothing has been sent, and there the way to remove a line is to delete the item — an occurrence would be a made-up justification for something the bank never saw. An installment that has already been paid cannot be rejected either: the money went out, and saying the bank refused it would contradict the statement; in that case the way is to reverse the installment in Accounts Payable/Receivable.
🗂 Tab: Approvals
The history of signatures, from the most recent submission to the oldest: Submission (the batch may have been sent more than once), Step ("2 - Director"), Approvers (who could sign), the step's Status — Pending, Approved, Returned or Canceled —, Signed by, Date and Reason.
This is where a return is recorded: the step is marked Returned, in red, with who returned it, when and the reason; the remaining steps are marked Canceled. The line is not erased when the batch goes back to draft, and the next submission comes in as a new cycle.
The splitting warning
At the top of the tab — and in the submission confirmation — a red warning may appear: "Attention: suppliers in this batch are also in other batches from the last 7 days", listing each supplier, the number and status of the other batch and its amount there. When the sum of the two would fall into a higher approval range, the warning adds: "If it were a single batch (R$ 118,000.00), it would fall into the range 'Above R$ 100k'."
It is a guard against splitting — dividing a large payment into small batches to fall into a range that requires fewer signatures. The warning is for whoever builds and whoever approves, and it does not block anything: there are legitimate reasons for the same supplier to appear twice in a week. In that case the submission button reads Send anyway.
✍️ Send, approve and return
- Send for approval — upCampo adds up the batch, looks for the active range in the approval rules that covers that total and copies its steps to the batch. Missing range, missing step or missing approver in a step? The batch stays in draft and the message says what to set up.
- Approve — signs the current step. If it was the last one, the batch becomes Approved; if not, the response is "Step approved. The batch moves on to the next step."
- Return — at any step, with a required reason, the batch goes back to draft. The dialog's help text warns what happens next: "Whoever built it corrects and resends it, and approval starts over from the first step."
- Back to draft — unlocks the batch (in approval or already approved) so you can change the installments. It erases the final signature and ends the cycle: whoever approved did not approve this, they approved the batch as it was.
Three checks apply at signing time, each with its own message: only an approver of the current step can sign; whoever created or sent the batch cannot approve it; and whoever has already signed one step cannot sign another in the same submission. They are detailed in the Approval rules article.
Approve and settle from the list
You don't need to open the batch to sign. In the list's Actions column, each line has Approve and Settle batch, enabled only when the action is possible for you on that batch — Approve shows as active only on batches where you can sign the current step right now. With the Awaiting my approval filter, the list shows only those.
Whoever approves from the list has not seen the installments, so the click first opens a confirmation with the batch's items and the total: "Check the installments before signing. Approving signs the current step: if it was the last one, the batch becomes approved and can be settled." No one signs what they haven't read.
🔐 Required approval to settle
By default, the payment batch is an extra path: anyone who wants to can still settle installments directly in Accounts Payable/Receivable. If you want approval to really count, turn on the option Require approval to settle in File > Company/Crop Settings, in the Financial block. The field's help text sums it up: "When on, no settlement happens outside an approved payment batch - on any screen. Requires approval rules to be set up."
With it on, any attempt to pay an account payable that is not in an approved batch is refused with "This company requires approval to settle: the installment must be in an approved payment batch." — no matter which screen the settlement came from. It is all or nothing on purpose: a single path around it would mean the approval controls nothing.
Since October 5, 2026, the rule applies only to accounts payable. Approval exists to authorize money going out, and the batch only accepts payable documents — so receivables are received normally in Accounts Payable/Receivable, whether the option is on or not.
Building the batch from the payment window
With the option on, a batch can also be started in Accounts Payable/Receivable. The Payment & Receipt window for an account payable does not offer Make payment/receipt: it says the payment goes out through an approved batch and shows the Add to batch button. In the Payment batch field you choose a batch in Draft or New batch — which asks for the bank account and the description — and the checked installments go into it. From then on the path is this screen's:
- add to batch;
- send for approval;
- approve;
- pay — by settling the batch or by reading the bank's return file.
If the installment is already in a batch, the window tells you which batch and its status, and the Open batch button brings up this screen with that batch selected. That installment is settled through the batch even after the batch is approved: that is how the batch knows what was paid, and the bank's return file does not pay again what was already paid outside it.
📤 Export payment file (Banco Inter CNAB 240)
Export payment file generates the file you upload to the business online banking so the bank pays the whole batch at once, instead of entering one payment at a time. The button's help text defines what it is: "Generates the batch's CNAB 240 file, in the Banco Inter layout, to import into business online banking."
Generating pays nothing. The bank pays, after you upload the file there; the settlement in the system is still a step of yours, through the return file, the statement or the settle button. The button works on an Approved batch — the signature is what authorizes sending money — and on a batch that already has Payment file generated, because re-exporting is normal (the file gets lost, the bank rejects the upload, someone needs to upload it again). Once sent or paid, no: from then on what's left is reading the return file.
Only pending installments go into the file: a rejected one is no longer money going out, and a paid one has already gone out. PIX and TED go out in the same file, in separate batches.
The "How it will be paid" column
In the Installments tab, the How it will be paid column answers, before anyone clicks export, which way each payment will go and where the bank details came from:
- PIX by key — the payee has a PIX key with its type filled in. It is what upCampo chooses whenever it can: it arrives instantly, costs nothing and does not depend on business days.
- Wire transfer (TED) — no PIX key, but bank, branch and account.
- PIX by bank details — the form that requires the ISPB of the payee's bank.
- No payment details, in red — the record has neither a PIX key nor an account.
In parentheses comes the origin of the details: Entity or Address. When money lands in the wrong place, the first question is "where did those details come from?", and the column answers without opening the record.
If anything is missing, no file is generated
When something is missing, upCampo opens the list: "The payment file was not generated. Fix what is missing and generate it again", with one line per issue and the supplier's name on each. Fix the record and click export again.
What the supplier record needs to have, in the Payment details tab:
| To be paid by | The record needs |
|---|---|
| PIX by key | PIX key type (CPF/CNPJ, Email, Phone or Key) and the PIX key. A key saved without its type is an issue: the type is what tells the bank what to look up. When the type is CPF/CNPJ, the key must match the record's CPF/CNPJ. |
| Wire transfer (TED) | Bank and Bank code, Branch with Branch check digit, Account No. with Account check digit and the Account type (Checking, Payment or Savings). |
| PIX by bank details | The same details as for TED plus the ISPB — the first eight digits of the CNPJ of the payee's bank. |
In addition, the payee needs a complete CPF or CNPJ in the record, and the batch's bank account needs an account number and check digit — Inter's manual explicitly does not accept a blank check digit — and the company needs a CNPJ.
The file and the payment date
- Do not rename the file: it comes out as
CI240_001_NNNNNN.REM, and online banking checks the name on upload. The screen warns: "Download the file and import it into Inter's business online banking. Do not rename it: the bank checks the name on upload." - Re-exporting reuses the payment file number and the "your number" of each installment. There are two different reasons: the bank refuses a repeated payment file number on the same day, and changing the "your number" would make the previous file's response find the wrong installment. The file comes out the same — it is not a new payment.
- The payment date is not the due date when that date has already passed. The bank does not accept a date in the past, and overdue installments are exactly what goes into a batch most often: a past due date becomes today, which is when you are sending the file.
- TED does not go out on weekends, so a TED's date moves to Monday. PIX goes out any day.
📥 Import bank return file (.RET)
It is the other half of the payment file. The bank sends back a .RET file saying, payment by
payment, what it did with each order — and this screen applies that response: what the bank carried out is
settled with the actual date and actual amount it reported, and what it refused is marked as
Rejected, with the occurrence in text, becoming free again for another batch.
The matching is exact: each line in the file finds its installment by the "your number" the payment file recorded. There is no tolerance, no leeway in days and no possible tie — if the "your number" does not belong to any installment in this batch, that line is not from this batch. That is why the button only exists after the payment file has been generated: in a batch that is only approved, no installment has a "your number", and the file would find an owner for nothing.
The screen shows what it will do before doing it — "N installment(s) to settle and N to reject", plus the lines in the file that are not from this batch and those already applied — and each installment with what the bank said, the actual date it was carried out and the amount actually paid.
The confusing cases
| What comes in the file | What upCampo does, and why |
|---|---|
| "Inclusion carried out successfully" | It is Accepted, pending — not paid. The bank received and accepted the order, and will pay on the date. Treating it as a payment would settle an installment with money that did not go out. The installment stays as it is; settle it when the payment shows up in the next return file or on the statement. |
| "Credit or debit carried out" with no execution date | Also comes in as Accepted, with a warning. A completed payment has an execution date; without it, what exists is an accepted order. Anyone who needs to settle it anyway has the statement route. |
| Occurrence on the whole batch (e.g.: "Batch not accepted") | It applies to all of its payments: no payment in that batch happened, and the items come without their own occurrence. The screen highlights this: fix what the occurrence points to and generate the payment file again. |
| A code upCampo does not recognize | It appears raw, as "unexpected occurrence", with the bank's code in view. Nothing is guessed: the bank can add codes without notice, and the decision to settle or reject is still yours. |
| Amount paid different from the amount sent | It warns, it does not block. The difference shows item by item and only goes ahead with an explicit yes — you don't undo a payment the bank has already made. The settlement pays off the installment at its amount; the difference is handled in Accounts Payable/Receivable. |
| Lines that are not from this batch | They are left out, and listed. A return file can carry the response to more than one payment file; only what belongs to this batch is applied. |
Settlement uses the actual date of each line, not today's: installments carried out on different dates are settled separately. And a closed period still blocks — no bank return file justifies changing a closed month.
.RET lines are not saved
in Bank reconciliation. The return file says
"your order was processed"; the debit on the account shows up on the actual statement, which is another file, with
another layout. Import the statement normally in Bank reconciliation: the outgoing lines will find the
installments the return file has just settled. Watch out for one detail from the bank: it delivers the payment
return file and the statement with the same .RET extension — and upCampo warns you when
the chosen file is the other one.
🔍 Reconcile the batch against the statement
Reconcile bank return file is the other path, and it answers a different question. It imports the statement the bank sent back and checks the batch's items against the lines in the file, matching by amount and date, with tolerance: what matched can be settled with the statement's date, and what did not match can be rejected with a reason.
The difference between the two is how you know whose each line is: the return file says what the bank did with the order and matches exactly, by the "your number"; the statement proves what left the account and matches approximately. Neither replaces the other — and reconciliation is the path for those who paid outside the CNAB file, or who want proof that the money went out.
The dialog is closed on purpose: only the installments of this batch against the lines of this file. It does not create entries, does not look for installments of another entity, does not offer candidates. If you need the rest, there is the full Bank reconciliation screen, right next to it. It works from an approved batch on, even an already paid one — it is normal to check the bank's file after a partial settlement.
Two things happen along with the settlement, and they prevent problems later:
- The file's lines are saved in bank reconciliation: those that matched, already reconciled with the installment they paid, and the rest as pending, to be resolved in Bank reconciliation — a fee, a tax, a payment outside the batch. Without this, anyone importing the same statement later would see those lines pending with no candidate, and a click on "Create document" would create a new expense for a cost that was already in the results.
- The file's account must be the batch's account. If it is a different one, the screen warns in red and requires explicit confirmation: settling that way would record one bank's activity inside another account.
💰 Settle batch
Settle batch is the manual path: it pays off all of the batch's pending installments at once. It only works on an Approved batch — after exporting the payment file, the way to pay is Reconcile bank return file or Import bank return file, which also settle.
The dialog asks for the Bank Account (the batch's comes pre-filled), Payment date (today), Payment method — Cash, Transfer, Credit card, Boleto, PIX or Check, with Transfer selected — and Notes, showing how many installments and how much will be paid. The help text says what it is: "Settlement uses the same path as Accounts Payable/Receivable: each installment is paid off once, moving the balance and the statement of the chosen account."
There is no batch-specific settlement: it is the same settlement as the Accounts Payable/Receivable screen, with the same rules and the same effects on the account balance. After it, the installments that were paid off become Paid in the batch, and the batch becomes Paid when none is left pending — otherwise the response is "Batch partially paid. The installments that were not paid off remain pending in the batch."
The financial close blocks settlement
If any pending installment in the batch is due within a closed period, the Settle batch button starts out disabled, and the explanation appears on hover: "3 installment(s) in the batch are due in a closed period and would be refused at settlement.", with the date through which finances are closed.
The number matters: it lets you go after the installments in question instead of guessing. Inside the settlement dialog the count is redone each time the payment date changes — the chosen date can also fall inside the closed period.
Without the warning, the batch would come back "partially settled" with no explanation: what really blocks it is the close's lock, which applies to the whole system, and it refuses the line midway. The two ways forward are: settle with a date after the close, when that is correct, or ask whoever is accountable for the finances to reopen the period.
⚠️ What is not included yet
So you don't find out in the rush of paying:
- Boletos (bank payment slips) and taxes with a barcode are not included in the payment file or the return file. Today's file carries PIX and TED. Supplier boletos and tax slips are still paid at the bank, one by one, and settled through Settle batch, Bank reconciliation or in Accounts Payable/Receivable. PIX by QR code isn't either.
- The payment file is only generated in the Banco Inter (077) layout. A batch whose bank account is at another bank does not generate a file — the issue says which bank it is. The rest of the screen (approval, settlement, reconciliation) works with any bank.
- A return file from another bank is read with caution. The FEBRABAN standard positions are the same, but the table of occurrence codes is specific to each bank: a code that is not recognized appears raw, and upCampo warns that the file is from another bank.
- Bank holidays are not handled, as mentioned above.
- Only installments payable go into a batch. There is no receivables batch, and old documents with a type outside today's standard do not appear in the selection.
- The week's payments become a document, with who built it, who approved it and when.
- No payment above the agreed amount goes out without the signature of whoever the company designated — and, with required approval turned on, no settlement happens outside an approved batch.
- Dozens of payments go up to the bank in one file, instead of being entered one by one.
- The bank's response comes back into the system: what was paid is settled with the actual date and amount, and what was refused is recorded with the reason.
- A refused installment is not lost: it becomes open again, free for the next batch.
- Finance knows, before exporting, which supplier has an incomplete record.
❓ Frequently asked questions
How do I pay several suppliers at once through the bank?
With the upCampo payment batch, in Financial > Payment batch. Create the batch choosing the account the money comes out of, use Add installments to check the open installments, send it for approval and, once the batch is approved, click Export payment file: upCampo generates a CNAB 240 file that you import into the bank's business online banking. Afterward, Import bank return file settles in the system what the bank carried out.
The payment file was not generated and a list of issues appeared. Why didn't anything come out?
Because the file is all or nothing: if a supplier's bank details are missing, no payment is generated. If it came out with one payment left out, the batch would say "payment file generated" and no one would find out what was missing until the supplier came asking for the money. Fix what the list points out in the Payment details tab of the supplier's record — PIX key with its type, or bank, branch and account with the check digits and account type — and click export again.
The supplier has an account, but the column says "No payment details". What's missing?
For upCampo to consider that an account exists, there must be a branch and account number; to consider that a PIX key exists, the key and key type. One of those pairs is missing. Also check whether the details are in one of the supplier's addresses instead of the Payment details tab — or the other way around: a filled-in address replaces the entity's details.
The bank refused one line of the batch. What do I do?
Use Reject on that installment's line, in the Installments tab, writing the reason — wrong PIX key, invalid account, details that don't match. The installment leaves the batch for payment purposes and stays open, free to go into another batch; nothing is settled or reversed. Fix the supplier's record before adding it to the next batch. If you import the return file, you don't need to do this by hand: the rejection is applied with the bank's occurrence.
I need to remove an installment from an already approved batch. Do I lose the approval?
No. Removing an installment also works on an approved batch, before settlement, and the approval stays valid: removing only reduces the authorized amount. Adding, however, requires going back to draft and approving again, because it raises what was authorized. If the batch is left with no installments, it goes back to draft on its own.
The return file says "inclusion carried out successfully". Was the installment paid?
No. That occurrence means the bank accepted the order and has not paid yet — upCampo shows it as Accepted, pending and does not settle the installment. Settling it at that point would record a payment with money that has not left the account. Import the next return file, once the payment has been carried out, or reconcile against the statement.
The settle button is grayed out. Why?
There are three possible reasons. The batch is not Approved — after exporting the payment file, pay through the return file or reconciliation. You don't have edit permission on the screen. Or some pending installment in the batch is due in a closed period: in that case, hover over the button and the tooltip tells you how many installments there are and through when finances are closed.
Can I generate the payment file twice?
Yes, and the file comes out the same: re-exporting reuses the payment file number and the "your number" of each installment, so the bank does not read the resend as a new payment. That covers the common case of the file getting lost or the upload being rejected. What you should not do is export "just to see": the batch leaves Approved and the manual settle button stops working — payment then goes through the return file or reconciliation.
Why doesn't the installment I want appear in the selection?
The selection shows only open installments of accounts payable, from the farm you are in, with a due date within the filter period and that are not already in another batch. Check the period (it starts one year back through one month ahead) and whether the installment is in someone else's batch. An installment from a rejected item shows up again.
I turned on "Require approval to settle" and now no one can pay anything. What happened?
The approval rules are probably missing. With the option on, no account payable is paid outside an approved batch (receivables are still received normally) — and, with no active range, no batch can be sent for approval. Set up the ranges and steps in Financial > Approval rules, or turn the option off in File > Company/Crop Settings in the meantime. Bank reconciliation keeps working in the meantime, because it only records what the bank has already done.
Can I build the batch directly from Accounts Payable/Receivable?
Yes, when the company requires approval to pay. In the payment window of an account payable, the Add to batch button puts the checked installments into a batch in Draft or into a New batch, created right there with the bank account and description. Then you just send the batch for approval on this screen.
What is the difference between "Import bank return file" and "Reconcile bank return file"?
They are two different files. The return file (the payments .RET) is the bank's response to the payment file: it finds each installment by the "your number", exactly, and brings the actual date and actual amount of each payment. The statement, used in "Reconcile bank return file", proves what left the account and matches by amount and date, with tolerance — it is the path for those who paid outside the CNAB file. Both remain valid, and neither replaces the other.
Does the supplier's boleto go into the bank file?
Not yet. Today's payment file carries PIX and TED; boletos and taxes with a barcode do not go into it or come back in the return file. Those are still paid at the bank, one by one, and recorded in upCampo through Settle batch, Bank reconciliation or directly in Accounts Payable/Receivable.
📘 Screen: Bank reconciliation
Bank reconciliation is the check between the bank statement and what is entered in the system: line by line of the statement, which installment, which transfer or which system entry corresponds to the money that came in or went out. In upCampo this check is done from the statement file — you download the statement from the bank, import it here, and the screen shows each bank transaction waiting to be matched with something in the system.
The problem it solves is the one every farm office has: the balance of the bank account in the system does not match the bank's balance, and no one knows whether it is a payment entered twice, a fee that was never recorded or a PIX the manager made without telling anyone. Reconciling is what turns that difference into a list of pending lines, one by one, with a name and an amount.
📍 Location in the system
Menu: Financial > Bank reconciliation
It sits in the month-end review block of the Financial menu, next to Period closing. Like every screen in the web portal, it only appears for those who have permission — access is granted in File > Users.
🧩 Main function
To import the bank statement and resolve each of its lines. Resolving a line can mean four things, and all of them leave the line Reconciled:
- Matching it with an open installment in Accounts Payable/Receivable — in that case, reconciling is settling the installment.
- Matching it with a transfer between accounts that already exists in the system — this settles nothing: the transfer already moved the balance when it was entered.
- Creating the missing entry, for what was never recorded (a fee, a tax paid in online banking) — the document is created already paid.
- Adding an installment to an existing document, when the bank debited an amount from that document that does not correspond to any of its installments.
Anything that is none of these can be Ignored: the line is cleared out of the way without creating any entry.
🔢 The screen in three steps
The screen is a numbered flow, from top to bottom. Each block shows its number and title, and the current block is highlighted — step 1 while the list is empty, step 3 afterward.
- Import the statement — the file you downloaded from the bank.
- Account and period — filled in by the file itself.
- Review and reconcile — the lines, with the buttons for each one.
Step 1 — Import the statement
The button is Import statement. Download the statement from the bank account and upload the file:
upCampo reads four formats, and what decides the format is the file's
content, not its extension. That matters because Banco Inter delivers the same CNAB 240 statement
under two names — .RET and .TXT — and customers rename files.
| Format | What the file contains | What it does not contain |
|---|---|---|
OFX (.ofx, .qfx) |
Bank and account from the header; the bank's identifier for each transaction (the FITID); the counterparty's name, when the bank sends it. | Opening and closing balance — so there is no balance check with this format. |
CNAB 240 (.RET or .TXT) |
Bank, branch and account; the opening and closing balance declared by the bank; its own identifier for each transaction; the debit and credit totals. | The counterparty's name. It says "PIX ENVIADO" (PIX sent) and stops there. |
CSV (.csv) |
The account from the header; the balances, from the running balance column; and the counterparty's name, which is why it is supported here even though CNAB exists. | A transaction identifier — the duplicate key is generated from the content (see Known limitations). |
After reading, the screen shows the File read line, with the file name, the format recognized, which bank and account it belongs to and how many transactions it has. The import message says how many lines came in and how many already existed.
When the file is incomplete or out of standard, the screen warns you instead of making up numbers: a file missing the standard's trailer, declared totals that do not match the transactions read, a number of transactions different from the declared one, a line with no date or no amount (those are skipped). A file no reader recognizes gets "Format not recognized", and not a message about OFX.
Step 2 — Account and period
This is the account the lines go into and the period the list shows. Both are filled in automatically from the file: the file's account is looked up among the farm's bank accounts and, when found, is selected; the start and end dates become the first and last day of the file's transactions.
That fixes two mistakes that used to happen. The first is having to guess the account — exactly what the file knows. The second is quieter: the period used to start as "from the 1st through today", and last month's statement came in without appearing in the list, giving the impression that the import had not worked.
The comparison is tolerant on purpose: bank, branch and account arrive written in every possible way ("077" and "77", "4461112-9" and "4461112"), so both sides are reduced to digits and compared with and without the check digit. What identifies it is the account number; the bank is only used to break ties, and the branch does not enter the decision — it shows on screen for you to see. And when the bank account record does not have the account number filled in, the screen flags nothing: warning about a mismatch because of a missing record would train anyone to click "Import anyway" without reading.
Step 3 — Review and reconcile
This is where the three tabs are — Statement, History and Summary — and, at the bottom of them, what is not a single-line action: Reload, Auto reconcile and Delete. The first two also appear in a small version at the top of the step, as a shortcut: the statement grid is tall, and anyone who scrolls to the bottom to reload loses the line they were looking at.
📝 Main fields
| Field | Description |
|---|---|
| Bank account | The account the statement is imported into and whose lines the list shows. Required. Filled in by the file. When the farm has only one account, it starts selected. |
| Start date / End date | The period the list shows. It starts at the 1st of the month through today and becomes the file's period after importing. Change it only to look at another period — it changes nothing that is saved. |
| Status | List filter: All, Pending, Reconciled or Ignored. |
| Payment method for auto reconcile | Applies only to the Auto reconcile button; it starts as Transfer. When reconciling a line through the window, the method is chosen inside it. The methods are the same as in Accounts Payable/Receivable: Cash, Transfer, Credit card, Boleto, PIX and Check. |
📋 The Statement tab: the bank's lines
One line per statement transaction, with a filter on every column: Date, Type, Amount, Description (the text the bank wrote), Document, Status, Reconciled with, Reconciled by and Reconciled on.
Reading it is visual, because a statement review is done by scanning:
- Money in and money out are told apart by arrow and color — a green down arrow for money in, a red up arrow for money out —, and the amount carries a sign, in the same color, right-aligned like on a bank statement.
- The status is a colored badge: Reconciled in green, Pending in light red, Ignored in gray. The whole line also gets a background in the status color.
Each line's actions
The buttons are on the line itself, and each line shows only those that make sense for its status:
| Button | Which lines it appears on | What it does |
|---|---|---|
| Reconcile | Pending | Opens the candidates window (see below). Double-clicking the line does the same. |
| Create document | Pending | Creates the document the line does not have, already paid, and reconciles. |
| Ignore | Pending | Clears the line out of the way without creating any entry. |
| Reopen | Already resolved | Returns the line to Pending. It only works on an ignored line — see the alert below. |
🔍 The reconcile window: three tabs, one choice
The window shows the statement line at the top and, below it, the candidates for it in three tabs. You choose one candidate across the three: selecting in one clears the others, and the Reconcile button sees the choice from any of them. Switching tabs does not clear the selection — you can choose in the third and go back to the first to compare before confirming.
Installments tab — the candidates by amount
Open installments with the same amount as the statement line (with a one-cent tolerance, matching the installment's net or gross amount). The line's sign decides where to look: money coming into the bank looks in Accounts RECEIVABLE, money going out in Accounts PAYABLE.
The Search option lives inside this tab, because it is the only one it affects:
- Same date — due on the same day as the statement line;
- Up to 5 days apart — the leeway for a boleto paid before or after its due date.
Columns: due date, amount, entity, the Accounts Payable/Receivable document and the management account. When the file brought the counterparty's name — CSV and OFX do, CNAB 240 does not —, installments of the entity with that name move to the top of the list. Only the order changes: no candidate is hidden and nothing is chosen automatically.
Transfers tab
The transfers between accounts already entered in the system, with the same amount. Reconciling with one of them settles nothing: the transfer moved the balance when it was entered, and all that's left is to mark that this statement line is that transfer. That is why this tab is the first thing auto reconcile tries.
Payables/receivables of the entity tab
This is the tab for the case the amount does not solve: paid with interest, paid with a discount, two documents in a single PIX, an installment entered with the wrong cents. It lists all of that entity's open installments, with no amount filter and no date filter — you choose by looking at the document, not the amount. The type still follows the line's sign (money in looks in RECEIVABLE, money out in PAYABLE), because that is not search tolerance: it is what the installment is.
The entity comes pre-filled, and can be changed. upCampo recognizes whose line it is from the statement text, comparing it with the names of the registered entities, and pre-selects it. Changing it is expected and common: the PIX comes from one entity and the document belongs to another. When you change it, the list reloads and the selection is cleared, so no installment stays selected for an entity that is no longer on screen.
➕ Create document: for what does not exist in the system
The bank fee, the one-off PIX, the tax paid directly in online banking: lines that match nothing because there is no document at all in the system. The Create document button creates the document from the statement line itself — with one installment, the installment is created already paid (the money moved: it is on the statement) and the line becomes Reconciled. All in a single transaction: if the settlement fails, nothing is saved.
It is in two places — on the grid line and inside the reconcile window —, because someone who already knows the line is a fee should not have to open the candidates window to find out there are none.
| Field | How it comes |
|---|---|
| Type | Read-only. It comes from the line's sign: money leaving the bank creates Accounts PAYABLE, money coming in creates Accounts RECEIVABLE. The sign already says which it is, and letting you choose would only open the door to creating a document on the wrong side. |
| Entity | Pre-selected when the statement text made it possible to recognize it. |
| Description | The statement line's description. Required. |
| Amount | Locked to the line's amount. The installment is created to be paid by that line, and a different amount would make the account balance diverge from the bank. |
| Due date | The statement date. Editable, if the real due date is different. |
| Management account | Required, with the same filter as in Accounts Payable/Receivable: expense on a payable document, revenue on a receivable document. |
| Cost center | Optional. |
| Season | Optional. |
| Currency | Appears only when the farm has a currency set up. |
| Tax settings | Appears only when the farm has tax settings set up. |
The settlement goes into this screen's bank account, with the statement date and the chosen payment method. Create document requires add permission in Accounts Payable/Receivable, which is the screen where the document will live — someone who can reconcile cannot necessarily enter documents.
📎 Add installment to this document
It is the opposite of Create document: the document exists, the installment does not. The bank debited an amount that does not correspond to any installment of that document — the supplier charged an extra amount, the payment went out in two parts, a second charge for the same document came in. The button adds the missing installment to the existing document, settles it with the statement date and marks the line as Reconciled, all in a single transaction.
It is only enabled with a line from the Payables/receivables of the entity tab selected — that line is what tells which document is the target. The fields: Target document (read-only), Amount locked to the statement line's amount, Due date set to the statement date (editable), management account and cost center inherited from the chosen installment and editable. Same permission as Create document: add permission in Accounts Payable/Receivable.
Do not use it when the existing installment was paid with interest or with a discount. There the document's total did not change, and adding an installment would increase what is owed to the supplier without anyone noticing. That case is handled with a partial payment in Accounts Payable/Receivable, which has interest and discount fields — and the statement line is reconciled through the entity tab, confirming the different-amount warning.
⚡ Auto reconcile
It scans the pending lines in the period shown and reconciles those that have a single candidate. The order it tries is:
- Transfer between accounts with the same amount — the safest, because it involves no settlement.
- Open installment with the same amount: first the same date, then up to five days apart. The settlement uses the payment method from the step 2 field.
Three things worth knowing, because they explain the result:
- A line with two or more candidates stays pending on purpose. Ambiguity is for a person to resolve — the message says how many lines are still pending.
- One installment does not match two lines in the same run. An installment that has been used drops out.
- Each line is its own reconciliation. One that fails does not bring down the ones that already worked.
🔒 A closed period blocks reconciliation
Reconciling an installment means settling it, and the settlement is made with the statement date. If that date falls inside the period that Period closing has locked, upCampo does not allow it — and it warns you beforehand, instead of refusing after you confirm:
- In the grid, that line's Reconcile button starts out disabled, and the explanation appears on hover, saying through when the period is closed.
- In the reconcile window, the button is re-evaluated with each choice: with an installment selected, it looks at the statement date and the installment's due date. With a transfer selected, nothing is blocked — there only the statement line's status changes.
- In Auto reconcile, those lines are skipped, and the message says how many and through when the period is closed.
- Create document and Add installment follow the same rule, for the same reason: the installment is created already paid, with the bank's date.
Ignore, Reopen and Delete are outside this rule: they only touch the statement list, not
documents or balances. To reconcile a line in a closed period, reopen the period in
Financial > Period closing, reconcile and close it again.
📊 The Summary tab: proof the statement is complete
The first strip has five cards for the period on screen: how many statement lines, how many pending (in red, when there are any), how many reconciled, how many ignored and the period's net activity — the sum of what came in minus what went out on the listed lines. Since they reflect the period and status chosen in step 2, changing the filter changes the cards.
Below comes the Balances declared by the imported file block, which is the part that matters in the review: opening balance, closing balance and the Check, in green when it balances and in red when it doesn't.
That calculation is the proof that the file is complete — that no transaction was lost in the download or in the reading. The balances are the ones the file itself declares, and the check is on the lines read from it: a line skipped because it already existed in the account does not change this calculation, because what is being proven is the file's integrity, not what came in now. When it does not balance, the screen tells you by how much it is off, at import time and on the card.
🕘 The History tab: who did what, and when
It is an event log: one line per action, not one per statement line. It shows all events for the lines of the account and period chosen in step 2, from the most recent to the oldest, with a filter on every column: When (with time), User, Action, Statement line (date, amount and description, to identify which line the event belongs to), Reconciled with and Notes.
Five actions are recorded: Imported (the notes keep the file name), Reconciled (the notes say which of the four paths was used), Ignored, Reopened and Deleted. Because the same line appears in several rows — it was imported, ignored, reopened and reconciled —, the whole sequence is visible. The event is saved in the same operation as the action: if the action fails, the event does not exist; if the event cannot be saved, the action is undone.
The step 2 Status filter does not apply here: it says how the line is today, and the history is about what happened. And the deletion event stays — importing into the wrong account and deleting afterward is exactly the kind of thing you need to be able to explain months later.
🚧 Known limitations
- Importing the same period in two different formats duplicates the lines. Each format gives a different key to the same transaction: OFX uses the bank's identifier, CNAB 240 uses its own transaction identifier and CSV carries neither (in that case the key is generated from the line's content). There is no way to cross-match the three. Pick one format per account and stick with it — at import, the screen tells you how many lines had a generated key, which is the sign that this risk exists in that file.
- OFX does not carry a balance, so the Summary tab check does not happen with that format. When the check matters, CNAB 240 and CSV are the formats to use.
- CNAB 240 does not carry the counterparty's name, so the entity is not recognized and the entity tab starts by asking you to choose whose line it is. CSV and OFX carry the name.
- This screen does not produce reports. The review is done on it, through the Summary tab and the Status filter; the financial reports are in the Financial quick guide.
- There may be pending lines you did not import. The reconciliation in Payment batch, when it checks the bank's file, also saves the file's lines here — those that matched already reconciled and the rest pending. The history of those lines records the file name and the batch number, and that is how you find out where they came from.
- The bank account balance in the system matches the bank's balance, and the difference, when there is one, has a name: it is a list of pending lines.
- Fees, taxes and one-off PIX payments stop being left out of the results — they come in as already-paid documents, straight from the statement.
- Installment settlements stop being typed in twice: the bank statement is what settles them.
- The bank's file is checked on the spot: opening balance plus transactions must equal the closing balance the bank declared.
- Who reconciled, ignored, reopened or deleted each line, and when, is recorded.
- The reviewed month can be locked in Period closing without worrying that someone will change it later.
❓ Frequently asked questions
How do I import my bank statement into upCampo?
Download the statement from your bank account as OFX, CNAB 240 (the .RET or .TXT files of the "statement for bank reconciliation") or CSV, open Financial > Bank reconciliation and click Import statement in step 1. upCampo detects the format from the file's content, not its extension, and fills in the step 2 account and period on its own from what the file says. PDF is not read.
I imported the same statement twice. Will it be duplicated?
No. In upCampo's bank reconciliation each transaction comes in with a unique key within the bank account, and the import skips what is already there — the message says how many lines came in and how many already existed. What does duplicate is importing the same period in different formats (the OFX and then the CSV for the same month, for example), because each format identifies the transaction in its own way and there is no way to cross-match the two. Pick one format per account and stick with it.
The screen says the statement is not from the selected account. What do I do?
Check the step 2 account before going on: upCampo read from the file which bank and account it belongs to, and they do not match the chosen account. Usually you just need to change the account in step 2 — or the bank account record is missing the account number. There is an Import anyway, but importing one bank's statement into another's account puts the activity in the wrong account and makes reconciliation settle installments with a statement that is not theirs.
How do I enter the bank fee that shows up on the statement?
Use the Create document button on the fee's line, in Financial > Bank reconciliation. It creates the document from the statement line itself, with one installment, already paid on the bank's date and amount, and marks the line as reconciled. It works for anything that has no document in the system: fees, taxes paid in online banking, one-off PIX payments. It requires add permission in Accounts Payable/Receivable, which is where the document will be kept.
The bank debited an amount different from the installment. How do I reconcile it?
With the Payables/receivables of the entity tab in the reconcile window: it lists all open installments of that supplier or customer, with no amount filter and no date filter, and you choose by looking at the document. upCampo warns that the amount differs from the statement and asks for confirmation — it warns, it does not block. If the difference is interest or a discount on the installment itself, enter the payment with interest or discount in Accounts Payable/Receivable; do not use Add installment to this document, which would increase the document's total.
When should I use "Add installment to this document"?
When the bank paid something extra to that supplier and that amount really belongs to that document — an extra charge, a second charge on the same document. The document becomes worth more, and that is what the highlighted warning shows before you confirm: today's total and the total it will have. Do not use it when the existing installment was paid with interest or with a discount: in that case the document's total did not change, and the way is a partial payment in Accounts Payable/Receivable.
I reconciled the wrong line. How do I undo it?
By reversing the installment, in upCampo's Financial > Accounts Payable/Receivable: open the installment and use Remove Payment, which only appears on a paid installment. The reconciliation's Reopen button only works for an ignored line, and a reconciled line cannot be deleted either — that is on purpose, because reconciling settled the installment, and returning the line to pending without reversing would leave the payment there.
Why is the Reconcile button disabled on that line?
Almost always because that line's date falls in a closed period: reconciling settles the installment with the statement date, and upCampo's financial close does not accept entries inside a locked period. Hover over the button: the explanation says through when the period is closed. The way is to reopen the period in Financial > Period closing, reconcile and close it again. The other possibility is missing edit permission on the screen.
Auto reconcile left lines pending. Why?
It only reconciles what has a single candidate — same amount, first on the same date and then up to five days apart. A line with two or more candidates stays pending on purpose: choosing between identical installments is a decision for someone who knows the payment, not for the system. Lines in a closed period are also skipped, and the message says how many. The rest is resolved line by line, with the Reconcile button.
How do I know whether the statement file came in complete?
With the bank reconciliation's Summary tab: it shows the opening and closing balance the file itself declares and says, in green or red, whether the statement balances — opening balance plus transactions must equal the closing balance. When it does not balance, the screen tells you by how much it is off, and the way forward is to download the statement from the bank again. This check exists for CNAB 240 and CSV; OFX does not report a balance.
How do I find out who reconciled a statement line?
With the History tab, which is an event log: one line for each import, reconciliation, ignore, reopening and deletion, with who did it, the time and which path was used to reconcile the line. This log starts on October 3, 2026 — a line older than that has no events, and for it the trail is in the Reconciled by and Reconciled on columns of the Statement tab, which show the line's current state.
The farm requires payment approval. Does that apply to reconciliation?
No. In upCampo, required approval authorizes a payment before it happens, and bank reconciliation records what the bank has already done — the money is on the statement. So Create document and Add installment remain available, and the entry is created already paid, with the bank's date. A payment that is still going to happen still goes through the approval batch.
📘 Screen: Period closing
The financial close locks the past. When the farm declares that its finances are closed through a date, nothing dated inside that period can be added, changed or deleted anymore — no document, no installment, no transfer between accounts. It is the system's equivalent of closing out the month's books and sending them to the accountant: from that moment on, the number no longer changes on its own.
It solves a concrete, well-known problem for anyone managing a farm: the report that closed in March no longer matches in May, because someone corrected an old payment, deleted an installment or entered a forgotten invoice with a backdated date. With the period closed, that stops happening by accident.
📍 Location in the system
Menu: Financial > Period closing
It is the last item of the Financial menu, after Accounts Payable/Receivable. Like every screen in the web portal, it only appears for those who have permission — access is granted in File > Users.
🧩 Main function
To record the date through which the farm's finances are closed, and to protect everything before that date. The close is per farm: each one has its own date, and the screen always shows the status of the farm you are in.
📝 Main fields
| Field | Description |
|---|---|
| Closed through | The cutoff date. Required. The field's help text says what it does: "An entry dated up to this day can no longer be added, changed or deleted". On a farm that closes monthly, the usual value is the last day of the month — 03/31/2026, for example. |
| Notes | Free space to record the reason or reference for the close: "March close, sent to the accountant on April 10". |
The list, above the form, keeps the history of closes with Closed through, User and Notes — you can see who closed each period and when. A close record cannot be edited: to change the date, you reopen and close again.
The screen's buttons
- Close period — saves the close and turns on the lock. Requires add permission.
- Reopen period — undoes the close and makes the entries of that period editable again. Requires delete permission.
- Cancel/View list — goes back to the list without saving.
Below the form, the screen states the current status in one sentence: "This farm's finances are closed through 03/31/2026" — or, when there is no close at all, "This farm has no closed period."
🔒 What gets locked
With the period closed, upCampo refuses to add, change or delete three things dated inside it:
| What | Which date is considered |
|---|---|
| The Accounts Payable/Receivable document | The document's date. |
| The installment | Two dates: the due date and the payment date. It is enough for one of them to fall inside the closed period. |
| The transfer between accounts | The transfer's date. |
The installment having two dates is the detail that matters most in practice. An installment due in April but paid in March is inside the March close — and that is how it should be: March is when the money left the bank, and it is March's balance that cannot change.
🚫 The button is grayed out, with the explanation on hover
Since October 3, 2026, the button that would change an entry in a closed period is disabled from the start, and the explanation appears when you hover over it:
"Finances are closed through 03/31/2026. Reopen the period in Financial > Period closing to change this entry."
Before, the button stayed clickable: the person filled everything in, confirmed the dialog and only then got the refusal. Now they see, before starting, that the path is closed and why. Where this applies:
| Screen | What is grayed out |
|---|---|
| Accounts Payable/Receivable | Save and Delete, on the document and on the installment; Pay/Receive; Remove Payment; and the Make payment/receipt button in the settlement window, which is re-evaluated with each installment checked and each change of date. |
| Transfer between accounts | Save, Delete and Finish. |
| Bank reconciliation | Reconcile and Create document, on the statement line and inside the reconciliation window. Auto reconcile does not stop: it skips the lines in the closed period and tells you how many it skipped. |
| Payment batch | Settle batch and the Confirm button of the settlement window. Here the tooltip counts them: "3 installment(s) in the batch are due in a closed period and would be refused at settlement.", followed by the message above. |
The grayed-out button is a courtesy of the screen, not the lock itself. The lock is still in the database: if some path gets around the screen, the refusal happens all the same, with the message "Finances are closed through 03/31/2026. Reopen the period to change this installment." — with variations for documents and transfers.
✅ How to close the month
- Finish reviewing the period. Closing is the last step, not the first: after it, a correction costs a reopening.
- Open
Financial > Period closingand click New. - Enter the last day of the period in Closed through — 03/31/2026 to close March.
- Write the Notes, if it helps you remember what it is about.
- Click Close period. The current status sentence now shows the new date.
🔓 When you need to reopen
Reopening exists because mistakes show up later. The invoice the accountant sent back, the payment entered in the wrong account, the duplicate installment someone only noticed during reconciliation: all of them require changing what has already been closed.
The Reopen period button undoes the close and makes those entries editable again. Before finishing, upCampo asks for confirmation, reminding you what is at stake: "Are you sure you want to reopen this period? Its entries will accept changes again."
Two things protect this path, and they are worth knowing:
- Reopening requires delete permission on this screen — a more restricted permission than closing, which only needs add permission. Closing the month can be the job of whoever runs the finances; reopening is usually a decision for whoever is accountable for them.
- Who did it is recorded. The list keeps the history with the user of each close, so a reopening is not an invisible event.
After correcting, close the period again — otherwise the month stays open and the problem comes back.
- A report run today on a finished month gives the same number six months from now.
- Retroactive corrections stop happening by carelessness — they now require an explicit decision.
- The balance of the bank accounts at month-end stops moving once reconciled.
- What was handed to the accountant remains what is in the system.
- Who closed and who reopened each period is recorded.
❓ Frequently asked questions
How do I stop someone from changing entries in months that are already closed?
With the Financial > Period closing screen in upCampo. Enter the cutoff date in Closed through — the last day of the month, for example — and click Close period. From then on, no document, installment or transfer dated inside the period can be added, changed or deleted.
The system says finances are closed and won't let me save. What do I do?
The date of what you are entering falls inside a period the farm has already closed — the message tells you through when. There are two ways forward: enter it with a date after the close, when that is correct, or ask whoever is accountable for the finances to reopen the period in Financial > Period closing. Reopening requires delete permission on that screen.
The Save (or Pay) button is grayed out and won't click. Why?
Hover over it: since October 3, 2026, upCampo disables the button when the entry would fall inside a closed period, and shows the reason in the tooltip — "Finances are closed through 03/31/2026. Reopen the period in Financial > Period closing to change this entry.". Warning you beforehand is deliberate, instead of letting you fill it in, confirm and only then refuse. If the tooltip does not mention a closed period, the reason is probably user permission, and then the way forward is File > Users.
I closed September and now I can't pay an installment that was due in September. Is that normal?
Yes. The installment is checked by two dates — due date and payment date — and it is enough for one of them to fall inside the closed period. Its due date was in September, so it is locked, even if you are paying it today. Paying that installment would change September's open balance, a number already reviewed. The options are to reopen September, pay and close again, or to close through a date that does not reach due dates still open.
I just started using the system. Will the close get in the way of my entries?
No. As long as no period is closed, nothing changes: the screen starts empty and finances work exactly as before. The lock only exists after the first Close period, and it is never automatic — it is always someone who decides to close.
I closed the wrong month. Can I undo it?
Yes. Select the close in the list and click Reopen period. upCampo asks for confirmation, warning that the entries of that period will accept changes again, and records who did the reopening. After fixing what was needed, close the period again.
An installment is due in April but was paid in March. Is it closed?
Yes, if March has already been closed. The installment is checked by two dates — the due date and the payment date — and it is enough for one of them to fall inside the closed period for the lock to apply. It makes sense: March is when the money left the bank, and it is March's balance that cannot change.
Does the close apply to all of the company's farms?
No. The close is per farm: each one has its own date, and the screen always shows the status of the farm you are in. One farm can be closed through March and another still at January, depending on how far along each one's review is.
Is the invoice I enter in inventory also blocked by the close?
The financial document it would generate, yes. The lock applies to everything that reaches the finances, including what the system would create on its own from an invoice, a contract or Generate Salary. If the date falls inside the closed period, the document does not go in — and that is on purpose, so the close has no back door.
Why can't I close the current month?
Because upCampo does not accept a future date in Closed through: the response is "It is not possible to close a period that has not ended yet.". Closing ahead of time would lock entries that are still going to happen. Wait for the period to end — to close March, enter 03/31 from April 1 on.
📘 Screen: Tax cash book
The tax cash book is the month-by-month review of what came into and went out of a grower's cash, organized the way the tax authority asks for it — not the way farm management asks for it. It is the basis of the LCDPR, the Livro Caixa Digital do Produtor Rural (Brazil's digital cash book for rural producers): the obligation the Receita Federal (Brazil's federal tax authority) places on the individual grower whose gross revenue from farming exceeds R$ 4.8 million in the year, filed once a year, within the income tax return deadline.
In upCampo, this screen is not a place where you type the book: it generates the book from the payments already recorded in Accounts Payable/Receivable, and each line of the book keeps track of which installment it came from. That is what keeps the book from telling a different story from the financials. The work here is review: see what the system could not answer, fix it, close the month — and, at the end of the year, generate the LCDPR file, explained in LCDPR generation.
📍 Location in the system
Menu: Financial > Tax cash book
It is the last item of the Financial menu, after Period closing. Like every screen in the web portal, it only shows up for users with the permission, granted in File > Users.
🧩 Main function
Build, per grower and per month, the tax list of payments and receipts from farming, with opening balance, income, expenses and closing balance — and show, side by side, everything still left to fix before that month can be handed to the accountant. When the month has been reviewed, it is closed, and from then on no line, balance or period changes without an explicit reopening.
🧭 The two views: Monthly cash book and LCDPR generation
At the top of the screen there is a selector with two options. They answer questions of different sizes:
| View | What for |
|---|---|
| Monthly cash book | The monthly work: update the book from the payments, review the lines, fix the open items and close. It is the view that opens by default, and it is the one this article describes. |
| LCDPR generation | The yearly work: the list of all LCDPR files already generated, with the New button to generate another one. It is explained in LCDPR generation. |
The screen remembers the chosen view while you are logged in.
📅 Producer, year and the month cards
At the top are Producer and Year. Once the producer is chosen, the 12 months of the year appear as cards, side by side. Each card shows, without opening the month, the status, the income, the expenses and how many open items the month has.
| Status on the card | What it means |
|---|---|
| No book yet | The month has never been generated for this producer. In the month header it shows as Not generated, with the notice "Click Update month to generate it from the payments recorded in finance." |
| Open | The book has been generated and is under review: fix it in the financials, update again. |
| Under review | Someone marked the review as finished. It still accepts changes (see Closing and reopening the month). |
| Closed | The month is locked. No line, balance or period changes anymore without reopening. |
The number of open items is the same everywhere: on the card, in the month header, on the Open items tab and in the Open items column of the grid. If the card says 14, the open month shows 14.
Who appears in the producer list
- There is no "Producers" screen. The producer is the individual
tax configuration,
set up in
File > Tax Configuration, in the format Name - 000.000.000-00. - The same CPF can have a tax configuration on each farm, and shows up only once in the list: the book belongs to the CPF, not the farm.
- Anyone who only takes part in a joint ownership or partnership also appears, with more than 0%, even without a tax configuration of their own — see example E.
- If the company has no individual tax configuration at all, the screen warns: "No individual tax configuration in this company. The cash book belongs to the farmer with an individual tax ID."
🔁 Update month and Update all producers for the month
When you click a card, the month opens below with only two actions in view: Update month and Close month (or Reopen month, if it is closed). The rest is in the More menu.
- Update month — generates or updates this producer's book for this month from the payments recorded in finance. The button's help text sums up the rule: "It can run as many times as needed while the month is not closed: the accountant's adjustments are kept."
- Update all producers for the month — sits at the top, next to producer and year. It does the same for all producers in the company, in the month chosen on the cards; a closed month stays as it is. Before running, it asks for confirmation, and it is all or nothing: if one producer runs into a problem, nothing is saved and the screen responds "No book was saved: one of the tax IDs failed and the whole month was undone. Solve the problem and create it again."
Updating requires insert permission on this screen.
🧾 The month summary
With the month open, the first line shows the status, the count of open items (in red, or No open items in green) and the date of the last update. Right below comes the summary:
| Field | Description |
|---|---|
| Income | The sum of the month's income lines. Calculated. |
| Expenses | The sum of the month's expense lines. Calculated. |
| Opening balance | A small field, with the save button inside it. It is the only value entered by hand — see The opening balance. |
| Closing balance | "Opening balance plus the income, minus the expenses of the month." Calculated. |
| Note for the month | Stays in the month's book and is used to explain to the accountant what is not in the lines. It has the Save note button. |
📄 The entries grid
The Entries tab is the book itself: one line per payment in the month, plus the lines upCampo adds on its own — the part withheld by the buyer, the withholding, loan interest and the share of each joint owner or partner (see the examples below). The grid opens with 9 columns:
| Column | What it shows |
|---|---|
| Date | The payment date — the day the money went out or came in —, not the day the payment was typed in. |
| Bank account | Exactly what goes into the LCDPR file: the account name, Cash (000) or Cash in transit (999), with the reason on a smaller line underneath. See the table right below. |
| Document | The document type and number — the invoice, or what was entered on the standalone title. |
| Description | The description of the entry. |
| Other party | Who paid or received, with the CPF or CNPJ. Without the document, it shows No CPF/CNPJ. |
| Property | The property and the type of exploration. On a line that came from another producer's title, it carries the badge "Share of partnership/joint ownership · title of João". |
| Classification | Farming income, Farming expense, Income from an advance or Outside the farming activity. A line adjusted by the accountant carries the Adjusted tag; a line removed from the calculation, Excluded from tax. |
| Amount in the book | This CPF's share, with the arrow and the income or expense color. |
| Open items | What is missing on that line. |
The Columns menu shows the hidden ones: Nature, CFOP, Classification source (Derived by the system or Accountant's adjustment), %, Title amount (the full amount, before the split among joint owners) and Source. At the bottom of the grid are the income and expense totals.
What the Bank account column means
The LCDPR separates money that went through the grower's bank account from money that did not. The Receita Federal matches bank account entries against the e-Financeira — what banks report to it — by date and amount. That is why the column does not show only the account name: it shows the code the line goes into the file with, and why.
| The column shows | When |
|---|---|
| The account name | The account is of the Bank account type in its record: "Producer's bank account: goes to the LCDPR with the code of record 0050". |
| Cash (000) | The account is set up as Cash on hand. |
| Cash in transit (999) | The account is set up as Funds in transit; or it is the part the buyer withheld ("Part of the revenue withheld by the buyer: did not reach the bank" and "Withheld by the buyer: did not go through the bank"); or it is the share of a joint owner or partner, whose money went through the holder's account ("The money is in the account of the holder João"). |
The type of each account is chosen in the bank account record.
The quick filter
Before the Change several button, the grid toolbar has a filter with six options: All · Bank account · Cash (000) · In transit (999) · Withholdings · Interest. It combines with the filters in the column headers. It is the quick way to check, for example, only what goes into the bank account against the statement, or only the month's withholdings against the buyers' receipts. With a filter on, the footer total and Change several apply only to the lines in view.
The tax classification, and who decided it
The system derives the classification from two questions: income or expense, from the title type; inside or outside farming, from the installment's Consider for income tax flag. The installment copies that flag from the management account when it is created — so, in practice, what decides whether an entry belongs to farming is the management account.
| Classification | Goes into the LCDPR file? | Counts in the book balance? |
|---|---|---|
| Farming income · Farming expense · Income from an advance | Yes | Yes |
| Outside the farming activity | No | Yes — stays in the book so the balance matches the bank |
| Excluded from tax (the accountant's decision) | No | No |
Income from an advance only exists through the accountant's adjustment: an advance on a future sale cannot be derived from the financials. And whatever the derivation cannot reach stays as Without tax classification — a title whose type is neither Accounts receivable nor Accounts payable, and a line generated before 10/04/2026, which is classified again when the month is updated.
🧑💼 The accountant's adjustment: clicking the line
Clicking a grid line opens a dialog, Entry of dd/mm/yyyy, with two parts: Entry details, with everything the grid does not show (nature, CFOP, title amount, percentage, source), and the Accountant's adjustment:
- Tax classification — the reclassification. Left blank, the one the system derived applies.
- Exclude from the tax book — "The entry stays in the book but leaves the calculation: it does not add to the balance and does not go to the LCDPR. The reason is required." A line excluded from tax also stops flagging open items.
- Property exploration — switches the line's property among this CPF's explorations in force on that date. Left blank, the one the system found applies. It does not change the amount of the line.
- Adjustment note — "Why this entry was adjusted. It is what later explains the difference between the book and the financials." It is required to exclude from tax.
Save adjustment records who adjusted it and when; Clear adjustment returns the line to what the system derived. Updating the month never overwrites the adjustment. Adjusting requires edit permission and a month that is not closed.
Change several
Each grid line has a checkbox. Once lines are checked, the button becomes Change several (N) and opens the Change several entries dialog, which applies the same adjustment to all of them at once. The dialog shows how many lines were chosen, what they add up to and what their current classification is.
There are four fields — Tax classification, Exclude from the tax book (with the reason), Property exploration and Adjustment note —, and only the fields marked "Change" are applied. A field that is marked and left empty clears that adjustment on the lines.
- Lines in a closed month are left out, and the dialog warns beforehand: "3 are in a closed month and will not be changed."
- The exploration field only offers those valid for all the chosen lines; when none is valid for all of them (different dates or CPFs), the adjustment is done line by line.
- At the end, the screen says how many lines changed and which were left out, with the reason for each one.
⚠️ Open items
The Open items tab lists one line per entry and reason, with a tag per reason showing how many times it occurs — that volume tells you what to tackle first. Selecting an open item and clicking Go to the entry (or double-clicking) takes you to the corresponding line.
| Reason | What to do |
|---|---|
| Entry without document type or number | On the standalone title, enter the Document type in Accounts Payable/Receivable. The LCDPR requires the type on every entry. |
| Without the other party's tax ID | Fill in the document in the entity record. |
| Without tax classification | Classify it in the accountant's adjustment, or update the month if the line is from before 10/04/2026. |
| Without a bank account | The installment was paid without a bank account. Fix the payment. |
| Without a description | Fill in the title's description. |
| Without an amount | Line with a zero amount. |
| No rural property: the title has no exploration in force on the payment date | Set up the exploration in Exploited properties and update the month, or choose the exploration in the adjustment. Without it, the line goes 100% to the title's CPF, with no property. |
| Rural income without an invoice: check whether the sale is already on another invoice (e.g. sold to the cooperative and paid by the industry) | Farming income with no invoice behind it. Sometimes it is legitimate; sometimes it is the same sale counted twice. Check and, if that is the case, exclude it from tax with the reason. |
| The installment split mixes accounts inside and outside rural activity: decide how much goes into the book | It only appears when the allocation combines accounts with and without Consider for income tax. An allocation among accounts that are all inside (or all outside) farming does not flag an open item. |
| The payment date and the date informed on the settlement fall in different months | Check which is the correct payment date. |
💵 Examples: how each case shows up in the book
The numbers below are for illustration. What they show is the rule upCampo applies.
Example A — sale with withholding by the buyer
Invoice of R$ 100,000.00. The buyer withholds R$ 1,500.00 of Senar and deposits R$ 98,500.00. On the payment, the withheld amount goes in the Withheld by buyer field. The book gets three lines:
Why three, and not two. The Receita matches the bank account against the e-Financeira by date and amount: recording R$ 100,000.00 in the bank would not match the statement, which received R$ 98,500.00. And it matches the invoice XML against the book: recording only R$ 98,500.00 of income would not match the invoice. The three lines satisfy both checks — the bank receives what the statement shows, and income adds up to the invoice amount.
Example B — withholding across several installments
A R$ 100,000.00 sale in 2 installments of R$ 50,000.00, with 1.5% withheld on each payment: on each installment, R$ 750.00 withheld and R$ 49,250.00 deposited. Record the withheld amount on each installment, according to the settlement statement of that payment — do not pile it onto the last one. If the buyer withheld everything on the first payment, record it all on that installment. There is only one rule: follow the settlement statement of each payment.
Example C — loan or crop financing
The inflow of R$ 1,000,000.00 of crop financing is not farming income: it stays in the book as Outside the farming activity. When paying an installment of R$ 10,000.00 of principal plus R$ 1,200.00 of interest:
For that, the Loans management account has Consider for income tax unchecked and Interest and charges go into the cash book checked (see Management account), and the interest must be entered in the payment's Interest & Penalties field. Interest built into the installment amount, without that field, does not become its own line.
Example E — the book of someone with no title at all
A R$ 100,000.00 title under João's CPF, on a jointly owned exploration in which he has 70% and Maria 30%. Maria has no title and no tax configuration of her own. Even so, she appears in the Producer drop-down, because she takes part, with more than 0%, in a registered exploration.
When you choose Maria and click Update month, the system brings in her share of João's titles — R$ 30,000.00 —, with the badge "Share of partnership/joint ownership · title of João" and the account Cash in transit (999), because the money went through his account, not hers. João's book keeps the R$ 70,000.00, in his bank account.
What each one files in the LCDPR file, with the property and the participants, is in example D.
Example G — crop protection product bought without knowing which property it will be used on
The LCDPR is cash basis: the expense goes in on the payment date, not the application date. For an expense shared by two properties, the Receita accepts recording it entirely on the main property or splitting it by a reasonable criterion. In upCampo, the line goes to the main exploration in force on the payment date, and the accountant can change it in the adjustment.
- If both properties are 100% the grower's, it hardly matters which one the expense falls on: the result is all theirs.
- If one of them is a partnership or joint ownership, it does matter, because the share recorded on that exploration is split with the partner. In that case, agree on the criterion with the accountant beforehand.
💰 The opening balance: it comes from the bank
The opening balance is the only value in the book that upCampo does not calculate. The field's help text is direct: "It comes from the bank statement, not from the system. It is only inherited from the previous month when that month is closed."
- In the first month, it starts at zero and is entered by the reviewer, looking at the statement, in the small field of the summary — the save button is inside it.
- The next month only inherits this month's closing balance if this month is closed. As long as the previous month can change, inheriting its number would leave two months that do not reconcile. The chain of balances is built by closing month by month, in order.
The field stays editable while the month is Under review. It requires edit permission.
🔒 Closing and reopening the month
- Close month — locks the book. It asks for confirmation: "Close the book of 09/2026 for this tax ID? After closing, no entry, balance or period changes without reopening the month." It requires edit permission.
- Reopen month — returns the book to Under review; whoever closed it stays on record. It requires delete permission, the most restricted one, as in Period closing.
- Send for review — is in the More menu and moves the book to Under review. Today it is only a marker: it does not notify anyone and does not lock anything. It is there so the team knows the review of that month is finished.
Once closed, the month is protected in the database itself: a line in a closed book is not created, does not change and is not deleted. Anyone who tries gets "This month is closed. Reopen the month to change it." That is why updating the month, Change several and the title allocation leave a closed month as it is.
🚧 What does not exist yet
So that nobody counts on something that is not ready in the week of the filing:
- Supplier advance with offsetting — paying in advance and deducting it later on the invoice.
- Assignment of receivables — when the buyer pays a third party on behalf of the grower.
- Withholding split by tax: the Withheld by buyer field is a single one, for Funrural, Senar, Fethab and Iagro together.
- Automatic import of the LCDPR into the income tax program, and a tax projection.
📊 Reports and dashboards
This screen has no report of its own. The book is viewed on the screen itself, and the LCDPR file comes out of the LCDPR generation view. To check the same activity from the financial side, the statement and cash flow reports are in the Quick Guide - Financial, which also explains which date each one uses.
- The grower reaches income tax season with the months already reviewed, not with a whole year to audit at once.
- Each line's bank account is the same one that goes into the file — and the bank matches the statement, even on sales with withholding.
- What is missing for the tax authority shows up by volume, and repeated corrections are done in one go with Change several.
- The book does not drift from the financials by accident: the only possible difference is the one the accountant wrote down and signed.
- A closed month gives the same number a year from now.
❓ Frequently asked questions
Does "Outside the farming activity" go into the LCDPR file?
No. A line marked Outside the farming activity stays in the book and counts in the balance, so the book keeps matching the bank statement, but it does not go into the LCDPR file. A line Excluded from tax, on the other hand — the accountant's decision, with a required reason — also leaves the balance.
What are accounts 999 and 000 in the cash book?
They are the two LCDPR codes for money that is not in a bank account. 999, cash in transit, is money that did not go through the grower's bank account: the part withheld by the buyer, a joint owner's or partner's share that came into the holder's account, a payment made in product. 000 is cash. In upCampo, the code comes from the bank account type, or from the line itself in the case of withholding and joint ownership.
Why did everything show up as "Outside the farming activity"?
Because the Consider for income tax flag is copied from the management account when the installment is created, and installments created before 10/04/2026 were created unchecked. On 10/08/2026 upCampo corrected all old installments to follow the management account. If your book still shows everything outside farming, click Update all producers for the month in each open month. If it persists, check whether the management account is flagged.
What is "Property exploration" in the line adjustment?
It is the property, the type of exploration (owned, leased, partnership, joint ownership…) and the percentage, set up on the Exploited properties tab of the Tax Configuration. The book uses the main exploration in force on the payment date. Changing the exploration in the adjustment changes the property the line goes to the LCDPR with, but does not recalculate the amount.
I updated the book twice. Did I duplicate the entries?
No. Update month can be used as many times as needed: it updates the lines that already exist, adds new payments and removes the ones that left the period. The adjustment the accountant made on each line is kept.
The income in the book is higher than what came into the bank. Is it wrong?
No, if the buyer withheld Funrural, Senar or Fethab. The book's income adds up to the invoice amount, in two lines: what came into the bank, on the bank account, and the withheld part, on 999. The withholding appears on a third line, an expense, also on 999. The bank account on its own matches the statement.
Is IBS/CBS withholding the same as Funrural's?
No. Funrural and Senar belong to the grower: they go into the book as an expense, on 999. The IBS and CBS of the tax reform are charged on top and belong to the buyer. How they go into the LCDPR, starting in 2027, the Receita has not yet defined, and upCampo does not handle them in the book today.
Do I need a withholding field on the invoice?
No. The amount that counts is the one on the buyer's settlement statement, recorded on the payment, in the Withheld by buyer field of Accounts Payable/Receivable. The Senar on the invoice is only a suggestion the payment comes pre-filled with for you to check.
How do I record crop financing interest in the cash book?
On the loan's management account, leave Consider for income tax unchecked and check Interest and charges go into the cash book. On the payment of each installment, enter the interest in the Interest & Penalties field. The principal stays outside farming, and the interest becomes a farming expense line, on the same bank account and the same date.
My partner has no titles. Does she have a book?
Yes, if she takes part with more than 0% in an exploration set up in Exploited properties. She appears in the Producer drop-down; when you click Update month, her book receives the share of each of the holder's titles, with the badge "Share of partnership/joint ownership" and account 999. Her book does not update by itself: use Update all producers for the month after changing the holder's titles.
A payment did not show up in anyone's book. Why?
Almost always because the title of that installment has no tax configuration: without it, upCampo does not know which CPF the entry belongs to. The screen counts these payments in a red warning at the top. Set the tax configuration on the title and update the month. The other possibility is that the title is under a CNPJ, in which case being left out is correct.
Does "Send for review" notify the accountant?
No. Today it is only a marker: the month moves to Under review, without notifying anyone and without locking anything. What locks it is Close month.
Where does the month's opening balance come from?
From the bank statement, entered by hand in the Opening balance field of the month summary. upCampo only inherits that value from the previous month when that month is closed. Close the months in order, and from the second one on the opening balance comes pre-filled.
I closed the month and need to fix an entry. What do I do?
Use Reopen month, which returns the book to Under review; whoever closed it stays on record. Reopening requires delete permission on this screen. After fixing it, update the month and close it again.
Why does a split installment show up as an open item?
Only when the allocation mixes accounts inside and outside farming — for example, 70% on an account with Consider for income tax checked and 30% on one without it. Then the book does not know how much of the installment belongs to farming, and the accountant decides in the adjustment. An allocation among accounts that are all inside, or all outside, does not create an open item.
Who has to file the Livro Caixa Digital do Produtor Rural?
The individual grower whose gross revenue from farming exceeds R$ 4.8 million in the year, under the Receita Federal rule. Filing is yearly, within the income tax return deadline. Anyone operating through a legal entity does not file this book.
🧾 Extra: LCDPR generation
The LCDPR — Livro Caixa Digital do Produtor Rural (Brazil's digital cash book for rural producers) — is the file that an individual grower files with the Receita Federal (Brazil's federal tax authority) once a year, with all farming income and expenses, the properties they operate and the accounts the money went through. In upCampo, it comes out ready from the Tax cash book: one file per producer (CPF, the individual taxpayer ID) per year, checked by a plain-language checklist before it is generated, and stored with a version history.
It is not a separate screen, but the second view of the Tax cash book screen. The monthly book is where you review the month; this is where the reviewed year becomes the file.
📍 Location in the system
Menu: Financial > Tax cash book, LCDPR generation selector, at the top of the screen
🧩 Main function
Generate a producer's LCDPR file for a year, from the lines of that CPF's tax cash book, and store each generation so that the original filing and the amendments can be compared and downloaded again at any time.
📋 The list of generations
The view shows all of the company's LCDPR generations, with Producer and Year at the top as optional filters. The columns:
| Column | What it shows |
|---|---|
| Producer · CPF · Year | Whose file it is and for which year. |
| Version | 1 on the first generation for that CPF and year; 2, 3 and so on with each new generation. |
| Generated on · Generated by | When and by whom. |
| Calculation method | Actual result or 20% of gross revenue. |
| Revenue · Expenses · Result | The totals that went into the file. |
| Lines | How many lines the file has. |
Each row has the Download button, which delivers that generation's file exactly as it was saved. The New button opens a new generation, already set to the producer and year from the filter.
⚙️ Generating the file: a single page
New opens the Generate the LCDPR (Rural Producer Digital Cash Book) dialog, with Producer and Year at the top and a status line — "Not generated yet for this producer and year" or "Last generation: version 2, on 10/08/2026 by John Doe". The rest is a single page, read from top to bottom:
- Checklist
- What goes into the file
- Calculation method
- Special cases
- Accountant
- Generate and download
1. Checklist
It runs by itself when the dialog opens — and again with the Check again button — and starts with a scoreboard:
| Scoreboard | What it means |
|---|---|
| "1 item blocks the file · 1 warning" | There is at least one problem the Receita would reject. The file is not generated until it is fixed. |
| "You can generate: warnings do not block, but take a look first" | Warnings only. The file is generated, but they usually point to something wrong. |
| "All set to generate the file" | Nothing to fix. |
Each item states the problem in plain language, what to do, and has a shortcut to the screen that fixes it — Open the tax settings, Open the rural properties, Open the bank accounts, Open the management accounts, Go to the tax cash book… The shortcut opens in a new tab: fix it there, come back and click Check again. What is in order also appears, in a separate list: What is in order.
| Blocks the file | Only warns |
|---|---|
|
|
2. What goes into the file
The summary: Revenue, Expenses, Result, and how many Properties, Bank accounts and Entries go in. When there is an item that blocks, it shows as a preview: "the file is only generated after the blocking items are solved."
3. Calculation method
The How the result is calculated field has two options: Actual result (revenue minus expenses) or 20% of gross revenue. The field's help text is the rule that matters: "Must be the same as in the income tax return." Choose it together with the accountant.
4. Special cases
It is collapsed, because it is almost never used: Special cases (start of activity, death, estate, leaving the country). It holds the situation at the start of the period (normal, the activity started this year, or the filing obligation started mid-year), the special situation (death, estate, permanent departure from the country) with the date, and the start and end of the period — which only differ from 01/01 to 12/31 in those cases.
5. Accountant
Name, CPF or CNPJ, CRC (accountant's registration), E-mail and Phone with area code. The accountant is stored per company and is suggested from the last file — the one for the same producer and year, if there is one; otherwise, the last one generated in the company. Check it every year.
6. Generate and download
Generate and download saves the new version and downloads the file. It stays disabled while there is an item that blocks ("Solve the item that blocks the file") and requires insert permission on the tax cash book — without it, the dialog is for checking only. When it finishes, the screen tells you the version: "LCDPR generated and saved: version 3". Once generated, there is also Download the last generation (version N).
🤝 Example D — 70/30 joint ownership: each one files their own
Farm X is operated under joint ownership by João (70%) and Maria (30%). A sales title of R$ 100,000.00 is under João's CPF, and the money came into his account. Each one files their own LCDPR:
| João's file | Maria's file | |
|---|---|---|
| Property | Farm X, joint ownership, 70% | Farm X, joint ownership, 30% |
| Participant | Maria, 30% | João, 70% |
| Income | R$ 70,000.00 in his bank account | R$ 30,000.00 on 999, because the money did not go through an account of hers |
Expenses, withholding and interest follow the same split. Maria does not need any title or tax configuration of her own: her book is built from João's titles (see example E of the tax cash book).
- A landlord comes in with 0%: for them, the lease is rent, not a crop result. So does a lender under a free-use agreement.
- A spouse, only 50/50 or 100/0.
- If each joint owner issues their own invoice, set up each one's exploration as individual: then each title already belongs only to whoever issued it, and there is nothing to split.
Explorations and participants are set up on the Exploited properties tab of the Tax Configuration.
🚧 What the system does not do
- More than one file per CPF in the same year. The Receita accepts it when the grower has more than one accountant, each with part of the activity. It is rare, and upCampo generates a single file, with everything.
- Import the LCDPR into the income tax program. The file is for e-CAC; the return is still filled out by the accountant.
- Transmit. upCampo generates and stores the file; the transmission, with the signature, is done in e-CAC.
📊 Reports and dashboards
There is no report of its own: the check is the checklist, and the result is the file itself, which can be downloaded again from the list of generations.
- The file comes out of the same book that was reviewed month by month, without retyping anything.
- What the Receita would reject shows up beforehand, in plain language, with the way to fix it.
- The original filing and each amendment are stored, ready to compare and download again.
- Joint owners and partners each have their own file, with their own share, without a side spreadsheet.
❓ Frequently asked questions
Is there one LCDPR per year?
Yes: in upCampo, one file per producer (CPF) per year, with a version history. Generating the same CPF and year again creates the next version, without erasing the previous ones, and any version can be downloaded again from the list of generations.
I generated the wrong LCDPR. How do I delete it?
You do not delete it: upCampo keeps every generation. Fix whatever was wrong in the tax cash book or in the records and generate again — the next version comes out, and that is the one you transmit. The wrong version stays on the list as a record of what was done.
Why won't the LCDPR generate, saying there are no farming entries?
Because every entry of the year is marked Outside the farming activity or has no classification. The cause is almost always the Consider for income tax flag left unchecked on the farming management accounts. Check it on the right accounts, update the months in the tax cash book and check again.
Which calculation method should I choose in the LCDPR?
The same one as the grower's income tax return: Actual result (revenue minus expenses) or 20% of gross revenue. The accountant decides; upCampo only records the choice in the file.
Does the LCDPR file come out already signed?
No. The signature is not in the file: it is applied with the digital certificate when transmitting through e-CAC.
I have two accountants. Can I generate a file for each one?
The Receita accepts more than one file per CPF in the year when there is more than one accountant, but upCampo does not do that split: it generates a single file, with all of the grower's activity. It is a rare case; if it is yours, talk to upCampo support.
Does my joint-ownership partner need to file an LCDPR?
Each joint owner files their own, with only their share, if they are required to. In upCampo, her book and file are built from the holder's titles, using the percentage set up on the exploration: her share of the income goes on account 999, because the money did not go through an account of hers.
Can I generate the LCDPR with months still open?
Yes: a month that is not closed is only a warning. But the file comes out with the numbers of that moment, and an open month can still change. The recommendation is to close all twelve months in the tax cash book before the generation that will be transmitted.
📒 Quick Guide - Accounting (how it works)
Accounting in upCampo is the farm's bookkeeping, built from what the farm already records day to day. The purchase invoice, the work order write-off, the payment to the supplier and the receipt from the sale are already in the system; accounting does not ask for any of that to be typed in again. The accountant says once which accounts each type of event should hit, and upCampo builds the month's debit and credit entries.
It is the same idea as the posting rules ("accumulators") in accounting software: for each type of operation, a rule with the accounts for each part of the amount. The difference is that the rule sits next to where the data comes from, and the entry comes from the document the farm itself saved.
📍 Location in the system
Menu: Accounting
The Accounting menu sits between Financial and Budget, with five screens in the order of the accountant's work:
- Settings: Chart of accounts (accounting), Accounting setup and Accounts in records.
- Entries: Accounting entries and Depreciation.
Everything in the module belongs to the company, not to each farm: one chart of accounts, one accounting setup and one set of entries per company, bringing together what all of its farms record. Like every screen in the web portal, each one only shows up for users with permission, granted in File > Users.
🔄 The path of an entry
Every accounting entry in upCampo goes through the same four steps:
1. The event
It is the document the farm already saved in upCampo. Accounting reads straight from the source, no matter who recorded it: the web portal, the app, the API or UPí. Each event becomes one entry, with as many lines as needed.
2. The Accounting setup
The Accounting setup holds the rule for each event. It has four tabs:
- Crops and production, Financial and Inventory and assets, for events that have a single rule, one panel per event: the work order write-off, the harvest and the cost of production sold; the payment, the receipt, standalone payables and receivables and the revenue from contract sales; fueling, requisitions and depreciation. For harvest, fueling, requisitions and depreciation, the How it is posted field says whether the event posts by itself, when the month is generated, or is left for the accountant to post by hand.
- Invoices and natures, for invoices. Here there are several operations (purchase for stock, purchase for consumption, sale of production, return…), and what decides which one applies to an invoice is its nature of operation.
Each operation has one line per part of the amount (the products value, freight, IPI, ICMS, interest…), and each line states the debit account and the credit account.
3. The account lookup
Each side of the line can have an account written in and, next to it, "Or the record one, if any". When generating, upCampo looks in this order:
Where each account is looked up:
| Account | Where upCampo looks, before the line's account |
|---|---|
| Inventory and consumption | On the product and, if it has none, on the product class. |
| Sales revenue and cost of goods sold | On the product, then the class, then the crop. |
| Crop in progress | On the crop. |
| Production inventory (grain, lint…) | On the product, then the class, then the crop's grain. |
| Supplier and customer | On the entity. |
| Bank | On the bank account. |
| Standalone bill expense or revenue | On the title's management account and, if it has none, on the management accounts above it. |
| Fixed assets and depreciation | On the fleet record (equipment), the same accounts the Depreciation screen shows for each asset. |
That is why the whole setup fits in a few accounts: the line's account is the company default, and the record only comes in for exceptions. Anyone who separates crop protection inventory from fertilizer inventory puts the account on each class; anyone who does not leaves the classes blank and everything falls into the line's account.
4. The month's entries
On the Accounting entries screen, the Generate the month button reads the month's events and builds the entries, with debit equal to credit. Generating again redoes what was generated and what was left pending; it does not duplicate. Whatever the accountant prefers to post by hand (the harvest when the season closes, for example) comes in through the Manual entry button, which the system can build for them to review.
An example, start to finish
A fertilizer purchase (the numbers are for illustration): an inbound invoice of R$ 50,000.00 in products and R$ 1,200.00 in freight, finalized, with a nature linked to the Purchase for stock operation. The Products value line says "debit: Input inventory, or the product class's account; credit: Suppliers, or the supplier's account". The Fertilizers class has its own inventory account; the supplier has no account of its own. The entry comes out like this:
Freight goes into the same debit because the purchase operation sends freight to inventory. If the farm takes ICMS credit, the ICMS line takes the tax out of inventory and puts it into recoverable ICMS.
⚙️ Setting up accounting: the accountant's steps
- Chart of accounts (accounting): import the accountant's chart of accounts spreadsheet.
- Accounting setup: Create the standard operations, check the accounts on the Crops and production, Financial and Inventory and assets tabs and link the natures of each operation in Invoices and natures.
- Accounts in records: only the exceptions, such as one inventory account per class or a supplier with its own account.
- Depreciation: the value, start and yearly rate of each asset that depreciates.
- Then, every month: Accounting entries, Generate the month, handle the pending ones and post by hand what was left for the accountant.
1. Import the chart of accounts
Menu: Accounting > Chart of accounts (accounting)
The Import spreadsheet button reads the chart of accounts that the accountant's system exports (.xls or .xlsx, with Code, T, Classification, Name and Level). The account code is the key shared with the accountant's system and does not change. Details in Screen: Chart of accounts (accounting).
2. Build the Accounting setup
Menu: Accounting > Accounting setup
The Create the standard operations button opens a wizard that asks for the main accounts once (suppliers, customers, cash and banks, inventory, revenue, depreciation…) and creates upCampo's 19 operations with the accounts already filled in. Then:
- on the Crops and production tab, check the accounts for the work order write-off and the harvest, choose how the harvest is posted (on the load ticket, when the field is finalized or by hand, when the season closes) and where the Cost of production sold comes from;
- on the Financial tab, check the accounts for payments, receipts and standalone bills, and choose where contract sales revenue is recognized;
- on the Inventory and assets tab, check the accounts for fueling, requisitions and depreciation and choose how each one is posted (automatic or manual);
- on the Invoices and natures tab, open each invoice operation and, on the Natures tab, link the natures of operation that use it;
- on the Taxes tab, enter the tax calculation accounts, each issuer's tax regime and the Funrural rates.
Details in Screen: Accounting setup.
3. Exceptions in the records
Menu: Accounting > Accounts in records
One grid per record type (classes, products, suppliers and customers, crops, bank accounts, management accounts and equipment) to set the accounting account on many at once. The same field appears on the Accounting tab of the record itself. Details in Screen: Accounts in records.
4. Assets that depreciate
Menu: Accounting > Depreciation
The Assets tab lists the machines, equipment and improvements from the fleet records. For each asset that depreciates, check Depreciates and enter the Asset value, the Depreciation start, the Yearly rate and, if any, the Residual value and Prior depreciation. upCampo calculates (value − residual) × rate ÷ 12 per month: a R$ 500,000.00 asset, with a R$ 50,000.00 residual and 10% a year, depreciates R$ 3,750.00 per month. Details in Screen: Depreciation.
5. Generate and review the month
Menu: Accounting > Accounting entries
Choose the month, Generate the month, filter Pending only and fix the cause of each pending item (almost always a missing account, or a nature with no operation). Then generate again. An event left in manual mode is posted with the Manual entry button, using Build from the system. Details in Screen: Accounting entries.
✅ What already becomes an entry
| Event | When it comes in | What it posts (in the standard operations) |
|---|---|---|
| Inbound invoice (Movement) | When finalized, on the movement date. | Through the nature's operation: purchase for stock, for consumption, of fixed assets, future delivery, bonus, return… Products value, freight, insurance, other expenses, IPI, ICMS-ST, discount, recoverable taxes and withheld Senar. |
| Outbound invoice | When authorized. | Through the nature's operation; on the sale of production, the revenue (D Customers · C Sales revenue) and the cost of production sold. |
| Cost of production (sale) | On the outbound invoice. | D Cost of production · C Production inventory, the quantity that went out (from the invoice itself or from the outbound load ticket linked to it) times the cost per kg: the stock average cost, the one computed by accounting (harvest cost ÷ kg harvested) or a fixed value per season and crop, depending on the Cost of production sold field. In Manual, the accountant posts it. |
| Work order write-off | When the cost is written off to the field: one entry per order in the month. | D Crop in progress · C Input inventory. A return reverses the sides. |
| Harvest (harvest load ticket) | On the load ticket, in proportion to what was harvested, with the rest when the field is finalized; or only when the field is finalized in Season Planting; or by hand, when the season closes. One entry per season and crop in the month. | D Production inventory · C Crop in progress, at the cost the field accumulated in the season's work order write-offs. |
| Fueling (pump) | When the month is generated (or by hand): one entry per day. Calibration and transfers do not post; fueling at a gas station comes in through the invoice. | D Consumption · C Inventory, at the fuel's average cost. |
| Requisition | When the month is generated (or by hand): one entry per requisition. The maintenance work order does not post; what leaves inventory leaves on the requisition. | D Consumption · C Inventory, at average cost. |
| Depreciation | When the month is generated (or by hand): one entry per branch, one line per asset. | D Depreciation · C Accumulated depreciation, straight-line: (value − residual) × yearly rate ÷ 12. |
| Payment (Accounts Payable/Receivable) | When the installment is paid, on the payment date. | D Suppliers · C Cash and banks, plus interest, discount and withholding. |
| Receipt | When the installment is settled, on the receipt date. | D Cash and banks · C Customers, plus interest, discount and withholding. |
| Standalone payables | Title without an invoice, on the title date. | D the management account's account (power, rent, land lease…) · C Suppliers. |
| Standalone receivables | Title without an invoice, on the title date. | D Customers · C the management account's account. |
| Sale by contract | On the invoice of each delivery or on the contract's title, as chosen in the Accounting setup. | Revenue goes into one of the two, never both. |
| Tax calculation | When the accountant calculates the month: one entry per issuer and tax, on the last day of the month. | ICMS, PIS and COFINS: D tax on sales · C tax payable, with the recoverable credit offsetting the payable. Funrural: D Funrural on sales · C Funrural payable, when the grower is the one who pays it. |
| Late entry | When generating the month after the closing, if the accountant allowed retroactive entries. | The difference between what an event in a closed month posts today and what was posted for it (an invoice that arrived late, a forgotten work order write-off, a canceled invoice), on the first day of the next month. With the month 100% locked, the web portal does not accept entries dated within the closed period. |
| Manual entry | When the accountant saves it, on the Accounting entries screen. | The lines the accountant enters, or the ones the system builds for the month's harvest, cost of production sold, depreciation, fueling and requisitions. An event posted this way is not generated again in that month. |
🚧 What does not become an entry yet
These events exist in upCampo, but do not generate an accounting entry yet:
- the allocation of a title across several management accounts: the title uses its own management account;
- the IBS and CBS of the tax reform, starting in 2027.
A transfer between storage locations does not post, on purpose: the inventory account belongs to the product, not the location, and the accounting balance does not change. A transfer between companies is an invoice.
In development
Also in development, with no set date:
- adjusting a generated entry (changing the account or amount);
- reversing an entry;
- opening balances;
- exporting entries to the accountant's system;
- the calculation of IBS and CBS, of ICMS-ST, and the quarterly calculation under presumed profit and actual profit (IRPJ and CSLL).
For checking, the Accounting entries screen filters and totals by column, and its Reports tab produces the Journal, the General ledger, the Trial balance, the Income statement (DRE), the Balance sheet and the Pending items (see Accounting reports).
- The accountant does not retype invoices, work order write-offs, harvest, fueling or payments: the entry comes from what the farm already recorded, and depreciation comes from the asset records.
- Whatever the accountant prefers to post by hand comes out built by the system, to review and save.
- Setup is done once, in a few accounts, and the exceptions stay on the records.
- Each entry shows where each account came from, and whatever does not balance shows up as pending, with the reason.
❓ Frequently asked questions
Do I have to type the invoices in again for accounting?
No. In upCampo, accounting entries come from the invoices, work order write-offs, payments and receipts the farm has already recorded. The accountant sets up the accounts once, in the Accounting setup, and generates the month on the Accounting entries screen.
Is accounting per farm or per company?
Per company. The chart of accounts, the operations and the entries belong to the company and bring together what all of its farms record in the month.
Why was an entry left pending?
Because something was missing to build the debit and credit: an account (neither the record nor the operation line has one), an outbound invoice whose nature is not linked to any operation, or a product sold with no cost in inventory. The reason is written in the Pending issue column of the Accounting entries screen. Once the cause is fixed, just generate the month again.
What is the difference between a management account and an accounting account?
The management account is the farm's financial classification (power, land lease, labor) and serves management. The accounting account is the one from the accountant's chart of accounts, imported in Accounting > Chart of accounts (accounting). The two are linked in Accounts in records: each management account can point to an accounting account, and that is the one standalone bills use.
Does the ICMS on a purchase go to cost or to recoverable tax?
It depends on whether the company takes the credit. In the Create the standard operations wizard, filling in recoverable ICMS, PIS and COFINS takes those taxes out of inventory cost; leaving them blank creates those tax lines turned off, and the tax stays in the cost.
Can I already send the entries to the accountant's system?
Not yet. Export, adjusting a generated entry, reversal and opening balances are in development. Today upCampo generates the month's entries, accepts the accountant's manual entries and produces the Journal, the General ledger, the Trial balance, the Income statement (DRE) and the Balance sheet, which the accountant can check or print (Accounting reports).
Do the harvest and depreciation go into the farm's accounting?
Yes. The harvest moves the cost of the crop in progress into production inventory: on the load ticket, when the field is finalized or by hand when the season closes, as chosen in the Accounting setup. Depreciation comes from the Accounting > Depreciation screen, where each asset has a value, start and yearly rate, and is posted every month.
Can I make a manual entry in upCampo accounting?
Yes. On the Accounting entries screen, the Manual entry button opens the window with Date, Document, Description and the lines; it saves with debit equal to credit. Build from the system fills in the lines for the month's harvest, cost of production sold, depreciation, fueling and requisitions.
📘 Screen: Chart of accounts (accounting)
The chart of accounts is the company accountant's chart of accounts, brought into upCampo: assets, liabilities, revenue and expenses, with the same numbering and the same code the accountant uses in their own system. It is the first step of accounting in upCampo, because all the other screens in the Accounting menu pick accounts from this list.
Do not confuse it with the management account, in the Financial menu. The management account is the farm's management classification (power, land lease, labor); the chart of accounts is the accountant's. The two are linked on the Accounts in records screen.
📍 Location in the system
Menu: Accounting > Chart of accounts (accounting)
It is the first item of the Accounting menu. The chart belongs to the company: it applies to all of its farms. An overview of the module is in the Quick Guide - Accounting.
🧩 Main function
Import the accountant's chart from a spreadsheet, and maintain it: add a new account, fix a name, deactivate an account that is no longer used. The normal path is the import; typing accounts in one by one is there for adjustments.
📥 Importing the accountant's chart
The Import spreadsheet button, on the list toolbar, opens the Import the accountant chart of accounts window. The accountant exports the chart of accounts from their system as a spreadsheet (.xls or .xlsx) with the columns Code, T, Classification, Name and Level, and you send the file with Upload spreadsheet... (or drop the file onto the window).
Before saving, the window shows what it read:
- the summary, such as "412 accounts read: 98 summary and 314 detail.";
- Problems that prevent the import, when there are any (the save button stays grayed out until the spreadsheet is fixed);
- Warnings (the import goes on), for what does not block it;
- the preview of the accounts, with Code, Classification, Name/Description, Type and Nature.
Once checked, Save the chart saves everything at once and tells you how many accounts were added and how many were updated.
During the import, upCampo fills in two things on its own that the spreadsheet does not carry directly:
- each account's parent account, from the classification: the parent of 1.1.04.02.01 is 1.1.04.02. If the classification above is not in the chart, the account is left without a parent, and the screen tells you how many ended up that way;
- the nature, from the account's group: accounts in groups 1 and 4 start as debit, groups 2 and 3 as credit, and contra accounts, with "(-)" in the name, are flipped. It can be adjusted account by account.
📝 Main fields
| Field | Description |
|---|---|
| Code | The account code in the accountant's system (column A of the spreadsheet). It is the key that links the upCampo account to the accountant's, which is why it is locked on imported accounts. It cannot repeat within the chart. |
| Classification | The dotted numbering, such as 1.1.04.02.01. It is what builds the chart's tree. |
| Name/Description | The account name: Input inventory, Suppliers, Crop in progress. |
| Type | Summary groups other accounts; Detail receives entries. Only detail accounts can be picked on the other Accounting screens. |
| Level | The account's level in the chart's tree. |
| Nature | Debit or Credit. |
| Parent account | The summary account above it. Filled in on its own during the import, from the classification. |
| Active | A deactivated account drops out of the choices, but stays in the chart. |
| Notes | Free text. |
The list shows the same columns and, at the top, the count: "412 accounts, 314 detail". The list buttons are New, Reload and Import spreadsheet; on the form, Save, Cancel/Back to the list and Delete.
- upCampo's chart is the same as the accountant's, with the same code on every account.
- When the accountant changes the chart, a new import updates it, with no rework.
- The other Accounting screens offer only detail, active accounts.
❓ Frequently asked questions
How do I bring my accountant's chart of accounts into upCampo?
Ask the accountant for the chart of accounts spreadsheet (.xls or .xlsx, with Code, T, Classification, Name and Level) and use the Import spreadsheet button in Accounting > Chart of accounts (accounting). The window shows the preview and the problems before saving.
If I import the spreadsheet again, will the accounts be duplicated?
No. Accounts are matched by code: an existing one is updated and a new one is added. No account is deleted by the import.
Why can't I change an account's code?
Because the code of an imported account is the link to the accountant's system and is locked. If the accountant renumbered the chart, the change should come through their spreadsheet.
Why doesn't an account show up to pick in the Accounting setup?
Only detail, active accounts receive entries and show up to pick. Check in the Chart of accounts whether the account is set as Summary or deactivated.
📘 Screen: Accounting setup
The Accounting setup is where the company tells upCampo what each event becomes in the accounting: which accounts the work order write-off debits and credits, where a payment to a supplier goes, how a purchase or sales invoice is posted. It is the heart of the generation: the Accounting entries screen only applies what is configured here.
It works like the posting templates of accounting systems. Each type of operation has an accounting operation, with one line per part of the amount (the products value, freight, ICMS, interest…) and the debit account and credit account of each line.
📍 Location in the system
Menu: Accounting > Accounting setup
It is the second item of the Accounting menu, after the Chart of accounts, which must be imported first: the accounts chosen here are the chart's posting (detail) accounts. Overview in the Quick Guide - Accounting.
🧩 Main function
The screen has six tabs at the top. The first three hold the events that have a single rule, grouped by subject; the fourth, invoices; the fifth, taxes; the sixth, reports:
| Tab | What for |
|---|---|
| Crops and production | The work order write-off, the harvest and the cost of production sold. |
| Financial | Payments, receipts, standalone payables and receivables, revenue from contract sales and the operation for inbound invoices with no linked nature. |
| Inventory and assets | Fueling, requisitions and depreciation. |
| Invoices and natures | Invoices, which have several operations (purchase into inventory, purchase for consumption, sale of production, return…). Each operation states the accounts and which natures of operation use it. |
| Taxes | The tax calculation accounts, the tax regime of each issuer and the rates table (Taxes). |
| Reports | The accounting reports: Journal, Ledger, Trial balance, DRE (income statement), Balance sheet, Open items and Crop cost (Reports). |
In the first three tabs, each event is a panel, with just the accounts to choose and, for events that have that choice, the field that says how the event is posted.
At the top of the screen, next to the title, is the Create the standard operations button, which builds everything at once from a few accounts. It is the best place to start.
🪄 Create the standard operations
The button opens the upCampo standard operations wizard. It asks for the main accounts once, in five groups, and creates upCampo's ready-made operations with those accounts already in the lines. Each account has, below it, a sentence saying where it is used.
| Group | Accounts asked |
|---|---|
| Main | Suppliers · Customers · Cash and banks · Input stock · Consumption (purchase that goes straight to cost) · Growing crop · Sales revenue · Expenses of standalone payables |
| Payments and receipts | Interest paid · Interest received · Discounts obtained · Discounts granted · Withholdings payable · Withholdings to offset · Revenue of standalone receivables |
| Purchases and sales | Fixed assets · Goods to receive · Bonus goods revenue · Senar payable · Senar on sales · Production stock (grain, lint...) · Cost of production (sale) |
| Tax credits (only if you take them) | ICMS recoverable · PIS recoverable · COFINS recoverable |
| Assets (depreciation) | Depreciation (expense or cost) · Accumulated depreciation · Indirect production costs (optional, for an asset whose depreciation goes to cost) · Cost of disposed assets (optional, for the asset's disposal) |
Create the operations creates the 19 operations below. An operation the company already has is not touched, and the screen tells you when there is nothing to create.
| Code | Operation | Where it appears |
|---|---|---|
| UP01 | Purchase into inventory | Invoices and natures |
| UP02 | Purchase for consumption (goes straight to cost) | Invoices and natures |
| UP03 | Purchase of machinery, equipment or improvements | Invoices and natures |
| UP04 | Future-delivery billing (the goods have not arrived yet) | Invoices and natures |
| UP05 | Future-delivery shipment (what was already billed has arrived) | Invoices and natures |
| UP06 | Bonus goods received | Invoices and natures |
| UP07 | Purchase return | Invoices and natures |
| UP08 | Sale of production | Invoices and natures |
| UP09 | Does not post (shipment for repair, demonstration...) | Invoices and natures |
| UP10 | Field application (work order write-off) | Crops and production |
| UP11 | Payment | Financial |
| UP12 | Receipt | Financial |
| UP13 | Standalone payables (electricity, rent, land lease...) | Financial |
| UP14 | Standalone receivables | Financial |
| UP15 | Harvest (from the crop to the production stock) | Crops and production |
| UP16 | Asset depreciation | Inventory and assets and the Depreciation screen |
| UP17 | Fueling (fuel leaving the pump) | Inventory and assets |
| UP18 | Requisition (inventory issued for consumption) | Inventory and assets |
| UP19 | Tax calculation (ICMS, PIS/COFINS and Funrural) | Taxes |
After creating, the screen asks for the next step: "Now link the natures of each invoice operation", in the Invoices and natures section.
📌 Crops and production, Financial and Inventory and assets
The three tabs for events that have a single rule. Each one shows these panels, in this order:
| Tab | Panels |
|---|---|
| Crops and production | Work order write-off · Cost that arrives dated in a closed month · Harvest · Cost of production sold |
| Financial | Accounts payable: 1. Inbound transaction (invoice) with no linked nature · 2. Standalone payable (no invoice) · 3. Payment. Accounts receivable: 1. Revenue from contract sales · 2. Standalone receivable (no invoice) · 3. Receipt. |
| Inventory and assets | Fueling · Requisition · Depreciation · Tax depreciation |
Each event is a bordered panel: the title, a sentence on when it happens and, right below, the How it is posted field, for events that have that choice (Harvest, Fueling, Requisition and Depreciation). Below come the accounts: the Debit and the Credit, side by side. When the event posts more than one part of the amount (the payment, with interest, discount and withholding; depreciation, with its destinations and disposal), the name of the part appears to the left of each pair of accounts. Below the dropdown, when applicable, the screen says which record the account can come from first: "or the supplier one", "or the crop one", "or the bank account one".
Cost that arrives dated in a closed month
Right below the work order write-off. When a month's accounting has already been closed and a write-off dated in it arrives later (the forgotten lime), it comes in as a late entry in the following month, when the accountant allowed retroactive entries at closing. If blank, that cost goes to the crop, like the others, and moves on to production at harvest. With an Expense account, it goes straight to expense, without touching the season's cost.
Financial: payables and receivables in sequence
The Financial tab follows the path of the money, in two numbered groups. In Accounts payable, the debt is created by the inbound transaction (the invoice) or the standalone bill and settled by the payment. In Accounts receivable, the right to receive is created by the contract sale or the standalone bill and settled by the receipt. Panel 1 of each group (the operation for invoices with no linked nature and the revenue from contract sales) is just a field, with no accounts: the accounts come from the operation in Invoices and natures.
| Event | Lines (in the standard operations) |
|---|---|
| Work order write-off | Cost: D Growing crop (or the crop one) · C Input stock (or the product class one). It is the input leaving inventory for the field; on a return, the sides are reversed. |
| Accounts payable (payment) | Amount: D Suppliers (or the supplier one) · C Cash and banks (or the bank account one). Interest: D Interest paid · C bank. Discount: D bank · C Discounts obtained. Withholding: D bank · C Withholdings payable. |
| Accounts receivable (receipt) | Amount: D Cash and banks · C Customers (or the customer one). Interest: D bank · C Interest received. Discount: D Discounts granted · C bank. Withholding: D Withholdings to offset · C bank. |
| Standalone payables | Amount: D the one of the bill's management account; if it has none, the expense chosen here · C Suppliers (or the supplier one). |
| Standalone receivables | Amount: D Customers (or the customer one) · C the one of the bill's management account; if it has none, the revenue chosen here. |
| Harvest | Cost: D Production stock (or the product, class or crop grain one) · C Growing crop (or the crop one). It is the crop cost moving to the grain, the lint or the harvested product. |
| Fueling | Cost: D Consumption (or the product class one) · C Input stock (or the product class one). It is fuel leaving the pump. |
| Requisition | Cost: D Consumption (or the product class one) · C Input stock (or the product class one). It is material leaving inventory through the requisition. |
| Depreciation | To expense: D Depreciation (expense or cost) (or the asset one) · C Accumulated depreciation (or the asset one). To indirect costs: D Indirect production costs · C Accumulated depreciation. To the crop (work order hours): D Growing crop (or the crop one) · C Accumulated depreciation. Disposal: accumulated depreciation: D Accumulated depreciation · C Fixed assets (the asset one). Disposal: cost of the disposed asset: D Cost of disposed assets · C Fixed assets (the asset one). Only the first is required; the others ask for an account only when some asset uses that destination or is disposed of. If missing, the entry stays pending. |
How it is posted: harvest, fueling, requisition and depreciation
These four events have, right below the panel title, the How it is posted field, which says when the event becomes an entry. Choosing manual mode loses nothing: the accountant posts the event on the Accounting entries screen, with the Manual entry button, and the system builds the debit and credit lines for review.
Harvest
In the Harvest panel, in the Crops and production tab, the How it is posted field says when the growing crop moves to the production stock:
| Option | What happens |
|---|---|
| At the ticket (proportional to harvest; the rest when the plot is finished) | Each harvest load ticket moves to production the share of the field's cost that matches what was harvested, in proportion to the expected harvest yield in Season Planting. With no forecast, everything the field has accumulated goes when harvest starts. When the field is finished, the rest goes. |
| When the plot is finished in Season planting | The field's entire cost goes to production when the field is finished. |
| Manual, at season closing (Accounting entries screen) | The monthly generation does not post the harvest. The accountant posts it when closing the season, through Manual entry. |
The amount is the cost the field has accumulated in the season's work order write-offs. One entry per season and crop is posted in the month, and each line keeps the season and the crop. Only a load ticket of type Harvest counts: contract, standalone or purchase load tickets do not post a harvest.
Cost of production sold
Right after Harvest, in the same tab, is the Cost of production sold panel, with the field of the same name: where the cost that the sale of production removes from inventory comes from, in the Cost of production (sale) line of the sales operation.
| Option | What happens |
|---|---|
| Stock average cost | The product's average cost in inventory. Harvested grain enters inventory with no value, so the sale stays pending for lack of cost, or goes out without the cost, depending on the invoice operation's Product sold with no cost in stock option. |
| Computed by accounting (harvest cost ÷ kg harvested) | The default. The cost per kg comes from what the harvest moved to production divided by the kg harvested. It does not combine with harvest set to Manual: the screen will not save both together, because what goes into inventory becomes whatever the accountant posts. |
| Manual (the accountant posts it) | The sale does not post the cost and does not stay pending because of it. The accountant posts the cost through Manual entry. |
| Fixed value (season harvest parameter) | The cost in R$ per kg from the Fixed production cost, in the harvest parameter of the Season (season, crop and product). The Fixed cost by harvest parameter button, in the same panel, opens the list of parameters: choose the line, enter the Cost per kg and save, or use Clear the value. The parameter itself (crop, product and discounts) is set up on the Season screen. |
The quantity is what left inventory: the invoice's own, when it moves inventory, or that of the outbound load tickets linked to it. Without that quantity, the invoice stays pending with "Missing the quantity that left inventory for the cost of production".
Fueling, requisition and depreciation
In the Inventory and assets tab, the How it is posted field of the three panels has the same two options: Automatic, in the month generation or Manual (Accounting entries screen).
- Fueling: fuel leaving the pump, at the inventory average cost, in one entry per day. Calibration and transfers do not post. External fueling, at a gas station, comes in through the invoice.
- Requisition: inventory issued through the requisition, at average cost, in one entry per requisition. The maintenance work order does not post: what leaves inventory for it leaves through the requisition.
- Depreciation: every month, for the assets on the Depreciation screen, calculated by upCampo or entered by the accountant, asset by asset. Each asset says where its depreciation goes: expense, indirect costs or the crop, by work order hours. In the month an asset is disposed of, the disposal entry is posted too. The same panel appears there, in the Configuration tab.
Tax depreciation
Right below the Depreciation panel is the Tax depreciation panel. It does not post anything: the accounting always posts book depreciation. The field says how upCampo calculates the tax column of the Book × tax report, on the Depreciation screen:
| Option | What happens |
|---|---|
| Same as book | Tax depreciation is the same as book depreciation. There is no difference to track. |
| Each asset's tax rate (revenue service table) | Each asset uses the tax rate entered on it, on the Depreciation screen (the one from the Receita Federal table for that type of asset). |
| Accelerated rural depreciation (all in the start month) | The asset's entire value goes to tax depreciation in the month it starts depreciating. |
| Not applicable (cash book) | The company does not depreciate for tax purposes; the tax column stays at zero. |
For payments and receipts, the Amount is the instalment amount. Interest, discount and withholding adjust what actually left or entered the bank.
The two panels that open each group in the Financial tab have just one field:
| Field | Description |
|---|---|
| Revenue from contract sales | On the outgoing invoice of each delivery (default) or On the contract receivable, for the total. The contract generates the receivable for the full amount, and each delivery goes out on an invoice: the revenue is posted on one of the two, never on both. With the receivable chosen, the contract's outgoing invoice posts only the cost of production. In both cases, the accounts are those of the nature's operation (of the contract or of the invoice), in Invoices and natures. |
| Accounting operation for inbound transactions with no linked nature | The operation an inbound invoice uses when its nature is not in any operation. Usually Purchase into inventory. If blank, that invoice stays pending. |
Each tab has its own Save button, at the top right, which saves only that tab. Each line needs the debit account and the credit account (for depreciation, only the To expense line); a side that has "or the record one" can be left blank, and then only the record applies. If an account is missing on a side without a record, the screen tells you which event and which line.
🧾 Invoices and natures
The Invoices and natures section shows the Accounting operation list, with only the invoice operations, with Code, Name/Description and Active, and the New and Reload buttons. Selecting one opens its form.
The operation header
| Field | Description |
|---|---|
| Code | Required and unique: UP01, UP08… in the standard operations. |
| Name/Description | How the operation appears in the list and in the entry: Sale of production. |
| Posts | Unchecked, the invoice generates no entry. That is the case of Does not post (shipment for repair, demonstration). |
| Active | A deactivated operation goes out of use. |
| Product sold with no cost in stock | Applies to the Cost of production (sale) line, when inventory has no average cost for the product that left: The entry stays pending (default) or Do not post the cost of this product. |
| Notes | Free text. |
The buttons are Save, Cancel/View list and Delete. An operation linked to a nature cannot be deleted: deactivate it.
Accounts tab
The accounts posted when an invoice comes in with one of this operation's natures. One line per part of the amount. The grid shows Amount, Debit, Credit, Description, Validity and Posts, and each side reads as a sentence: "1.1.04.02 Inventory, or the product class one".
| Line field | Description |
|---|---|
| Order | The line's position in the grid. |
| Value part | Which invoice amount the line posts: Products value, Discount, Freight, Insurance, Other expenses, ICMS, ICMS-ST, IPI, PIS, COFINS, Senar, Cost of production (sale)… |
| Posts | An unchecked line does not post. That is how the recoverable-tax lines are set for those who do not take tax credits. |
| Debit account / Credit account | The account from the chart of accounts. With the field next to it filled in, it serves as the default when the record has no account. |
| Or the record one, if any | One for each side. Chooses the record looked up first: Product stock (class), Product consumption (class), Product revenue (class or crop), Cost of goods sold (class or crop), Growing crop (crop), Supplier (entity), Customer (entity), Bank (bank account), Bill management account, Fixed asset (equipment)… If blank, the account next to it is fixed. |
| Description | The entry text. It accepts {numero}, {fornecedor}, {cliente}, {produto}, {cultura}, {talhao}, {safra} and {parcela}, as in NF {numero} - {fornecedor}. If blank, the document's text applies. |
| Valid from / Valid until | The line's validity. If blank, no limit. Useful for taxes that come in or go out with the tax reform. |
The line buttons are Save line, Cancel and Delete. Each line needs, on each side, an account or a record it comes from.
Cost of production (sale)
In the Sale of production operation, the Cost of production (sale) line removes the sold production from inventory: D Cost of production (or the product, class or crop one) · C Production stock (or the product or class one). The amount is the quantity that left inventory times the cost per kg. The outflow is the invoice's own, when it moves inventory, or that of the outbound load tickets linked to the invoice.
Where the cost per kg comes from is chosen once, in the Cost of production sold field, in the Crops and production tab: the inventory average cost, the cost calculated by accounting from the harvest (the default), a fixed value from the season's harvest parameter, or manual.
With Stock average cost, when inventory has no average cost for the product (no history, zero or negative cost), the header's Product sold with no cost in stock option applies: the invoice stays pending, or goes out without that product's cost.
Natures tab
The natures of operation whose invoices use this operation: this is what decides, invoice by invoice, which operation applies. The grid shows Code and Nature of operation.
- Choose the nature in the Nature of operation field and click Link. If it was in another operation, the list shows "now in …" next to the name, and linking it here removes it from there.
- Unlink selected removes the nature from this operation.
The same link can be made from the other side: the nature of operation record has the Accounting tab, with its accounting operation.
- The accountant sees, on one screen, all the accounts for each type of invoice and each fixed event.
- With the wizard, the company goes from zero to the 19 operations in a few minutes.
- Harvest, fueling, requisitions and depreciation post on their own in the monthly generation, or are left for the accountant to post, depending on the choice made for each.
- The natures of operation decide on their own which rule each invoice follows.
🧮 Taxes
The Taxes tab has what the tax calculation uses, in three panels:
| Panel | What it contains |
|---|---|
| Tax calculation | The accounts of the tax calculation entry, one line per part: ICMS (D ICMS on sales · C ICMS payable), ICMS credit that offsets (D ICMS payable · C ICMS recoverable), the same for PIS and COFINS, and Funrural (D Funrural on sales · C Funrural payable). Enter only the accounts for the taxes the company pays; the other lines can stay blank. |
| Tax regime of each issuer | Each CPF or CNPJ that issues invoices on the farm has its own regime: Individual farmer, Presumed profit, Actual profit or Simples Nacional. Check Funrural on payroll for those who chose to contribute on payroll. Choose the line and the regime, and click Save. |
| Rates | The rates with the date they take effect (Valid from). Create default rates brings in the Funrural rates since 2018: individual farmer 1.2% + RAT 0.1% + Senar 0.2%; legal entity 1.7% + RAT 0.1% + Senar 0.25%. Check with the accountant. Did the law change? Add a new line with the date it takes effect, without deleting the old one. |
📊 Reports
The Reports tab, the last on the screen, shows one card per accounting report: General
Journal, Ledger, Trial balance, DRE (income statement), Balance sheet, Accounting open items and Crop cost by
season and crop (codes CTB.01.01 to CTB.04.02). Click the card to open the
report. What each one shows and what goes into them is in
Accounting entries,
which has the same tab.
❓ Frequently asked questions
Where do I start setting up the accounting?
After importing the chart of accounts, open Accounting > Accounting setup and use the Create the standard operations button. Enter the main accounts, create the operations and then link the natures of operation to each invoice operation, in the Invoices and natures section.
How does upCampo know which operation to use for an invoice?
By the invoice's nature of operation. Each nature is linked to an operation in the Natures tab of the Accounting setup. An inbound invoice whose nature has no operation uses the operation chosen in the Financial tab; an outgoing one stays pending.
What does "or the supplier one" mean on the account?
That upCampo first looks for the account on the supplier record and, only if it has none, uses the account written on the line. That is how one default account applies to everyone while the exceptions live on the record itself.
How do I separate electricity, rent and land lease in standalone payables?
Through the bill's management account. In Accounting > Accounts in records, Management accounts tab, give each management account its accounting account. The account in the Standalone payable panel only applies to a management account that has no accounting account.
Is contract sales revenue posted on the invoice or on the receivable?
On the outgoing invoice of each delivery, by default. In the Financial tab, the Revenue from contract sales field can be switched to the contract receivable, for the total amount; then the contract's outgoing invoice posts only the cost of production. The revenue is never posted on both.
My company does not take ICMS credits. What do I do?
Leave ICMS, PIS and COFINS recoverable blank in the wizard. The lines for those taxes are created switched off and the tax stays in the purchase cost. If you have already created the operations, uncheck Posts on those lines.
When does the crop cost move to the harvested grain inventory?
According to the How it is posted field of the Harvest panel, in Accounting > Accounting setup, Crops and production tab: at each harvest load ticket, in proportion to what was harvested; when the field is finished in Season Planting; or by hand, by the accountant, when closing the season. The amount is the cost the field has accumulated in the season's work order write-offs.
Why did the grain sale go out without cost or stay pending?
Because the Cost of production sold field is set to Stock average cost, and harvested grain enters inventory with no value. In the Crops and production tab, choose Computed by accounting (harvest cost ÷ kg harvested) or Fixed value (season harvest parameter), and generate the month again. If the open item mentions the quantity, the invoice did not move inventory and has no outbound load ticket linked.
Do fueling and requisitions generate accounting entries?
Yes, at the inventory average cost: pump fueling in one entry per day, requisitions in one entry per requisition, both debiting consumption and crediting inventory. In the Inventory and assets tab, the How it is posted field of each can be set to Manual, for the accountant to post. Calibration, transfers and maintenance work orders do not post.
Why does depreciation have five account lines?
Because each asset says, on the Depreciation screen, where its depreciation goes: expense, indirect costs or the crop, by work order hours. The last two lines are for the asset's disposal. Only the To expense line is required; the others ask for an account when some asset uses that destination or is disposed of.
📘 Screen: Accounts in records
Accounts in records is where the company assigns the accounting account to the records that need their own account: the product class with a separate inventory account, the supplier with an account of its own, the bank account, the management account that becomes an expense for the accountant. One grid per record type, so you can fill in many at once.
It is the third step of the setup, and it is for the exceptions. The general rule lives in the lines of the Accounting setup; when a record has an account here, it takes precedence over the line's account. A blank record follows the line's account.
📍 Location in the system
Menu: Accounting > Accounts in records
It is the third item of the Accounting menu. With no chart of accounts imported, the screen shows only a button, "The company has no chart of accounts yet: import the accountant's chart first", which takes you to the Chart of accounts. Overview in the Quick Guide - Accounting.
🧩 Main function
See, in one place, which records have an accounting account and which do not, and apply the same account to several at once. The same field exists in the Accounting tab of each record (Product class, Product & Service, Entity, Crop, Bank Account, Management account and Fleet), for those who prefer to adjust them one by one; this screen is for batch work.
🗂 The tabs
| Tab | Account columns | When it is used |
|---|---|---|
| Classes | Inventory · Consumption · Sales revenue · Cost of goods sold | Purchase into inventory and work order write-off (inventory); purchase for consumption; sale of a product in the class; cost of what was sold. Applies to all products in the class. |
| Products | The same four | Only if the product differs from its class. If blank, the product class's account applies. |
| Suppliers and customers | As supplier · As customer | Only if the entity has its own account. If blank, the operation's default supplier or customer account applies. |
| Crops | Crop in formation · Grain stock · Sales revenue · Cost of goods sold | Only for those who split the accounting by crop: the write-off of a soybean work order debits the soybean crop, a corn one debits corn. If blank, the operation's default account applies. |
| Bank accounts | Accounting account | The bank's account in the chart of accounts, used for payments and receipts. One per bank account. |
| Management accounts | Accounting account | Used for standalone payables and receivables (electricity, rent, bank fees…). Several management accounts can map to the same accounting account, and a management account without one uses the account of its parent management account. |
| Equipment | Fixed asset · Depreciation expense · Accumulated depreciation | Per machine or improvement (fleet). If blank, the default account of the fixed-asset purchase operation applies (or, for depreciation, the one in the Configuration tab of the Depreciation screen). These are the same accounts the Depreciation screen shows for each asset. |
Each grid also shows what identifies the record: Code and Name/Description in all of them, plus the Class for products, the CNPJ/CPF and the Type (Supplier, Customer or Supplier and customer) for entities, the Bank and Branch for bank accounts, the Classification for management accounts and the Plate for equipment.
✍️ How to fill in batches
- Open the tab for the record type.
- Use the header filters of each column to find the lines, or check Only without account to see only the lines with some column left blank.
- Select the lines in the grid. The summary above it shows, for example, "12 of 87 lines in the grid, 5 selected".
- In Column, choose which account to fill in (Inventory, Consumption…). On tabs with a single account, this field does not appear.
- In Account, choose the account from the chart and click Apply to selected.
Clear from selected removes that column's account from the selected lines, and they go back to using the operation line's account. With only one line selected, the Account field shows the account it already has.
An account that was deactivated in the chart, or that became a summary (non-posting) account, appears in the grid as (inactive or summary account): replace it.
- The company's exceptions are visible on one screen, without opening record after record.
- Dozens of classes or management accounts get an account in a few clicks.
- The Only without account filter shows what is missing before you generate the month.
❓ Frequently asked questions
Do I need to set an accounting account on every product?
No. A blank product uses the class's account, and a blank class uses the operation line's account in the Accounting setup. Fill in only what differs from the default.
How do I separate crop protection inventory from fertilizer inventory in the accounting?
In Accounting > Accounts in records, Classes tab, give each product class its own account in the Inventory column. Purchases and work order write-offs then use the class's account.
What is the difference between this screen and the Accounting tab on each record?
None in the result: both save the same field. The Accounting tab adjusts one record at a time; Accounts in records shows all of them in a grid and applies the account to several at once.
Does the supplier need its own accounting account?
Only if the accountant tracks that supplier in a separate account. Without its own account, the supplier uses the Suppliers account set in the operation.
📘 Screen: Accounting entries
Accounting entries is the screen where the month becomes accounting. Once you choose the month, the Generate the month button reads what the company has recorded (invoices, work order write-offs, harvest, fuelings, requisitions, depreciation, payments, receipts, standalone bills), applies the rules from the Accounting setup and builds one entry per event, with the debit and credit lines. What could not be built stays pending, with the reason written out. What the accountant prefers to post by hand goes in through Manual entry, which the system can build for review.
📍 Location in the system
Menu: Accounting > Accounting entries
It is in the Entries group of the Accounting menu, before Depreciation. Generating the month requires add permission; users with view-only permission can browse. Overview in the Quick Guide - Accounting.
🧩 Main function
Generate a month's entries, check each one, find what is pending, post by hand whatever the accountant wants and run the accounting reports. The entries belong to the company: they bring together what all of its farms recorded in the month.
⚙️ Generate the month
- Choose the Month (the list covers the last three years; it starts on the current month).
- Click Generate the month and confirm. The window reminds you that what was generated earlier for that month is replaced and that what the accountant adjusted is kept.
- When it finishes, the screen reports how many entries were generated, how many are pending and how many adjusted entries were kept.
What goes into the month
| Event | Date that counts |
|---|---|
| Inbound invoice | The transaction's date, once finalized. |
| Outbound invoice | The transaction's date, once authorized. |
| Work order write-off | The date the cost was written off to the field; one entry per order in the month. |
| Harvest | The harvest load ticket date or the field finishing date, depending on the Harvest panel's How it is posted; one entry per season and crop in the month. |
| Fueling | The date of fueling at the pump; one entry per day. |
| Requisition | The requisition's date; one entry per requisition. |
| Depreciation | The month; one entry per branch, with one line per asset. |
| Payment and receipt | The date the instalment was paid or received. |
| Standalone payables and receivables | The bill's date. |
| Tax calculation | The last day of the month; one entry per issuer and tax (see Tax calculation). |
| Late entry | The first day of the open month, for what changed in closed months (see Late entry). |
Harvest, fueling, requisitions and depreciation only go into the generation when set to Automatic in the How it is posted field of the Accounting setup (harvest in the Crops and production tab; fueling, requisitions and depreciation in the Inventory and assets tab); in Manual, the accountant posts them through Manual entry, and the generation flags what is still to be posted (see below). Transfers between storage locations do not post, on purpose. What does not yet become an entry (IBS, CBS and corporate income tax) is listed in the Quick Guide.
What is left to post by hand
When an event is set to Manual and has activity in the month, but nobody posted it, the monthly generation creates a Pending entry, with no lines, so the event is not forgotten. The pending item states the amount the system calculated: "Event in manual mode with no entry in the month (calculated: R$ 3750.00). Post it through Manual entry, with Build from the system". This applies to harvest, depreciation, fueling and requisitions. With Cost of production sold set to Manual, the notice appears when the month has an outbound invoice.
That pending item disappears on its own when the accountant saves the built entry for that event, through Build from the system. A manual entry typed from scratch does not count, because the system does not know which event it belongs to.
📋 The entries grid
Next to the month are Reload and two selectors:
- View by: Entry (one per event, with its lines below) or Line (not grouped) (all the month's lines in a single grid, like a journal).
- Status: All, Pending only or No pending issue.
The summary says how many entries there are, how many are pending and the total; in the line view, the total debit and total credit.
| Column | Description |
|---|---|
| Date | The event's date. |
| Event type | Invoice, Work order write-off, Harvest ticket, Fueling, Requisition, Depreciation, Accounts payable (payment), Accounts receivable (receipt), Standalone payables, Standalone receivables, Crop cost (manual), Manual. |
| Document | The number of the invoice, order or bill. |
| Standard description | The entry text, built from the description of the operation line. |
| Accounting setup | The operation that was applied (UP01, UP08…). |
| Amount | The entry total. |
| Status | Generated, Pending, Adjusted or Manual. |
| Pending issue | The reason, when there is one. |
Every column has a filter in its header. Selecting an entry shows its lines below, with debit and credit totaled in the block title:
| Line column | Description |
|---|---|
| Order | The line's sequence in the entry. |
| Accounting account | The account from the chart of accounts. |
| Debit / Credit | The amount on the line's side. |
| Value part | Which part of the invoice or bill it came from: Products value, Freight, ICMS, Interest, Cost… |
| Standard description | The line's text. |
| Account source | Record (from the product, class, supplier…), Operation default (the line's account, because the record had none), Fixed account (line with no record lookup) or No account. |
The Account source column answers the most common question when checking: "why did this invoice land in this account?". When the event has them, the line also keeps the season, the crop, the asset and the cost center it came from: harvest, for example, comes out split by season and crop, and depreciation, by asset.
🔧 Resolving pending items
Check Pending only and read the Pending issue column. The most common reasons, and where to fix them:
| Pending issue | Where to fix it |
|---|---|
| No account on the debit (or credit) of a value part | Neither the record nor the operation line has an account. Put the account on the line, in the Accounting setup, or on the record, in Accounts in records. |
| Invoice with no accounting operation, with the nature's name | Link the nature to an operation, in the Natures tab of Invoices and natures. For an inbound invoice, choosing the operation for inbound transactions with no linked nature, in the Financial tab, also solves it. |
| No inventory average cost for the cost of production, with the product's name | Inventory has no cost for the product sold (harvested grain enters with no value). In the Crops and production tab, change Cost of production sold to Computed by accounting or Fixed value (season harvest parameter); or, in the sales operation, choose Do not post the cost of this product. |
| No fixed production cost in the season's harvest parameter | Cost of production sold is set to fixed value, and the harvest parameter for the season, crop and product sold has no Fixed production cost. Enter the value in the harvest parameter of the Season or in the Accounting setup. |
| Event in manual mode with no entry in the month | The event is set to Manual in the Accounting setup and nobody posted it. Post it through Manual entry, with Build from the system. |
| Cost of production sold to post by hand | Cost of production sold is set to Manual and the month has an outbound invoice. Post it through Manual entry, with the Cost of production sold event. |
| Missing the quantity that left inventory for the cost of production | The sales invoice did not move inventory and has no outbound load ticket linked to it. Link the outbound load ticket to the invoice, or post the cost through Manual entry. |
| The operation has no line with an amount for this event | The applied operation has no active line for the parts of this invoice. Check the lines and the Posts box on each one. |
Once the cause is fixed, generate the month again.
✍️ Manual entry
The Manual entry button, next to Generate the month, opens the window for the accountant to post what does not come from a document, or an event they prefer to post by hand: the harvest when closing the season, the cost of production sold, a depreciation, an adjustment.
| Field | Description |
|---|---|
| Date | The entry date. Required. |
| Document | The number or reference the accountant wants to give it. |
| Standard description | The entry text. |
| Crop cost | Check it when the entry is a crop cost that did not come from a work order: the allocation of indirect costs, a service without a work order, a cost adjustment. When checked, each debit line asks for the Season and the Crop, and the harvest carries that amount to production along with the work order write-offs. Unchecked (the normal case), the entry does not affect the harvest cost. |
| Lines | One row per line: the Accounting account, Debit or Credit, the Amount and the line's description. Add line adds a row. |
At the bottom, the total shows Debit · Credit · Difference. The entry only saves with at least two lines, every line with an account and an amount greater than zero, and debit equal to credit.
Build from the system
At the top of the window, the Build from the system block does the calculation and leaves the review to the accountant. Choose the Fact and click Build from the system: the system calculates the event's volume for the month, as the automatic generation would, and fills in the lines. The accountant reviews the accounts and amounts and saves.
| Fact | What the system builds |
|---|---|
| Harvest (crop to production) | D Production stock · C Growing crop, at the cost the fields accumulated in work order write-offs. |
| Cost of production sold | D Cost of production · C Production stock, for the month's sales. |
| Depreciation | D Depreciation · C Accumulated depreciation, one line per asset on the Depreciation screen. |
| Refuelings | D Consumption · C Inventory, at the average cost of the fuel that left the pump. |
| Requisitions | D Consumption · C Inventory, at the average cost of what left through requisitions. |
For Harvest, two more fields appear:
- Season: blank, it brings the month's volume for all seasons. With a season chosen, it brings what that season's crop accumulated and has not yet moved to production, minus what was already posted as harvest.
- Season closing (all the crop accumulated): with a season chosen, it brings everything the season accumulated, harvested or not. This is the path for those who post the harvest once, when closing the season.
If there is nothing to post for that event in the month, the window tells you. If the calculation runs into something missing (an account, a cost), it shows the notice, and the lines come in for the accountant to complete.
Delete manual entry
With an entry of status Manual selected in the grid, the Delete manual entry button deletes it, after you confirm. An entry generated by the system cannot be deleted this way: fix the cause and generate the month again.
➗ Indirect cost allocation
Depreciation, fuel, maintenance and salaries go into indirect cost accounts and do not reach the crop on their own. The Indirect cost allocation button, next to Manual entry, opens a report for the chosen month: nothing is posted there. The accountant sees what each criterion would give, decides and posts by hand.
| Field | Description |
|---|---|
| Farm/Branch | Blank, all farms. When chosen, only that farm's entries and fields. |
| Indirect cost accounts | The accounts whose balance for the month will be split. The depreciation indirect cost account comes checked (the To indirect costs line of the Accounting setup); add the others (fuel, maintenance, salaries…). |
| Calculate | Reruns the report with the chosen farm and accounts. |
Above the grid are the total to allocate for the month and each account's balance. The balance is debit minus credit of the month's lines, excluding pending entries. The grid has one row per season and crop and the three criteria side by side:
| Criterion | Basis |
|---|---|
| Planted area | The area of the fields in seasons running during the month (start before the end of the month and end after its start). |
| Direct cost (work order issues) | The cost of the month's work order write-offs in each season and crop. |
| Machine hours (work orders) | The hours from the month's work order executions (core activity). |
For each criterion the grid shows the basis, the percentage and the amount the season and crop would get. Every column has a filter in its header.
To post, choose the Criterion to post and click Post by hand with this criterion. The Manual entry opens already filled in, with Crop cost checked: a debit to the growing crop of each season and crop (the crop's account or the harvest operation's) and a credit to each indirect cost account, for its balance. The accountant reviews, changes whatever they want and saves. Once saved, the accounts' balance goes to zero and the report shows zero to allocate.
🧮 Tax calculation
The Tax calculation tab calculates, for the month, the ICMS, PIS, COFINS and Funrural of each issuer: each CPF or CNPJ that issues invoices on the farm. Each one is calculated under its own tax regime, set in the Accounting setup, Taxes tab. An issuer with no regime is left out, and the calculation warns you if it had an outbound invoice in the month.
- Generate the month in the Accounting entries tab.
- In the Tax calculation tab, choose the Month and click Calculate the month.
- The grid has one row per issuer and tax: base, debits, credits, offset, adjustment, payable and the amount withheld by the buyer. Click a row to see the Calculation details, which say how many invoices each amount came from.
- If you need to correct it, enter the Adjustment (positive increases the tax, negative reduces it), the Notes and click Save adjustment.
| Tax | For whom | How it is calculated |
|---|---|---|
| ICMS | Individual farmer, presumed profit and actual profit | Debit: the ICMS on sales invoices. Credit: the ICMS on inbound invoices whose accounting operation takes the credit, minus the reversal for purchase returns, plus the previous month's credit balance. |
| PIS and COFINS | Presumed profit and actual profit | Debit: the PIS and COFINS on sales invoices. Under presumed profit (cumulative) there is no credit; under actual profit (non-cumulative), the credit is calculated as for ICMS. |
| Funrural (with RAT and Senar) | Individual farmers and legal entities, except those who contribute on payroll | Gross sales revenue times the rate in the table. Exports are exempt. An individual farmer selling to a legal entity has the amount withheld by the buyer: it appears under Withheld by buyer, for checking only. In the other cases, the farmer pays it. |
- The tax amounts come from the invoices themselves, which already carry the CST and rate of each item.
- Payable = debits + adjustment − offset. The credit reduces the tax down to zero, and what is left over carries to the next month.
- Calculating the month again redoes the numbers from the invoices and keeps each row's adjustment and notes.
- The calculation generates its own entry (type Tax calculation), with the accounts from the Taxes tab of the Accounting setup: tax on sales against tax payable and, when there is a credit, tax payable against tax recoverable. A tax with no configured account stays pending, with the reason.
- Simples Nacional is not calculated here: the tax is the one on the DAS.
- Pay the tax slip through the financial module, with a management account that points to the tax payable account. That way the expense is not counted twice.
🔒 Month closing
The Closing tab closes the accounting up to the end of a month. A closed month cannot be generated again and does not accept manual entries. It is what the accountant does after delivering the month.
- Choose the month in Close up to month. Write a note if you want, and click Close.
- The window first shows what prevents closing:
- a pending entry up to that month;
- a farm with a payment, receipt or bill in the period whose financial module is not closed up to the same date. Accounting only closes what the financial module has already closed.
- The window also shows what needs attention, without blocking: a month with no entries, taxes not calculated.
- With nothing blocking, choose what happens to records dated in the closed period:
- Block 100% (the default): the web portal will not let anyone save, change, delete or finalize an invoice, inventory transaction (the work order write-off is one), fueling or requisition dated in the closed period. Anyone who tries gets a notice to use a date after the closing or to ask the accountant.
- Allow: saves normally, and the entry lands in the following month as a late entry.
- Confirm. The grid keeps each closing: up to when, who closed, when and whether it allows late entries.
The choice can be changed later, with the Allow late entries or Block 100% button, right below the closing status.
Recorded in a closed month
What comes from the app (work order write-offs or fuelings recorded offline) or from an integration cannot be rejected after the phone syncs, so it comes in even with the month blocked. So it is not forgotten, click Check, at the end of the Closing tab: the grid lists everything dated in the closed period that is not yet in the accounting, with the entry that would be made. The check for a new closing also warns you.
- With late entries allowed, the list is what is waiting for the next month: generate that month again.
- With the month blocked, decide: allow late entries and generate the next month, or reopen the month.
Reopen the last closing goes back to the previous closing and releases that period. It requires delete permission, and the grid shows who reopened it.
Late entry
Applies when the accountant allowed late entries. The farm keeps working after the month is closed. A forgotten work order write-off, an invoice recorded late or a cancelled invoice may be dated in the closed period. None of that reopens the month. When generating the month following the closing, the system compares each event of the closed months with what was posted for it and posts the difference on the first day of that month:
- "Late entry of 09/15/2026: NF 1234 - …" for what came in or changed afterwards;
- "Late reversal of …" for what no longer exists.
Closed months stay as they were delivered. The comparison covers the last twelve closed months that were generated. Adjusted or manual entries are not touched.
The harvest is adjusted too. Cost that reached the crop after the closing, dated within it, goes to the production stock in the month after the closing. The cost written off in later sales already includes it.
Prefer that the late work order write-off cost goes to expense rather than to the crop? Choose the account in Cost that arrives dated in a closed month, in the Accounting setup, Crops and production tab.
📊 Accounting reports
The screen has four tabs: Accounting entries, with the month and the grids described above,
Tax calculation, Closing and
Reports, with one card per accounting report. Click the card to open the
report and choose the filters. The same tab is in the
Accounting setup, and the reports are also
in the Reports menu, in the Accounting area (code CTB). Only the reports enabled
for your user appear.
| Report | What it shows | Filters |
|---|---|---|
CTB.01.01 General Journal | One row per line, in date order: document, description, account, debit and credit. | Period and farm |
CTB.01.02 Ledger | By account: the opening balance, each line in the period with the running balance, and the closing balance. | Period, account and farm |
CTB.02.01 Trial balance | All accounts with activity or a balance, in chart order: opening balance, debits, credits and current balance. Summary accounts add up the posting accounts below them. | Period and farm |
CTB.03.01 DRE - Income statement | The income statement accounts for the period and, at the end, the profit or loss. | Period and farm |
CTB.03.02 Balance sheet | Assets on one side, liabilities and equity on the other, with balances accumulated up to the date. | End date and farm |
CTB.04.01 Accounting open items | The period's pending entries, by event type, with the pending text and the amount. | Period, farm and event type |
CTB.04.02 Crop cost by season and crop | The activity on lines that carry a season or crop, account by account, with debits, credits and balance. | Period, farm, season and crop |
What goes into the reports
- Generated, adjusted and manual entries go in. Pending entries are left out of the books, the trial balance and the financial statements, and appear only in Accounting open items. So resolve the month's pending items before running the trial balance.
- With no farm in the filter, all the company's farms are included.
- In the Journal, Ledger and Trial balance, the balance is shown as positive, with D (debit) or C (credit) beside it.
- The DRE and the Balance sheet follow the financial statement format, without D or C: in the DRE, revenue is positive, and cost, expense and loss appear in parentheses; in the Balance sheet, a balance on the opposite side (accumulated depreciation, loss) appears in parentheses.
- The Balance sheet shows the accounts in groups 1 (assets) and 2 (liabilities and equity) of the chart; the DRE, those in the other groups.
- Since the fiscal year is not yet closed in the system, the Balance sheet shows the Result for the period within equity: it is the result accumulated up to the date, and it is what makes assets equal liabilities plus equity.
- The opening balance in the Ledger and Trial balance is everything posted before the start date. There are no opening balances yet: in a company that started its accounting mid-year, the inventory and bank accounts may show balances that do not match reality.
🚧 What does not exist yet
Still in development, with no set date: adjusting a generated entry (changing account or amount), reversing a chosen entry, opening balances, export to the accountant's system, calculation of IBS and CBS, of ICMS-ST and the quarterly presumed and actual profit taxes (IRPJ and CSLL), automatic allocation of indirect costs (today it is the report plus a manual entry) and the monthly accrual of prepaid expenses, such as insurance and land lease paid in advance (the accountant posts it by hand). There is also no scheduled generation: the month is generated with the button.
- The accounting month comes out of what the farm has already recorded, with debit equal to credit.
- Each line says where the account came from, and each pending item says what is missing.
- Fixing the setup and generating again is safe: it neither duplicates nor wipes adjustments.
- What the accountant prefers to post by hand comes out built by the system, ready to review and save.
❓ Frequently asked questions
If I generate the same month twice, do the entries duplicate?
No. Generating the month again replaces what was generated and what was pending for that month, and keeps the adjusted and manual entries.
Why did a sales invoice end up pending?
Most of the time, because the invoice's nature of operation is not linked to any accounting operation: outbound invoices have no fallback operation. Link the nature in the Natures tab, in the Accounting setup, and generate the month again. Another cause is a product sold with no average cost in inventory.
How do I know why upCampo used one account and not another?
Select the entry and look at the Account source column in the lines: Record, Operation default, Fixed account or No account. Record means the product, class, entity or another record had its own account.
Does the invoice I recorded today already show up in the entries?
Only after you generate the month. Generation is done with the Generate the month button; there is no automatic routine. An inbound invoice also has to be finalized, and an outbound one, authorized.
How do I make a manual accounting entry in upCampo?
In Accounting > Accounting entries, click Manual entry, enter the Date, the Document and the Description, and add the lines with Add line. It only saves with at least two lines and debit equal to credit. For harvest, cost of production sold, depreciation, fuelings or requisitions, use Build from the system, which fills in the lines.
How do I post the harvest all at once when closing the season?
In Manual entry, choose the Fact Harvest (crop to production), the Season, and check Season closing (all the crop accumulated). Click Build from the system, review and save. So that the monthly generation does not post the harvest on its own, set the How it is posted field of the Harvest panel to Manual, in the Accounting setup, Crops and production tab.
If I build the entry by hand, will the monthly generation post the same event again?
No. An entry built from the system keeps which event and which month it came from, and the automatic generation does not post that event again for that month. A Manual entry is also never deleted when the month is generated again.
How do I move indirect costs to the crop?
In Accounting > Accounting entries, choose the month and click Indirect cost allocation. The report shows the balance of the indirect cost accounts split by season and crop by planted area, by direct cost and by machine hours. Choose the criterion and click Post by hand with this criterion: the manual entry opens filled in, as a crop cost. Review and save.
What is the pending "to post by hand" entry?
It is the notice for an event in Manual mode (harvest, depreciation, fueling, requisition or cost of production sold) that had activity in the month and that nobody posted. The pending item shows the calculated amount. Post it through Manual entry, with Build from the system: when you save, the notice disappears.
📘 Screen: Depreciation
Depreciation is the screen where the company tracks the assets that lose value over time: the tractor, the combine, the center pivot, the barn, the dryer. For each asset you enter what it cost, when it started depreciating and how many years it lasts; upCampo calculates each month's depreciation and creates the accounting entry. If you already track assets in another system (your accounting firm's, for example), you can instead enter each month's amount, and upCampo posts that amount.
The assets come from the Fleet / Farm Assets register: you don't register the machine again here. This screen only adds the depreciation data to each one.
📍 Location in the system
Menu: Accounting > Depreciation
It sits in the Entries group of the Accounting menu, after Accounting entries. Like every screen in the web portal, it appears only to users who have its permission (015.006), granted in File > Users. Overview in the Quick Guide - Accounting.
🚦 Where to start
- To check tab. Lists the own assets in the register that don't have depreciation yet. For each one, decide: does the asset depreciate or not?
- Asset that doesn't depreciate (an old implement, a tool): click Not depreciated. It leaves the list.
- Asset that depreciates: click Open the asset and fill in, on the Assets tab, what it cost, when it started depreciating and its useful life in years. Save.
- Month tab. Check how much each asset will depreciate in the month and where it goes.
- Generate the month. upCampo saves the depreciation entry.
Purchase values don't exist anywhere else in the system: the equipment register doesn't store what the asset cost. That's why you enter them here, asset by asset.
🧩 Main function
At the top, outside the tabs, are the month controls:
| At the top | What it's for |
|---|---|
| Month | The month the tabs show and the buttons generate. |
| Generate the month | Generates only the depreciation for the chosen month (and the disposal of assets disposed of in that month); the month's other events stay as they are. If depreciation is set to be posted by hand (Settings tab), the screen warns you and tells you to use Manual entry. |
| Manual entry | Opens the manual entry, the same one as on the Accounting entries screen, already filled in with the month's depreciation, for the accountant to review and save. |
| Reload | Reads the assets and amounts again. |
| Summary | How many assets have depreciation, how much it adds up to in the month and how many assets are waiting to be checked: "12 assets with depreciation, R$ 18,450.00 this month · 5 to check". |
The screen has five tabs: Assets, To check, Month, Book × tax and Settings.
🚜 Assets tab
The grid shows all assets in the equipment register, of any type (Fleet, Equipment, Farm asset, Other), whether they have depreciation or not. Pick one in the list and fill in the form above it, laid out in blocks, in the order you fill them.
👤 Who calculates depreciation
| Option | When to use it |
|---|---|
| upCampo calculates (default) | The farm tracks its assets in upCampo. You enter value, start and useful life, and upCampo calculates every month. |
| The accountant enters it monthly | The accountant already tracks the assets in their own system. They type here each month's amount, the same as in their system, and upCampo posts that amount without recalculating. The two numbers never differ. A month with no amount entered stays pending in the generation and shows up in To check. |
📝 Fields
| Field | Description |
|---|---|
| Asset | The asset picked in the list (read only). |
| Depreciates | Checked, the asset is included when depreciation is generated. Unchecked, the data stays saved and the asset doesn't depreciate. |
| Who calculates depreciation | upCampo calculates, or the accountant enters it monthly (above). |
| Cost and useful life | |
| Asset value | The acquisition value, the depreciation base. |
| Depreciation start | The asset depreciates from this month on, inclusive. In "accountant enters" mode, this is the month from which upCampo expects each month's amount. |
| Useful life (years) | How many years the asset lasts. The yearly rate is 100 ÷ useful life: 10 years = 10% a year. |
| Residual value | The value the asset keeps at the end of its life: depreciation stops when it gets here. |
| Month depreciation / Month tax | Only in "accountant enters" mode: the amount the accountant posted in their system for the month chosen at the top and, optionally, the tax amount (blank: same as book). |
| Prior depreciation | What the farm had already depreciated on the asset before starting in upCampo (the asset was already being depreciated in another system). An asset bought used starts from zero: the previous owner's depreciation doesn't count. |
| The change applies from | When you change the value, useful life or residual of an asset that was already depreciating, the months before this one don't change; what is left to depreciate is spread over the remaining life (see Revision). |
| Tax rate a year (%) | Control only, not posted. Used in the Book × tax report when the tax regime is the Brazilian Federal Revenue (Receita Federal) rate. Blank: the book rate applies. |
| Destination and disposal | |
| Goes to | Period expense (default), Indirect production costs or Crop, by work order hours (see Where it goes). |
| Month with no hours | Only with the "Crop, by work order hours" destination: where the month goes when the machine has no hours in the work orders (expense or indirect costs). |
| Asset disposal | Sold, scrapped or lost: the asset depreciates up to this month and, when that month is generated, upCampo posts the asset write-off. It can't be before the start. |
| Disposal reason | Sale, Scrap, Loss or Other. Required when there is a disposal. |
| Asset accounts | |
| Asset account (fixed asset) · Depreciation account · Accumulated depreciation account | The chart of accounts accounts for this asset. Blank: the Settings tab ones apply. They are the same as on the Accounting tab of the equipment record and in the Equipment grid of Accounts in records: changing them in one place changes them in the others. |
| Notes | Free text. |
In "upCampo calculates" mode, Asset value, Depreciation start and Useful life are required. The buttons are Save, Not depreciated (marks the asset as excluded from depreciation without asking for values) and Remove depreciation (removes the depreciation data from the asset; the asset stays in the equipment register and anything already posted stays).
The asset grid
Columns: Asset, Type, Depreciates, Who calculates, Asset value, Start, Useful life, Goes to, Month depreciation, Accumulated to the month and Disposal. Every column has a filter in its header. Month depreciation and accumulated depreciation are for the month chosen at the top.
⚠️ To check tab
What is missing for depreciation to be complete. Nothing here stops you from generating the month: an incomplete asset is left out of the generation and shows up here.
| What is missing | What to do |
|---|---|
| Own asset with no depreciation set | Open the asset and fill it in, or click Not depreciated. Third-party and inactive equipment is not on this list. |
| Missing value, start date or useful life | Open the asset and complete it. |
| No amount for the month entered by the accountant | Asset in "accountant enters" mode with no amount for the month chosen at the top. Open the asset and enter it. |
| Inactive in the equipment register and not disposed in depreciation | The asset is no longer in use, but depreciation keeps going. Open the asset and enter the disposal and the reason. |
The buttons are Open the asset (takes you to the Assets tab with that asset selected) and Not depreciated.
📅 Month tab
What Generate the month will post, asset by asset and destination by destination, before saving: Asset, Goes to, Season, Crop, Hours and Amount, with the month's total at the top. It uses the same calculation as the generation.
🧮 How depreciation is calculated
In "upCampo calculates" mode, it is straight-line, the same every month:
It runs from the start month until the asset reaches the residual value, counting prior depreciation, and never after the disposal month. In the last month, only what is left to reach the residual is posted.
An example (illustrative numbers): an asset worth R$ 500,000.00, with a residual of R$ 50,000.00 and a useful life of 10 years (10% a year).
If the farm had already depreciated R$ 90,000.00 of that asset before using upCampo (Prior depreciation), R$ 360,000.00 is left to depreciate, or 96 months.
🔁 Revision: changing value, useful life or residual
Did the estimate change (the machine will last less, the residual dropped)? Change the field and pick in The change applies from the month of the change. Earlier months stay as they were. From there on, what is left to depreciate is divided by the remaining months of life:
In the example above, after 18 months (R$ 67,500.00 accumulated), the useful life goes from 10 to 5 years: 42 months and R$ 382,500.00 remain, or R$ 9,107.14 per month. Changing the Depreciation start recalculates everything from the beginning.
🎯 Where depreciation goes
| Goes to | The month's entry |
|---|---|
| Period expense (default) | D Depreciation (the asset's account or the one in Settings) · C Accumulated depreciation. For administration vehicles, headquarters, office. |
| Indirect production costs | D Indirect production costs · C Accumulated depreciation. It stays in that account until it is moved to the crops by the Indirect cost allocation, on the Accounting entries screen. |
| Crop, by work order hours | The month's depreciation is split between season and crop according to the machine's (or implement's) hours in the month's work order executions: D Crop in formation for the crop · C Accumulated depreciation, with season and crop on the entry line. A month with no hours posted goes entirely to the destination chosen in Month with no hours. It only works well if hours are entered in the work orders. |
📤 Asset disposal
With Asset disposal and Reason filled in, the asset depreciates up to the disposal month and, when that month is generated, upCampo posts the asset write-off:
The sale amount comes in through the outbound invoice, with the sales revenue. The gain or loss is the difference between the revenue and the cost of the disposed asset.
⚖️ Book × tax tab
Accounting always posts the book depreciation. Tax depreciation is control only: this tab shows, per asset and for the chosen year, the book and tax depreciation for the year, the accumulated amounts and the differences, so the accountant can carry them to the tax adjustments. The company's tax regime is chosen on the Settings tab:
| Tax regime | How tax depreciation is calculated |
|---|---|
| Same as book (default) | The same as book: zero difference. |
| Tax rate of each asset (Receita Federal table) | Asset value × Tax rate a year ÷ 12, with no residual, up to the asset value. An asset with no tax rate uses the book rate. |
| Accelerated, for rural activity | The full value in the start month. |
| Not applicable (cash book) | Zero: the investment is booked as an expense when it is paid. |
⚙️ Settings tab
Shows the Depreciation panel, the same as on the Inventory and assets tab of the Accounting setup (changing it here changes it there), and the Tax depreciation panel, with the company's tax regime.
- How it is posted, below the panel title: Automatic, when the month is generated or Manual (Accounting entries screen) (the generation doesn't post depreciation, and the accountant posts it through Manual entry).
- The accounts, one line per destination and for the disposal:
- For expense: Depreciation · Accumulated depreciation.
- For indirect costs: Indirect production costs · Accumulated depreciation.
- For the crop (work order hours): Crop in formation (the crop's account) · Accumulated depreciation.
- Disposal: accumulated depreciation: Accumulated depreciation · Fixed asset.
- Disposal: cost of the disposed asset: Cost of disposed assets · Fixed asset.
- The farm that tracks its own assets and the accountant who tracks them in their own system use the same screen.
- Each month shows how much each asset depreciated, where it went and how much has accumulated.
- Changing useful life doesn't alter the past; a sold asset leaves fixed assets with an entry.
- Tax control sits right beside it, without double posting.
❓ Frequently asked questions
Where do I start with depreciation in upCampo?
On the To check tab of the Accounting > Depreciation screen. It lists the assets that don't have depreciation yet. For each one, click Not depreciated, or open the asset and enter what it cost, when it started depreciating and its useful life in years.
How do I calculate my tractor's depreciation in upCampo?
On the Assets tab, pick the tractor in the list, leave Who calculates on "upCampo calculates" and enter the Asset value, the Depreciation start and the Useful life in years. upCampo calculates (value − residual) ÷ useful life ÷ 12 every month and posts it when the month is generated.
My accountant already calculates depreciation. Do I need to calculate it again?
No. In Who calculates depreciation, choose "The accountant enters it monthly". The accountant types each month's amount, the same as in their system, and upCampo posts that amount. A month with no amount shows up in To check.
I bought a used machine. How do I enter it?
As a new asset for the farm: the Asset value is what the farm paid, and Prior depreciation stays blank. The previous owner's depreciation doesn't count. Prior depreciation is for what the farm itself had already depreciated before using upCampo.
The machine will last less than expected. What do I do?
Change the Useful life and pick in "The change applies from" the month of the change. Earlier months don't change; what is left to depreciate is spread over the remaining months.
I sold an asset. How do I stop depreciation?
Enter the date in Asset disposal and the Reason (Sale). The asset depreciates up to that month and, when that month is generated, upCampo posts the asset's write-off from fixed assets. The sales revenue comes in through the outbound invoice.
Can the tractor's depreciation go into the crop cost?
Yes. In Goes to, choose "Crop, by work order hours": the month's depreciation is split between season and crop according to the tractor's hours in the work orders. If hours aren't entered, choose "Indirect production costs".
Tax depreciation is different from book depreciation. What does upCampo post?
Only book depreciation. Tax depreciation is control: the Book × tax tab shows both per asset and the difference for the year, according to the tax regime chosen on the Settings tab.
The machine doesn't show up on the Depreciation screen. Why?
The screen lists the assets in the Fleet / Farm Assets register. If the machine isn't there, register it first in Fleet > Fleet / Farm Assets and click Reload.
Can I post depreciation by hand instead of letting the system generate it?
Yes. On the Settings tab, set the How it is posted field of the Depreciation panel to Manual. The Manual entry button opens the entry already filled in with the month's depreciation; the accountant reviews and saves it, and generating the month won't post the depreciation again.
🧮 Quick Guide - Budget (Orça.Agro)
Orça.Agro is upCampo's budgeting module: where the farm works out, before the season starts, how much it will spend per hectare, how much it expects to harvest and how much is left at the end. The Budget menu brings together the screens for that work.
🧱 The setup order
It's the same order as the menu — and it isn't decorative: each screen depends on the previous one.
- Season — the cycle being budgeted, with the dollar exchange rate and the period.
- Fields/Crop/Technology — the budget's areas, usually grouped by crop.
- Scenario — the version of the budget (the optimistic one, the conservative one), with expected yield and sale price per area.
- Component Group and Component — what you buy: seed, herbicide, fertilizer, fuel, services.
- Matrix — the recipe for each operation: which components, at what rate per hectare.
- A - Detailed Planning — applying the matrices to each area.
- B - Monthly Operational Planning — spreading what was planned across the months of the season.
- C - Fixed Allocation (amounts) — the costs that aren't per hectare.
- Planning Quote — the price of each component, which turns quantity into money.
- Summary — the result: cost, expected production and expected profit.
🎯 The scenario drives almost everything
From the Matrix screen onward, almost every screen in the menu has a Scenario dropdown at the top. It isn't a display filter: it's the context you are working in. Switching scenarios switches the data set shown — and that's how you compare "what if the dollar is at 5.40?" with "what if it's 6.00?" without redoing the whole budget.
Check the scenario before you're puzzled by a number.
🧮 Variable or fixed: the two kinds of cost
Every matrix is one of two types, and that runs through the whole module:
- Variable (hectares) — cost that follows the area: seed, crop protection, fertilizer, machine operations. The unit is the hectare and the amount grows with the size of the field.
- Fixed (amounts) — cost that exists regardless of the planted area: land lease, administrative salaries, insurance. The unit is the amount, and it is allocated across the areas.
The split isn't red tape: it's what makes cost per hectare answer the right question. Variable cost is per hectare from the start; fixed cost has to be divided before it becomes comparable.
A 1,000 ha soybean crop, with R$ 4,200/ha of inputs and operations and R$ 1,800,000 of fixed costs in the scenario:
| Cost component | Calculation | Per hectare |
|---|---|---|
| Variable cost | sum of the matrices | R$ 4,200.00 |
| Fixed cost | R$ 1,800,000 ÷ 1,000 ha | R$ 1,800.00 |
| Total cost | — | R$ 6,000.00 |
| Expected revenue | 65 bags/ha × R$ 125.00 | R$ 8,125.00 |
| Expected profit | — | R$ 2,125.00 |
This is the calculation the Summary shows ready-made, with the production and expected profit lines. Because fixed cost is divided by area, changing the scenario's area changes the cost per hectare without any price changing — that's exactly the effect you're after when simulating opening or cutting back area.
📚 To understand the module before setting it up
If you're still evaluating Orça.Agro, or implementing it for the first time, start with the overview articles: Orça.Agro - Overview, How it works, step by step and the Implementation Checklist.
- Cost per hectare stops being a back-of-the-napkin figure and gets a traceable origin — matrix, component, rate and price.
- You can compare scenarios side by side before closing input purchases.
- The quantity to buy of each item comes out ready, already net of what you have in inventory.
❓ Frequently asked questions
Does the season I set up in the Budget show up under Crop?
No. They are separate records: the budget season only shows up on the Budget menu screens, and the operation's season only shows up on the day-to-day screens. The same goes for fields.
Where do I start the season budget?
With Season and Fields/Crop/Technology, in that order, and then Scenario. Without those three, the following screens have nothing to build on.
Do I have to register my products again in the budget?
You don't need to type everything: the Component screen has an Import from general register button that brings in the items from Product & Service. Each component's Integration tab keeps the link to the real product.
What's the difference between variable and fixed cost here?
Variable (hectares) is what grows with the area — seed, crop protection, operations. Fixed (amounts) is what doesn't depend on it — land lease, administration, insurance —, entered as an amount and allocated across the areas.
📘 Screen: Budget - Season
This is the budget season: the cycle being planned, with the period it covers and the dollar exchange rate used as a reference. Everything you build in the Budget menu hangs off one of these seasons.
📍 Location in the system
Menu: Budget > Season
🧩 Main function
Define the budget cycle — September to August, for example — and store the reference exchange rate for that crop year. It's the first thing to set up in the module.
📝 Record fields
| Field | Description |
|---|---|
| Code | Sequence number of the planning season (0001). |
| Name/Description | What the season is called — "Crop Year 2024/2025". |
| Dollar Unit Value | The cycle's reference exchange rate. It's the base of the budget in dollars; each scenario can work with its own rate. |
| Start Date (from) | Start of the budgeted crop year. |
| End Date (to) | End of the period. This interval becomes the month columns in Monthly Operational Planning. |
| Active | A closed season can be unchecked without losing its history. |
The list shows Code, Description, Active and Dollar Unit Value.
- Scenarios have something to build on.
- The cycle's period defines the months of the monthly breakdown.
- The reference exchange rate is stored with the plan, not in a separate spreadsheet.
❓ Frequently asked questions
Why doesn't the budget season show up under Crop?
Because it's flagged as a planning season. That's on purpose: the budget needs the freedom to simulate without interfering with the operation's entries. The two live in the system side by side without mixing.
Which dollar rate applies: the season's or the scenario's?
The rate of the scenario you're working in. The season's rate is the cycle's reference; it's precisely because the exchange rate can vary between scenarios that you can compare versions of the same budget.
Can I have more than one budget season at the same time?
Yes. It's common to keep the current season and already open next year's to start planning. The Season filter on the Scenario screen separates what belongs to each one.
📘 Screen: Budget - Fields/Crop/Technology
These are the budget's areas. Day to day, a field is a physical piece of the farm; here it's usually a grouping by crop and technology — "SOYBEAN 1,500 ha", "CORN 1,000 ha", "SORGHUM 500 ha" —, because budgets are made by blocks of area under the same management, not field by field.
📍 Location in the system
Menu: Budget > Fields/Crop/Technology
🧩 Main function
State how much area the budget has and how it's split. These are the lines the scenario attaches yield and sale price to, and where the matrices are applied.
In the list bar, next to New and Reload, you'll see the Total (ha) of what is displayed — the number that has to match the area the farm will plant — and the Reports ▼ menu.
📝 Record fields
| Field | Description |
|---|---|
| Code (order) | Number that identifies the area and sets its order in the list (001, 002). |
| Name/Description | The block's name — "SOYBEAN", "CORN", "SORGHUM", or the field name, if the farm budgets that way. |
| Sector | Grouping by region of the farm, when the budget is split by sector. |
| Area (ha) | How many hectares the block has. It's the multiplier for every variable cost. |
| Active | Removes the block from the budget without deleting its history. |
- The budget's total hectares are visible and checkable right in the list.
- Each block can get its own yield and price expectation in the scenario.
- The matrices have somewhere to be applied.
❓ Frequently asked questions
Do I need to register every field of the farm here?
No. The usual approach is to group by crop and technology — one line for all the soybeans, another for corn —, because the budget is built by management block. Going field by field only pays off when management really differs between them.
I changed a field's area in the crop. Does the budget follow?
No. The records are independent: the area here is the budgeted area. If planting changed, adjust this screen too — that's what keeps planned and actual comparable.
Where do I check whether the total area is right?
In the Total (ha) shown in the list bar, next to the buttons. It adds up what is shown in the grid.
📘 Screen: Budget - Scenario
A scenario is a version of the budget. "Good Scenario", "Conservative Scenario", "Scenario with the dollar at 6.00": each one is a complete plan, with its own dollar rate and its own yield and sale price expectations for each area.
The scenario is what appears in the dropdown at the top of almost every screen in the module — and switching it switches the entire budget you're looking at.
📍 Location in the system
Menu: Budget > Scenario
🧩 Main function
Let you simulate. Instead of redoing the budget every time a question comes up, you clone the idea into another scenario, change what you want to test — the exchange rate, expected yield, the price per bag — and compare the two in the Summary.
The list bar has the Season filter, which separates the scenarios of each budget season.
📝 Record fields
| Field | Description |
|---|---|
| Code | Sequence number of the scenario (0001). |
| Name/Description | A name that says what it represents — "Good Scenario", "Locked price". |
| Dollar Unit Value | The rate used in this scenario. It's one of the most obvious levers for simulation. |
| Start Date (from) | Start of the budgeted period. |
| End Date (to) | End of the period. Together with the start date, it defines the month columns of the monthly breakdown. |
| Active | A discarded scenario drops out of the lists without being deleted. |
🗂 Fields/Crop/Technology tab
This is where the scenario gets its content: each budget area comes in with what is expected from it.
| Field | Description |
|---|---|
| Fields/Crop/Technology | The budget area being added to the scenario. |
| Crop | What will be planted in that area. |
| Total Area (ha) | Hectares considered in the scenario — it can differ from the registered area, if you want to simulate less area. |
| Expected average harvest | Expected yield, in bags per hectare. It's the "how much I think I'll harvest". |
| Expected sale price | Expected price per bag. |
| Expected by-product sale price | Expected price of the by-product, when there is one — cottonseed, for example. |
The tab's list shows Field, Sector, Crop and Area, and the sum of those lines becomes the budget's expected revenue.
- You can answer "what if the dollar goes up?" without redoing the budget.
- Expected revenue and expected cost sit in the same place, comparable.
- Input purchasing decisions get a reference scenario.
❓ Frequently asked questions
How do I compare two scenarios?
Build both and open the Summary, switching the scenario in the dropdown at the top: cost, expected production and expected profit appear for the selected scenario.
I switched the scenario in the dropdown and the data disappeared.
It didn't disappear: each scenario has its own plan. If the new scenario hasn't received matrices in Detailed Planning yet, the screens really are empty.
Does the scenario area have to match the field register?
No. The tab's Total Area (ha) field is the area considered in that scenario — it's what lets you simulate planting less, or swapping one crop for another on the same area.
📘 Screen: Budget - Component Group
This is how budget items are classified: Seed, Herbicide, Fungicide, Insecticide, Fertilizer, Adjuvant, Fuel, Service/Labor, Other. Every component belongs to a group, and the Summary shows cost by group.
📍 Location in the system
Menu: Budget > Component Group
🧩 Main function
Give the budget its reading structure. When the director asks "how much is going to crop protection?", this register is what answers — which is why it's worth thinking it through before you start registering components.
In the bar: New, Reload, Import — which brings in a ready-made structure — and Sort, to set the order in which the groups appear.
📝 Record fields
| Field | Description |
|---|---|
| Name/Description | The group's name: "Herbicide", "Seed", "Service/Labor". |
| Code | The group's code, when the farm uses its own coding. |
| Parent Group | Builds the hierarchy: "Seed treatment fungicide" can sit under "Fungicide". Reports add up at the higher level. |
| Sort order | The group's position in the lists and in the summary. |
| Reference ID | Identifier for integration with another system. |
| Active | A group no longer in use drops out of the lists without deleting its history. |
🔗 Integration tab
Links the budget group to the system's Product & Service Class — the mapping between the planning world and the inventory world. The fields are Type, Product & service class, Description and Integration ID.
That link is what later lets you compare the budget's planned figures with the operation's actuals, without matching item by item by hand.
- Budget cost can be read by type of expense, not just item by item.
- The hierarchy lets you expand or collapse the level of detail depending on who's looking.
❓ Frequently asked questions
Do I have to build the groups from scratch?
No. The Import button, in the list bar, brings in a ready-made structure that you adjust afterward — it's faster than typing group by group.
What is the Parent Group for?
To group in levels. With "Seed treatment fungicide" under "Fungicide", the summary can show the total of the larger group and still let you drill into the detail.
Is the budget group the same thing as the product class?
They are different records, linked by the Integration tab. The group organizes the budget; the class organizes inventory. The link between them is what makes it possible to compare planned and actual.
📘 Screen: Budget - Component
A component is the budget's "product": seed, herbicide, fertilizer, fuel, machine hours, third-party services. Everything that goes into a matrix and becomes cost is a component registered here.
📍 Location in the system
Menu: Budget > Component
🧩 Main function
Keep the list of items the budget consumes, with unit and default rate. It's a deliberately lean register — technical sheets, active ingredients and labels live in Product & Service; here what matters is what makes up cost.
How to avoid typing everything
- Import from general register — brings in the items already registered in Product & Service. This is the recommended path: the component is linked to the real product from the start.
- Import from Excel — if you have the list in a spreadsheet.
📝 Record fields
| Field | Description |
|---|---|
| Active | A component no longer in use drops out of the lists without deleting its history. |
| Fuel | Flags the item as fuel. |
| Seed | Flags the item as seed. |
| Code | Sequence number of the component (0001). |
| Description | The name the farm uses — usually the brand name. |
| Unit | Liter, kilogram, unit, hour. It's the unit of the rate and the price. |
| Group | The item's classification — it's what groups the cost in the summary. |
| Default Rate | Suggested rate, used as a starting point when building the matrix. |
| Notes | Free field. |
🔗 Integration tab
Ties the component to the real item in the system: Type, Product & Service, Description and Integration ID.
That tie is what lets the Planning Quote show the quantity already in inventory and, later on, compare planned with what was actually consumed.
- The matrices have something to receive.
- Planned consumption comes out per item, in the right unit.
- What's already in inventory is counted in what's left to buy.
❓ Frequently asked questions
Do I have to re-register the products already in inventory?
No. Use Import from general register: it brings in the items from Product & Service, already linked to the source product through the Integration tab.
Where does the component's price go?
In the Planning Quote, which gathers everything the budget will consume and where you enter the unit price. This register holds the rate, not the price.
Do labor and third-party services count as components?
Yes, in the service/labor group, with whatever unit makes sense (hour, hectare, unit). For the budget, everything that makes up cost is a component.
📘 Screen: Budget - Matrix / Type / Short ID (Subtype)
The matrix is the operation's recipe: "SOYBEAN BURNDOWN MODEL 01" with the components it consumes and the rate of each one per hectare. You build it once and apply it to as many areas as you like — it's the heart of the budget.
The long menu name says where it comes from: the planning matrix is the equivalent of the day-to-day work order, activity type, short identification — which is what Short ID abbreviates — and recommendation — only in the plan, not in execution.
📍 Location in the system
Menu: Budget > Matrix / Type / Short ID (Subtype)
The title inside the screen is longer: Matrix / Work Order/Activity / Short ID (Subtype) / Recommendation.
🧩 Main function
Store the "how it's done" of each operation, with its cost. The list bar has New, Reload, the Scenario dropdown and the Allocation filter — Variable (hectares), Fixed (amounts) or All.
📝 Header fields
| Field | Description |
|---|---|
| Description | The operation's name — "SOYBEAN BURNDOWN MODEL 01". |
| Code | Sequence number of the matrix (0001). |
| Allocation | Variable (hectares) or Fixed (amounts). This choice changes the screen: see the alert below. |
| Unit | Filled in according to the allocation — Ha - Hectare for variable, Vl - Amount for fixed. |
| Notes | Free field. |
| Group | The matrix's classification, for a grouped view in the summary. |
The document buttons are Save, Cancel/See the list, Delete and Clone — the last one is the shortcut for creating a variation of a recipe without retyping the components.
🗂 Components tab
This is the recipe itself. Each line is an item consumed by the operation:
| Field | Description |
|---|---|
| Component | The item consumed. |
| Matrix | An alternative to the component: instead of an item, the line points to another matrix, nesting recipes. Picking one clears the other — a line is one or the other. |
| Component quantity/Rate | How much is used per hectare (or per amount, with fixed allocation). The label changes with the units chosen. |
| Unit | The rate's unit. It's suggested from the component's unit. |
| % Use | How much of the area receives this application: 100 for the whole area, 50 for half. Useful for crop protection applied to part of the field. |
| Currency · Amount · Amount (US$) | The item's price in the matrix, in reais and in dollars. |
| Hectares (Simulation) · Quantity | Check fields: enter the hectares and you see the quantity the recipe would consume. |
The tab bar has Save, Cancel, Delete and Import, which brings in components from another matrix.
- Each operation's cost gets a traceable origin: item, rate and percentage of area.
- The same recipe serves several areas, with no retyping.
- Changing a rate recalculates the budget of every area that uses that matrix.
❓ Frequently asked questions
What's the difference between Variable (hectares) and Fixed (amounts)?
Variable is cost that follows the area — seed, crop protection, machine operations — and is entered per hectare. Fixed is cost that doesn't depend on the area — land lease, administration, insurance — and is entered as an amount, allocated across the areas.
Can I put one matrix inside another?
Yes. On the Components tab, instead of choosing a component, choose a Matrix: the recipe then includes the other one in full. The two fields are mutually exclusive — a line is either a component or a matrix.
What is % Use for?
For when the operation doesn't cover 100% of the area. With 50, the budget assumes only half the hectares receive that item — useful for spot applications.
Do I have to redo the recipe for each crop?
Use Clone: it copies the matrix with its components, and you adjust only what changes. That's how you keep "model 01" and "model 02" of the same operation.
📘 Screen: Budget - Detailed Planning
This is where the budget leaves the registers and becomes a plan: you pick an area and say which matrices it will receive during the season — burndown, planting, applications, harvest.
It's step A in the menu, and the most time-consuming one in the module. It's also the step that gives the cost per hectare of each block of area.
📍 Location in the system
Menu: Budget > A - Detailed Planning
🧩 How the screen works
It's numbered, and the numbering is the step-by-step. At the top are the Scenario dropdown and the Save button.
1 - Select a field
The list on the left shows the scenario's areas, with Crop, Field, Area, Sector and the Detailed Planning column, which shows what has already been planned there. Click the area that will receive the matrices.
2 - Available matrices
On the right are the scenario's matrices, as a tree: the matrix on the top line and, when you expand it, its components, with Component quantity, % Use, Total Qty and Unit. The + button on the line adds the matrix to the selected area.
3 - Matrices added to the field
Below is what has already been applied to that area, with the Remove, Move up and Move down buttons — the order matters because it reflects the sequence of operations in the season.
Next to the title is the Replace month-by-month field planning checkbox: when it's on, a change made here also redoes that area's monthly breakdown instead of keeping the existing one.
- Each budget area has the list of operations it will receive.
- Planned consumption of each component is already calculated per area.
- The next step — spreading it over the calendar — starts from something ready.
❓ Frequently asked questions
I added the matrix to the wrong area. How do I undo it?
Select the area, find the matrix in block 3 - Matrices added to the field and use Remove. Then just save.
Why does the order of the matrices matter?
It reflects the sequence of operations in the season — burndown, planting, applications, harvest. Use Move up and Move down to set it; that's what makes the plan read in line with the crop calendar.
What does the "Replace month-by-month field planning" option do?
It has that area's monthly breakdown redone from what was just planned. When it's off, whatever was already spread across the months is kept.
The list of available matrices is empty.
Matrices are per scenario: check the Scenario dropdown at the top and, if needed, register them first in Matrix.
📘 Screen: Budget - Monthly Operational Planning
After saying what each area will receive, this screen answers when: it spreads the planned consumption across the months of the season. It's step B in the menu — and it's where the budget's purchasing and cash flow come from.
📍 Location in the system
Menu: Budget > B - Monthly Operational Planning
🧩 How the screen works
At the top are the Scenario dropdown, the Allocation selector — Variable (hectares) or Fixed (amounts) —, the Fields/Crop/Technology dropdown, which picks the area you'll work on, and the Finalize/Lock Field button.
The screen is split in two:
- Linked matrices, on the left: what that area received in Detailed Planning, with Matrix, Component, Component quantity and Unit.
- Monthly Breakdown, on the right: one column per month of the scenario period (9/2024, 10/2024, 11/2024…) and the Total column. This is where you enter how much of each matrix happens in each month.
Buttons
- Save — saves the breakdown.
- Split Field Area — opens the window that spreads it automatically: Equal quantities, which splits evenly across the chosen months, or Set percentage, to say how much goes in each month.
- Finalize/Lock Field — closes that area's planning and protects it from accidental changes.
- The budget stops being a yearly number and becomes a consumption calendar.
- Input purchases can be scheduled for the month they'll be used.
- The season's expected cash flow takes shape.
❓ Frequently asked questions
Do I have to type every matrix month by month?
No. Use Split Field Area: choose Equal quantities to split evenly across the months or Set percentage to give each month its weight. Then adjust whatever you need by hand.
Which months show up in the columns?
Those of the scenario period — the start and end dates set on it. If a month is missing, adjust the period in Scenario.
What is Finalize/Lock Field for?
To mark the area as planned and prevent accidental changes after it's closed. It's the "done" for that block of area.
The screen is empty.
Check, in this order: the Scenario, the Allocation and the selected Fields/Crop/Technology. With no area chosen — or no matrices applied to it in Detailed Planning — there's nothing to spread.
📘 Screen: Budget - Fixed Allocation (amounts)
It's the sibling of the monthly breakdown, but for cost that does not depend on the size of the area: land lease, administrative salaries, insurance, financing. Instead of a rate per hectare, here you enter an amount — which is why this allocation is called Fixed (amounts).
It's step C in the menu.
📍 Location in the system
Menu: Budget > C - Fixed Allocation (amounts)
🧩 How the screen works
At the top are the Scenario dropdown and the Allocation selector, which here already comes set to Fixed (amounts). Next to them, the field to select a field — the area whose fixed cost will be spread.
The grid has one column per month of the scenario period, plus Matrix, Component and Total. You enter how much of that cost falls in each month.
Buttons
- Save — saves the breakdown.
- Split Field Area — spreads it automatically across the months, by Equal quantities or Set percentage. It's the natural path for fixed cost, which is usually the same every month.
- Finalize/Lock Field — closes that area's planning.
- Cost per hectare no longer considers only inputs and operations; it now includes what the farm spends no matter what.
- The budget's monthly flow is complete.
- The expected profit in the Summary becomes comparable with the actual result.
❓ Frequently asked questions
What kind of cost goes on this screen?
Cost that exists regardless of the planted area: land lease, administration, insurance, loan installments, facility maintenance. Inputs and machine operations go in the variable allocation, per hectare.
How do I spread the same amount across every month?
With the Split Field Area button, Equal quantities option. For months with different weights — season and off-season —, use Set percentage.
How is fixed cost split between crops?
Through the fixed matrix's Allocation split tab, where you enter the percentage that belongs to each area, and through this screen, which spreads the amount across the months.
📘 Screen: Budget - Planning Quote
This screen brings together, in a single list, everything the budget will consume — and it's where consumption becomes money. It shows how much of each component the plan calls for, how much is already in inventory, how much is left to buy, and it takes the price you got.
📍 Location in the system
Menu: Budget > Planning Quote
🧩 Main function
Close out the budget math. Without prices, the plan is a list of quantities; with the unit price entered here, each component becomes cost, and the Summary shows the total.
On top of that, it's the season's shopping list: what's left to buy comes already calculated.
📝 The columns
| Column | What it shows |
|---|---|
| Component | The item planned. |
| Class | The component's group — herbicide, seed, fertilizer. |
| Operational Qty | The quantity that comes from the applied matrices, in full. |
| Planned Qty | The quantity planned for the planning period. |
| Inventory Qty | What the farm already has — it comes from inventory, through the component's link to Product & Service. |
| Qty to buy | What's missing: planned minus what's already on hand. |
| Currency | Real or dollar, for an item priced in foreign currency. |
| Unit price | This is what you fill in. The purchase price used in the budget. |
| Total amount | Calculated: quantity × unit price. |
Fill in the prices and click Save. Like every screen in the module, it works within the Scenario chosen at the top — the same component can have different prices in different scenarios.
- The budget has a cost in money, not just in quantity.
- The list of what's left to buy comes out ready, already net of inventory.
- You can simulate purchasing: change the price in one scenario and see the effect on the result.
❓ Frequently asked questions
Where does the planned quantity come from?
From the matrices applied to the areas in Detailed Planning: rate per hectare × area × % use. If an item doesn't show up, it's because no applied matrix consumes it.
The Inventory Qty column shows zero.
The balance comes from real inventory, through the Integration tab of the component. Without that link to Product & Service, the system has no way of knowing what's already on hand.
Is this the same quote as the one in the Inventory menu?
No. This is the planning quote — the estimated price that makes up the budget's cost. The Quote in the Inventory menu is the real purchasing process, with supplier and proposal.
📘 Screen: Budget - Summary (Dashboard)
It's the wrap-up of the budget: one column per crop, one line for each number that matters — area, total cost, cost in bags, expected yield, production, sale price and expected profit — and a TOTAL column at the end.
In the menu it's called Dashboard; the title inside the screen is Summary.
📍 Location in the system
Menu: Budget > Dashboard
🧩 Main function
Answer, on one screen, the questions the budget exists to answer: what a hectare costs, how many bags pay for the cost, how much is left if the season turns out as expected. All within the Scenario chosen at the top — switching the scenario switches every number.
🗂 The three tabs
- Grouped by Group — cost broken down by component groups: how much goes to seed, crop protection, fertilizer, services.
- Grouped by Crop — the same numbers organized by crop, with unit price, quantity, total amount and amount in dollars.
- Dashboard — the budget's graphic panels, refreshed automatically on a timer.
📊 The summary lines
| Line | What it is |
|---|---|
| Hectares | Each crop's area in the scenario, and the farm total. |
| A - Total Costs - R$ | The planned cost, in reais — the sum of what came from the matrices with the price from the Planning Quote. |
| B - Total Costs - Bags | The same cost converted into bags. It's the most common reading on the farm: "I need this many bags per hectare just to pay the bill". |
| C - Expected average harvest - Bags | The expected yield, from the scenario. |
| D - Production - Bags | Total expected production: yield × area. |
| E - Expected sale price - Per Bag | The expected price per bag, also from the scenario. |
| F - Total Production - R$ | Expected revenue: production × price. |
| Expected profit - R$ | What's left after cost. It's the line that closes the budget. |
- The season's cost per hectare and per bag is spelled out, crop by crop.
- You can compare scenarios and decide with numbers, not gut feeling.
- The budget becomes a benchmark to hold actuals against during the season.
❓ Frequently asked questions
Costs show as zero. What's missing?
The components' prices. Open the Planning Quote, enter the unit price and save — the summary recalculates.
How do I know how many bags per hectare pay for the cost?
It's the B - Total Costs - Bags line, which converts the planned cost into bags using the scenario's expected sale price.
Why did the summary change when I didn't touch it?
Because it's calculated: any change to a matrix, planning, area or price shows up here right away. Also check the Scenario selected at the top.
Can I see cost broken down by type of input?
Yes, on the Grouped by Group tab, which breaks cost down by component groups — seed, herbicide, fertilizer, services.
📊 Quick Guide - Reports (generate, filter and export)
Every report in upCampo works the same way: you choose the report, the system asks for the filters, you click Generate report! and the result opens on screen — ready to print, save as PDF or send to Excel.
This guide explains that path once, so it applies to every report: crop, inventory, fleet, storage and financial ones.
📍 Where the reports are
- The
Reportsmenu, the last one on the bar. The first item is Search report…; below it comes the full list, with code and name (EST.01.01 - Local X Estoque (Saldo atual)), grouped by area — each group headed by the area's name. - The Reports tab on the Home Screen: the same reports in accordions by theme, with a Search field — the fastest route when you remember part of the name but not the theme.
- Inside the screen itself: several screens have a Reports ▼ button with the reports for that subject — such as Accounts Payable/Receivable and the load tickets.
The list varies from person to person: each report is enabled per user. If a coworker has a report you can't see, it's a permission issue — whoever manages the company's users can fix it.
🔢 How the report code is built
Since October 4, 2026, a report's code in upCampo tells you where it lives. It has three parts separated by dots — AREA.SUBJECT.NUMBER:
- Area — three letters, in the order they appear in the Reports menu.
- Subject — two digits: what the report is about. Sheet, list and dashboard for the same subject sit side by side. Each area's subjects are ordered by what is used most day to day.
- Number — two digits: the position within the subject. The most used comes first; export tables and dashboards come last.
| Area | Subjects |
|---|---|
CAD Records | 01 Users · 02 Entities |
LAV Crop | 01 Season planning · 02 Planting · 03 Harvest · 04 Fields |
CLI Weather | 01 Rainfall · 02 Temperature |
MON Monitoring | 01 Scouting (IPM) · 02 Phenology and growth · 03 Assessments and analyses · 04 Pest alerts and trends · 05 Traps · 06 Observations · 07 Scout tracking · 08 Pest register |
CUS Costs | 01 Season cost · 02 Cost by class and product · 03 Detailed cost · 04 Third-party costs |
OPE Operations | 01 Recommendation sheet · 02 Work orders · 03 Products and rates · 04 Executions · 05 Scheduling · 06 Irrigation · 07 Aerial application and reports by area · 08 Operational performance · 09 Farm dashboards |
EST Inventory | 01 Inventory balance · 02 Movements · 03 Purchasing and quotes · 04 Field order write-offs · 05 Tax documents · 06 Lots · 07 Stock count · 08 Loans and third parties · 09 Products |
FRO Fleet | 01 Maintenance · 02 Fueling · 03 Fleet cost · 04 Checklist · 05 Fleet and equipment |
POS Post-Harvest | 01 Inbound load ticket (harvest) · 02 Outbound load ticket · 03 Standalone load ticket · 04 Bales · 05 Bale collection · 06 Stored inventory · 07 Contracts and discounts · 08 Season summaries |
FIN Financial | 01 Accounts payable and receivable · 02 Financial statement · 03 Cash flow · 04 Income statement and planned vs. actual · 05 Overview (dashboards) |
CTB Accounting | 01 Books (Journal, Ledger) · 02 Trial balance · 03 Statements (Income statement, Balance sheet) · 04 Checks (pending items, crop cost) |
Two names in the Reports menu differ from the screen menus, on purpose: Monitoring gathers the pest monitoring reports — scouting, traps and observations, which in the web portal live under the Crop menu — and Post-Harvest gathers load tickets, bales, collection and contracts — what you enter under the Storage menu. Invoices (NF-e list, correction letter) sit under Inventory, because that's where the web portal has the invoice screens.
Custom report: the P in the code
A report built specifically for one farm has a P in place of the number: OPE.01.P12 is a Recommendation sheet report made only for your company. P numbering belongs to your company — another farm may have a different OPE.01.P12, and each one only sees its own. The reports cited in the Help Center are always the standard ones, without P.
What about the old code?
For a few weeks, the old code stays at the end of the name, in parentheses: Ficha de recomendação (INDIVIDUAL) (003.B). The Help Center cites it the same way — OPE.01.01 (formerly 003.B). If you're used to the old number, you can type it in Search report…, which finds reports by either one. After that period, the old number is removed from the name.
🔎 Search report…
It's the first item of the Reports menu, and the quickest way to find a report when you don't remember which area it's in.
- Click Reports and then Search report….
- A window opens with a search field and the list of all reports enabled for you, with the columns Code, Report, Theme and Subject.
- Type in the field: the list filters with each letter. Code, name, theme or subject all work — and so does the old code. No accents needed and in any order: chuva detalhado finds Controle Pluviométrico - Detalhado, and 003.B finds the Recommendation sheet.
- Click the report's row to open it. Only the click opens it — typing or pressing Enter does nothing.
Each column also has its own search field in the header, like other lists in the web portal. In the Theme column, for now, Monitoring reports show as Scouting and Post-Harvest ones as Storage — the same grouping under its old name.
At the end of the menu there are also Other, with reports that haven't received the new code yet, and Files.
🎚️ The filters
When you open a report, the Filters window appears, with the code and name in the title and the notice "Fill in the filters and click 'Generate Report'". Filters change from report to report — location, product, field, period, season, scout —, but filling them in is always one of these:
| Field type | How to fill it in |
|---|---|
| Selection field | Click on the field and the Select window opens, with the full list. Check one or more items and click Done. |
| Date | With the calendar. Many reports ask for a period: Start date and End date. |
| Checkbox | Yes/no boxes, such as Only with balance or Only zero value. |
| Text | Typed by hand. |
In the Select window, each column has its own search field — you can type part of the field name or the sector to find it faster. The None/cancel button clears the choice and closes the window. In filters that accept a single value, clicking the row closes the window and fills in the field.
*) next to the name. If one isn't filled in, the report isn't generated: the system warns "Filling in the field 'X' is required!" and the window stays open. The other fields are optional.
With the filters ready, click Generate report!.
🧰 The generated report's bar
At the top of the screen, next to the report's code and name:
- Reload — runs it again with the same filters. Useful to see the result after entering something else.
- Filters — reopens the filter window so you can change the period, location, field. It's the button for "run it again, but with a different cut", without going back to the menu.
- ✕ — closes the report.
📄 The three output types
What changes from one report to another is how the result is presented. There are three.
1. Report — the visual format
It's the default, and the one most people use: a laid-out sheet, with header, farm logo, groupings and totals, split into pages. Above it is the viewer bar, with Print, Open, Save, page navigation, zoom and search.
Save offers Adobe PDF, Microsoft Word, Microsoft Excel, PowerPoint, HTML, Text, OpenDocument Writer and Calc, Image, Data and Report Snapshot. To file it or send it to someone, PDF; to work with the numbers, Excel — with the caution in the block below.
2. Table — for exporting
Instead of the laid-out sheet, the result opens as a grid on the screen itself, with one tab per query and search in each column. At the top is the Export to Excel button, which downloads exactly what is in the grid.
It's the format for people who want the data, not the sheet: checking balance by lot, cross-referencing with another spreadsheet, sending to the accountant. Some reports exist in both versions — they sit under the same subject, with the table at the end, such as EST.01.01 (formerly 012) - Local X Estoque (Saldo atual) and EST.01.08 (formerly 012.T) - Local X Estoque (Saldo atual) - Tabela.
3. Dashboard — for keeping track
Panels with charts and indicators instead of rows, such as LAV.02.01 (formerly 020) - Dashboard Plantio or EST.01.09 (formerly 012.A) - Dashboard Visão Geral Local x Estoque. They open the same way and are for looking at the big picture — a quick read of the situation, not line-by-line detail. When the dashboard is a Power BI one, it opens in another browser tab.
💡 Missing a filter? It can be created
Filters aren't fixed: each one is a record inside the report. upCampo can add a new filter, change an existing one, rename it, make it required or optional and adjust the list of options it offers.
So if your day-to-day work is missing a cut — filtering by sector, by product class, by scout, by a period on a different date —, ask upCampo. It isn't development: it's an adjustment to the report's setup, and it then applies to everyone who uses that report. The opposite works too: a filter nobody uses that just gets in the way can be removed.
The fastest route is support, via the WhatsApp behind the Request help button on the Help tab of the Home Screen. When you ask, help get it solved the first time: give the report code, which field you want to filter and an example of what you need to see.
🛠️ Who registers and organizes the reports
The catalog — code, name, theme, filters and file of each report — is in File > Report, a setup screen usually handled together with the upCampo team. That's where a report is taken off the menu, the theme it appears under is changed, or a new report is requested.
- Any report in the system works the same way — choose, filter, generate.
- Data reaches Excel ready to use, not as a printed sheet pasted into the spreadsheet.
- You can run the same report with several cuts without leaving the screen, using the Filters button.
❓ Frequently asked questions
The report came out blank. What happened?
It's almost always the filters: a period that doesn't cover the entries, a location or field that isn't the one in the transaction, or the season selected at the top of the system, which applies to everything. Click Filters, widen the period and generate it again.
How do I get the report into Excel to work with the numbers?
If it's a Table report, use the Export to Excel button. If it's the visual format, use Save > Microsoft Excel and, in the window that opens, check Export Data Only — otherwise the spreadsheet comes with the printed sheet's layout and you can't filter or sum.
Can I pick several fields in the same report?
Yes. Click the field, check as many as you like in the Select window and click Done. Some filters are single-value — in those, clicking the row closes the window right away.
I can't find a report in the menu.
Each report is enabled per user, so it may be a permission issue — ask whoever manages the users. It may also be off the menu on purpose: the record in File > Report has a Show in report menu option. Before that, try Search report…, the first item of the Reports menu: it searches every report you can open, including by the old code.
The report I used to use changed code. How do I find it?
In October 2026, upCampo's report codes were reorganized by area and subject — the old 003.B, for example, became OPE.01.01. It's the same report. Open Reports > Search report… and type the old code or part of the name: it shows up with the new code. For a few weeks the old code also stays at the end of the name, in parentheses.
What does the P in a code like OPE.01.P12 mean?
That the report is custom: it was built specifically for your company. Standard ones have a number (OPE.01.01); custom ones, P and a number (OPE.01.P12). P numbering only applies within your company.
What's the difference between the Reports menu and the File > Report screen?
The Reports menu is where you run them. The File > Report screen is where reports are registered and organized — code, name, theme, filters and permissions.
I need to change the period and run it again. Do I have to go back to the menu?
No. Use the Filters button at the top of the report: it reopens the filter window so you can change whatever you want and generate it again.
The report I use is missing a filter. Can it be added?
Yes. Filters are set up inside each report, so upCampo can add a new one, change one, or remove one that isn't used. Ask support, giving the report code, the field you want to filter and an example of what you need to see.
What does the asterisk next to a filter name mean?
That filling it in is required. Without it, the system warns "Filling in the field 'X' is required!" and doesn't generate the report. Fields without an asterisk can be left blank — and, when blank, they don't restrict anything.
🛠 How to track substrate in inventory
Substrate — the mix of rice hulls, coconut fiber, peat or vermiculite in which seedlings are grown — is bought with an invoice, stored at the nursery and used up little by little, bag by bag. In upCampo it is tracked like any other input: it enters through inventory, has a balance, has an average cost and goes out when it is used.
What changes is the outflow. Crop protection products and fertilizers leave inventory inside a work order, which says which field received the application — that is how the cost reaches the field. Substrate has no such destination: it is used at the nursery, the seedbed, the seedling shed. Opening a work order for every bag used would be unworkable day to day, and it would also force you to pick a field that isn't true.
That is why substrate tracking is generic: its own storage location, inflow through the invoice, outflow with no field and no order. The path described here works the same for any material consumed with no area destination — nursery sand and vermiculite, PPE, cleaning supplies, packaging, wire, general-purpose screws.
The path, in four steps
- A storage location of its own, just for substrate.
- Product registration, with the unit in which it is bought and used.
- Balance inflow, through the invoice or as an opening balance.
- Outflow, by one of two paths: outbound movement or requisition.
1️⃣ Create a storage location just for substrate
Menu: Inventory > Storage Location
Register a location with a name the nursery staff will recognize — Substrate, Nursery, Nursery - Substrate. Separating it isn't mandatory, but it is what makes tracking work: the balance is kept apart from the crop protection warehouse, checking is quick and whoever runs the nursery looks only at what is theirs.
There is a technical reason too: in upCampo the average cost is calculated per product and per location, not per product alone. Substrate stored together with everything else goes into the same average for the whole location; in its own location, the average cost shown is the substrate's and nothing else.
2️⃣ Register substrate as a product
Menu: Inventory > Product & Service
Without a registered product there is no inflow, no balance and no outflow — the record supports everything else. Each different substrate is a different product: if the nursery uses one for trays and another for bags, that's two records, and each will have its own balance and cost.
Before creating it, check whether there is a product class that fits — something like Nursery inputs or Materials. The class groups the product in reports and generates the code abbreviation.
3️⃣ Enter the balance
Menu: Inventory > Movement
Inflow is always through Movement, and the header's Type changes with the situation:
| Situation | Type to use |
|---|---|
| A purchase invoice arrived | Inbound with invoice — enter the supplier, the number and the date. If you have the access key, the invoice can be imported and the items come filled in. |
| The substrate is already at the nursery and you are starting to track it now | Standalone inbound — it asks for no supplier or invoice number: just a description of what is being entered, the product, the quantity and the value. |
In either case, what raises the balance is the item. On each line, the field Type - 'this cost GOES TO:' must be set to To inventory, and the Storage Location must be the substrate's.
4️⃣ Outflow: two paths
This is the question behind most support requests. With no field and no work order, there are two ways to take substrate out of inventory, and both have the same effect on the balance. What changes is how much is recorded about who asked for it and why.
| Outbound movement | Requisition | |
|---|---|---|
| Where it is | Inventory > Movement | Inventory > Requisition |
| When to use | Bulk consumption, entered by the storekeeper: the month's usage, a large withdrawal all at once. | Over-the-counter handout, item by item, with a record of who asked. |
| Records the requester | No | Yes — Requester, Department and Priority |
| Cost center | On the item, through the cost destination | On the document header |
| Document has a status | No | Yes — Open or Finalized |
Path A — Outbound movement
Menu: Inventory > Movement
Choose the Type Standalone outbound — the outflow that issues no invoice, which is the case for internal consumption. The header asks for little: a date and a description that explains the entry ("Substrate used at the nursery — September").
On the item, the field is now called Type - 'this cost COMES FROM:'. Keep it on To inventory and choose the substrate location: that combination is what lowers the balance. Enter the product and the quantity.
Path B — Requisition
Menu: Inventory > Requisition
The requisition is the internal request: the nursery worker asks, the storekeeper hands it out, and there is a record of who asked for what and when. For substrate, set the header's Type to Inventory write-off — with this type the screen hides the maintenance work order and activity fields, which have nothing to do with this case.
Fill in the Description (required), the Requester, the Department and, if the farm tracks expenses that way, the Cost Center. Save the header and add the item with Type set to Inventory outflow — the screen then asks for the storage location and shows the Inventory balance next to it, before you promise what you don't have.
💰 Where the substrate cost shows up
It's worth saying clearly, because it's the next question: since there is no field on the outflow, the substrate cost does not go into the cost per field for that season — that number comes from work orders, which are allocated by each field's area.
What is recorded is the consumption: the quantity that went out, the value at the location's average cost and the date. This shows up in the inventory history and in the movement reports. To follow nursery spending that way, the path is the cost center — entered on the requisition header — and the separate storage location itself, which already isolates what belongs to the nursery.
📊 Reports and dashboards
- Nursery balance you can check at any time, without counting bags in the shed
- Substrate average cost isolated from the rest of the storeroom
- Consumption recorded with a date — and, through the requisition, with the name of who asked
- No made-up work orders, and no field chosen for lack of an option
❓ Frequently asked questions
Do I need to create a work order to take substrate out of inventory?
No. The work order exists to take cost to a field, and substrate is consumed at the nursery, with no defined area. The outflow is done directly, through a Standalone outbound on the Movement screen or through a Requisition with an item of type "Inventory outflow". Both lower the balance the same way.
What's the difference between taking it out through Movement and through Requisition?
For the balance, none: both remove the same quantity from the same location. The difference is the record. The standalone outbound Movement is an entry made by the storekeeper, good for bulk consumption. The Requisition keeps who asked, from which department, with what priority and under which cost center, and the document has an Open or Finalized status. Farms with a busy nursery usually prefer the requisition.
I entered the outflow and the balance didn't change. What was missing?
It's almost always the item type. In Movement, the field Type - 'this cost COMES FROM:' must be set to To inventory, with the storage location selected — with the other options (Standalone, To a fleet, To an entity, To a field, To an allocation) the screen doesn't even show the location field, and the item doesn't change the balance. In Requisition, the item type must be Inventory outflow; "Request to purchase" doesn't withdraw anything, because it is a purchase request.
Do I really need a storage location just for substrate?
It isn't mandatory, but it's recommended. In upCampo the average cost is calculated per product and per storage location, so a dedicated location keeps the substrate cost clean, separates the nursery balance from the crop protection warehouse and keeps the balance report readable for whoever looks after the seedlings.
How do I enter substrate that is already at the nursery, without an invoice?
Through a Standalone inbound on the Movement screen: it asks for no supplier or invoice number, just the description, the product, the quantity and the value. The other path is the Inventory count, where you enter the counted balance and the system applies the difference — it's the best choice when you are adjusting several products at once.
Does the substrate cost go into the field cost?
No. The cost per field comes from work orders, allocated by each field's area, and the substrate outflow doesn't go through any order. Consumption is recorded in the inventory history, with quantity, value and date, and can be followed by cost center and by the nursery's storage location.
Is this only for substrate?
No. It applies to any material the farm consumes with no area destination: nursery sand and vermiculite, PPE, cleaning supplies, packaging, wire, general-purpose screws. The product and storage location names change; the path is the same — a dedicated location, a registered product, inflow through Movement and outflow through an outbound movement or a requisition.
🛠 How to scout for pests and diseases in the app
Scouting is the record, made on the phone, of what the technician found while walking a field. In upCampo it lives in the app's Scouting (IPM) menu: at each stop the technician opens a point, enters the crop stage and counts each pest, disease or weed found, tapping Save on each one. All the points in that field on that day make up one scouting, which the agronomist reads on the web portal and the technician can look up later on the phone.
This article is the path for whoever is in the field: getting to the screen, seeing the farm map, scouting point by point and looking up what was done. What each number means and how the web portal compares it with the action threshold is in the Quick Guide - Pest Monitoring.
- Get to Scouting (IPM) and choose the field — from the list or from the farm map.
- Open the point at the stop: stage, plant measurements and OPEN POINT.
- Count what you found: pest, disease or weed, with Save on each one.
- Close the point and walk to the next stop.
- Finish the scouting at the end of the field and let the phone sync.
- Look it up later: field history, point by point and the map of the points.
Before you start
- The app installed — Google Play (Android) or App Store (iPhone).
- The login is the same as the web portal. The administrator creates the user and grants access to the farm, in Users.
- The first update done with internet. After the first login, the app downloads the farm's data. When it finishes, the fields show up in Scouting (IPM). If they don't, the field's Season Planting is almost always missing.
- Location (GPS) turned on. The point stores the coordinate of the stop, and the app won't open a point without it.
In the field, you don't need internet. What you record is stored on the phone and uploads by itself when the signal comes back.
1. Get to Scouting (IPM)
App: ☰ > Scouting (IPM)
There are two ways to the same screen:
- From the Home screen, which opens after login: the big Scouting (IPM) button, in the first row.
- From the side menu: tap ☰, in the top corner, and then Scouting (IPM).
The screen has four tabs: LIST and MAP, to choose the field, and IPM MGMT. ANALYSIS and SUMMARY, to look up what has already been done (step 9).
2. The farm map
App: Scouting (IPM) > MAP
The MAP tab shows the farm's fields over the satellite image, each with its name in the center, plus your position on the map. The Sector filter, at the top, shows only part of the farm — on a farm with distant areas, it is what zooms the map to the area you are in. When varieties have a color in their record, each field appears in its variety's color and the Legend button shows which color is which, with the hectares; with no color, the field stays white.
Tapping inside a field opens its history — the same one that opens from the list. It is the fastest way to find the field you are in.
3. Choose the field and open the scouting
On the LIST tab, each field appears with its crop and how long ago it was last scouted — it helps you see what is overdue. Use the Sector and Field filters to find yours and tap it (or tap the field on the map). The field history opens. Tap the orange + button and then New Scouting.
4. Open the point
App: Scouting (IPM) > field > New Scouting
Each stop in the field is a point. The point opens in the Point Opening block, on the DETAIL tab:
- Tap Stage and choose what phase the crop is in (V4, R5…). The stage decides which action threshold range applies to what you count afterwards.
- Fill in the plant measurements that appear — stand, height, number of nodes. Which ones appear depends on the crop and the farm's settings.
- Tap OPEN POINT.
The screen already shows the Planting Date and the Days After Planting, which come from the planting record.
Where you are and where you've already stopped: the MAP tab
Next to the DETAIL tab is the MAP tab, which shows the field during the scouting:
- the field outline and your position;
- a red pin on each point already done today, with the point number — this is how you see whether your stops are well spread across the area;
- the Distance to edge, at the top, with a red line from your position to the nearest edge — it helps you avoid placing a point right at the field border;
- from the ⋮ menu, Show previous scouting points adds the points from the field's last scouting in yellow, so you can go back near them or cover what was left out.
5. Count the pests
With the point open, the screen shows the Type — the counting method used at that stop — and the Select a Pest/Disease field. Choose the Type before counting:
| Type | How it is counted |
|---|---|
| Plant | A number of plants at the point are examined, one by one. Enter how many plants you assessed in the Qty field. |
| Beat cloth | The cloth is laid between two rows, the plants are shaken and whatever falls is counted. No quantity is asked. |
| Meter | What is found in linear meters of row is counted. Enter how many meters you assessed in the Qty field. |
Which of these types appear, and which one comes preselected, is set by the farm in the Crop record. The type gives meaning to the number: five caterpillars on a beat cloth is not the same information as five caterpillars on a hundred plants examined.
Then tap Select a Pest/Disease. On the point's first pest, the app asks you to confirm the quantity assessed; check it and tap OK.
The Pest and size screen opens, with the list of pests. To find the one you found:
- Type — Pest, Disease or Weeds. The app remembers the last one you used.
- Class — Caterpillars, Stink bugs, Mites… All shows the whole list for that type.
- The magnifying glass, at the top, searches by pest name.
Tap the pest name (or the + next to it) to open its fields and fill them in according to what appears:
| What appears | How to record |
|---|---|
| A Value field with − and + | How many individuals you counted. Tap + once per individual or type the number. |
| Preset options (Present, Low, Medium, High…) | Choose the one that describes what you saw. None (clear selection) undoes it. |
| One row per size (Larva, Adult, small, large…) | Fill in each size you found. The ones that didn't appear stay blank. |
Which fields each pest has is defined in its record, in Basic > Pest.
After filling it in, tap Save, on the pest itself. The app confirms with Saved successfully!. Repeat for each pest found at the point. What was saved appears in the Found at Point list, on the point screen.
6. Diseases and weeds
It is the same path as step 5, changing only the Type at the top of the list: Disease for rust, target spot, ramularia and the like; Weeds for invasive plants. Diseases are usually assessed by score or by preset options (for example Low, Medium, High), but each one's record decides: if a number field appears, count; if options appear, choose.
And the same rule applies: Save on each one.
Photo: on the point screen, the camera icon at the top (Take Photo) records what you are seeing — a lesion, a caterpillar, a patch. The photo is attached to the point, and it can only be taken after the point has some record. A point with a photo shows the With photo(s) shortcut.
7. Close the point
Counted everything you found at that stop? Tap CLOSE POINT (the button carries the point number: CLOSE POINT 1) and confirm with Yes. The app closes that stop and gets the next point ready. Walk to the next stop and repeat steps 4 to 7.
- Didn't find any pest, disease or weed? Close it the same way. A point with the opening done (stage and measurements) is already a record: that is how the system knows you passed there and found nothing — and that point counts in the field averages.
- What can't be closed is a point without the opening. If you didn't tap OPEN POINT, the app warns that the point has no record: do the opening first.
8. Finish the scouting
At the end of the field, tap Finish Scouting, at the bottom of the point screen. The app closes the point that was open and returns to the field. (With the keyboard open the button disappears: close the keyboard.)
Then, with signal, the phone sends everything by itself. While there is anything to upload, the Scouting (IPM) list shows the notice There are items pending sync. Click here to send to the server., with the pending count; tapping it forces the upload. When the notice disappears, it has been uploaded.
Going back to the scouting on the same day
Stopped for lunch, finished another field, closed the app? To go back to the scouting on the same day, just open the scouting again: tap the field, the + and New Scouting. The app continues from the point after the last one closed, and all the day's points go into the same scouting — nothing is lost and no new one is started.
The next day, it resets: the app starts a new scouting, from point 1, with that day's date. Yesterday's stays in the field history.
9. Look up the scouting later
The field history
Tap the field (in the list or on the map). The IPM HISTORY(SUMMARY) tab shows the scoutings, newest to oldest. Each one has a header with the date, who did it, the stage, the days after planting and how many points. Only the most recent comes open: tap the header of a date to open or close its summary, with each pest's value. Each date has two buttons:
- REPORT — generates the report for that day's scouting.
- DRILL DOWN — opens the scouting point by point (below).
Next to it are the WORK ORDER/APPL. tab, with the season's work orders for that field, and the DETAILS tab, with the planting data and the last scouting.
The points on the map: DRILL DOWN
DRILL DOWN opens the day's Detail screen, with two tabs:
- Point by Point — the table of each point with what was counted there.
- Map — the field outline and a pin on each point, with its number and who did it. In Select a Pest/Size here, choose a pest: with Values, the map shows each point's value; with Interpolated map, it paints the field in patches of Low (green), Medium (yellow) and High (red) — that is how you see where the hotspot is. When two technicians scouted the field on the same day, the Monitor selector separates each one's points.
All fields at once: IPM MGMT. ANALYSIS and SUMMARY
In Scouting (IPM), the IPM MGMT. ANALYSIS tab lists the scoutings for a period (choose the Period or the dates, the User if you like, and tap APPLY FILTER), with field, date, number of points and who did it. The SUMMARY tab builds, with that same filter, a table of field by pest, with the Type filter (All, Pest, Disease, Weeds); tapping a value opens the pest's detail. It is how the technician sees, on the phone, a snapshot of the day across several fields.
On the web portal, the same scouting appears in the scouting panel of the Home Screen, with the action threshold color, and on the Scouting screen.
Correcting a wrong entry
- Still on the pest list: set the value back to zero (or choose None (clear selection)) and tap Save. The entry is removed from the point.
- On the point screen: tap the item in Found at Point. It goes back to the form: correct it and tap Save. To delete it, with the item selected, use the ⋮ menu and Delete.
- After it has uploaded: the agronomist checks and corrects it on the web portal, on the Scouting screen.
- Each stop is recorded with stage, coordinate, time and who did it.
- The technician sees on the map where they've already stopped and looks up any past scouting on the phone, point by point.
- The agronomist sees the scouting on the web portal minutes after the phone gets signal, with the action threshold color.
❓ Frequently asked questions
How do I mark pests and diseases in the app?
Through scouting: in the upCampo app, go to Scouting (IPM), tap the field, the + and New Scouting. At each stop, open the point with the stage, choose the pest or disease from the list (changing the Type to Disease when needed), fill in the count and tap Save. Close the point and move on to the next one.
I counted the pest in the app, but it doesn't show up at the point. What happened?
You didn't tap Save. In the upCampo app, tapping + or choosing an option only changes the screen; the entry goes into the point when you tap Save, on the pest itself. If you went back without saving, the app warned that there were unsaved items and they were not stored — enter them again and save.
I can't find the pest or disease in the app's list. Why?
First check the Type at the top of the list: diseases only appear with Disease selected, and weeds with Weeds. Then the Class (leave it on All) and the magnifying glass, which filters by the text you type. If it still doesn't appear, the pest isn't registered for that field's crop — ask whoever handles the records on the farm to add it in Basic > Pest.
How do I see on the map where I've already made points today?
During the scouting, open the MAP tab, next to DETAIL: each of the day's points appears as a red pin, along with your position and the distance to the edge. From the ⋮ menu, Show previous scouting points shows the field's last scouting points in yellow.
How do I see the points from an old scouting?
In the upCampo app, tap the field, open the date in IPM HISTORY(SUMMARY) and tap DRILL DOWN. The Point by Point tab shows what was counted at each point, and the Map tab shows the points on the field — choosing a pest, you can see each point's value or the interpolated map in Low, Medium and High.
I closed the app in the middle of the field. Did I lose the scouting?
No. On the same day, just open the scouting again — field, + and New Scouting: the upCampo app continues from the point after the last one closed, and everything goes into the same scouting. Only the next day does it start a new scouting, from point 1.
The app says "Location not found" and won't open the point. What do I do?
Turn on the phone's location (GPS) and wait a few seconds: the upCampo app only saves the point after it receives the position, because each point stores the coordinate of the stop. If location is turned off in the device settings, the app warns you and closes the screen — turn it on and open it again.
What's the difference between closing the point and finishing the scouting?
Closing the point ends one stop and moves to the next, within the same field. Finishing the scouting is for when you've finished the field: it closes the open point and returns to the list. All the field's points on that day make up a single scouting.
Do I need internet to scout in the field?
No. The upCampo app stores everything on the phone and sends it when the signal comes back. While there is anything to send, the Scouting (IPM) list shows the pending items notice; when it disappears, the data is already on the web portal. Only the first update, right after login, needs internet.
I found nothing at a point. Do I still need to record it?
Yes: open the point (stage and measurements) and close it. The opening is already a record and proves the stop was made — the point closes even without any pest, disease or weed. In upCampo, the total number of points walked is the divisor of the field averages, so skipping clean points makes the result higher than reality.
I entered the wrong pest. How do I delete it?
On the point screen, tap the item in Found at Point and use the ⋮ menu → Delete. While still on the pest list, you can also set the value to zero (or choose None (clear selection)) and tap Save. After the scouting has uploaded, the correction can also be made on the web portal, on the Scouting screen.
🛠 How to monitor the cotton boll weevil
The boll weevil (Anthonomus grandis) is tracked in upCampo along two paths that complement each other: the pheromone trap, which shows whether the insect is arriving and how fast, and the count in the scouting, which shows what it is already doing inside the field. Both end up in the same place — the dashboard and the reports the agronomist reads to decide.
This article shows the whole path: what needs to be registered, how the technician records each thing in the app and where the result shows up.
- The pest is registered with the measurements the technician will use and with the action threshold.
- The traps are installed in a group of their own and checked from time to time, with pheromone replacement.
- During the season, the boll weevil goes into the scouting, counted point by point along with the other pests.
- The result is read on the trap dashboard and in the reports.
1. The pest record
Menu: Basic > Pest
The boll weevil is registered like any pest; what changes is what is measured on it. Instead of a single count, the record usually has four measurements — what the system calls sizes:
| Measurement | How the technician answers |
|---|---|
| Adult per point | Number: how many adults were seen at that point. |
| Larva | Presence: you mark that it was found, without typing a quantity. |
| Egg-laying | Presence — the flower bud with the oviposition puncture. |
| Feeding | Presence — the feeding damage on the structure. |
The three presence measurements exist because, with the boll weevil, finding the sign is already information: often the insect doesn't show up, but the damage does. All four use the calculation method Points average, meaning the field result is the total divided by the points walked.
2. Pheromone traps
Menu: Basic > Trap Group and Crops > Trap x Season
The boll weevil trap belongs to a group of its own, separate from moth traps. The group is what gives the capture ranges their names and colors. In the example below, the farm named the ranges in BAS — boll weevils per trap per week:
| Range | Color |
|---|---|
| 0 BAS | green |
| 0 to 1 BAS | blue |
| 1 to 2 BAS | yellow |
| Above 2 BAS | red |
That color paints each trap's side bar in the app list and its pin on the map — and it is what lets the technician see, at a glance, where captures went up.
Traps are registered per season, one by one, and can be created on the phone itself, at the spot where they are being installed — with number, sector and GPS location. In the app list, the Trap Group filter lets you see only the boll weevil ones.
Each visit becomes a check, and that is where the Classify field comes in: Check or Check + pheromone replacement. Marking the replacement matters because pheromone loses attractiveness over time — a trap with an old lure catches less, and without that record there is no way to tell whether the drop came from the insect or the bait.
Recording zero is part of the job. A check with Pests found? = No is what separates an inspected, empty trap from a trap nobody went to check — in the list, the latter shows as Never.
The full step by step for the screen, with all the fields, is in Trap x Season.
3. The count in the scouting
App: Scouting (IPM) > field > New Scouting
Once the crop is standing, the boll weevil is counted inside the scouting, along with the other pests: the technician walks the field and at each point enters what was seen. The three presence measurements are marked when the sign appears; Adult per point gets the number.
In the field history, inside the app, the boll weevil appears with its measurements side by side. Each one's result comes out in the measurement's format: presence measurements show in what percentage of the points the sign was found, and Adult per point shows the average — and comes out in red, because the registered range starts at zero.
In the example farm's 2026 cotton season, there were 302 adult records across 47 fields, from February to July — plus the feeding, egg-laying and larva marks. That set is what feeds the field result and the comparison with the action threshold.
4. Where the result shows up
Web portal: upCampo > Trap and Reports
On the web portal's home screen there is the Trap tab, with period, sector and group, which shows the checks as a Map or a Table — by group, sector, date, classification, field and quantity.
Choosing Trap Group equal to BICUDO and the period, the tab shows check by check — with the classification and the quantity captured in each:
In the reports, the Scouting theme has the three that deal with traps and the ones that read the scouting count:
The period's checks, trap by trap.
Captures grouped by week — the view that shows the curve rising or easing off, and the one that lines up with the group's BAS ranges.
Lists what exceeded the registered threshold. With the boll weevil's zero tolerance, any occurrence ends up here.
The pest's evolution over the season, to compare dates and fields.
How to run them is in the Quick Guide - Reports.
- The insect's arrival shows up in the trap before the damage shows up in the field
- Pheromone replacement is recorded, so a drop in captures can be interpreted with confidence
- Damage inside the crop is counted point by point, not just the adult insect
- Any occurrence above the registered threshold shows up in the action threshold report
❓ Frequently asked questions
Why does the boll weevil record have larva, egg-laying and feeding instead of a single count?
Because with the boll weevil the sign of damage usually appears before the insect. In upCampo, each of these measurements is a size of the pest: Larva, Egg-laying and Feeding are marked as presence, and Adult per point gets the number of insects seen at the point.
Do I need to record the check when the trap is empty?
Yes. Record it with Pests found? = No. That is what distinguishes an inspected, empty trap from one nobody went to check — the latter keeps showing as Never in the app list, and drops out of the weekly views.
Where do I record the pheromone replacement?
On the check itself, in the app: the Classify field has Check and Check + pheromone replacement. Choose the second option on the visit when the lure was replaced. Avoid correcting that check on the web portal afterwards: when you save from the Checks tab, the classification is stored blank.
What do the trap colors in the list and on the map mean?
They are the trap group's level ranges. In the example boll weevil group they go from 0 BAS (green) to Above 2 BAS (red), through blue and yellow. The ranges are defined by quantity captured, and their names are chosen by the farm.
Is the boll weevil trap only for the off-season?
No. In upCampo the trap is registered per season, and the same farm keeps boll weevil traps in both cotton and soybean seasons. The trap tracks the insect's pressure; during cotton, it works alongside the count done in the scouting.
Which report shows boll weevil captures week by week?
MON.05.02 (formerly 002.Q) - Lev. de armadilhas por semana por setor and MON.05.03 (formerly 002.R), which does the same by field. For the count done in the scouting, use MON.04.02 (formerly 002.M) - Evolução de praga; and MON.04.04 (formerly 002.J) lists what exceeded the action threshold.
🛠 How the John Deere integration works
The integration with John Deere brings into upCampo the work that the machines already record on their own in the Operations Center: how many hectares each field received, on which day, with which machine, in how much time and with how much fuel. Instead of someone typing the work order's execution at the end of the day, the order fills itself in with what the sprayer, the tractor or the harvester recorded in the field.
And it also sends information the other way: the farm's weather stations and rain gauges show up on the Operations Center map with rainfall and weather, and the application map of each field, made in Field maps, can be sent to the matching field.
This article shows the whole path, from setup to result: how to connect the farm's John Deere account, what has to be linked between the two systems, how upCampo figures out which work order each John Deere operation belongs to, what appears on the order's two execution tabs and where that number ends up — on the operations, yield and machine dashboards.
The setup is done once, in this order:
- Connect the farm's John Deere account and approve upCampo's access.
- Link the farm to the John Deere organization, in the Farm record.
- Link each upCampo field to the matching John Deere field.
- Link each activity type to the John Deere operation type.
- Write the order's Ide. Res. exactly like the product the operator enters in John Deere.
From then on it is automatic: the machine works, upCampo finds the work order, and the area and the per-machine detail go into it — and feed the dashboards.
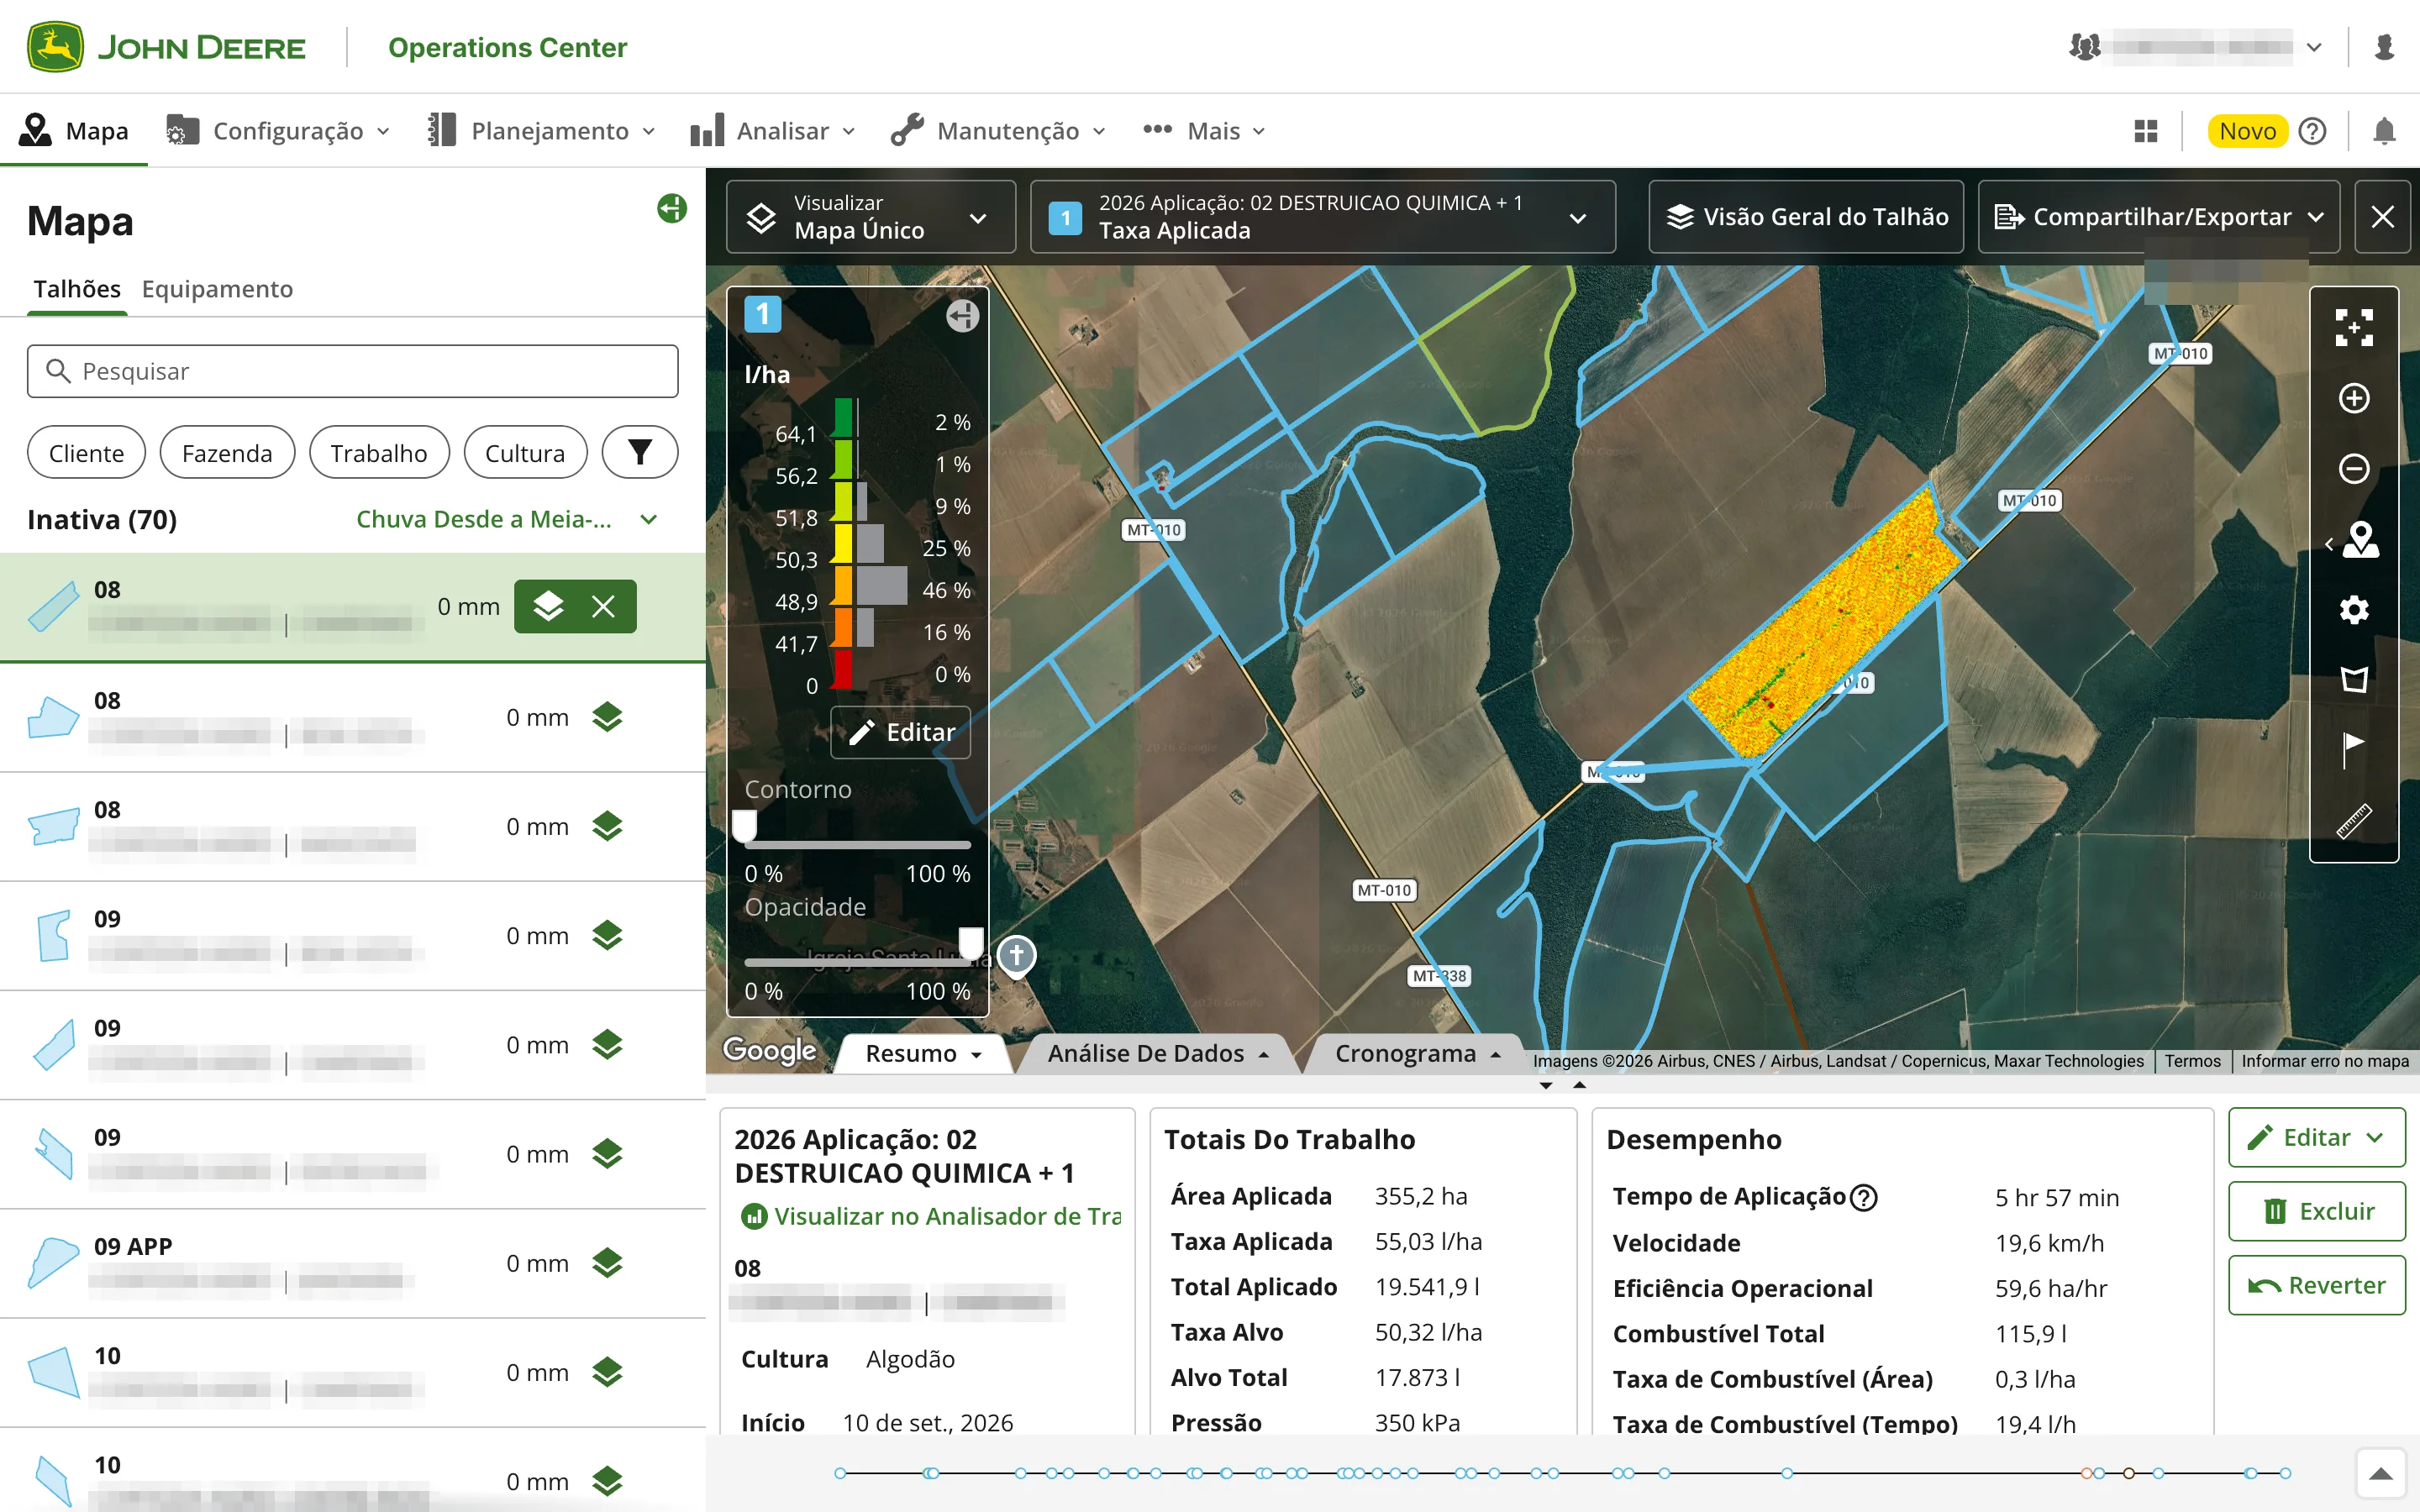
🧩 What the integration brings — and what it doesn't
The integration runs both ways. From the Operations Center into upCampo comes the work the machines recorded. From upCampo to the Operations Center go the farm's weather stations and rain gauges and the application map of each field. The operation recorded by the machine is read only: upCampo does not change or delete anything the display recorded.
⬇️ From John Deere to upCampo
| It brings | It does not |
|---|---|
| The area worked in each field, per day | It does not create work orders — the order has to exist beforehand |
| Machine, hours, liters of diesel, speed, width and applied rate | It does not deduct inputs from inventory or post product cost |
| The yield and total quantity applied or harvested in the operation | It does not fill in the operator as an upCampo employee |
| The cotton bales produced by the harvester | It does not touch aerial application orders |
⬆️ From upCampo to John Deere
| What is sent | How it shows in the Operations Center | Where to turn it on in upCampo |
|---|---|---|
| The farm's weather stations and rain gauges, with today's, yesterday's, 7-day and 30-day rainfall and, for stations, temperature, humidity and wind | A point on the Map, Assets tab, with the rain gauge's name; the readings update on their own every 30 minutes | In the Rain Gauge record, the option Send to John Deere Operations Center |
| The application map of each field — applied rate, deviation from target, passes or coverage, with the legend | A map item on the field, with the name chosen when sending, next to the machine's operations | In Crops > Field maps, the Send to Operations Center button |
Weather stations and rain gauges. What goes to the map is an active rain gauge, with
latitude and longitude, on a farm already linked to the John Deere organization (step 2). Check the option in the
record and save; the first send happens within 30 minutes. Each one's status appears in
File > Integrations, on the John Deere card, Stations in Operations
Center tab: On the map, Waiting for the first send, No location or
Farm without John Deere ID. That is also where the Send now,
Rename (changes the name shown on the map) and Remove from map buttons are; the last one removes
the point and the readings from the Operations Center and unchecks the option in the record.
Application map. On an application map that has already been processed, Send to Operations Center opens a window where you choose what to Show (one or more views, which go together as layers of the same item), the Product and the Name in Operations Center. One item is sent per field. Resending with the same name replaces the previous one; with a different name, it creates a new item. The list of sends, in the same window, shows the status of each one (Sent, Replaced, Deleted) and has the trash icon to Delete from Operations Center.
1. Connect the John Deere account
To read the operations, upCampo needs the grower themselves to authorize, in John Deere, access to their organization's data. That authorization is done through a connection link:
- Ask the upCampo team for the link. It arrives by WhatsApp, is valid for 7 days and can be used only once. Anyone with access to the Farm record can also generate it there (see the box below).
- Open the link and sign in with your John Deere account — the farm's Operations Center account, with your own username and password. You sign in on John Deere's own website: upCampo never sees the password.
- Approve upCampo's access on the screen John Deere shows next.
- If John Deere opens the Operations Center approval screen, it means an organization on the account has not yet authorized upCampo: review and save. When you save, John Deere sends you back to the upCampo page.
- Check the "John Deere account connected" page. It lists the organizations the account can see, each one marked as authorized for upCampo or awaiting approval.
Ideally, the connection is made by an organization administrator in John Deere: that way the approval in step 4 happens right away, without depending on someone else.
Organization "awaiting approval". A John Deere account can see more than one organization. If any of them shows as awaiting approval in Operations Center, an administrator of that organization still needs to approve upCampo's access inside the Operations Center. Until that happens, that organization's data does not come in — the others keep working normally. John Deere takes you to the approval screen for only the first pending organization; the others are approved by each one's administrator directly in the Operations Center, and then you click Refresh organizations in the web portal's connection window.
The connection is made once. Access renews on its own, without anyone signing in again. It only drops if the account owner revokes upCampo's authorization in John Deere, changes the password or leaves the organization. In that case the account shows in the connection window as Refused — connect again: generate a new link and repeat the steps above.
John Deere connection button. In the
Farm record, next to the
John Deere ID (integration) field, the button opens the
John Deere Operations Center connection window. It shows the company's John Deere accounts already
connected, with each one's organizations marked as authorized or
awaiting approval in Operations Center, and it has the
Connect John Deere account button, which generates the same connection link — to open it
(Open John Deere sign-in) or copy it and send it to whoever has the farm's John Deere
username. After finishing the connection, click Refresh. Anyone without access to that
record asks the upCampo team for the link.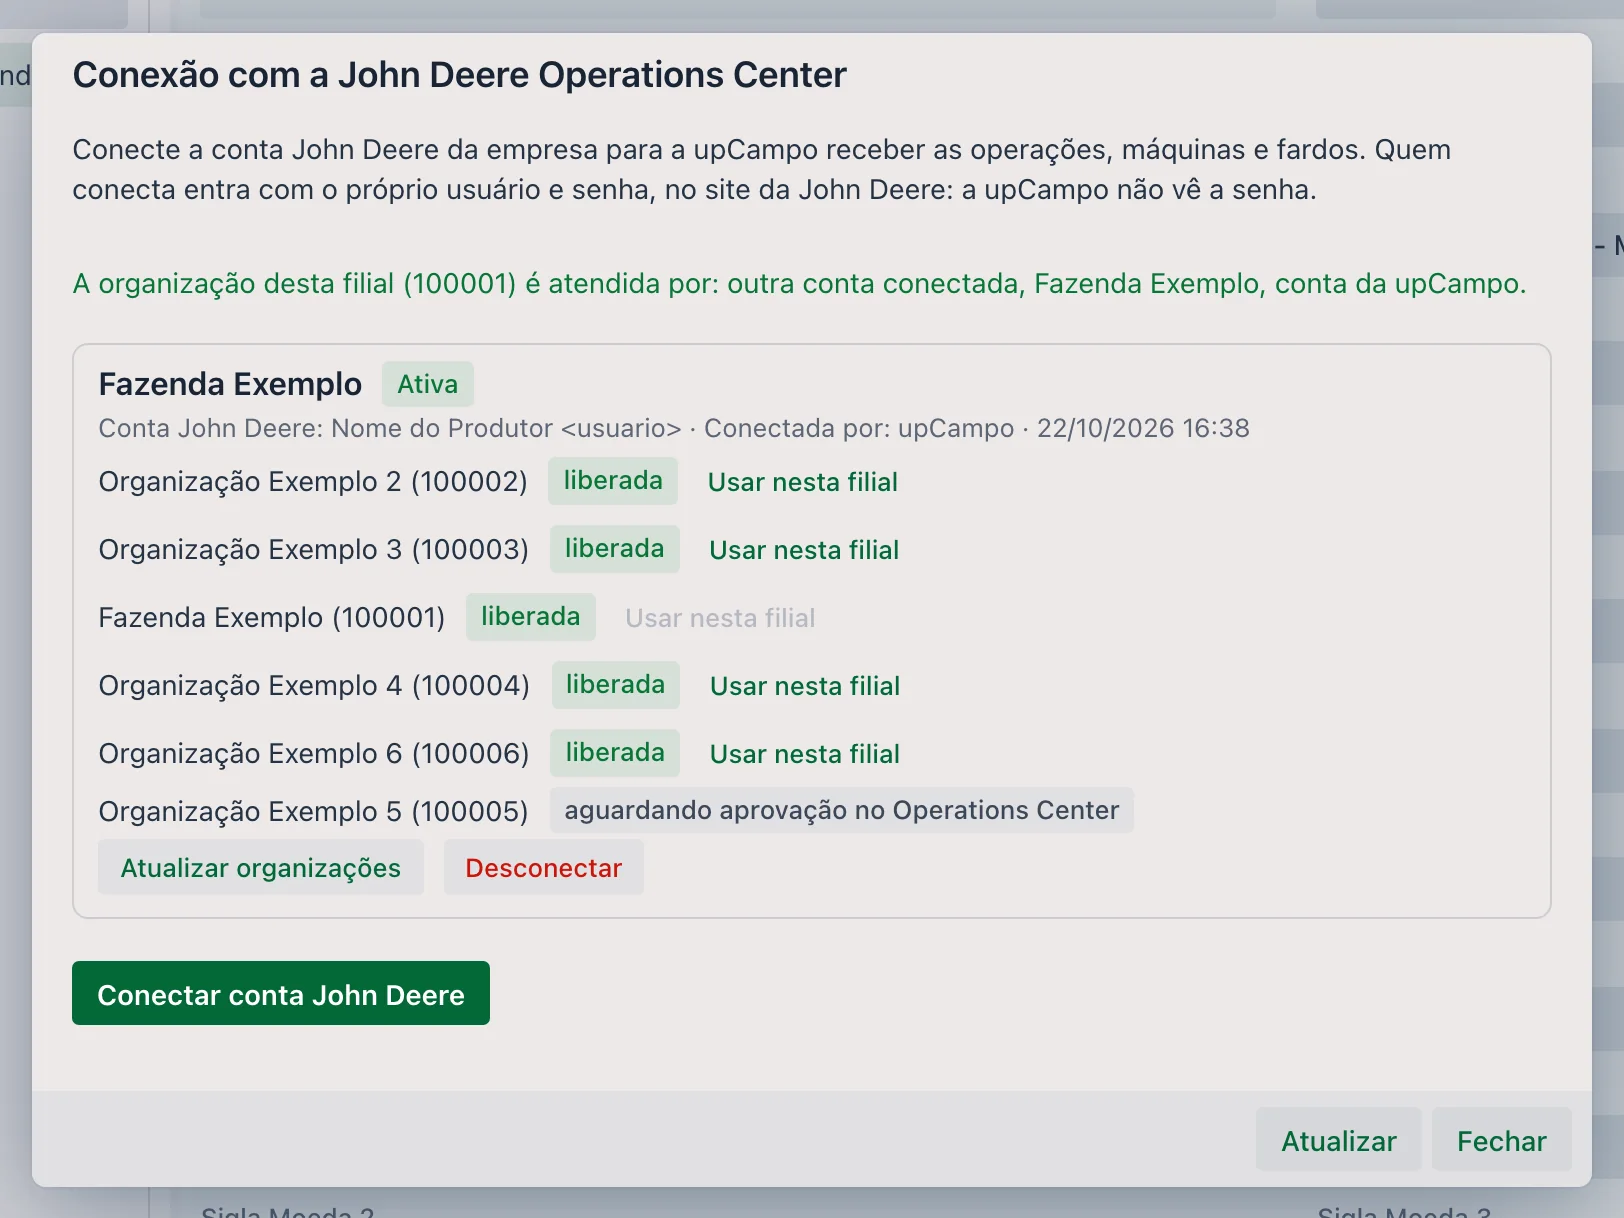
2. Link the farm to the John Deere organization
Menu: File > Farm — John Deere ID (integration) field
In John Deere, a grower's fields, machines and operations live inside an
organization. The John Deere ID (integration) field in the Farm record says
which organization matches that farm — it is what makes upCampo fetch the right fields and
operations.
In the window of the John Deere connection button, each authorized organization has the
Use in this farm button, which fills in the field without typing the code; then just
save the farm. If you prefer, the upCampo team does this step together with the
connection.
3. The upCampo field is linked to the John Deere field
Menu: Crops > Field — Integration tab
Both systems have the same field registered, each with its own internal code. The Integration tab of the Field record is where you say that field 08 – CAMPINAS in upCampo is the same 08 in John Deere. Repeat for every field that will receive John Deere operations.
On the tab, the John Deere Integration ▼ button holds what you use day to day:
| Option | What it does |
|---|---|
| Refresh Options | Fetches the organization's current field list from John Deere. It is the first step when a new field was created there. |
| Select JD Field | Opens the list of John Deere fields (name, farm, type and last change). When you pick one, the ID, description and sector fill in on their own. |
| Open Last JD Operation / Open All JD Operations | Open the John Deere response window with what John Deere returns for that field, in the technical format it sends. They are for confirming the link responds; to interpret the content, ask the upCampo team for help. |

The tab's list shows the saved link: Description, Sector,
ID (the field's code in John Deere) and Type, which here is
Jonh Deere. The same tab serves other integrations — that is why the Type field exists.
4. The activity type is linked to the operation type
Menu: Operations > Work Order/Activity Type — Operation tab
John Deere classifies all field work into four types. upCampo works with the farm's activity types — Crop Protection Spraying, Disking, Planting, Harvest. The Operation tab is the mapping between the two:
| Type in John Deere | What it is |
|---|---|
Application | Application — crop protection, liquid fertilizer, burndown |
Seeding | Seeding / planting |
Harvest | Harvest |
Tillage | Soil preparation — disking, subsoiling |
These four names are registered once in
Operations > Operation, and the Description there must be exactly the name
John Deere uses (Application, Seeding, Harvest,
Tillage) — it is by this text that the two sides recognize each other. Then, in each activity
type, the Operation tab gets a line linking that type to the matching operation. The
Quick/Dynamic Import button creates these lines all at once.
The same line has the Equipment field, which reserves a fixed fleet unit for whatever comes in through that operation. Since the imported execution does not bring the machine that worked — it brings the area of the whole operation —, the usual practice is to use a generic fleet unit there, John Deere Integration, which marks in the list what came from the integration and what someone typed.
Application.5. The Ide. Res. is the product name in John Deere
Menu: Operations > Short ID (Subtype)
Ide. Res. is how the web portal abbreviates the short identification: the subtype that tells one order apart from another within the same activity type — 02 DESTRUICAO QUIMICA, FERT KCL, PLANTE E APLIQUE.
This is the fine-grained key of the integration. In the Operations Center, the operator records the operation entering the product applied; John Deere stores that name with the operation. upCampo reads that name and looks for the work order with the same Ide. Res. — text for text.
That is why the field rule is short: the product name in John Deere and the order's Ide. Res. must be written the same way. That is how a September 8 operation on field 08 finds the right order, and not the order for another application on the same field.
Two exceptions, which do not depend on the name:
- Planting (
Seeding) — the order is found if it is marked as a planting order. - Harvest (
Harvest) — likewise, if it is marked as a harvest order.
For soil preparation, the name used is the tillage type entered in John Deere.
🔎 How upCampo picks the work order
Every twenty minutes upCampo asks John Deere what is new on the linked fields — and John Deere also notifies when it closes an operation. For each operation received, the order search follows this list:
| Condition | Detail |
|---|---|
| Same field | The field linked in step 3, within an active season |
| Compatible activity type | Through the mapping in step 4 |
| Same Ide. Res. | Or a planting/harvest order, in the two cases of step 5 |
| Order not finalized | An order already finalized no longer receives area |
| Cannot be an aerial application | An order marked as aerial stays out of the integration |
| Compatible date | The order cannot be scheduled for more than 60 days after the end of the operation |
If more than one order meets all of this, the one with the planned date closest to the start of the operation wins; if it is still a tie, the one registered last.
6. What reaches the work order
Menu: Operations > Work Order/Activity
The operation found becomes a record on two different tabs of the order, with different purposes.
4 - Execution tab: the area that counts
It is the regular execution tab, the same one someone would fill in by hand. The integration adds a line there per field and per day, with:
| Column | What comes from John Deere |
|---|---|
| Date | The day of the work |
| Area | The hectares worked on that field |
| Field | The linked field |
| Fleet | The integration's generic fleet unit — not the machine that worked |
| Hours Qty | Left at zero: the real hours are on the next tab |
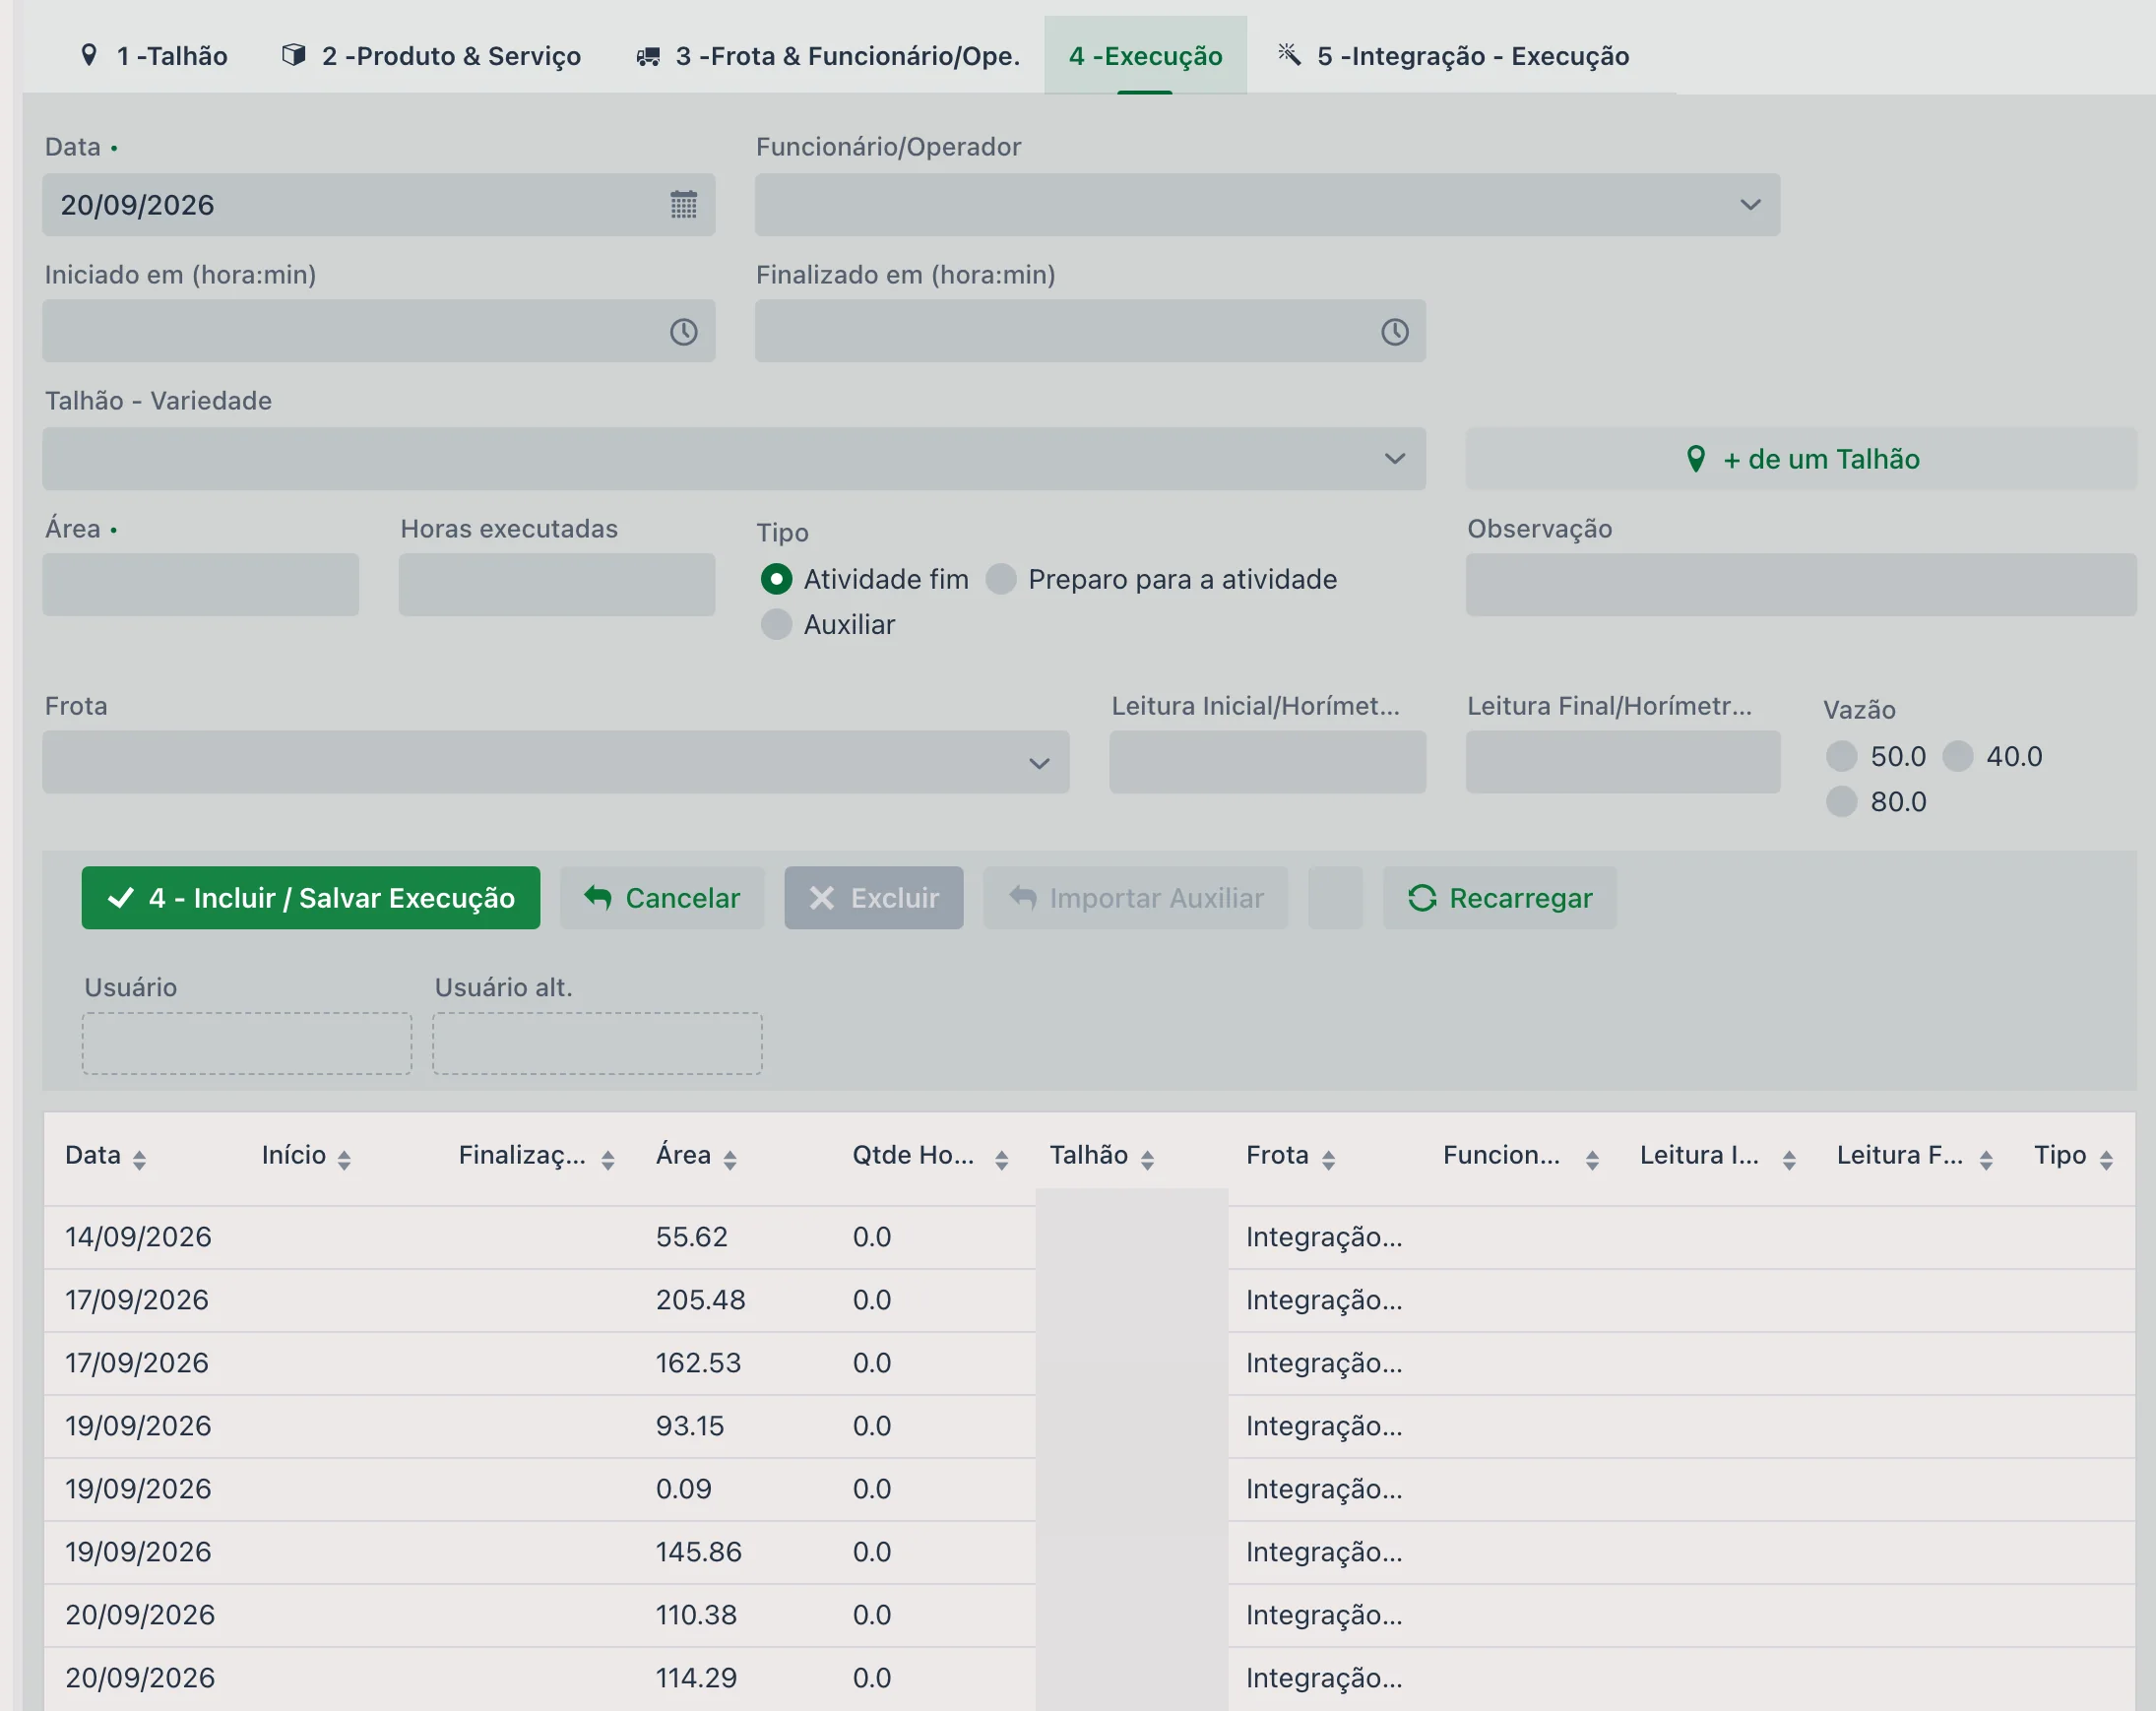
It is this area that adds up in the order's % Executed and in the list's Area exec. column — the number the manager looks at to know how much of the order is already done.
5 - Integration - Execution tab: machine by machine
This tab only appears when the farm has the John Deere integration. It shows the detail the execution tab does not carry: one line per machine and per day.
| Column | What it shows |
|---|---|
| Date | That machine's working day |
| Area | The hectares that machine covered that day |
| Hours Qty | The hours of actual work, in decimal |
| Field | The field |
| Fleet | The real machine, recognized by the chassis or serial number |
| Integration ID | The operation's code in John Deere |
Above the list, the Area and Qty label totals what is being shown. Stored in the record alongside it are also the fuel used, the average speed, the working width, the target rate and the applied rate — those are the numbers that feed the machine dashboard.
The tab's buttons:
| Button | What it does |
|---|---|
| Reload | Rereads the list, without going to John Deere |
| Delete | Deletes the selected line |
| Open Operation in JD | Opens that operation inside the Operations Center, in another browser tab — it is the way to check the number at the source |
| Force New Integration | Tells upCampo to fetch the selected line's operation again |
| Force New Integration - Enter Operation ID | The same, typing the operation code by hand |
| Integration Issue | Opens the Integration Issues screen without leaving the order |
⏱ How long it takes to appear
Once set up, the integration runs on its own — no one needs to press a button for it to fetch:
- Every 20 minutes upCampo asks John Deere what is new on the linked fields.
- When John Deere notifies that a new operation was recorded, upCampo fetches it right away, without waiting for the next round.
The order's two tabs, however, do not necessarily arrive together:
| What | Where it comes from | When it appears |
|---|---|---|
Total area on the 4 - Execution tab | The operation summary | On the first fetch after John Deere records the operation |
Lines per machine and per day on the 5 - Integration - Execution tab | The operation's map file, with each machine's point-by-point track | It can take longer: John Deere has to generate that file, and when it is not ready yet upCampo tries again on a later fetch |
That is why it is normal to see the area already posted on the order and the machine tab still empty for a while. If
you need the detail sooner, Force New Integration - Enter Operation ID, on the
5 - Integration - Execution tab, requests the operation again.
⚠️ When the operation finds no order
Menu: File > Integration Issues
An operation that arrives and finds no order is neither lost nor made up: it becomes a record on that screen, with the field, the operation type, the text that came in place of the Ide. Res. and the start date. There are two reasons upCampo records on its own:
- Order not found — there was no open order with that Ide. Res. on that field, or one of the conditions in the list above was not met.
- Area greater than a thousand hectares — the operation came with an area too large to be real for one field. In that case upCampo does not even look for an order: it records the problem and waits for review.
The normal way to fix it is to correct what was wrong — create the order, fix the Ide. Res., link the field — and use Force New Integration on the order, entering the operation code.
📊 Where the result shows up
The imported work does not stay only inside the order. It shows up, the same day:
- In the work order list — in the Area exec. and % Executed columns, which now move on their own.
- In the operations reports — any report that adds up executed area by field, by Ide. Res. or by period already counts what came from the integration.
- On the farm's TV dashboards, which upCampo builds to order and publishes at their own address.
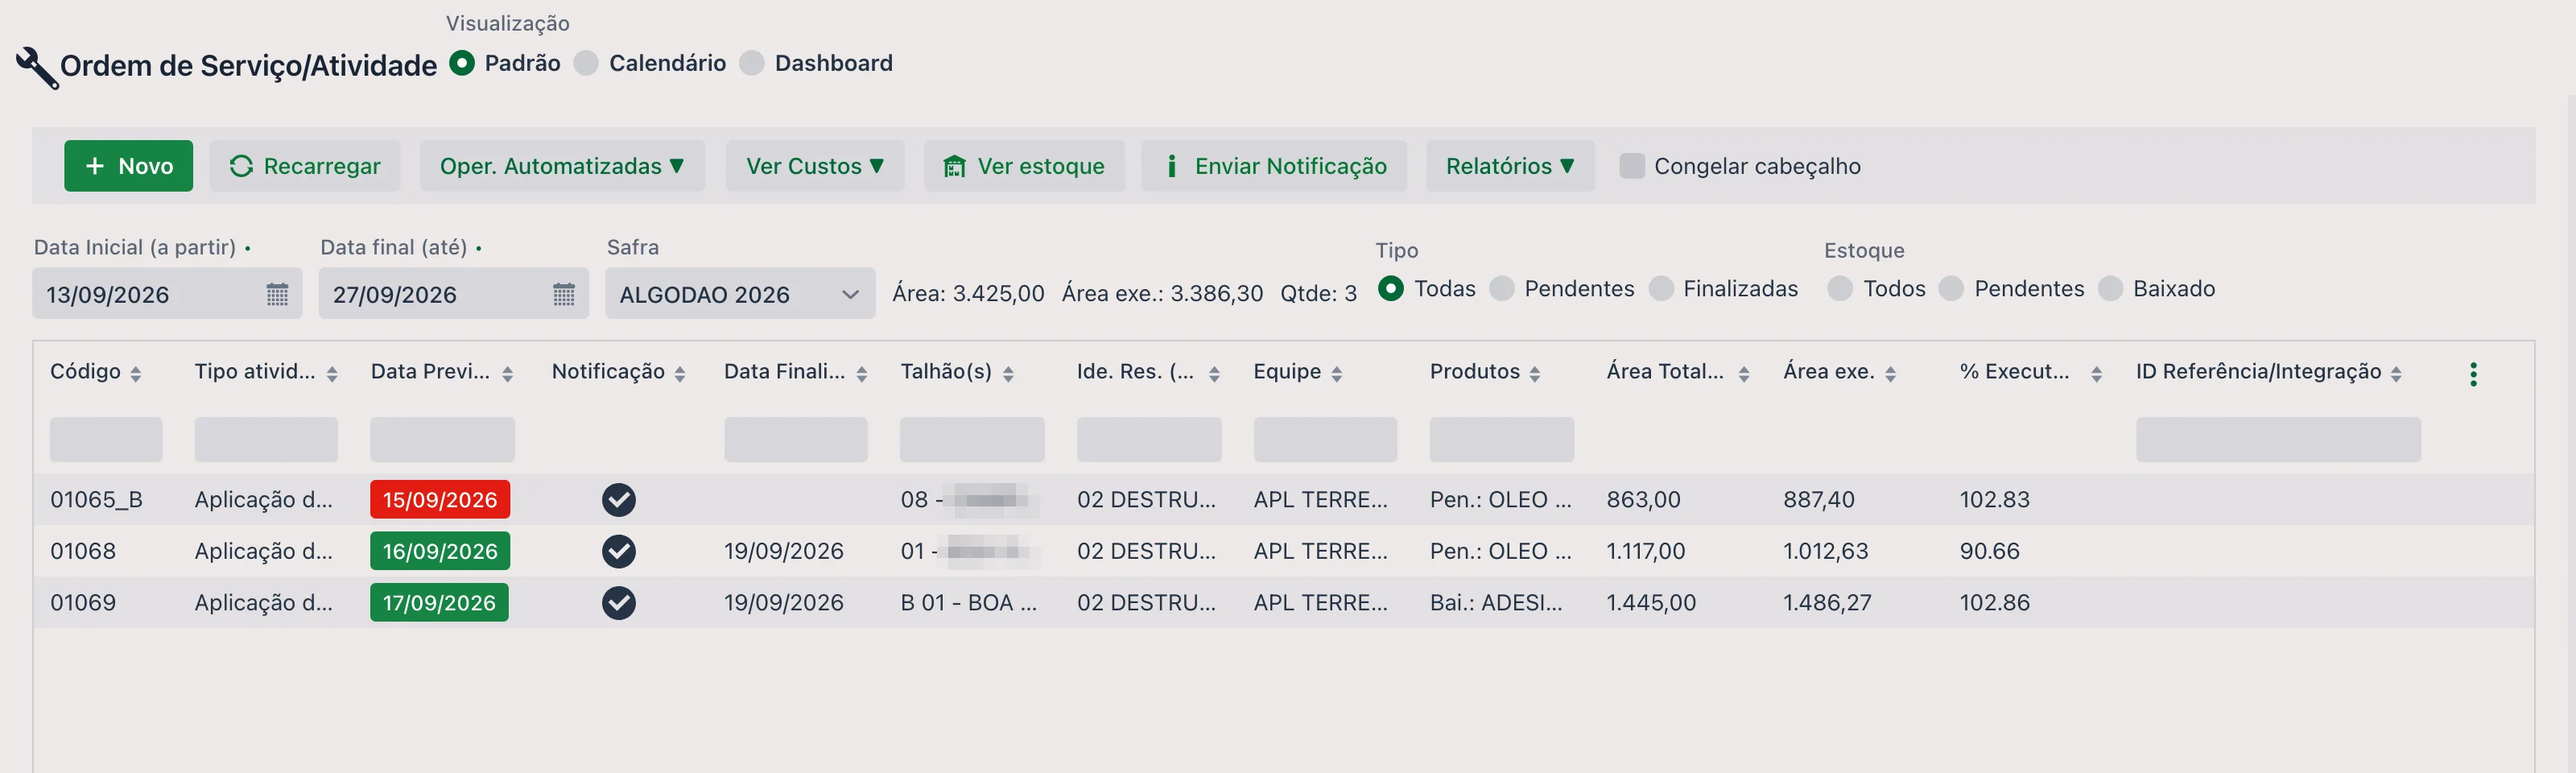
Three dashboards live off these numbers:
| Dashboard | What it shows |
|---|---|
| Operations overview | How much of the season is already planted, the progress per farm and the list of the latest operations — date, field, crop, Ide. Res. with the order number and the hectares. It is the integration showing up almost in real time. |
| Yield | By field and by variety: hectares, bales and arrobas per hectare. For cotton, the bales also come through John Deere, read from the harvester. |
| Machine summary | By machine and by day: hectares worked, working hours, total hours in the day, % of the day
working, efficiency in ha/h, average speed and liters per hour. It is the
5 - Integration - Execution tab consolidated. |
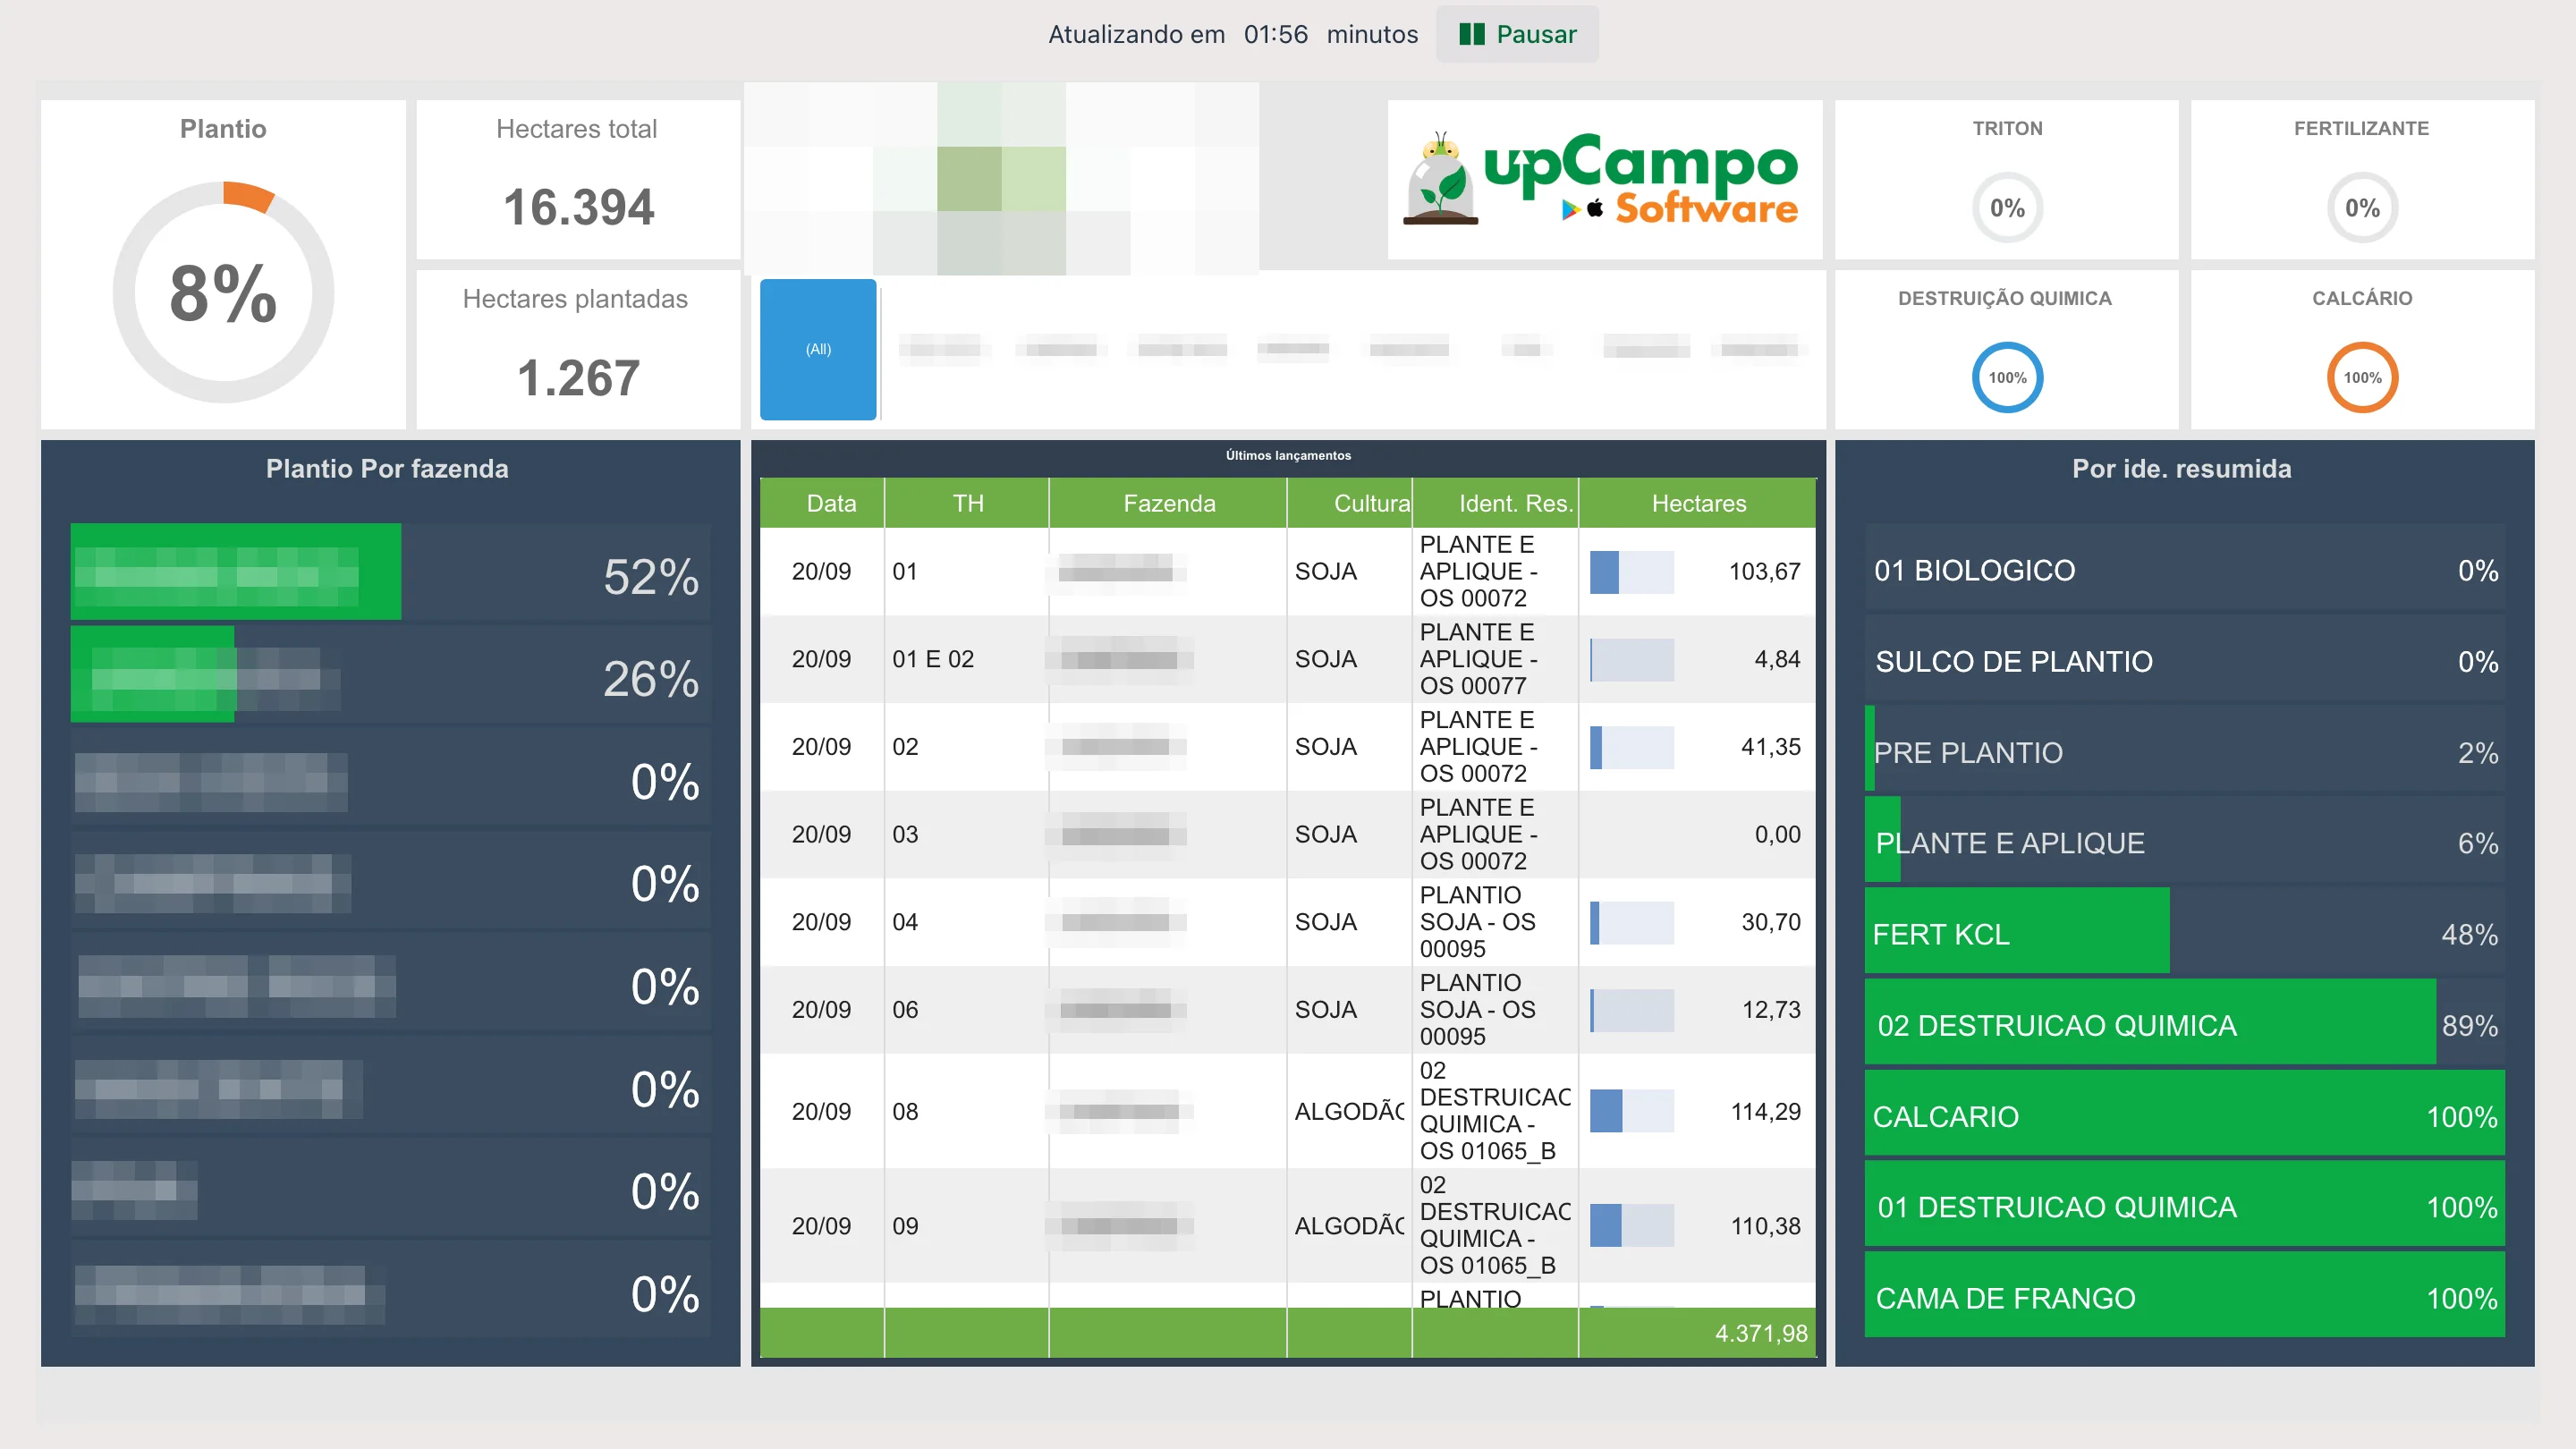
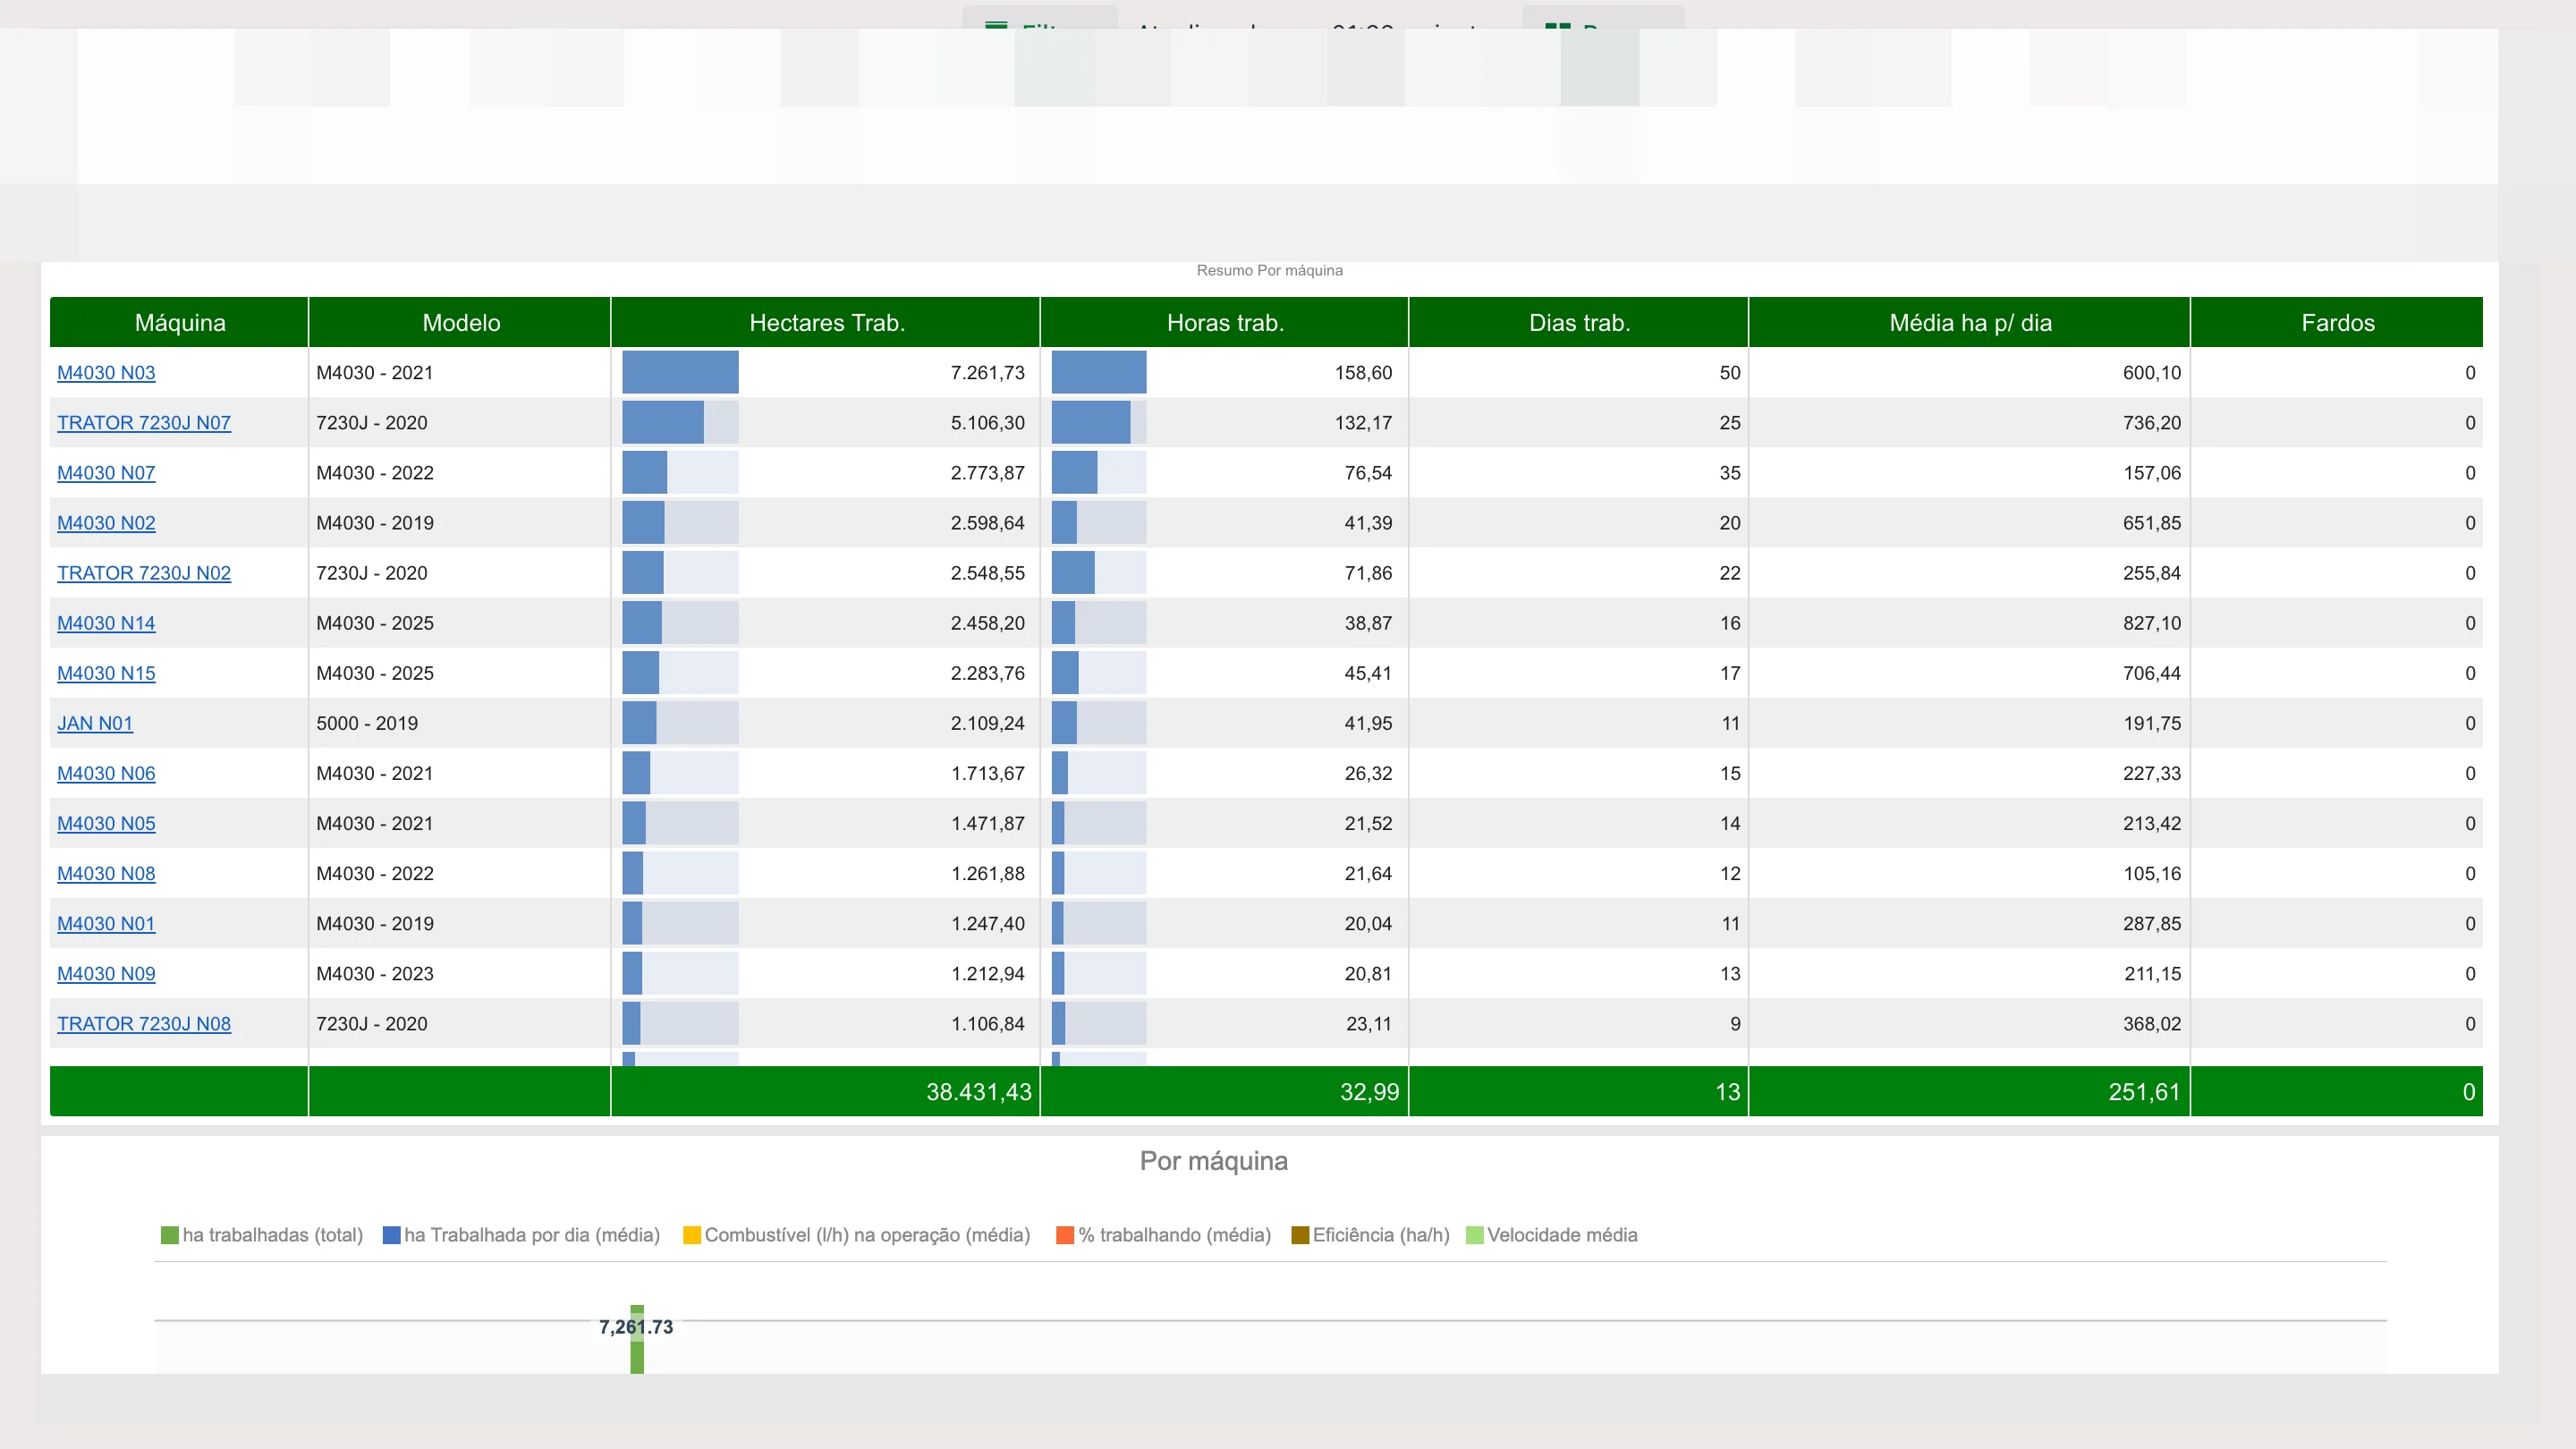
- Execution without typing — the area comes from the machine, not from the memory of whoever remembered to log it.
- Order progress in near real time — the % executed moves while the sprayer is in the field.
- More accurate cost per field — the executed area is what the machine actually did, and that is what the cost is spread over.
- Measured machine performance — hours, hectares per hour, liters per hour and speed, machine by machine, with no spreadsheet.
- Visible errors — whatever did not match stays on a single screen, with the reason, instead of disappearing.
Want to understand the scope of the integration before turning it on? See the John Deere integration page on the upCampo website.
❓ Frequently asked questions
How do I connect my John Deere account to upCampo?
Ask the upCampo team for the connection link: it arrives by WhatsApp, is valid for 7 days and
works for one connection only. Open the link, sign in with your John Deere account — the farm's Operations
Center account — and approve upCampo's access. Anyone with access to the Farm record can also generate the link
with the John Deere connection button, next to the John Deere ID (integration) field.
An organization shows "awaiting approval". What is missing?
An administrator of that organization still needs to approve upCampo's access inside John Deere's Operations Center. The account connection is already done; what is pending is the authorization for that specific organization. After it is approved, click Refresh organizations in the connection window, or let the upCampo team know.
Why did John Deere ask for my password again if I was already signed in?
It is on purpose. The connection link always asks for the username and password, to make sure the person approving is the owner of the farm's John Deere account — and not some other account that happened to be open in the browser, such as a consultant's or another grower's.
Do I need to reconnect the John Deere account from time to time?
No. Once connected, the John Deere account stays linked to upCampo and access renews on its own. You only need to connect again if the account owner revokes upCampo's authorization in John Deere, changes the password or leaves the organization — then the account shows as Refused — connect again in the John Deere connection window of the Farm record, and you just generate a new link.
How often does the John Deere area show up in upCampo?
upCampo checks John Deere every 20 minutes, and John Deere also notifies when
a new operation is closed. In practice, what the machine did in the morning is already on the work order before
lunch. If you need it sooner, use Force New Integration on the order's
5 - Integration - Execution tab.
The operation happened but did not go into any order. What should I check?
First, the connection: the farm's John Deere account is connected and the organization shows as
authorized (see the question about "awaiting approval"). On the order: the field is linked to John Deere, the Ide. Res. is written exactly like the product
entered there, the order has not been finalized yet and it is not an aerial application. Then look at
File > Integration Issues: if the operation arrived and found no order, it is
recorded there with the text that came in — usually the spelling difference is obvious right away.
Why does the execution's fleet show as "Integration" and not the machine that worked?
Because the 4 - Execution tab records the area of the whole operation, which may have
been done by three machines at the same time — there would be no single fleet unit to put there. The real machine
is on the 5 - Integration - Execution tab, with one line per machine and per day, and that is where
the hours and fuel come from.
The order's area went over 100%. Is that wrong?
Not necessarily. The executed area is what the machine actually covered, including pass overlap and re-covered headlands; the order's total area is the field's registered area. Going a little over 100% is common, and it is exactly the information the integration gives you for free. Far above that, it is worth checking whether the same operation came in twice and whether the field's area is up to date.
I finalized the order and the area stopped growing. Is that right?
Yes. A finalized order no longer receives execution from the integration. If the machine went back to the field after you finalized it, the way forward is to reopen the order or open the next order, with the same Ide. Res., and use Force New Integration with the operation code.
I bought a new machine. What do I need to do?
Register the machine in Fleet / Farm Assets with the chassis number matching what John Deere shows. That number is how upCampo recognizes which piece of equipment each line on the integration tab came from. Without it, the area keeps going into the order, but the per-machine detail — and the machine dashboard — will not include it.
I created a new field in John Deere. Does it come in on its own?
No. Open the matching field in Crops > Field, go to the Integration tab,
use Refresh Options to bring in the new list from John Deere and then
Select JD Field to pick it. Until the link exists, no operation for
that field is looked up.
Do I still need to post the input to inventory with the integration on?
Yes. The integration brings the machine's work — area, hours, fuel —, not the product consumption. The inventory deduction is still done through the work order, the usual way.
What does upCampo send to John Deere?
Two things, and only when the farm turns each one on: the weather stations and rain gauges checked in the record, which appear on the Operations Center Map, Assets tab, with rainfall and weather updated every 30 minutes; and the application map of each field, sent with the Send to Operations Center button in Field maps. The operation recorded by the machine is not changed, and upCampo work orders, prescriptions and records do not go there.
🛠 How to set up your farm by chatting with UPí
With the UPí connector — upCampo's artificial intelligence — turned on in Claude or ChatGPT, the farm's records can be created by chatting. You write "I have fields T1 with 120 ha and T2 with 85 ha", UPí shows what it is going to save, you confirm and the two fields go into upCampo. It works for season, crop, variety, field and field map, planting, activity type, subtype, rain gauge, storage location, product class, product, supplier, equipment type, equipment, employee and opening inventory.
The same records can also be created through UPí on WhatsApp (see How to use UPí on WhatsApp), with the same phrases as in this article — including sending the spreadsheet, the PDF or the field map in the chat.
It is the same record used by the web portal screens: what goes in through the chat shows on the screen right away, and what was registered on the screen UPí can see. It serves two moments:
- Onboarding — upCampo creates the company, the farm and the first user; the rest of the base the farm builds itself through the chat, in the order UPí indicates.
- Day-to-day maintenance — adding a field, fixing a product name, deactivating an activity type that is no longer used.
The path, in four steps
- Connect UPí with permission to post, using a user who has permission on the registration screens.
- Ask what is missing: UPí checks the farm's progress and tells you the next step.
- Dictate each stage, in order, and confirm what it shows before saving.
- Fix and deactivate later, in the same chat, whenever you need to.
1️⃣ Before you start
The connector must be turned on with permission to post. On the UPí sign-in screen, the authorization has to include posting, not just querying. How to connect in Claude and ChatGPT is on the UPí in Claude and ChatGPT page. If the connector was turned on for querying only, UPí warns "This connection was authorized for querying only" — disconnect and connect again, authorizing posting as well.
Your user needs permission on the registration screens. UPí follows the web portal's access control screen by screen and action by action, on the farm you are in:
| To ask UPí to… | You need, on the matching screen, the permission to… |
|---|---|
| add | add |
| change | edit |
| deactivate | delete |
The company administrator grants it, on the web portal's Users screen. The user upCampo creates during onboarding already has full access. Anyone without permission on any registration screen does not even see these functions in the chat.
One farm per chat. If you do not name a farm, UPí works on your current farm. If you have more than one, say its name in your first message.
2️⃣ How to start: ask what is missing
Open a new chat and write something like:
💬 "I want to set up my farm in upCampo. What is missing?"
UPí checks the progress — how many records of each kind the farm already has — and says what the next step is. The order is always this one, because each stage uses what was registered in the previous one:
| # | Stage | Web portal screen | Why in this order |
|---|---|---|---|
| 1 | Season | Crops > Season | everything in the crop is by season |
| 2 | Crop | Crops > Crop | variety and planting require the crop |
| 3 | Variety | Crops > Variety | planting states the variety |
| 4 | Field and field map | Crops > Field | planting is on a field; the map can come with it or later |
| 5 | Season planting | Crops > Season Planting | without it there is no work order or harvest |
| 6 | Activity type | Operations > Work Order/Activity Type | without it you cannot post a work order |
| 7 | Subtype | Operations > Short ID (Subtype) | the work order asks for the activity type's subtype |
| 8 | Rain gauge | Crops > Rain Gauge | to post rainfall |
| 9 | Storage location | Inventory > Storage Location | the opening inventory goes into a location |
| 10 | Product class | Inventory > Product & Service Class | the product requires the class |
| 11 | Product | Inventory > Product & Service | the opening inventory requires the product |
| 12 | Supplier | Inventory > Entity | for incoming invoices |
| 13 | Equipment type | Fleet > Fleet Classification | equipment can have a type |
| 14 | Equipment | Fleet > Fleet / Farm Assets | for fueling and work order execution |
| 15 | Employee | Operations > Employee/Operator | for work order execution and fueling |
| 16 | Opening inventory | Inventory > Movement (Inbound & Outbound), as a Standalone inbound | only with product and location already registered |
3️⃣ What to say at each stage
At every stage UPí shows the list of what it will save and asks for your confirmation first. You can dictate several items at once. The phrases below are examples — write it your own way.
Season
💬 "Register the 2026/27 season, from September 1, 2026 to August 31, 2027."
- Name, start and end are required. The period is how UPí knows which is the current season when you do not name one.
- The season applies to all of the company's farms.
Crop
💬 "My crops are soybean, corn and cotton."
- UPí brings the crop from the upCampo base, which already comes with the growth stages ready.
- A crop that does not exist in the base — a specific fruit crop, for example — is created with just the name and the type, Annual or Perennial.
- The crop applies to all of the company's farms.
Variety
💬 "In soybean I will plant M 8644 IPRO and Olimpo. The M 8644 cycle is 120 days."
- Each variety belongs to one crop. The same name can exist in different crops.
- Cycle in days and technology (IPRO, RR…) are optional.
Field
💬 "Fields: T1 with 120 ha, T2 with 85.5 ha and T3 with 60 ha, all in the Sede sector."
- Name and area, in hectares, are required — the area can be left out when the field comes with the map (see below). The sector is optional; a new sector is created on its own.
- A field name repeated on the farm is rejected.
Field map
The field map also goes in through the chat: by attaching the KML file or typing the points. On WhatsApp, send the KML or KMZ file or the shapefile in a .zip — see just below.
💬 "This is the farm's KML, save the map of each field." — with the file attached to the
chat.
💬 "The map of T1 is: -12.500 -55.700; -12.500 -55.6954; -12.491 -55.6954; -12.491 -55.700."
💬 "Register field T5 with this map." — without stating the area: the map's area is used.
- The map can come with the field registration or later. Sending a new map replaces the previous one.
- UPí calculates the area from the map. A field with no area takes the map's area. A field that already has an area keeps it; if the registered area and the map's area differ by more than 5%, UPí saves the map and warns you, showing both — then it is up to you: if the map's area is right, ask it to fix the area.
- If the field does not yet have its point marked on the web portal map, the center of the field map becomes that point.
- The map shows in the web portal and in the apps, just like one imported through the Field screen.
- In Claude and ChatGPT you can use KML or the points as text. The shapefile goes through WhatsApp or through the web portal's Field screen.
The whole farm map through WhatsApp. Send the KML, KMZ or shapefile (a .zip with the .shp, .dbf and .prj) and say 💬 "this is the farm map, register the fields". UPí shows a preview before saving:
- how many fields are new and how many already exist and will only have the map and area replaced, the total area and the sectors;
- what was left out and why — pieces smaller than 0.1 ha and names repeated in the file;
- if the file does not include the field names, each one shows as "Field 1, 2…" with the area and a map link, and UPí asks for the names before saving.
With your "yes", UPí saves field by field. A shapefile in UTM or SAD69 is converted automatically; in another projection (polyconic, Albers), export it again in latitude/longitude or UTM.
The map is rejected when:
- it has fewer than 3 distinct points;
- the points do not form an area — check the order they were written in;
- latitude and longitude look swapped. Each point is latitude then longitude; a KML lists longitude first, but UPí converts that automatically.
Season planting
💬 "In the 2026/27 season T1 and T2 get soybean M 8644, and T3 gets corn."
- One planting per field in each season. If no area is given, the field's area is used.
- The planting date is optional — it can go in later, when you plant.
- One variety per field. A field with more than one variety in the same season is registered on the Season Planting screen, in the web portal.
- To change a planting's season, field or crop, deactivate the planting and register it again.
Activity type
💬 "The types I use are: planting, harvest, burndown, fungicide and topdressing. The harvest must require the machine."
- UPí starts from the upCampo base templates — soil preparation, planting, fertilization, application, harvest… —, picks the one that matches each name and saves them all at once. The template brings the behavior ready (whether it is planting, harvest, application); the name is the one you gave.
- You can ask for the work order execution to require equipment, an employee or times.
- Without an activity type you cannot post a work order — that is why it comes right after planting.
Subtype
The subtype is the Short Identification (Subtype) field of the work order: the subdivision of the activity type, such as the 1st and 2nd fungicide application. In the web portal menu, the screen is Short ID (Subtype).
💬 "For the Fungicide type I use the subtypes 1st application, 2nd application and 3rd application; for Burndown, pre-planting and post-harvest."
- Each subtype can apply to one or more activity types.
- The stage (from 1 - Before planting to 8 - Other) and the For requisition flag are optional.
- A subtype already used in a work order cannot be renamed, because the order stores the name: register a new one. It also cannot be deactivated while it is in a work order, schedule or treatment.
Rain gauge
💬 "I have the Sede rain gauge, which covers T1 and T2, and the Fundo rain gauge, which covers T3."
- Each rain gauge carries the list of fields it covers.
- A field covered by two rain gauges is accepted, but UPí warns you: when posting rainfall on that field, it will ask which rain gauge.
Storage location
💬 "The locations are Crop Protection Warehouse and Fertilizer Shed."
- Silos and fuel stations are registered on the Storage Location screen, in the web portal.
Product class
💬 "Classes: Herbicide, Fungicide, Insecticide, Fertilizer and Seed."
- UPí makes suggestions based on the classes in the upCampo base, but the class is yours.
- The class type is one of these: Fuel, Part, Lubricants, Input, Service or Other. Crop protection products, fertilizer and seed are Input.
Product
💬 "Products: Roundup Original in liters, Herbicide class; urea in kilos, Fertilizer class."
- Name and unit are required. The unit can be given by its code (L, KG, UN, sc, TON…) or by its name (liter, kilo).
- UPí checks the upCampo base to suggest the unit, class and spelling of the name — but the product is yours: it saves what you confirm.
- A repeated product code is rejected.
Supplier
💬 "Supplier Agro Insumos Ltda, CNPJ 12.345.678/0001-95, from Sorriso-MT."
- The supplier is saved as an Entity.
- The CPF or CNPJ (Brazilian individual and company tax IDs) can be dictated with or without dots; it is saved without punctuation. The new CNPJ, with letters, is accepted.
- A document repeated in the company is rejected.
Equipment type
💬 "The machine types I have are tractor, harvester, sprayer and truck."
- It is the record of the web portal's Fleet Classification screen.
- UPí suggests the names from the upCampo base, but the type is yours.
- The abbreviation is optional. With it — "TR" for Tractor, for example —, the code of the equipment of that type becomes TR0001, TR0002…
Equipment
💬 "John Deere 6110J tractor, plate ABC1D23, year 2019, diesel, 200-liter tank, hour meter currently at
4,520 hours."
💬 "Implements: Jumil 12-row planter and leveling disk harrow."
- It is the record of the web portal's Fleet / Farm Assets screen.
- A machine is created with an hour meter — or an odometer, if it is a road vehicle — and ready for fueling and work orders.
- An implement is created with no meter and outside fueling.
- Today's hour meter or odometer reading is only informational: the first fueling is what updates it.
- A plate repeated on the farm is rejected. Two pieces of equipment with the same name need different plates or codes.
Employee
💬 "Employees: João Silva, tractor driver; Pedro Souza, harvester operator; Maria Lima, sprayer operator."
- It is the record of the web portal's Employee/Operator screen.
- The name is required; role, hourly rate, phone and email are optional.
- A name repeated on the farm is rejected — the name is how UPí finds the employee later, when posting the execution of an order or a fueling.
- The team, which groups employees, is still put together in the web portal.
Opening inventory
💬 "Opening inventory in the Crop Protection Warehouse: 200 liters of Roundup at R$ 32.50 per liter."
- It goes in as a Standalone inbound in Movement, with the description "Opening inventory".
- Only with the product and location already registered, and with each product's unit cost — that is what forms the inventory's average cost.
- Lot and expiration date do not go in through the chat yet: a product controlled by lot has its opening inventory posted in the web portal.
4️⃣ Fixing and deactivating later
Change — say what changes:
💬 "Fix the area of T2 to 87 ha."
💬 "Rename the product Round to Roundup Original."
UPí finds the record, shows the before and after, and saves only what changed.
Deactivate — say what is no longer used:
💬 "I no longer use the Disking activity type."
The record leaves the lists and the history stays: nothing is deleted. Old orders, movements and reports keep showing the deactivated record.
Query — to check what already exists:
💬 "Which fields do I have?"
💬 "List my activity types."
- a season with a planted field;
- a field with a planting in progress;
- a crop with a variety or planting;
- a planted variety;
- a planting that is on a work order;
- an activity type used on a work order;
- a subtype used on a work order, schedule or treatment;
- a class with products;
- a storage location or product with a balance;
- equipment used on a work order, maintenance, fueling or invoice;
- an employee who already has work order execution.
5️⃣ When UPí refuses
Saving is all or nothing: if one item on the list has a problem, none is saved, and UPí tells you which item and why. Fix that item and send the list again. The most common refusals, and what to do:
| UPí replies | What to do |
|---|---|
| "Field "T1" already exists on this farm…" | The field is already registered. If the idea was to fix it, say you want to change it — UPí will ask. |
| "Enter the field's area, in hectares, or the field map." | The area was missing. Send it again with the number of hectares, or with the field map — then the area comes from the map. |
| "In the field map, latitude and longitude look swapped…" | Each point is latitude then longitude. Reverse the order and send it again. |
| "That field is already planted in this season." | A field has one planting per season. To change the variety, area or date, ask to change the existing planting; to change the crop, deactivate that planting and register another. |
| "The variety … belongs to another crop." | The variety mentioned was registered under another crop. Check the crop or register the variety under the right crop. |
| "Unit "barrel" does not exist in upCampo. Use one of these: …" | Pick one of the units UPí lists. |
| "Your user cannot add on the "Field" screen…" | The permission on that screen is missing. The administrator grants it on the web portal's Users screen. |
| "This connection was authorized for querying only." | Disconnect the connector and connect it again, authorizing posting as well. |
6️⃣ What is still done in the web portal
The chat asks for the essentials of each record. Whatever is left out is done on the screen:
- a field with more than one variety in the same season — Season Planting;
- silos and fuel stations — Storage Location;
- inventory of products with lot and expiration date — Movement;
- teams (putting the team together with the employees) — Team —, and pests, which do not go in through the chat yet;
- field map by shapefile (.shp) in Claude and ChatGPT — on WhatsApp it goes in, or through the Field screen;
- any field the chat does not ask for — the nozzle and flow rate setup of the activity type, and so on.
- the farm's base comes out ready without anyone having to learn a dozen screens on day one;
- UPí tells you the next step and follows the right order, so no record is left without what it requires;
- every save is shown first and confirmed by you;
- fixing and deactivating day to day becomes a single sentence, without losing the history.
UPí also works on WhatsApp and answers about the whole farm — see what else it does at meet UPí.
❓ Frequently asked questions
Does what I register by chatting with UPí show up in the web portal?
Yes, right away and on the same screens. UPí saves to the same records the web portal uses: a field added through the chat shows up on the Field screen, and a product registered on the screen can be seen by UPí.
Can I send UPí a spreadsheet to register?
Yes. Attach the spreadsheet or PDF to the Claude, ChatGPT or WhatsApp chat and ask for it to be registered: the assistant reads the file and passes the list to UPí, which shows what it will save before asking for your confirmation. Check the list carefully, because the one interpreting the file is the assistant. UPí saves up to 50 items at a time, and a longer list is split into parts.
In what order do I register the farm through UPí?
Season, crop, variety, field and field map, season planting, activity type, subtype, rain gauge, storage location, product class, product, supplier, equipment type, equipment, employee and, last, the opening inventory. You do not need to memorize it: ask UPí "what is missing?" and it checks the farm's progress and tells you the next step.
Can I send UPí the field map?
Yes. Attach the KML file to the Claude or ChatGPT chat, or type the map points of each field, and UPí saves the field map after your confirmation. It calculates the area from the map: a field with no area takes the map's area, and if the registered area differs from the map's by more than 5%, UPí warns you showing both. On WhatsApp you can also send KMZ and shapefile (in a .zip, with the .shp, .dbf and .prj): UPí shows a preview of the fields and saves after your "yes".
UPí saved nothing from my list. Why?
Saving is all or nothing: if one item on the list has a problem, none is saved. UPí tells you which item was refused and why — repeated name, missing area, a unit that does not exist. Fix that item and send the list again.
Does deactivating through UPí delete the record?
No. The deactivated record leaves the lists, but the history stays: old orders, movements and reports keep showing what was recorded. And UPí does not deactivate what is in use — a field with a planting in progress or a product with a balance, for example.
Is there a record of who registered something through UPí?
Yes. Every save appears on the web portal's Access log screen, with your user. For crop, variety, product class and product, the record itself also stores a mark that it was added by UPí and on which date.
Can I use upCampo's entire product list?
No. upCampo's product base is there for UPí to suggest the name, unit and class. The registry belongs to your farm, with the products you use — UPí saves only what you confirm.
UPí says my user cannot add. What should I do?
UPí follows the web portal's access control: to add you need the add permission on that record's screen, to change you need edit permission, and to deactivate you need delete permission. Ask your company administrator to grant it on the Users screen of the upCampo web portal. If the message is "This connection was authorized for querying only", the problem is different: disconnect and connect the connector again, authorizing posting.
Can I register the farm through UPí on WhatsApp?
Yes. Anyone with permission on the web portal's registration screens can register through WhatsApp using the same phrases as in this article, and can send the spreadsheet, the PDF or the field map (KML, KMZ or shapefile) in the chat. See How to use UPí on WhatsApp.
🛠 How to post seed treatment on the work order
Seed treatment is the application of fungicide, insecticide, inoculant or another product onto the seed before planting. In upCampo it is posted on a work order, like any other operation — but with a different calculation: the rate is not per hectare, it is per 100 kg of seed, and what you track afterwards is not the area executed, it is the slurry volume withdrawn.
When the order's activity type is a seed treatment one, the screen changes on its own: the header asks for the amount of seed in kilos, each product asks for the rate in milliliters per 100 kg, the system calculates the slurry volume and, during execution, each withdrawal is added up until the order reaches 100%.
The path, in five steps
- Activity type with the Seed treatment category (done only once).
- Order header, with the amount of seed to treat.
- Seed treatment field, on tab 1.
- Products and rates, on tab 2 — the system calculates the slurry volume.
- Withdrawals of slurry, on tab 4, until the order is closed.
1️⃣ Have a seed treatment activity type
Menu: Operations > Work Order/Activity Type
It is the activity type's Category that turns the order into a seed treatment. Register (or check whether there already is) a type — for example, Seed Treatment — with the Seed treatment category. This is done once; after that, every order of that type opens with the right fields.
2️⃣ Create the order and enter the amount of seed
Menu: Operations > Work Order/Activity > New
In the header, choose the seed treatment activity type. When you do, three fields specific to this kind of order appear:
| Field | What it is |
|---|---|
| Seed Treatment KG | How many kilos of seed will be treated in this order. You enter it, and it is the basis for all of the product calculations. |
| Total Qty | Read it as the total slurry volume, in milliliters. It is not typed: it is the sum of the volume of all the order's products, filled in automatically when each product is saved. |
| Total Qty Withdrawn and % Withdrawn | How much of the slurry has already been used and what share of the total that is. They are filled in by the withdrawals on tab 4 (step 5). |
Fill in the rest of the header as in a regular order and save.
3️⃣ Choose the seed treatment field
In the order: 1 - Fields tab
A work order always has a field. For seed treatment, the usual practice is to have a field in the season set aside for it — for example, Seed Treatment CORN and Seed Treatment SOYBEAN — and choose it here. That way the treatment does not get mixed with the crop orders.
4️⃣ Add the products with the rate per 100 kg
In the order: 2 - Product & Service tab
Choose the product and, if the inventory deduction will be done now, the storage location. In place of the flow rate used in other orders, the Seed treatment - Slurry block appears, with three numbered fields:
| Field | What it is |
|---|---|
| 1 - Total seed Qty (kg) | Comes already filled with the header's Seed Treatment KG. |
| 2 - Rate (ml) | The product rate per 100 kg of seed, in milliliters — the rate from the recommendation. |
| 3 - Total slurry volume (ml) | Calculated by the system as soon as the rate is typed: how much of this product goes into the slurry. |
The system also fills in the product's Quantity, which is what leaves inventory. Since crop protection inventory is usually kept in liters, it converts the volume from milliliters to liters. If the product is registered in ML or KG, no conversion is made and the quantity equals the volume.
Total slurry volume (ml) = Rate (ml per 100 kg) × Total seed Qty (kg) ÷ 100
Quantity (product in liters) = Total slurry volume ÷ 1,000
Illustrative example — 2,000 kg of soybean seed, with two products:
| Product | Rate (ml/100 kg) | Slurry volume | Quantity (inventory in L) |
|---|---|---|---|
| Fungicide | 200 | 200 × 2,000 ÷ 100 = 4,000 ml | 4 L |
| Insecticide | 50 | 50 × 2,000 ÷ 100 = 1,000 ml | 1 L |
After saving both, the header's Total Qty shows 5,000 — the total slurry volume, in milliliters. Repeat for as many products as the prescription has. In the order's product list, the rate column becomes Rate (ml).
Print the treatment sheet
With the products added, the order's Reports menu issues the OPE.01.04 - Seed Treatment Sheet (formerly 003.A2): the slurry recipe ready to print and hand to whoever prepares it, or to file in the treatment's paper folder.
5️⃣ Post each slurry withdrawal
In the order: 4 - Withdrawals/Consumption tab
In other orders this tab is called Execution and records area. In seed treatment it records how much of the slurry was used, withdrawal by withdrawal:
- Date of the withdrawal. Start time and end time are optional.
- Employee/Operator — who withdrew it. This is what lets reports group withdrawals by person.
- Qty Withdrawn — the slurry volume used, in the same unit as the header's Total Qty: milliliters.
When you save, the withdrawal is added to Total Qty Withdrawn and % Withdrawn is recalculated. In the example above, a 2,500 ml withdrawal takes the order to 50%. Area is not asked for here: in this order, progress is measured by volume.
When the order reaches 100%, finalize it from the header. Finalizing locks the order: it stops accepting changes until someone with permission reopens it.
📊 Reports
Issuing and filters are explained in the Reports quick guide.
- The recommendation rate (ml per 100 kg) becomes slurry volume and inventory quantity with no mental math.
- The product leaves inventory in the unit it is tracked in, liters.
- Each withdrawal is recorded with date and employee, and the order shows how much of the slurry has already been used.
- The printed sheet documents the treatment of each seed lot.
❓ Frequently asked questions
Is the seed treatment rate per hectare?
No. On upCampo's seed treatment work order, the rate is entered in milliliters per 100 kg of seed, in the product's 2 - Rate (ml) field. The system multiplies it by the order's amount of seed and calculates the slurry volume.
What does Total Qty mean in the seed treatment order header?
It is the total slurry volume, in milliliters: the sum of the volume of all the order's products. It is filled in automatically every time a product is saved on the 2 - Product & Service tab.
Why is the product quantity in liters if the rate is in ml?
Because the quantity is what leaves inventory, and crop protection inventory is usually kept in liters: upCampo divides the slurry volume by 1,000. If the product is registered in ML or KG, no conversion is made and the quantity equals the volume.
I changed the amount of seed. Are the products recalculated?
Each product's slurry volume is calculated when the rate is typed. After changing the Seed Treatment KG in the header and saving, open each product on tab 2, check the 1 - Total seed Qty (kg), type the rate again and save — that way the volume and quantity are recalculated with the new amount.
Where do I post the use of the seed treatment slurry?
On the work order's 4 - Withdrawals/Consumption tab: date, employee and Qty Withdrawn, in milliliters. Each withdrawal is added in the header, in Total Qty Withdrawn, and % Withdrawn shows how much of the slurry has already been used.
When should I finalize the seed treatment order?
When the withdrawals reach 100% of the slurry. Finalizing locks the order, which stops accepting changes until it is reopened by someone with permission.
🛠 How to use UPí on WhatsApp
UPí is upCampo's artificial intelligence, and it answers on WhatsApp. You write the way you would to a coworker — "how much did it rain this week?", "log 300 liters of diesel on tractor 7230" — and it looks up the farm, answers with the system's numbers right away and, when you ask, records rainfall, fueling, work orders, executions and invoices. It accepts text, voice messages, photos, PDFs, spreadsheets, the field map (KML, KMZ or shapefile) and location.
It is the same system as the web portal and the app: what UPí records shows up on the screens, and what was entered on the screens UPí can see. It also schedules alerts — "let me know when it rains more than 20 mm" —, explained in How to receive UPí alerts and the daily summary.
The path, in five steps
- Enable your number and the AI permissions in the web portal.
- Chat your way: text, voice, photo or file.
- Ask about anything on the farm.
- Record what happened in the field, confirming before saving.
- Register what is missing and schedule alerts.
1️⃣ Before you start: enable your number
File > Users with AI access
The company administrator enables it, in the web portal. For each person:
- WhatsApp number with the country code — for example
5565999998888. That is how UPí recognizes who is writing. A number can only be on one active user; if it is on two, UPí answers questions but does not record anything. - Preferred farm (AI) — the farm UPí works on when the person does not mention one.
- AI permissions, per farm: what it can look up (crops, weather, scouting, work orders, inventory, financial…) and what it can record (rainfall, fueling, work orders, executions, inventory transactions).
The user record itself is created on the Users screen.
2️⃣ How to chat with UPí
- Write your way. There are no commands or menus: UPí understands the question as it comes. You can send it in several messages in a row — it waits a few seconds and puts everything together.
- 🎤 Voice message: say the question or what to record. UPí transcribes it and answers in writing.
- 📷 Photo: send a photo of the invoice, the repair shop receipt or the order — UPí reads it and prepares the invoice entry.
- 📄 PDF: invoice, order, report or lab report of up to 30 pages. UPí reads the content and uses it for whatever you ask — record the invoice, check an amount, summarize. Larger PDF: say which pages matter or send only those.
- 📊 Spreadsheet (Excel or CSV): UPí reads all the sheets, up to 200 rows per upload. It is useful for bulk registration — "register the products in this spreadsheet". A larger spreadsheet goes in parts; UPí tells you what was left out.
- 🗺️ Field map: a KML, KMZ or shapefile (the .zip with the .shp, .dbf and .prj). UPí shows the fields it found, with the area of each one, and saves the map after your "yes" — see step 5.
- 🗜️ .zip file: UPí opens it and reads the PDFs inside (up to 5) and the field map. Other file types inside the zip, such as a spreadsheet or photo, send separately.
- 📍 Location: send the WhatsApp location pin to say where you are — for example, along with an issue found in the field. UPí keeps it in the conversation.
- Pick from a list: when there are options (which equipment, which field) or a summary to confirm, UPí sends a list — tap the button and choose. You can also reply by typing.
- Change the subject whenever you want. Were you recording an execution and remembered to ask about inventory? Ask. If an entry was half done, UPí tells you in one line that it was not saved.
- Wrote while it was replying? No problem: UPí combines the new message with the previous one and sends a single answer.
- Questions about how to use the system: "how do I run a report?", "where do I set up the maintenance plan?" — UPí answers using the articles in this Help Center and sends the article link.
- Talk to a person: "I want to talk to someone on the team". UPí calls the upCampo team, who reply in this same conversation.
- Start over: send just "clear history". UPí forgets the previous conversation — useful when it keeps going back to a subject that is already over.
Which farm? If you don't mention a farm, your preferred farm applies. To switch, say 💬 "now I want the CIMA farm" — if there are similar names, UPí asks which one. The switch applies to the next messages and takes a few seconds. For a single question about another farm, mention its name in the message.
3️⃣ Questions: examples by topic
UPí queries the system for every question — the answer always has the current data, even if you have asked before. The sentences below are examples; write your way.
🌱 Crops, planting and harvest
- 💬 "How many hectares of soybeans are planted this season?"
- 💬 "What is the yield of field 3A?"
- 💬 "How is the second-crop corn harvest going? How much is left to harvest?"
- 💬 "Which variety yielded the most last season?"
Yield comes in sc/ha (grains) or @/ha (cotton), weighted by area. A field only counts as harvested once the harvest has been finalized in the system.
🌧️ Rainfall and weather
- 💬 "How much did it rain this week?"
- 💬 "How much has it rained on field 12 since planting?"
- 💬 "What was the rainiest day in September?"
- 💬 "Accumulated rainfall for the season by sector"
🐛 Pest monitoring (IPM)
- 💬 "What are the latest scouting reports?"
- 💬 "Is any pest above the action threshold?"
- 💬 "How is the caterpillar pressure on field 5 this season?"
- 💬 "Show me the full scouting of field 8 from yesterday"
- 💬 "How long did the scout spend at each point?"
Each pest comes with the level color: 🟢 low, 🟡 medium, 🔴 high (above the action threshold) — the same as in the scouting in the app.
⚙️ Work orders and costs
- 💬 "Which work orders are open?"
- 💬 "How much of WO 00026 has been executed?"
- 💬 "Which orders are overdue?"
- 💬 "How much did inputs cost on field 3A this season?"
- 💬 "Who operated and with which machine on WO 00014?"
- 💬 "How many WOs did Marco enter in the last 10 days?"
"Order", "WO" and "operation" always mean the agricultural work order, even when you mention a machine ("orders for tractor T9"). For the maintenance work order, talk about maintenance, shop, service or repair.
📦 Input inventory
- 💬 "How much diesel is in the fuel station?"
- 💬 "What is below the minimum?"
- 💬 "Is any batch of crop protection product about to expire?"
- 💬 "Balance of all inoculants"
- 💬 "Glyphosate transaction history for the last month"
🚜 Fleet and maintenance
- 💬 "How much diesel did tractor T8 use this month?"
- 💬 "Which machines are overdue for service?"
- 💬 "How much have I spent on the Delivery truck?"
- 💬 "Which maintenance work orders are open?"
⚖️ Post-harvest, bales and contracts
- 💬 "How much soybean have I harvested this season?"
- 💬 "Average bale weight for variety FM 933"
- 💬 "How much is left to ship on contract 125?"
- 💬 "Outbound load tickets this week"
Harvest load tickets and bales always come summed (by field, variety, day…), never one by one — a season has thousands. The full list comes from the report in the web portal.
🧾 Purchasing
- 💬 "Which purchase orders are late?"
- 💬 "What is still to arrive from supplier X?"
- 💬 "Who quoted the lowest price for fertilizer?"
- 💬 "Which requisitions are stuck without a quote?"
💰 Financial
- 💬 "What do I have to pay this week?"
- 💬 "Which bills are overdue?"
- 💬 "How much does customer Y still owe me?"
- 💬 "Bank account balance"
You need the Financial AI permission on that farm. On WhatsApp, financial is look-up only: settling and entering bills is done in the web portal.
🔗 Several topics at once
- 💬 "Do I have enough input for the next application?" — UPí compares the inventory balance with the rate and area of the planned order.
- 💬 "Did it rain a lot around planting time?" — it combines rainfall and planting dates.
- 💬 "Has the fertilizer order arrived and been paid?" — it combines purchasing and financial.
4️⃣ Entries: what happened in the field
For every entry UPí shows a summary with the values and only saves after your "yes".
The summary starts with the type marker (Lcto de chuva/clima, Lcto abastecimento…). If
any data is missing, it asks for everything in a single message. Replying "yes", "go ahead" or
tapping Save in the list saves it right away. The season is always the farm's current one — UPí does not
ask; for another one, mention the season in the message.
🌧️ Rainfall
💬 "It rained 18 mm at the headquarters rain gauge today."
- UPí checks whether there is already an entry for that rain gauge on that day — and tells you, instead of recording it again.
- If the field you mention is covered by two rain gauges, it asks which one to record on.
⛽ Fueling
💬 "I put 320 liters of diesel in tractor T8 02, hour meter 5,548, at the headquarters fuel station."
- If the fuel station has pump control, UPí asks for the start and end readings.
- The equipment reading is in hours or km, depending on the machine. If the equipment requires a reading and you didn't give one, UPí asks for it.
- Outside station (external): liters and amount are enough; the fuel type is optional, as in the web portal.
- The time is not required, and UPí does not ask for it.
- A duplicate fueling (same equipment, day and liters) is rejected: UPí gives the number of the one already recorded.
📋 Work order
💬 "Create a WO to apply gypsum on field Ari 08, 500 kg/ha of agricultural gypsum, to be finished by the 20th."
- UPí looks up the field, the product and the activity type in the records and shows the assembled order.
- Product, rate, crew and date can be adjusted in the conversation before the "yes".
✅ Work order execution
You can send everything in one message, in the format the team already uses:
WO: 00026
Operator: Mateus Gama
Equipment: NH SP 3500 04
Start hour meter: 5056
End hour meter: 5060
Start time: 13:00
End time: 17:00
Date: 06/10
Field: 3 arsc
Area: all
- Area "all" or "what's left": UPí calculates what is left of the field on that order.
- What is required (equipment, operator, time) depends on the activity type, as in the web portal — UPí only asks for what that order requires.
- Corrected right after? "Actually the end hour meter was 5052" — UPí changes the execution it just saved, instead of recording another one.
- An operator who is not in the employee records goes into the notes; UPí lets you know.
🧾 Inbound invoice (product, part or service)
📷 Send a photo of the invoice — or write: 💬 "Record an expense of R$ 150 for a part on the Delivery truck, from the Retruck store."
- Product for inventory: UPí asks for the storage location.
- Part or service for a vehicle or machine (repair shop, alignment, tire shop): it goes in as a cost for that fleet unit. UPí finds the equipment by license plate or name — a plate written differently on the invoice is also found.
- Standalone item — neither inventory nor fleet, such as a rain gauge bought for use: say "standalone" and UPí records it without asking for a storage location.
- Without an invoice number, the entry goes in as a standalone inbound entry.
5️⃣ Records and alerts
Records. Anyone with permission on the web portal's registration screens can also register by chatting: season, crop, variety, field, planting, activity type, subtype, rain gauge, storage location, product class, product, supplier, equipment type, equipment, employee, crew and nozzle.
- 💬 "Register employee William Funke, machine operator."
- 💬 "Register tractor T8 03, John Deere 8R 410, year 2024."
- 💬 "What is still missing in the farm setup?"
- 📊 Attached spreadsheet: 💬 "Register the products in this spreadsheet."
- 🗺️ Attached map (KML, KMZ or shapefile): 💬 "This is the farm map, register the fields."
Field map. UPí shows a preview — the fields it found, the area of each one and what it ignored, such as pieces smaller than 0.1 ha — and only saves after the "yes". A field that already exists gets the map; a new field is registered. If the file does not include field names, UPí lists each one with its area and a map link and asks for the names before saving. Shapefiles in UTM or SAD69 are converted automatically.
Before adding, UPí checks whether it already exists and suggests a name following the farm's pattern. The step-by-step setup is in How to set up the farm by chatting with UPí.
Alerts. 💬 "Every Monday at 7 a.m. send me the week's rainfall", 💬 "let me know if 2 days go by without a rainfall reading" — see How to receive UPí alerts and the daily summary.
6️⃣ What is still done in the web portal
On WhatsApp UPí looks up all of this, but entering it is still done on the screen:
- harvest load tickets, outbound load tickets and contracts;
- purchase orders, requisitions and quotes;
- fleet maintenance work orders (open, follow up, finalize) — a vehicle service invoice is not on this list: it goes through UPí, as in step 4;
- accounts payable and receivable, settlements and transfers;
- PDF reports.
Load tickets, purchasing, financial and PDF reports already work through UPí in Claude and ChatGPT — see UPí in Claude and ChatGPT.
- questions from the field are answered right away, with the system's numbers, without opening the web portal;
- whoever is on the machine records rainfall, fueling and executions from their phone, by text or voice;
- the setup moves forward with what you already have: spreadsheets, PDFs and the field map;
- nothing is saved without you seeing the summary and confirming;
- what matters arrives on its own, through alerts.
Learn more about UPí at upcampo.com.br/upi.
❓ Frequently asked questions
UPí doesn't answer me. What could it be?
It is almost always the number: it must be registered, with the country code, on an active user, on the Users with AI access screen of the web portal. If the user exists but does not have UPí enabled, it replies saying so — ask the administrator for the AI permissions. If the number is on two active users, UPí answers questions but does not record — ask the administrator to keep it on just one.
UPí answered about the wrong farm. How do I switch?
If you don't mention a farm, UPí uses your Preferred farm (AI). To switch, say "now I want farm X": UPí switches and the next messages apply to it. For a single question about another farm, mention its name in the message.
Does what UPí records show up in the web portal and the app?
Yes. UPí saves to the same database as the screens: an execution recorded on WhatsApp shows up on the work order in the web portal and reaches the app within a few seconds. In the record, the source is marked as WhatsApp.
I recorded something wrong through UPí. How do I fix it?
Right after saving, say what changed — "actually it was 32 ha" — and UPí changes that same entry, showing the summary first. Older entries are corrected on the web portal screen.
Can I send voice messages to UPí?
Yes. UPí transcribes the voice message and answers in writing, for questions and for entries. Say the numbers slowly — the summary shows what it understood before saving.
What files can I send to UPí?
Photos, PDFs of up to 30 pages, spreadsheets (Excel or CSV, up to 200 rows per upload), field maps in KML, KMZ or shapefile, and .zip files with PDFs or the map. It does not read other types (Word, video): copy the text into the message or send it as a PDF.
How do I send the field shapefile?
Compress the files with the same name into a .zip — the .shp, the .dbf and the .prj (and the .cpg, if there is one) — and send the zip on WhatsApp. Without the .prj, it only works if the map is in latitude/longitude. A projection that is neither latitude/longitude nor UTM (polyconic, Albers) is rejected: export it again in WGS84, SIRGAS 2000 or UTM.
UPí got stuck on an old subject. What do I do?
Send just "clear history". UPí forgets the previous conversation and starts from scratch. Entries and alerts are not affected.
Why doesn't UPí list every load ticket or bale?
A season has thousands of load tickets and bales: UPí always answers with totals, by field, variety or day. For the full list, use the report in the web portal.
Can I talk to a person from upCampo on the same WhatsApp?
Yes. Write "I want to talk to someone on the team": UPí calls the upCampo team, who reply in this same conversation.
🛠 How to receive UPí alerts and the daily summary
UPí, upCampo's artificial intelligence, can send messages on its own to your WhatsApp: the week's rainfall every Monday at 7 a.m., a warning when a rain gauge goes over 20 mm, a reminder when nobody records a work order execution that day. You ask for it in the conversation, it confirms, and from then on the information arrives without you asking — always with current data, looked up at the time it is sent.
It works in the UPí conversation on WhatsApp (see How to use UPí on WhatsApp) and also through Claude and ChatGPT. The alert always arrives on the WhatsApp number registered on your user.
Three types of alert
- Scheduled — "every Friday at 9 a.m. send me…": UPí answers your question on the day and at the time set.
- Daily summary — what changed on the farm yesterday, every morning.
- When it happens — "let me know when…": UPí watches and only sends when the condition is met.
1️⃣ Scheduled alerts
Ask for the information and when you want to receive it. UPí shows what it understood and only saves after your "yes":
💬 "Every Monday at 7 a.m. send me how much it rained the previous week, by complex."
🤖 "Every Monday at 7 a.m., I'll send you the previous week's rainfall, grouped by complex, for the Grupo
Agrosalgueiro farm. Shall I confirm?"
💬 "Yes."
🤖 "Scheduled! First delivery: Monday, 10/19 at 7 a.m."
More examples:
- 💬 "Every Friday at 9 a.m. send me the boll count from the week's pest scouting."
- 💬 "Every day at 6 p.m. send me the work order executions recorded that day."
- 💬 "On the 1st of every month at 8 a.m. send me the month's accounts payable."
- 💬 "Tomorrow at 7 a.m. send me the diesel balance at the fuel stations." — a one-time alert.
If you already have an alert within 30 minutes of the requested time, or one on the same subject, UPí tells you before creating it — so the same information doesn't arrive twice.
2️⃣ Daily farm summary
💬 "I want to receive the farm summary every day."
Every day at 6:30 a.m. (or at the time you ask), UPí sends what was new on the previous day:
- 🌧️ yesterday's rainfall, by sector or complex;
- 🐛 scouting with pests above the action threshold;
- ✅ work order executions recorded — area and activities;
- ⏰ work orders for the season that passed their planned date in the last month;
- 📦 products with negative inventory.
Only what was new shows up. It ends with "Want details on any of these? Just reply" — and the conversation continues from there: 💬 "give me the rainfall details".
3️⃣ When-it-happens alerts
UPí watches a condition and only sends a message when it is met. Nine conditions exist today:
| You say | UPí alerts you when… | Checks |
|---|---|---|
| 💬 "Let me know when it rains more than 20 mm" | a rain gauge goes over the limit that day (one alert per rain gauge per day) | every 30 min |
| 💬 "Let me know if a pest hits red" | a scouting report has a pest at the High level (above the action threshold) | every 30 min |
| 💬 "Let me know when the S10 diesel at the fuel station drops below 1,000 L" | the balance drops below the limit — with no limit, the minimum stock in the product record applies | every 30 min |
| 💬 "Let me know when a tractor is close to its service" | a maintenance plan is close to coming due or comes due | every 30 min |
| 💬 "Let me know if a rain gauge goes 2 days without a reading" | an active rain gauge has gone 2 days (or as many as you say) without a rainfall reading | every day at 8 a.m. |
| 💬 "Let me know if a day goes by without an execution recorded" | no work order execution was recorded the previous day (Sunday doesn't count) | every day at 9 a.m. |
| 💬 "Let me know when someone fuels up at the headquarters station" | a fueling is recorded at that station — "external" covers fueling outside the farm; you can watch a single machine | every 30 min |
| 💬 "Let me know when fleet cost goes over R$ 500 thousand this season" | the season cost goes over the amount — with no machine mentioned, the whole fleet; with a machine, each one that goes over | every day at 7 a.m. |
| 💬 "Let me know when any field goes over R$ 8 thousand per hectare" | a field's season cost goes over the amount (total or per hectare) — for one field, one sector or any field | every day at 7 a.m. |
Example alert:
🤖 "🔔 Rain gauge without readings — 3 rain gauges have gone more than 2 days without a reading on the farm: Pivô 04 (last reading 10/05), Sede SP (10/06) and PV 01 SP (10/05). Want to see the others?"
- Rainfall, pest, inventory, maintenance and fueling alerts only report what happens after you ask. What was already that way on the day — a service overdue for months, a product already below the minimum — does not become an alert, so everything doesn't arrive at once.
- Absence alerts (no reading, no execution) alert you on the first check, including what is stalled today, and repeat every day while it stays stalled.
- Inventory below the limit repeats at most once a week while it stays low.
- Cost alerts (fleet and field) alert you once per season for each machine or field that goes over the amount. If one had already gone over when you asked, the alert arrives on the first check. The calculation is always for the current season — when the season changes, the alert moves to the new one on its own and starts counting again.
- Say the name of the product, rain gauge, pest, fuel station, machine or field when you want to watch just one: 💬 "let me know when the headquarters rain gauge goes over 30 mm".
- The time of the daily checks changes if you ask: 💬 "check at 7 a.m.".
4️⃣ View, change, pause and cancel
| You say | What happens |
|---|---|
| 💬 "What alerts do I have?" | the list, with the number and next delivery of each one |
| 💬 "Move the rainfall one to Tuesday at 8 a.m." | changes it and gives the new next delivery |
| 💬 "Pause the summary until the 30th" | doesn't send until the 30th and returns at the normal time afterwards — without sending what was missed |
| 💬 "Pause the summary" | stays paused until you say "start sending the summary again" |
| 💬 "Cancel the rainfall alert" | the alert no longer exists |
| 💬 "Cancel alert 3" | the number also works, to pause, change or cancel |
Each alert has a number, and every message it sends starts with it: 🔔 Alert 3 · Week's rainfall. That way you can tell which alert each message came from and change it by number.
Each person sees and changes only their own alerts.
5️⃣ Rules that apply to all
- The alert arrives on your user's WhatsApp. Without a WhatsApp number in the record, UPí
refuses and explains — the administrator fills it in under
File > Users with AI access. - An alert belongs to one farm — your preferred farm, or the one you mention in the request: 💬 "let me know if a day goes by without an execution on the CIMA farm".
- Times are in the farm's time zone.
- Up to 10 active alerts per person. An alert identical to one you already have is refused — UPí offers to change the existing one.
- Everything respects your AI permissions on the farm: a rainfall alert needs Weather; pest, Survey; inventory, Inventory; maintenance, fueling and fleet cost, Fleet; execution and field cost, Work order. Without the permission, UPí does not create the alert — and, if the permission is removed later, the alert stops sending.
- If you are chatting with UPí at delivery time, the alert waits for the conversation to end and arrives separately, in its own message — it does not get mixed with the answer you are receiving.
- the information you checked every week arrives on its own, on the right day and time;
- heavy rain, a pest in the red, low inventory, a service coming due and fueling at the station are reported right away;
- a machine or field that went over the amount you set shows up the next day, still within the season;
- a forgotten rain gauge and a day with no entries show up the next day, not at season close;
- everything is turned on, changed and turned off with one sentence.
❓ Frequently asked questions
How do I create an alert in UPí?
Ask in the conversation: "every Monday at 7 a.m. send me the week's rainfall" or "let me know when it rains more than 20 mm". UPí shows what it understood and saves after your "yes". The alert arrives on your user's WhatsApp.
Does the alert send the data from when I asked or from when it sends?
From when it sends. At the scheduled time, UPí runs the query again and sends the number from that moment.
I created the cost alert and got an alert the very next day. Is that right?
Yes. If the machine or field had already gone over the amount when you asked, UPí alerts you on the first check, at 7 a.m. After that, that machine or field does not alert again in the same season — only the ones that go over the amount from then on. When the season changes, the count starts over in the new season.
I created the maintenance alert and didn't get the services that were already overdue. Why?
Rainfall, pest, inventory, maintenance and fueling alerts only report what happens after they are created — otherwise every old pending item would arrive at once. To see what is already overdue, ask UPí: "which machines are overdue for service?".
How do I stop receiving the daily summary?
Say "cancel the summary" to stop it for good, or "pause the summary until the 30th" to stop it for a while. To resume, "start sending the summary again".
Can I create an alert for someone else to receive?
Not through the conversation: each person creates their own alerts, on their own WhatsApp. To turn on the daily summary or an alert for someone on your team, ask upCampo support.
Can I get a temperature or frost alert?
Not yet. Today there are alerts for rainfall above a limit, pests at the High level, inventory below a limit, maintenance coming due, rain gauges without readings and days without a work order execution. For other information, ask for a scheduled delivery.