⛽ Initial fueling setup
Fueling records, for each pump and each machine, how many liters were dispensed, at what hour meter reading and of which product — and that is what supports fuel cost by fleet and by operation. Before the first fueling, however, a few records need to be ready. This is the step-by-step of that initial setup; day-to-day use of the screen is covered in the article Screen: Fueling.
📍 Location in the system
Menu: Fleet > Fueling
(To configure: Inventory > Product & Service, Storage Location, Inventory Count or Movement)
🧩 Main function
Enable detailed control of fueling by pump and by fleet unit, ensuring traceability, consumption control and integration with inventory balances.
📝 Initial Setup Steps
1. Product setup (Fuel)
Menu: Inventory > Product & Service
- Register the product that will be used for fueling (e.g.: Diesel).
- Check the Fuel option in the product record.
2. Storage Location setup (Fuel Station)
Menu: Inventory > Storage Location
- Create one location for each fuel (one location = one product).
- Check: Fuel/Fueling
-
Set the reading entry mode:
- Liters: the user types only the liters.
- Start/end reading: the user types both values and the system calculates the liters.
- None: used for pumps without a meter.
- Link the matching product (e.g.: Diesel S10).
- Check the Gallon option if the pump is American (1 gallon = 3.78 L).
In the Pump tab, the system creates a pump automatically.
- You can adjust the current counter and set a multiplier for pumps that do not show decimals — this is where the end reading lives (the counter physically on the pump).
(Example of the Pump tab available in the original screen)
3. Opening balance in the Storage Location
Choose one of the paths:
-
Inbound movement (
Inventory > Movement): create an entry with the invoice data or a non-invoice entry, and link the location and product.(Example of the Movement screen available in the original screen)
-
Inventory Count (
Inventory > Inventory Count): choose the location and product, enter the physical balance and finalize the count.
4. Fleet setup
Menu: Fleet > Fleet / Facility
- Check the Show in Fueling option.
- Indicate whether it has an hour meter, the tank capacity and the hour meter limit between fuelings.
5. User Preferences
Menu: Settings > User
- In the Preference tab, set whether the user can change the start/end reading when fueling (by default, they cannot).
6. Check in the app
App: menu Fueling > +
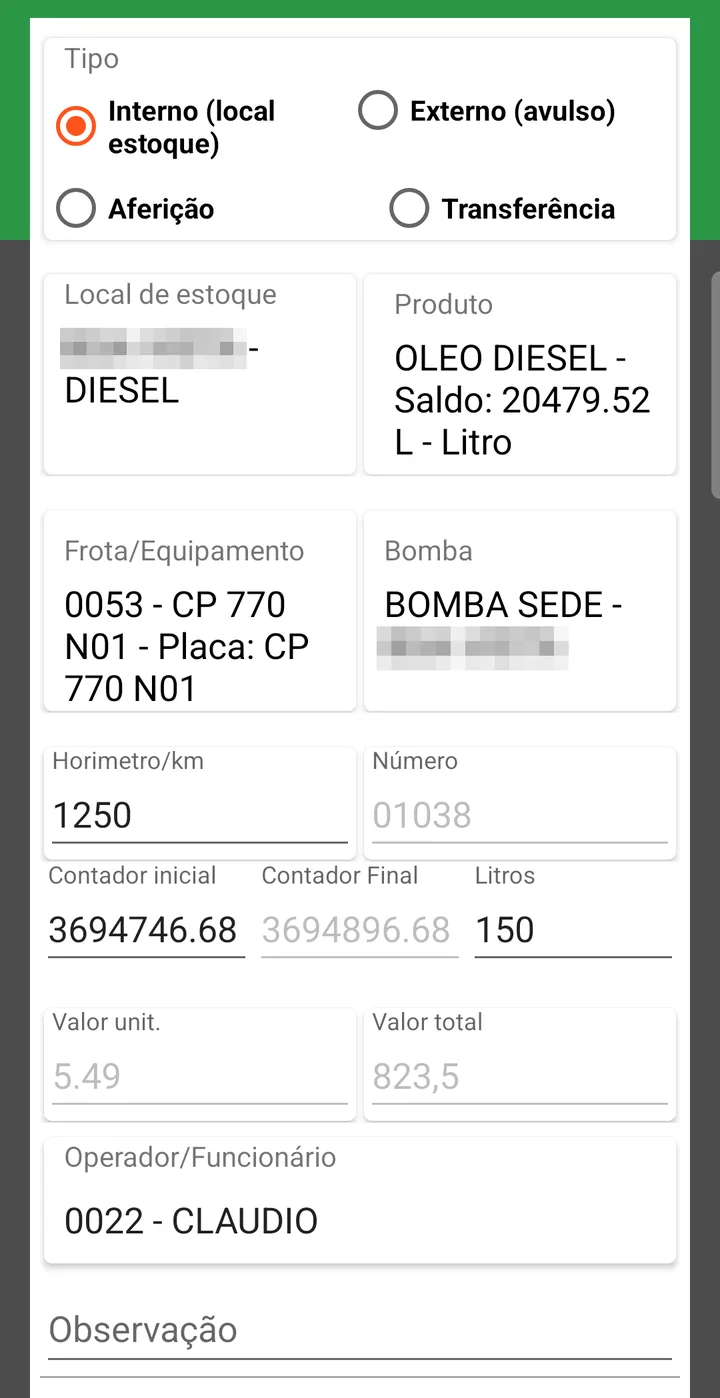
- Choose the fleet unit and the storage location. The product, pump, start counter and unit price should fill in on their own — if they do not, something is missing in steps 1 to 3.
- The Hour meter/km field only appears if the fleet unit tracks an hour meter (step 4).
- Check it and leave without saving, if it is just a test.
- The system will be ready to record fuelings in an integrated way.
- Fuel control will be automatic and based on the pump data.
- The data will feed reports and dashboards of cost by fleet and consumption by pump.
📊 Related reports and dashboards
❓ Frequently asked questions
What do I need to set up before recording fuelings?
First the fuel product (for example Diesel), with the Fuel option checked in its record; then the station's storage location, checked as Fuel/Fueling — with one location for each fuel.
What are the fueling reading modes?
Three: Liters, where the user types only the quantity; Start/end reading, where they type both values and the system calculates the liters; and None, when the pump has no reading control.
Can I have more than one fuel at the same station?
Not in the same storage location. The rule is one location per fuel — if the farm has diesel and gasoline, that is two registered locations.
Does fueling deduct inventory automatically?
Yes. Control is done by pump and by fleet unit, integrated with inventory balances, which provides traceability and lets you track consumption.