📘 Screen: Stock Count
The Stock Count screen is used to make accurate balance adjustments based on the physical inventory you have checked. It is an essential tool to make sure the system matches what is actually in the storage location.
📍 Location in the system
Menu: Inventory > Stock Count
🧩 Main function
Adjust product balances in a specific storage location. The system automatically works out whether to create a receipt or an issue based on the counted balance.
🖥 The list
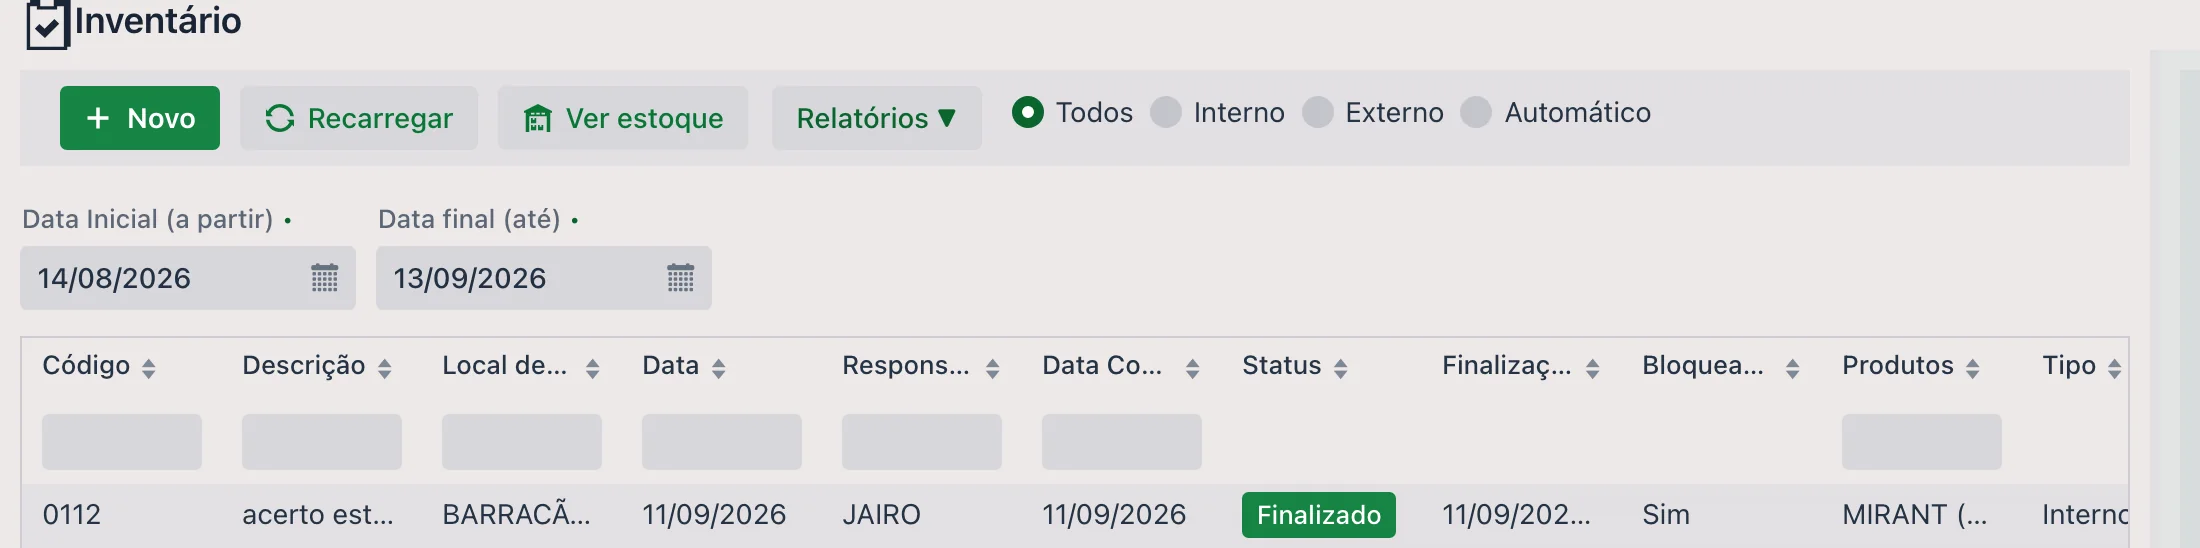
At the top are New, Reload, View inventory and Reports ▼, plus a type filter (All, Internal, External or Automatic) and the period (Start date and End date).
The grid shows Code, Description, Storage Location, Date, Person in charge, Count Date, Status, Finalized (date and time it was applied), Products and Type.
📝 Stock count header
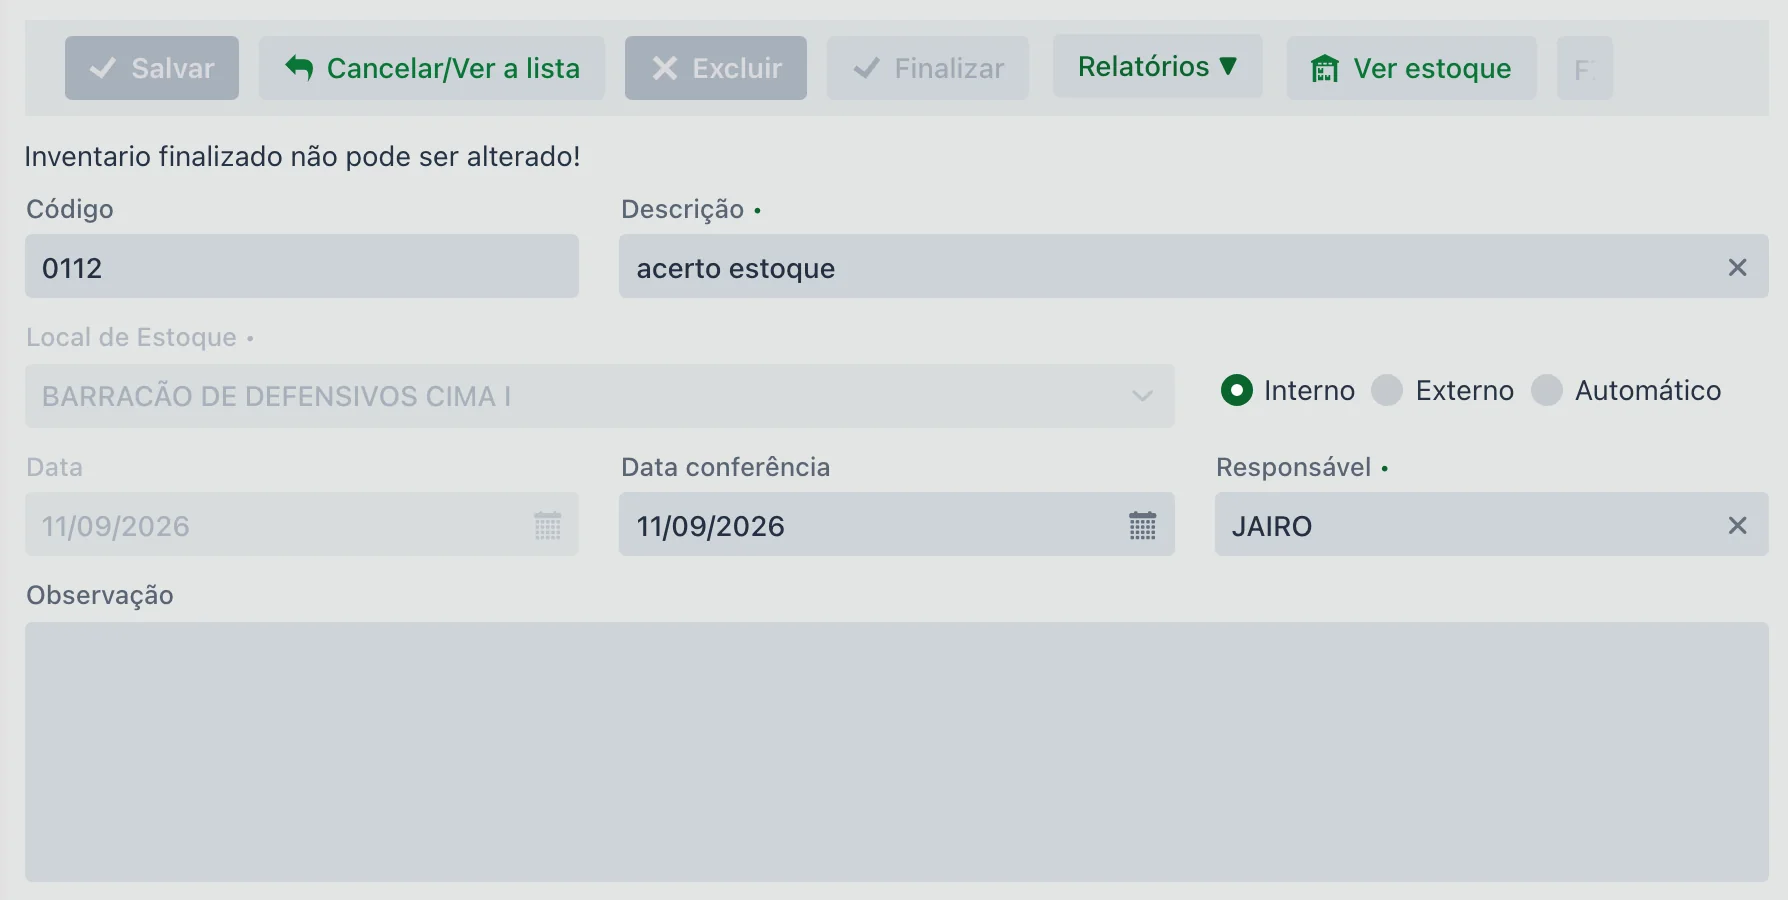
- Storage Location (required): defines where the count is being done
- Description (required): enter a clear name for the stock count
- Type: Internal (default), External or Automatic — classifies the count and works as a filter in the list
- Date and Check date: the document date and the date of the physical count
- Person in charge (required): the person who did the count
- Notes: we recommend describing the reason for the count, approvals, the context of the check, etc.
🗂 Product details
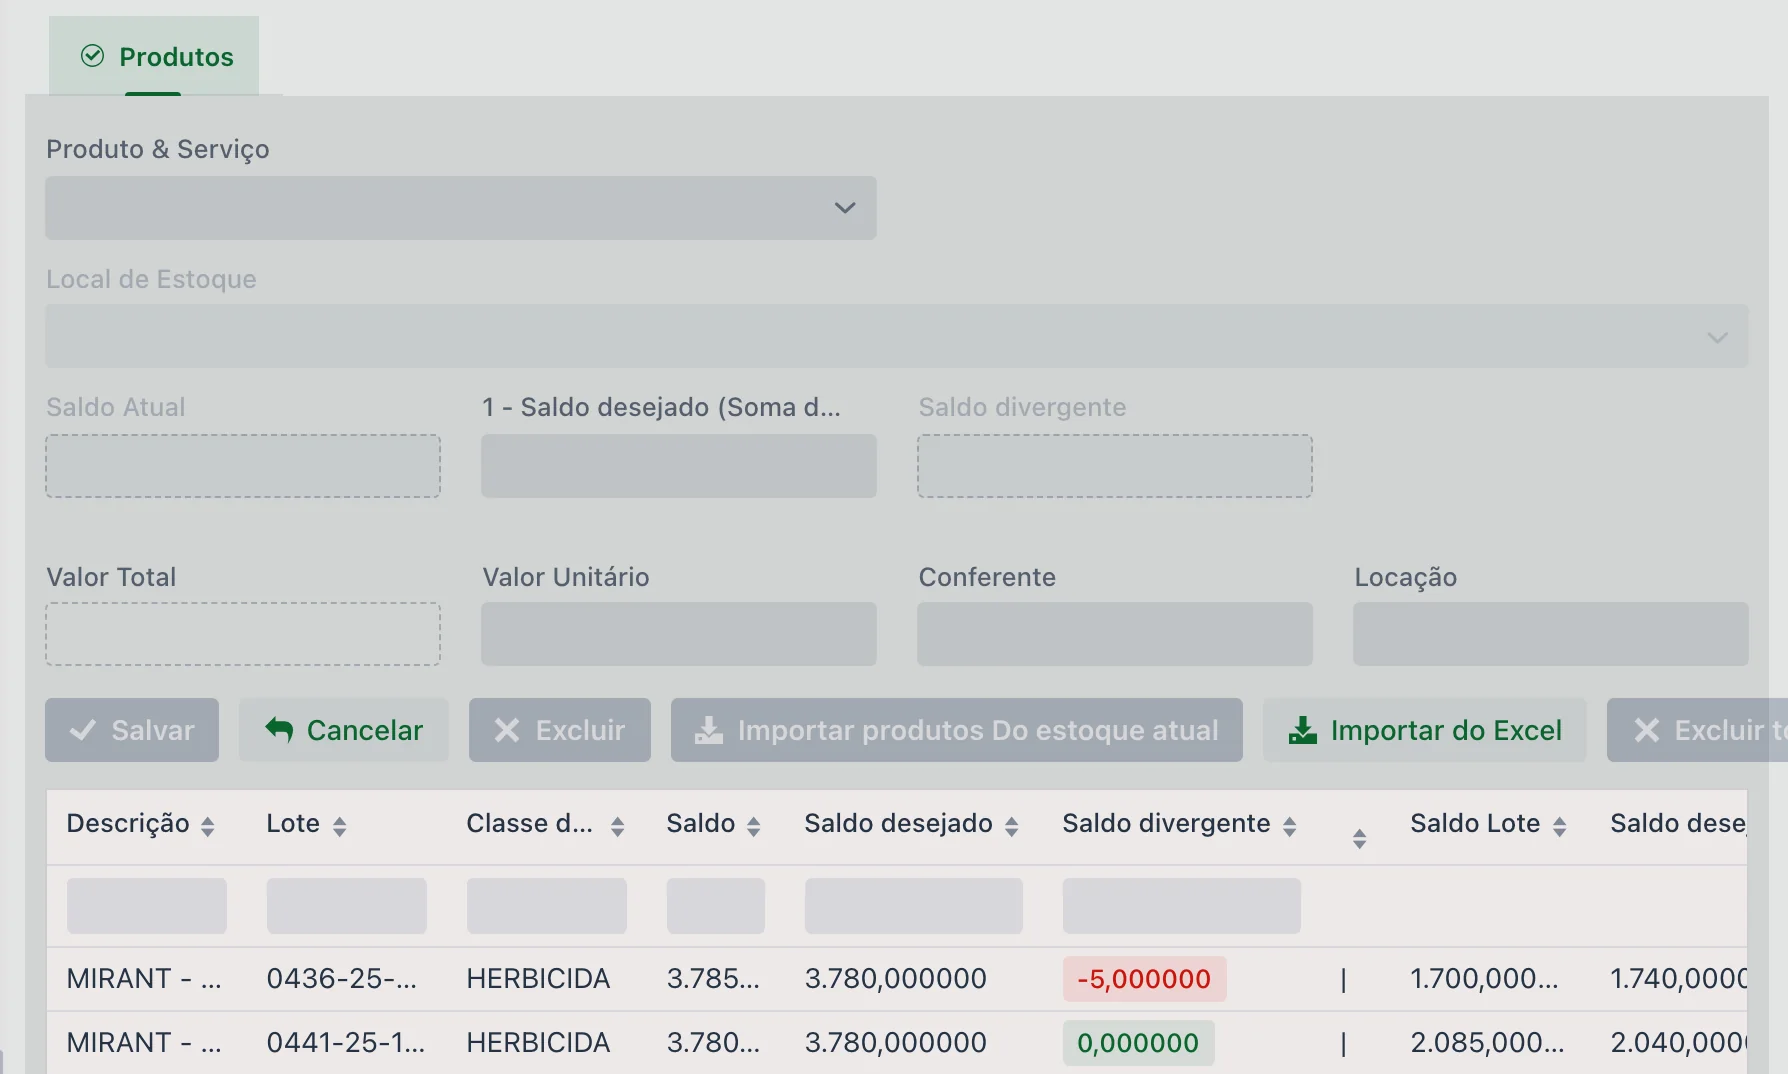
- Product & Service and Lot (when the product tracks lots)
- The item's Storage Location
- Current Balance and Current Balance - Lot — provided by the system
- Counted balance — what was counted; this is what will be applied when you finalize (see below, for lots)
- Difference and Difference - Lot — calculated by the system
- Unit Price and Total Amount, for the financial adjustment
- Counter — who counted that item, which may be different from the person in charge of the count
- Bin location — where the product is kept inside the location (shelf, aisle, block)
🔢 Products with lots: count by lot
When the product has lots, the screen shows two pairs of balances, numbered on the screen itself:
| Field | Who fills it in |
|---|---|
| 1 - Counted balance (Sum of all lots) | The system. It is the product's total at the location, adding up the lots. |
| 2 - Counted balance (For the specific lot) | You. Enter here how much was counted of that lot. |
In other words: with lots, the count is always lot by lot. You enter each one's balance in field 2, and field 1 keeps updating with the sum — no need to add it up by hand or type the product's total.
📥 Available imports
Import products From current inventory: opens a window with the location's products, broken down by lot, showing Balance - Product and Balance - Lot, plus reference, brand, class, unit and bin location. Three checkboxes control what the window lists:
- Show all products
- Show only not included — checked by default, so you don't repeat what is already in the count
- Show products with balance
Check the products and choose, at the bottom, how they come in:
- Import with CURRENT balance: brings the counted balance already filled in with what the system has — good for checking and fixing only what differs
- Import with ZERO balance: brings everything in at zero, so you type the count from scratch
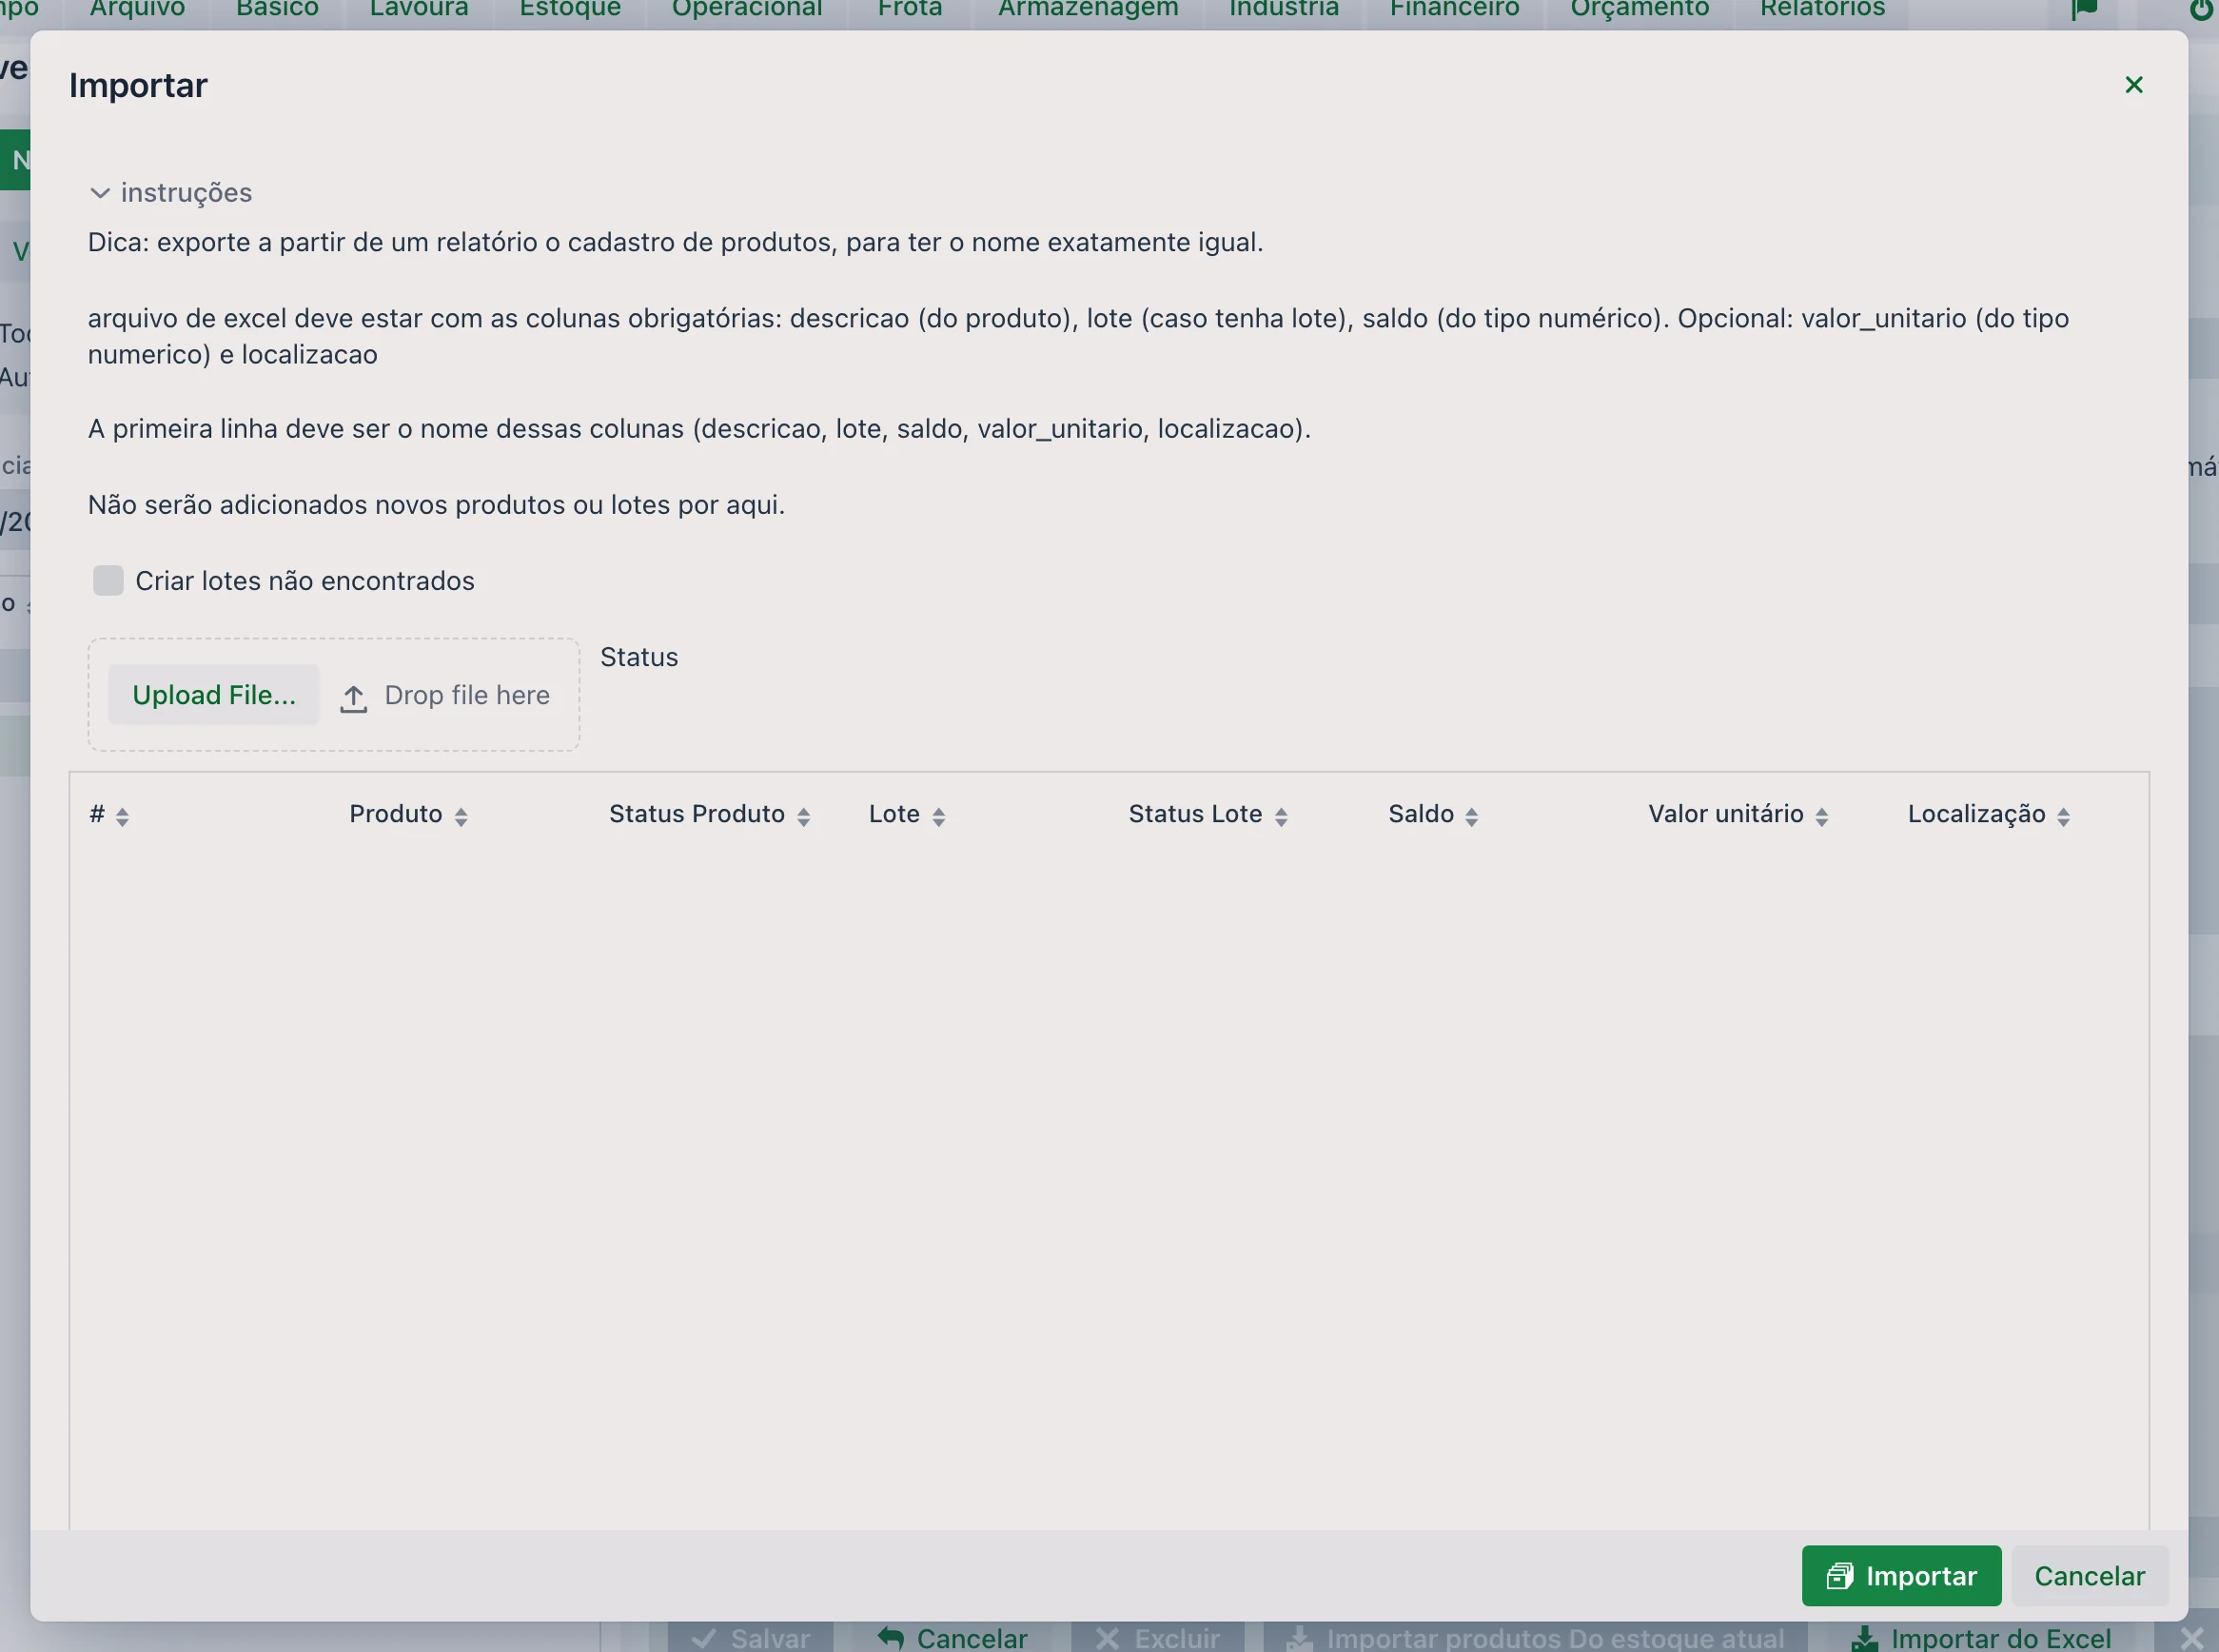
Import from Excel:
- Requires the columns: Product, Lot (if applicable), Counted balance
- The product description must be identical to the setup
- We recommend exporting a products report first to make sure the names are standardized
See the instructions in the system, in the "Instructions" group.
🛠 Finalizing
For the stock count to be applied to inventory, you have to click the "Finalize" button in the header.
- Only finalized stock counts affect the current inventory
- Once finalized, the stock count cannot be changed
- Any later correction must be made with a new stock count
📊 Related reports
On the home screen, the Inventory tab also shows dashboards with graphical summaries of balances and movements by location.
- It lets you correct balances without entering receipts and issues by hand
- Everything is properly documented, with history
❓ Frequently asked questions
I did the stock count and the balance didn't change. Why?
It probably still needs to be finalized. The stock count is only applied to inventory after you click Finalize, in the screen's header.
Do I need to calculate the difference between what I counted and the system?
No. You only enter the Counted balance — what was physically counted. The system calculates the difference and decides on its own whether to create a receipt or an issue to reach the correct amount.
The product has several lots. Do I enter the total or lot by lot?
Lot by lot. Fill in the "2 - Counted balance (For the specific lot)" field with what was counted for each lot; the "1 - Counted balance (Sum of all lots)" field is calculated by the system, adding up what you entered. No need to add it up by hand.
I only want to check what is wrong. How can I speed up data entry?
Use "Import products From current inventory" with the Import with CURRENT balance option: the products come in with the system balance already filled in, and you only change the lines where the count differed. For a blind count, use Import with ZERO balance.
Can I count more than one storage location at the same time?
No. The Storage Location is required in the header and defines where the count is being done — one stock count per location.
What else is worth recording in the stock count besides the numbers?
The Person in charge of the count and, in the Notes, the reason for the count, approvals and the context of the check. That is what makes the adjustment traceable later.